
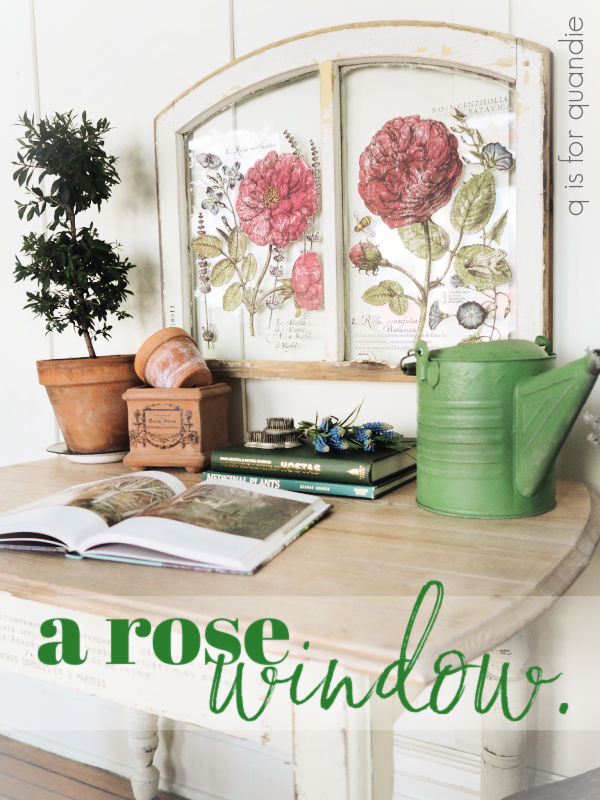
I picked up an old window at a garage sale last year. I tend to grab chippy old windows, especially when they have a unique shape like this one.

This particular one was in pretty rough shape with the glass practically falling out before I got it home.
So, I started out by giving the window a good clean, and then I re-glazed the glass. Now, you should be forewarned that I have very little talent for glazing and I really don’t know what I’m doing. But, I need to get it figured out because we have quite a few windows at our house that need re-glazing and I want to do it myself. So this seemed like a good way to get some practice in.
However, I’m pretty sure I picked the wrong product.
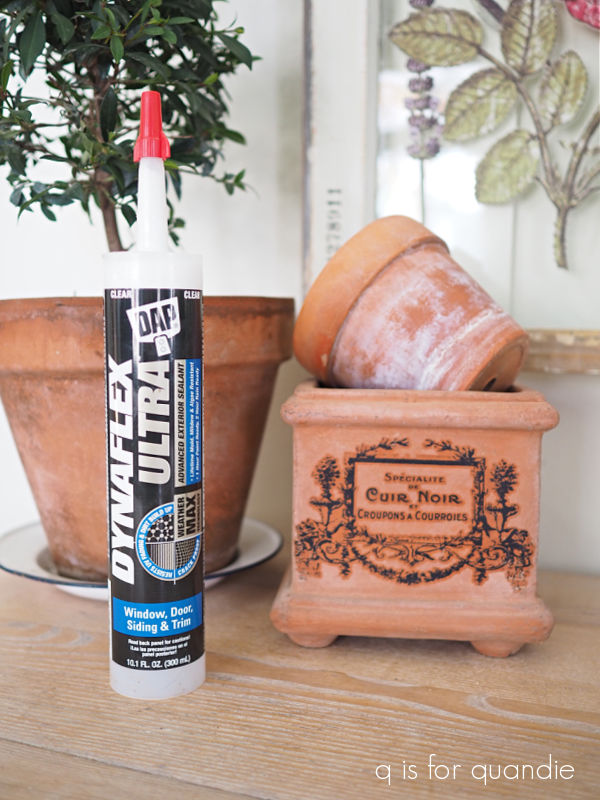
I saw the words ‘window’, ‘clear’ and ‘paintable’ on the label and thought it was what I needed. I also thought a ‘sealant’ was what I needed. In the end, this worked OK for my purpose here, which was basically to hold the glass firmly in place. But it’s not really the right product for glazing windows, so I’ll be going back to the drawing board before I attempt to work on my house windows next summer.
In the meantime, here’s how my totally imperfect sealant looks on the back side of the window.
![]()
Fortunately it’s on the back, and it’s clear, so it really isn’t noticeable from the front at all.
Next up I debated re-painting the frame. But the thing is, I like the authentically chippy look. So rather than paint it, I sanded off any loose paint and then added a couple of coats of Dixie Belle’s flat clear coat to seal it.

Next up I pulled out two sections from the I.O.D. Ladies in Waiting transfer to add to the glass.
I cleaned the glass well before starting and then applied the transfers to the front of the window.

I have to confess that I nearly applied the first one to the back of the window before coming to my senses. The transfers do not work that way. Here’s how that would have looked …

Yep, I dodged a bullet on that one. Don’t know what I was thinking.
Ultimately the Ladies in Waiting transfers were the perfect fit for this window. One on each side (the full set includes four of them).

I added a number to the side of the window frame too.
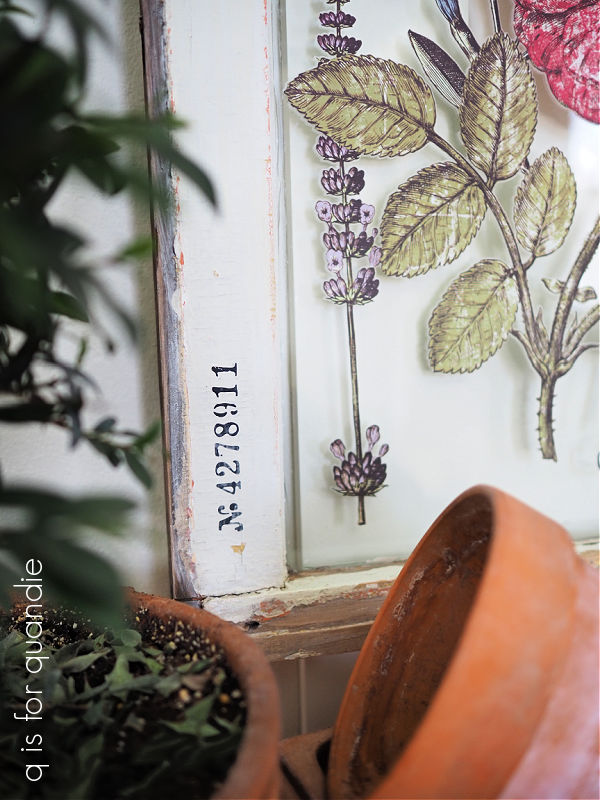
That came from my pile of transfer scraps, so I’m sorry, but I don’t know which particular transfer it was from originally.

One question I get frequently is whether or not I use a sealer over transfers that are applied on glass, and I do not. The transfers stick to glass extremely well. However, they can be removed using a razor blade, if one should ever want to remove it down the road.
As for cleaning, I would simply dust it using a soft cloth. I would not recommend using a spray glass cleaner of any kind on a transfer.
This window looks great hung on the wall over a desk.
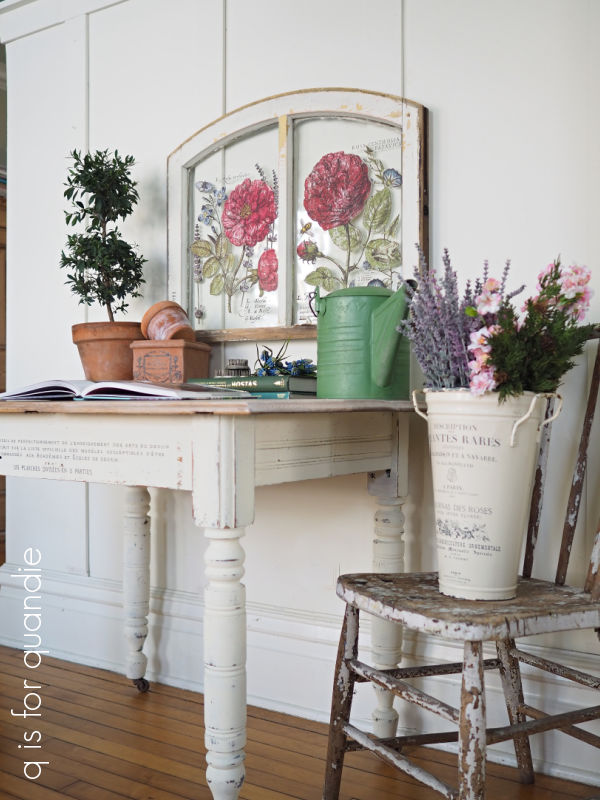
But you could hang it anywhere.
What do you think? Are you a fan of transfers on glass?
If so, here are links to some other projects I’ve done with transfers on glass; this one is on a mirror, this one is on a barrister bookcase, and this one features glass cannisters with transfers on them. Check them out!
In the meantime, this window is for sale. Check out my ‘available for local sale‘ page for more details.

Gorgeous! Love your ideas! A friend recently gifted me with two small cupboard doors that have glass. I was thinking about trying something like this and hoping they would look like windows. What do you think?
LikeLike
Wow….this is a great “repurpose”! Beautifully done. Love the colors. You were right not to paint over it – its perfectly imperfect the way it is.
LikeLike
Thanks Terri!
LikeLike
Absolutely! I think they’d look great.
LikeLike
I love this window! The transfer was perfect for it!
LikeLike
Thanks Freida!
LikeLike
Oh my Gosh! I just love this project!! I think I need to get to more garage sales this year.
LikeLike
I keep saying that too 😉
LikeLike
I love it!
Love the colors and everything about it
LikeLike
Thanks Annie!
LikeLike
That is absolutely fabulous! You are so clever with a great eye! I’m glad you saved the original paint. That is one of my favorite looks. Cudo’s!
Smiles, alice
LikeLike
Yay! I’m glad some of you guys like that original chippy paint look too 🙂
LikeLike
Love this window! I have reglazed quite a few of my windows in my 1913 home. I recommend following The Craftsman blog. Scott has helped immensely with my window journey, and he is very entertaining
LikeLike
I will definitely check that out, I need all the help I can get!
LikeLike
I love this look! I would love to know how to glaze old windows as well. Look me up in the summer I will come over and help😀
LikeLike
Okie dokie 😉
LikeLike
Looks great. Have a great day.
LikeLike
Thanks Charleen!
LikeLike
Very pretty Miss Quandie! And smiles! I love how Alice always writes that! Maybe it’s because, like me, when she tries to send her own simple smile with a paraenthesis and colon it turns into that dumb smiley emoji! Lol………
LikeLike
I love the way Alice signs off too. I wish I was more of an emoji expert, but I have yet to learn that skill. Maybe one day.
LikeLike
Just lovely! Love that transfer and the chippy paint on that curved window! Keep us posted on how your window glazing project goes this summer.
LikeLike
Will do!
LikeLike
You need window glazing to hold the panes in and there are plenty of good tutorials on you tube. We bought an old house and all the windows need reglazing ugh. I second the craftsman blog recommendation.
I love the IOD transfers on glass – I made my IOD sign for my booth out of an old glass frame and have applied them to old windows and mirrors. I don’t seal because it impairs the clarity of the glass although I saw one sealed with resin and it looked great.
LikeLike
Oh, I’d not heard of the resin trick. Good to know. But yes, I’m with you, any other kind of sealer messes up the look of glass/mirrors. I’ve never had a problem with them not being sealed.
LikeLike
Yes, yes, yes, I love the transfers on glass. Beautiful window.
LikeLike
Thanks Valerie!
LikeLike