silver linings.

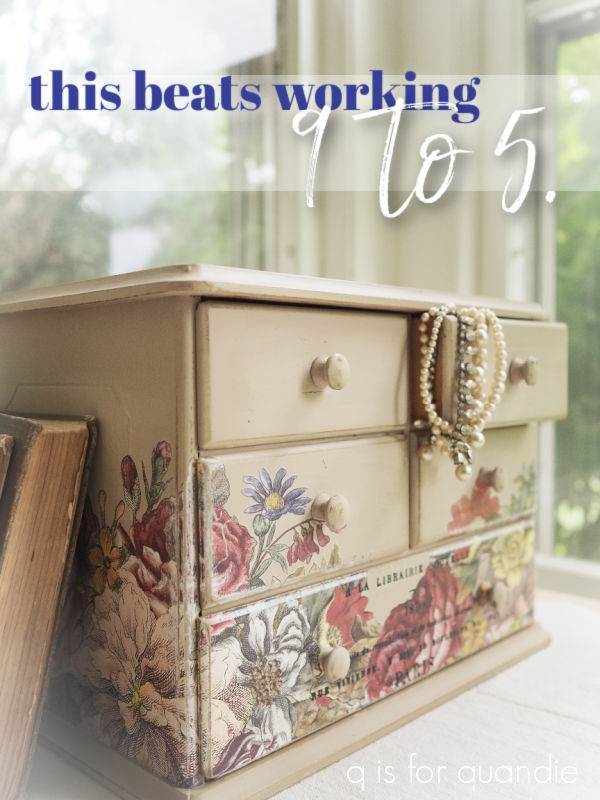
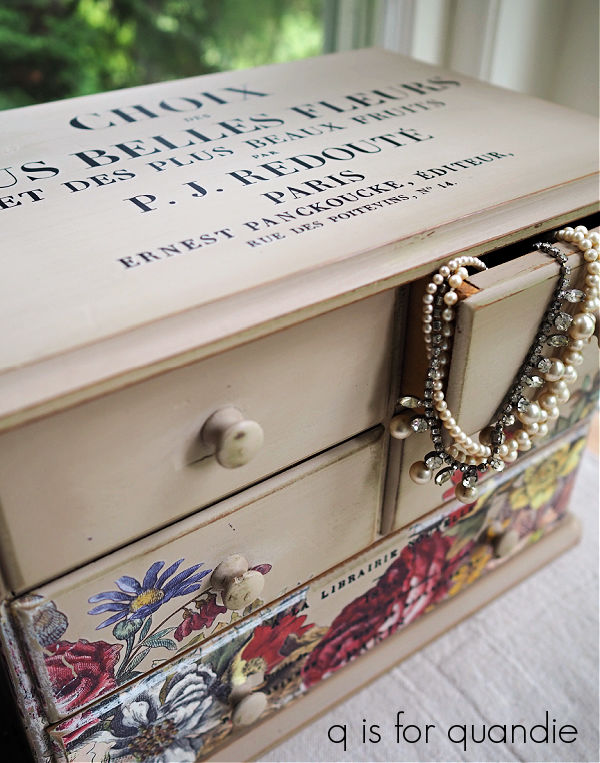
How about a mid-summer garden tour?  Everything is looking very green and lush right now, so it seems like a great time for an update.

You may remember that we had a horrendous hail storm back in May.

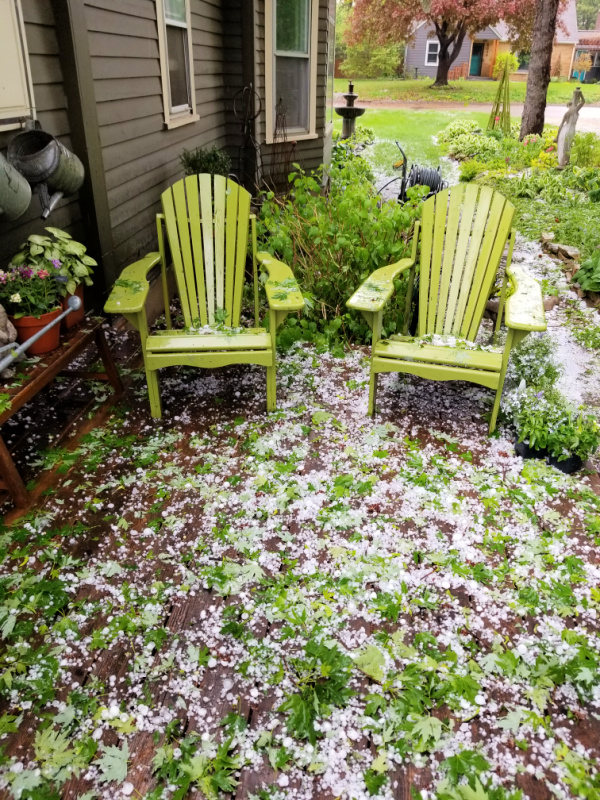
I was a tad upset by the damage done to my gardens, especially the hostas.

But let’s talk about silver linings!  As a result of the hail damage, Mr. Q and I are getting a new roof on both the house and the carriage house compliments of our insurance company.  What a blessing in disguise!

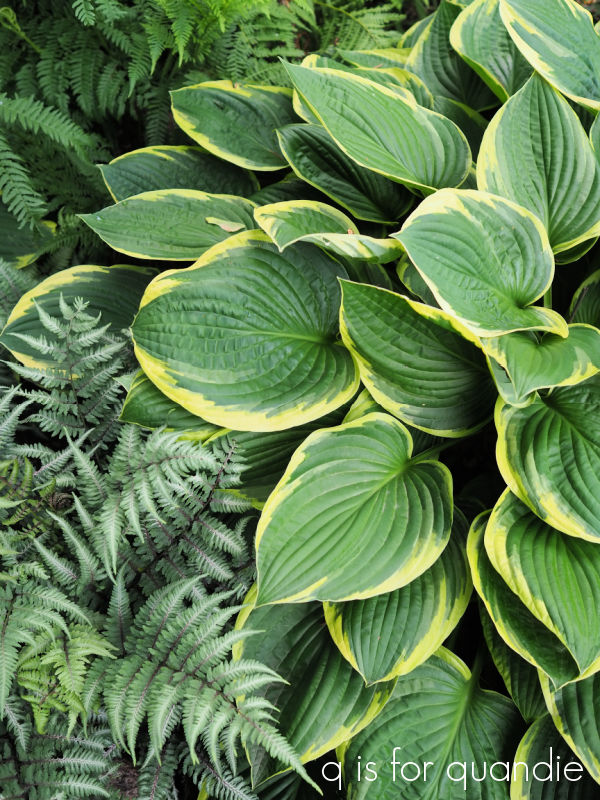
In addition, although the hostas were looking pretty rough after the storm, it was early enough in the season that most of them bounced back.

I trimmed away a lot of the really damaged leaves, and most of the hostas filled out with new ones.

There are a few that still look fairly sad, but for the most part we’re good.

Let me give you the technical details of my garden.  I garden in a suburb of the Twin Cities which is zone 4b.  I have a lot of shade, and in fact I don’t think any of my gardens qualify as ‘full sun’ since that means six to eight hours of sun per day.  There is a small portion of my yard that gets hot, full sun around noon, but really only for a few hours.  As a result, my flowering annuals do OK in that area, but they are never loaded with flowers like they would be with more sun.  So I mostly rely on foliage to provide interest in my gardens.

But playing around with different textures and colors of foliage has come a long way in the last 34 years (that’s how long we’ve been in this house, and that explains how well established my gardens are).  I can remember early days in my garden when all we had was one kind of variegated hosta, an Annabelle hydrangea, a couple of peonies that never bloomed, and lots of rocks!  Yep, originally the foundation gardens (garden beds installed along the house foundations) were all landscaping rock with a hosta popped in here and there.  We hauled all of those rocks out over time … well, OK, Mr. Q hauled all of those rocks out.

I’m really happy with how the front garden looks this year.  All of the hostas have filled in, the astilbe are looking fab and the dark purple huechera I added for contrast looks good too.  You may remember the rusty iron garden chair that I added earlier, it’s being swallowed up by plants now.

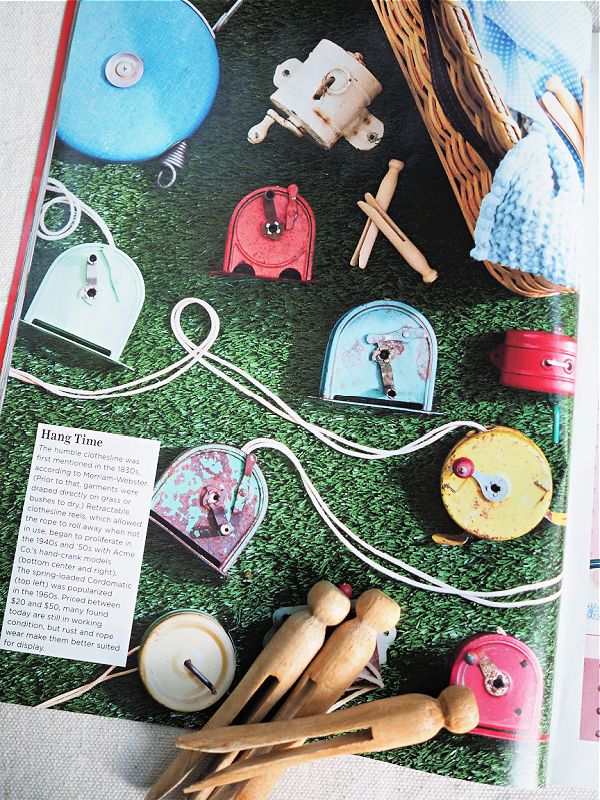
I forgot to give my sedum the chelsea chop this year and I’m kind of regretting that now.  If you aren’t familiar with the chelsea chop, you can read more about it in last year’s mid-season garden update.

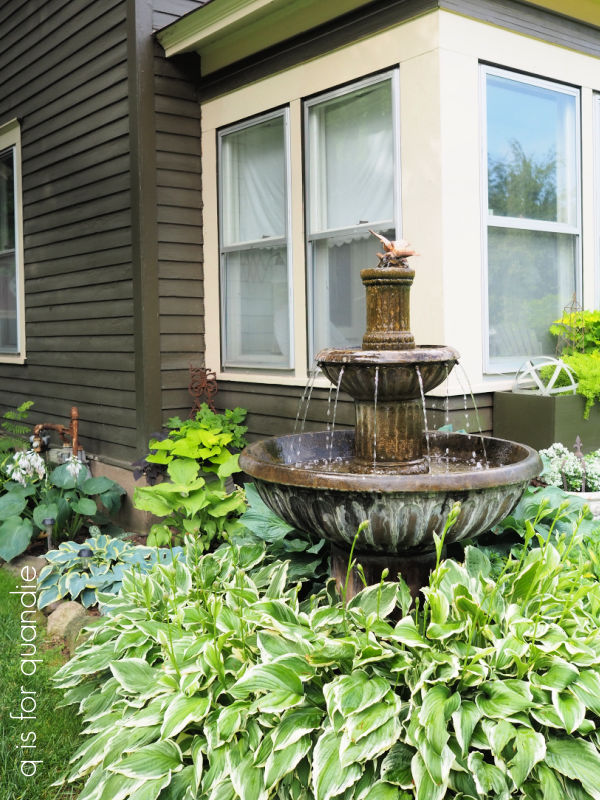
We moved our fountain to this location in the front garden a few years back after trying it in a couple of other spots over the years.  So far, this spot is my favorite.  We can hear the water from our bedroom window which is lovely at night.

For the most part, I repeated last year’s plant selections in the front window box because they worked out so well  I’ve got several types of coleus, some lemon coral sedum, some dark purple oxalis, and a dark sweet potato vine.

And the fuchsia is doing especially well in there this year.

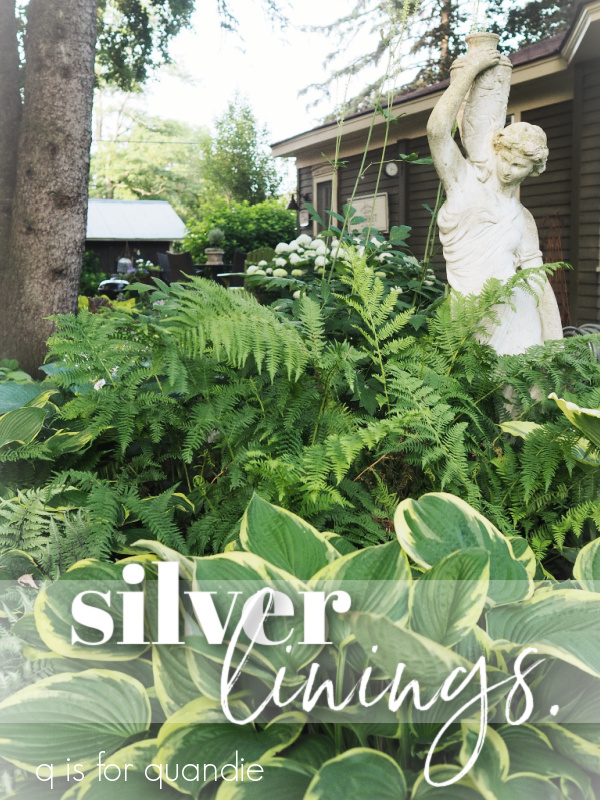
My favorite garden (although I suppose one shouldn’t play favorites) is the one that runs down the side between the house and the driveway.  This one is in full shade with the exception of some evening sun.  It’s filled with hostas, ferns, evening primrose, fairy candles, foam flower, heuchera, brunnera, lungwort and Cossetta, my statue.

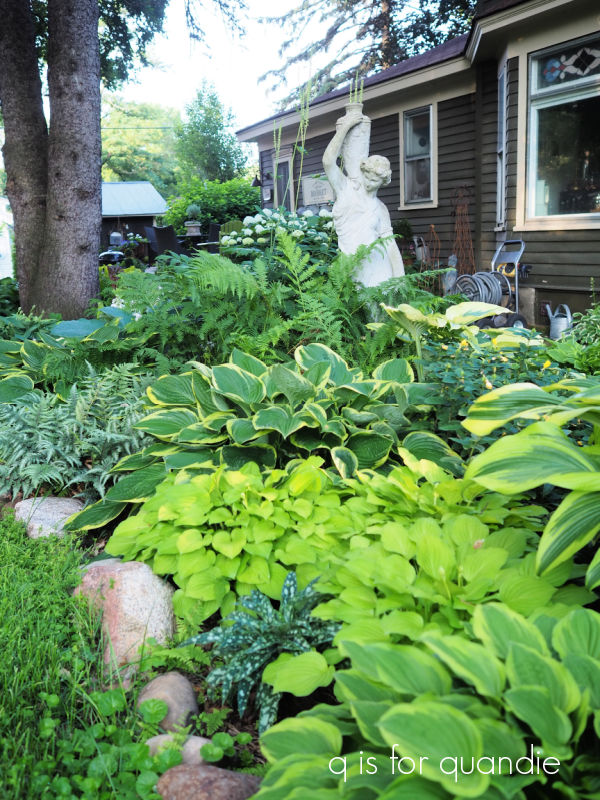
I think it might be my favorite because it’s such a cool, shady spot to work in most of the time, so it tends to get the most attention from me.

You can just catch a glimpse of my Annabelle hydrandea in the background of that photo above.  This is the one that came with the house when we bought it, but it wasn’t in that spot.  It was originally in what is now my fern garden, we dug it up, divided it and planted half near the deck and half out behind the carriage house in the cutting garden.

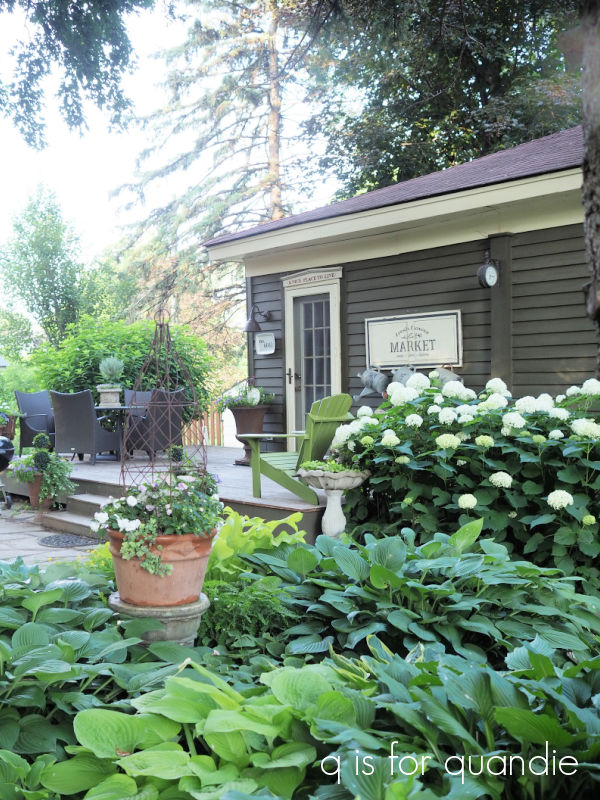
Although it does look really lovely right now, I wouldn’t plant an Annabelle (Hydrangea arborescens) these days.  They tend to get floppy, so I much prefer the Hydrangea paniculata family of hydrangeas these days, although they aren’t blooming yet.  That’s the shrub that you can see behind my patio table and chairs in the photo above.

I’ve got 8 clematis, but not all of them bloom at the same time.  Currently the one on my arbor is in bloom …

and this one on an obelisk.

I planted an old galvanized sink with an herb garden and it sits up on the deck so we can easily grab some herbs when cooking.

I have to confess that I keep forgetting about the chives, even though I love fresh chives on a baked potato.  I’ve been adding the mint sprigs to my lemonade which is pretty refreshing.  I added the word ‘herbs.’ to the planter after cutting them out of adhesive vinyl on my Cricut machine.

I still have my chicken feeder turned planter hanging above the herb garden.

I have to be honest, it doesn’t hold much dirt so it’s a bit of a challenge to keep plants happy in it.  They dry out really quickly on hot summer days.  But I still enjoy having it out there.

I hope you enjoyed this brief tour of my garden.  Gardens are always a work in progress, and mine is no exception.  I have a couple of projects still in the works for this year, and I’m already planning ahead on what I may do next year.  How about you?  Do you have a green thumb, or do you prefer to let others do the gardening?  Leave a comment and let me know.

unintentionally accumulating.

I’ve had a little pile of vintage laundry items unintentionally accumulating this summer.  Some of them are items my picker has found for me, and some are things I found … or already had on hand.  They were all pretty random finds, but in the end they have a laundry related theme.

Meanwhile, I was skimming through the April 2022 issue of Country Living and they had an article on exactly this sort of thing.

They featured vintage clothespins, washboards, and these cool retractable clothes line reels …

I kinda wish I had one of those for my basement in the winter.

Anyway, after seeing that article I decided I should figure out a good container for grouping all of these items together for sale.  I had a couple of baskets on hand, but I didn’t like the size and/or shape of them for this particular use.

Then while garage saling a while back I found this wooden box.

I thought it would be the perfect size for my accumulation of stuff, and it was priced right at only $3.  So I nabbed it.

After giving it a good scrub with soap and water and then letting it dry in the sun for a day, I painted it with just one coat of Dixie Belle’s Midnight Sky.  Once the paint was dry I sanded it heavily to give it a really worn appearance.  Then I added the Laundry & Co stencil from Maison de Stencils using Dixie Belle’s Putty.

Today’s q tip; I highly recommend doing any sanding before adding your stenciling when working with highly contrasting colors like black and white, or red and white … if you wait until after adding the stencil you will get a mess when the fine sanding dust from the black paint works its way into the white (or, in this case, Putty) stenciling.

So, I sanded first, wiped away the dust and then added the stencil.

FYI, I usually use a small paint brush to fill in the bridges on these kinds of stencils, and I did do that on this one except for the word “AND”.  I must have missed that one!

After the stenciled design was dry, I used DB’s Big Mama’s Butta to finish off the box.

Next up, I gathered up all of my vintage goodies to fill it up including the Watkins Household Hints book I picked up a while back …

the washboard …

some vintage wooden clothespins …

and hangers …

and finally this adorable vintage embroidered clothes pin bag.

I filled up the box, and I even threw in the magazine for good measure.

Sweet, right?

It would make a fantastic house warming or wedding shower gift for someone who appreciates vintage.  One could also just add all of these items to their laundry room for some instant vintage flair.

I’ll be taking this one in to the shop where I sell on consignment and we’ll see if it goes, unless of course one of my locals wants to snatch it up first.  If interested, be sure to check my ‘available for local sale‘ page for more details.

this beats working 9 to 5.

This mini dresser/jewelry box came from a garage sale earlier this summer.

These little pieces are so much fun to make over.

With this one, I initially thought about replacing the knobs with something else.  However, those knobs are glued in place and it would have been more trouble than it was worth to remove them.  However, I did use some Dixie Belle Mud to fill in those grooves on each drawer front.  I just didn’t like them and thought it would be preferable to have a flat surface.

Today’s q tip; once the Mud is dry and you have sanded your surface smooth, add a coat of sealer of some kind over it before painting.  That will ensure that you don’t see a difference in the way the filler absorbs the paint v. the wood finish.  I simply sprayed these drawer fronts with some Rustoleum matte clear spray paint, but you could also brush on a clear sealer as well.

Next up I painted the entire piece in Dixie Belle’s Putty.  I let that dry overnight as a base coat.  Then I continued to work on my paint blending skills by blending Putty and Drop Cloth.

Once again, I kept the color blending very subtle, trying to make it lighter in the middle and darker on the outer edges.  Maybe one of these days I’ll graduate to a more obvious look, but I’m definitely not ready for that yet.

Here, maybe you can see the color blending a little bit more on the top of the piece …

As you can also see, I used a section from IOD’s Label Ephemera transfer on the top.  I added pieces from their Floral Anthology transfer to the front and sides …

and then added some more Label Ephemera wording over that on the bottom drawer.

Once the transfers were in place, I sanded lightly with 220 grit paper and then added a topcoat of clear wax.

In an homage to my former day job as an accountant, I lined the drawers with some old October Afternoon scrapbook paper from their 9 to 5 line.

Ahhh … debits and credits, general ledger, account no … all things I no longer have to worry about 😉

Instead I get to spend my time working on fun little projects like this one.

Whether my pieces sell or not, this still definitely beats working 9 to 5!

And speaking of sales, this piece is for sale locally so be sure to check my ‘available for local sale‘ page for more details.

Thank you to Dixie Belle Paint Co for supplying the paint used on this project.

scandi end tables.

Moving forward on my plan to unstick myself, creatively speaking, I decided to work on this fabulous pair of end tables that came from my neighbor nnK’s parents.

She’d grown tired of them and replaced them with chrome and glass of some kind.

They look great from that angle, but nnk’s mom had kept houseplants on these tables resulting in water damage to both tops.

There was also a spot where the veneer was worn through, I’m not quite sure how that happened.  In addition, the pieces were discolored from years in bright and sunny living room overlooking the lake.

All of which meant that these tables were great candidates for some paint.

I decided to keep it super simple, just painting the damaged shells of the tables and leaving the drawer fronts and legs in their original finish.

Since the previous owners had often spruced up these tables with a coat of furniture oil of some kind, I gave them an extra thorough cleaning with Dixie Belle’s White Lightning which contains trisodium phosphate.  I usually use a TSP substitute, but in this case I thought I should go for the big guns.

Today’s q tip; always wear gloves when using TSP.  Also, be sure to rinse your piece with clean, plain water after cleaning it with White Lightning to remove any residue.

Once the tables were dry again, I sanded them with 220 grit paper to rough up the surface a bit and thus improve the adherence of the paint.

Finally, I painted the shell in Dixie Belle’s Silk paint in Anchor.  Just a reminder, Anchor is the black in the Silk line, Black Sands is a charcoal grey.  I was confused by that once and ordered the wrong color and I don’t want you guys to make the same mistake.

Once again, I chose the Silk line from Dixie Belle because of its built in primer and top coat.  It was super simple to add two coats of Anchor to each table.

The Silk paint has just a tad more shine to it than the very flat chalk paint, but I’d say it’s comparable to the sheen you get with a waxed chalk paint finish.

I then spruced up the existing finish on the areas that I didn’t paint using some of Dixie Belle’s Big Mama’s Butta.

By the way, the backs of the tables look like this …

And here is the completed pair.

I like the clean, modern lines of this Scandi looking pair.

Although this isn’t my usual style, it was still fun to breath new life into these tables with just a little paint and some butta’.  The next step will be to find out whether or not they will sell!  I’ll keep you posted.  Of course, if any of you locals are interested in purchasing this pair, be sure to check my ‘available for local sale‘ page for the details.

As always, thanks to Dixie Belle Paint Co for providing the White Lightning, Silk paint and Big Mama’s Butta used for this makeover.

getting unstuck.

As I’ve mentioned recently, my furniture is not selling very quickly (or at all) for me these days.

I had a really strong start to 2022.  I sold a number of pieces in January and February including the nightstands made by separating the two sides of a vanity …

this gorgeous armoire …

the barrister bookcase …

a primitive chippy dresser …

and the botanical cupboard …

But since then the only piece of furniture I’ve sold is the dry sink.

Well, and also the rusty garden furniture, which I suppose does count as the sale of furniture.

I’ve been selling refurbished furniture for a long time, and if there is one thing I can say for sure, it’s that it is very difficult to predict what will sell and what won’t.  Mainly because it changes all the time.

For a while there, dressers were a sure fire seller for me while more unique pieces like dry sinks, armoires, book shelves or restyled radio cabinets were likely to be more difficult to sell.  Now the opposite seems to be true.

One of the problems I have when unsold pieces start backing up is that I have nowhere to store them safely.  Sure, I could put them out in the carriage house, but it is damp and dirty out there (not to mention the bugs and critters).  Definitely not a great environment for storing my finished pieces.  They really need to be inside the house, so I line them up in the dining room.  And currently I’m out of space out there.

But really, the bigger problem I have when pieces aren’t selling is that I get stuck creatively.  I totally lose my motivation for working on more furniture.  I just can’t continue to add to the pile.  It starts to weigh me down.

So I took some time this past holiday weekend to try and brainstorm some potential solutions to this problem and I came up with a few ideas.

First up, I have this washstand that hasn’t sold.

I decided that I really liked this piece myself, and it could possibly work in my front hallway.  So I put it out there just to see how it would look.

It turned out to be a good fit.  So at least it’s out of my dining room and freeing up some space in there for now.  I’ll continue to list it for sale, but in the meantime I’ll enjoy it in my hallway.

Next up is the bench.

As you may remember, this is look number 3 for this bench.

If it still doesn’t sell in the next month or so, I may possibly take it into the shop where I sell on consignment.  I don’t usually take big pieces of furniture to them, and I have to wait until they have space for it, but maybe I can reach a wider audience … or at least a new audience … there.

I’ve also decided to try something a little more trendy on this piece …

I’m going to strip the drawer fronts and then either leave them as raw wood or add a white wax.  Then I’ll repaint the rest of the shell in a closely matching chalk paint, maybe Dixie Belle’s Putty or maybe the Burlap that I used on those nightstands.  Or maybe I’ll just strip the whole thing.  I’m not sure yet.  But it will be getting a new, raw wood sort of look.

If that ends up helping it sell, I may have to rework the other two dressers that aren’t selling.  This one …

and this one …

Another idea I had is to try going in a little different direction with the style of pieces I work on, starting with this set of modern end tables.

I’ll be sharing their makeover with you tomorrow.  And then we’ll see if these sell quickly or not.  If so, maybe I need to change up my inventory and focus more on mid mod pieces?

And finally, I’m also going to spend some time working on a couple of projects for myself.  I have a cabinet that I’ve been meaning to get to that will be part of a makeover of my shed/photo cottage, and I also have a headboard that I’m making into a sign to hang on the carriage house.

So hopefully in the end some/or all of these options will help me get unstuck.

I’d love to hear from any of you that are furniture refurbishers.  What is selling for you these days?  And when you get stuck, how do you get unstuck?  Leave a comment and let me know.

nothing earth shattering.

I went to the Longfellow (Minneapolis) neighborhood sale the weekend before last and it was pretty much a bust.  I brought home a couple of jigsaw puzzles, another glass canister, a shovel with a beautiful wooden handle, and this E. Swasey & Co crock.

The crock has some pretty good chips and dings in it.  I ended up giving it a quick refresh by filling the chips in the upper dark brown area with some paint to make them less noticeable.

Dixie Belle’s Coffee Bean was a pretty good match.  I added a top coat of DB’s Gator Hide over the Coffee Bean to try and match the sheen on the pottery as well.  It’s definitely not a professional looking repair or anything, but it improved the appearance of the crock.  This one wouldn’t be collector quality, but it would be great for holding utensils on the kitchen counter or as a plant pot.

Normally I wouldn’t even bother sharing this with you guys, but I wanted to point out that I don’t always come home from neighborhood sales with a carload of amazing finds.

I was with my sister and my niece that morning, and by 11 a.m. we’d had enough so we gave up on the garage sales and went for brunch at the Longfellow Grill.  They have a lovely patio, and the food and mimosas were delicious.

But all is not lost.  I also popped over to a sale near me recently and came home with a few goodies.

The sled will go into my stash for Christmas, as will the metal ‘Christmas trees’.  The metal lockbox will be added to my growing pile of metal boxes so that I’ll have plenty to work on when the weather isn’t quite as nice.  True, it’s not a toolbox, but I’ve done a couple of these lock boxes and they turn out pretty cool too …

The doorstop will head to the shop …

As will the urn …

I found a spot for that funky wire thingie in my garden …

It was the perfect fit for this little concrete urn filled with pale pink double impatiens.

And that leaves the galvanized tote.

I cleaned it up and added an Everyday Farmhouse transfer to the side.

Then I had some fun staging it up with my faux flowers.

It will also make its way to the shop to be sold.

So, nothing earth shattering, but I did find a few goodies to share with you guys after all!  Hope you enjoyed seeing my finds, and what I’ve done with them.  Let me know if you have a favorite.

steep and hilly.

We had some absolutely perfect weather this past Sunday, so my sister, niece and I decided to take advantage of it and do some hiking.  My niece purchased an annual state park pass, and we are getting lots of use out of it.

We started out in Whitewater State Park, which is near Winona, MN.  The list of trails in this park all seem to have one thing in common, the guide describes them as steep and hilly.  Personally I’m more of a ‘flat and wooded’ sort of hiker, but I was game to try ‘steep and hilly’ if it meant getting an amazing view.  So we headed for the Chimney Rock Trail.

Hmmm, a ‘moderate’ 1 hour hike, that seems easily doable, right?

It starts out pleasantly enough with a stone bridge over the Whitewater River.

As soon as you’re across, you see some steps in front of you.

But that, my friends, is only the beginning.  There are over 100 steps leading up to Chimney Rock, interspersed with some narrow, rocky trails.

It was fun to check out Chimney Rock, but I have to admit I wasn’t brave enough to crawl inside (although plenty of others were).

Although going up is physically challenging, for me it’s coming back down that totally freaks me out.  I was so focused on not slipping and falling that I didn’t even take any photos on the way down.

But we made it down safely, and then decided maybe the Trout Run Creek Trail, which was described as flat with packed dirt was more our speed.

It was really lovely.  We were surrounded by leafy forest that was filled with bird song.

However, we’d only gone a little way down this trail when we saw a turn off for Inspiration Point.  There were a couple of hikers coming down from that trail and they told us we really shouldn’t miss it.  Sure, it’s steep and there are over 100 more stairs, but it’s so worth it.

And I thought the first trail was scary.  Yikes!

If you like narrow, rocky trails with a steep drop off beside you, or lots and lots of rickety wooden stairs, you’ll love this trail.

But I have to agree that it was worth it to get to Inspiration Point.

That being said, none of the three of us were actually brave enough to go stand at the very end of the point.  Luckily that other lone hiker went out there so I could include her in my photo to try and capture the scale of the place.

The view was pretty spectacular, even from where we stood (in safety).

Unfortunately my photos definitely don’t do it justice.

I have to confess that my fear of heights kept me from really admiring the beauty up there.  And on the way down I was too concerned with not falling to my death to get any photos.  But I found this great post on daytripper28.com with good photos of these trails, including a picture of the rather frightening stairs coming down from Inspiration Point, so go check it out if you want to see what I’m talking about.

After making it back to the car in one piece, we decided to head over to Carley State Park.  This is a much smaller, and less spectacular, park.  But my sister and niece want to get to as many of the Minnesota state parks as possible, and it was just a short distance from Whitewater.  We did a quick hike through the woods there just so that they could check it off their list.

We decided to take the scenic route home from there and stop off in Lake City.

If you aren’t familiar, Lake City is located on the Minnesota side of Lake Pepin.

Lake Pepin is a naturally occurring lake on the Mississippi River (ie. it was not created by a man made damn).  It’s known as the birthplace of water skiing which was invented here in 1922 (you can read more about that here).

We didn’t realize it beforehand, but Lake City was celebrating Water Ski Days last weekend.  We arrived just in time to have roads blocked by the parade, but too early to see the water ski show.

That’s OK, we found a great ice cream place and enjoyed some waffle cones while wandering around lakeside.

As I enjoyed my white chocolate raspberry ice cream I was reminded of what a beautiful state Minnesota is.  So tell me, where do you live and what are some of the prettiest spots near you?  And are you a fan of steep and hilly, or is flat and wooded more your style as well?