quandie’s cast of characters.

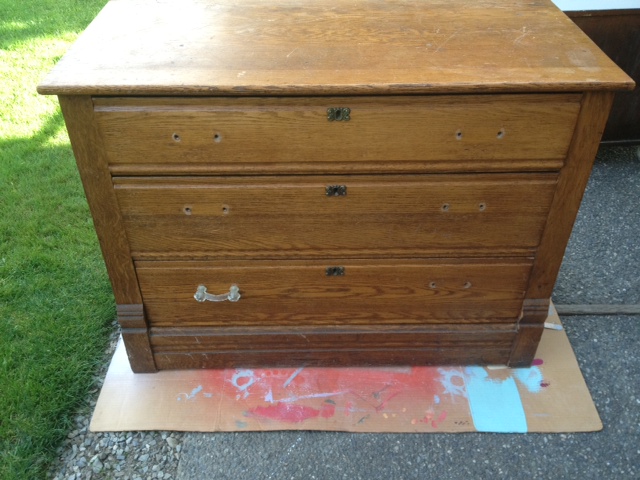
If I sometimes give the appearance of doing it all myself, you should know that in reality I have a lot of help.   With my one year blogiversary coming up soon, I thought I would officially introduce you what has become the cast of characters on q is for quandie.

First and foremost, of course, is Mr. Q.  My hubby of 25 years.  I’m pretty sure I couldn’t live without him. He is the brawn behind q is for quandie, helping me move furniture here and there.  He runs all over tarnation picking up craigslist buys.  He has also started doing a lot of the prep work for me; sanding and removing hardware.  He also is very understanding about my total obsession with refurbishing old stuff.  Really, he is just an all around good guy.

cast - mr q

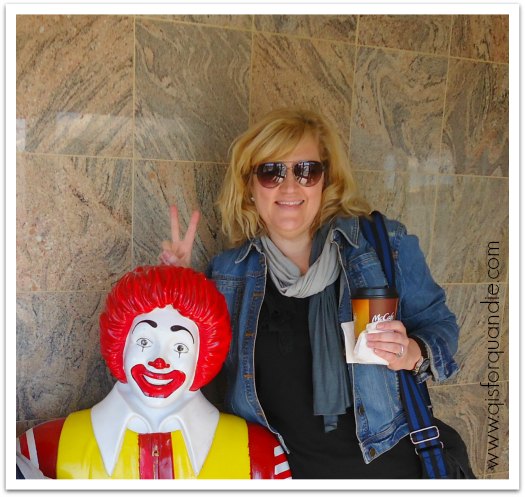
My sis (on left, that’s me on the right).  She lives in New Jersey (bummer!), but you’ll still see her mentioned all over the place on my blog.  She is always supportive of everything I do!  She visits as often as possible, and we travel together frequently.  Thank goodness for modern technology because we can text, call, email and just basically pretend like we don’t really live way too far apart.

cast - debbie

Handyman Ken.   Several of my readers have gotten confused and think that Ken is Mr. Q a.k.a. my husband, but no, Ken lives next door.  He’s retired, so he has a little spare time on his hands for fixing stuff.  He is one of those guys who just knows how to make stuff work.  I think it’s a dying breed really.  I truly couldn’t do what I do without Ken.  He makes sure that the furniture I revamp functions the way it should.  He likes to sneak over during the day while I am at work.  Then, like magic, I come home from work to find that the furniture in my Carriage House has been magically transformed while I was off at the day job.  And best of all, he accepts payment in the form of wine!

Ken

New neighbor Karen, a.k.a. nnK.  She lives across the street from me and is my numero uno craigslist spotter.  She is always on the lookout for great pieces.  She’s also available at the drop of a hat to help me move furniture when Mr. Q isn’t home.  I can text her, and she’ll pop right over to lend a hand.  How fabulous is that?  nnK and her mom, Judy, are also there at every Carriage House Sale to help man the check out.

 cast - nnK

Sue (on left) is the other half of the Carriage House sale.  Sue and I have worked together at our day jobs for over 27 years (dear lord, how can that be possible I wonder).  We started hosting our sale together over 15 years ago and we are still going strong.  We’ve added other vendors here and there over the years, but in the end we find that we really only have enough space for stuff from just the two of us.  In the center of this picture is Sue’s sister Jan who always keeps me fortified with triscuits and cheese in a can while we garage sale! Cathy (on right) is the finder of free, or almost free stuff.  When she spots a cheap piece of furniture that she knows I can revamp, she grabs it for me every time!

mac grove crew

And finally, there is me.  The creative mastermind behind qisforquandie.com (ha!  I say that with a big smirk on my face).  My real name is Linda, in case you didn’t know.  I started this blog nearly one year ago to share my furniture makeovers with the world, or really just the very small group of people who might be interested.

quandie

So, that is my fabulous cast of characters.  Hope you’ll continue to join us for another year of adventures!

blast from the past.

I was going through some old photo files the other day.  A couple of things struck me.  The first was just how long I’ve been doing furniture make-overs.  I started in the 90’s when shabby chic was at its height.  How is it even possible that this was more than 20 years ago?  Have I really been doing this that long?  Crazy!

Next, I was reminded of some really fun pieces I had done.  So I decided to share some of them with you.  I don’t have extensive before and after photo shoots of any of these.  Most of them were just photographed for a Carriage House sale ad.  So, no judgments about the quality of my photos, ok?

Let’s start back in 2008.  Look!  The photo cottage exterior was barn red back then.  And I painted this fab potting bench and used a rusty old child’s shovel as the drawer pull.  I was using a lot of vintage tablecloths to reupholster chairs back then.  I was also doing a fair amount of decoupage (on the bucket under the chair, the galvanized pot under the bench).  If memory serves, I believe my fab customer Jenny bought this potting bench.  Am I right Jenny?  Do you still have it?

blast 2008

In addition to containers, I also decoupaged on furniture.  Many of my favorite pieces back then were decoupaged.  Like this desk.

Black desk with decoupaged book pages

Here is a close up of the drawer.  Those black swirly bits are rub-ons.

Decoupaged book pages on drawer

In 2009, I painted this gorgeous white buffet.

white buffet

Fast forward to 2012.  The always classic Union Jack dresser.  This was the first one I ever did, and honestly, I think the best.  I’ve struggled with getting them right every since.  Maybe it was just beginners luck.

blast 2012

I’ve always been a fan of both white and aqua.  So fresh and lovely.  That little aqua and white table originally belonged to my grandparents.  I kept in my own home for a long time, but it was time to say goodbye to it.  So I gave it a darling makeover and sent it on its way.  That sleigh bed was one of my favorite pieces too.  How fantastic would that be in a young girl’s room.  Actually, that is where it ended up.  I remember the woman who bought it was going to put it in her daughter’s room.  I wonder if she still has it.

blast white and aqua

This darling little aqua and white nightstand was one of my faves.  I’m quite sure that it was originally half of a vanity/dressing table that someone took apart.

1914 nightstand

When it comes to the Carriage House sale, I am not the only one coming up with fabulous furniture.  Sue occasionally knocks one or two out of the park herself.  This was one of my favorite pieces that she did.  Isn’t it deliciously chippy and fabulous?  It sold in about 2 seconds flat!

blast Sue's cupboard

So, there you have it, a little walk down memory lane.  Hope you enjoyed it as much as I did.

it’s in the bag.

I am so looking forward to my trip to Budapest and the cruise on the Danube River, but I am a little nervous about traveling in winter.  But, heck, I’m a Minnesotan for gosh sakes (you betcha).  I should be able to handle it.  I definitely have plenty of winter gear.  The real trick for me is figuring out which things to bring.

I recently purchased a new coat for the trip that meets all of what I consider to be the necessary requirements; waterproof, warm, comfortable, has good pockets, covers my butt.  All important factors.  I also got a great deal on it on the sale rack at Macy’s.  I also have a North Face fleece hoodie that I can add under it for even more warmth, not to mention some long undies just in case it is really cold.

I plan to style it up with some fabulous scarves, hats and gloves.  But I’m also debating about a suitable bag.  I like to use a cross body type bag when I travel, and it needs to be big enough to hold my digital SLR camera, maybe an extra lens, a bottle of water, definitely a collapsible umbrella, plus all of the usual suspects that go in your handbag.

I’ve narrowed it down to two choices.  I thought maybe you guys could help me pick.

Option 1 is a suede Crown Vintage bag that I picked up at DSW for $119.95.

opt 1 furry scarf

I really love the look of this bag, but the drawstring top makes it a little tricky getting the camera in and out easily.  I take a lot of photos when I travel, so easy access to the camera is important to me.  Plus, the color of this bag kind of leans towards the khaki green side of grey.  It looks great here with my new furry infinity scarf that I bought at Carver Junk Co though.

But it doesn’t work quite as well with my aqua scarf and gloves.

opt 1 aqua scarf

Option 2 is an inexpensive Mossimo bag from Target that cost $29.99.

opt 2 furry scarf

This bag is totally faux leather, but it has a distressed look that is almost believable.  The camera comes in and out a little easier with this bag.

It also looks better with the aqua ensemble (and I do plan to bring both the aqua and the furry scarves).

opt 2 aqua scarf

And let’s not ignore the fact that it is $80 cheaper than option no. 1.  However, it does look cheaper to me, and I doubt it will hold up as well as the more expensive bag.  I probably won’t use this bag at home at all, it will likely only be pulled out for traveling.  And only winter traveling at that, so it’s not going to get a ton of use.

There are definitely pros and cons to each bag.  I haven’t take the tags off either one yet, so both are still returnable.  So, tell me, which bag would you choose?

a do-over.

Every winter a magical thing seems to happen.  Just when it gets too cold to be taking photos either outside or in the photo cottage, the leaves all fall off the trees and suddenly I have this fantastic light in my piano room.  This also happens to be the only room in my house with a wall that works as a suitable back drop for furniture photos.  It’s like kismet.

I was never really happy with the outdoor photos I took of this petite dresser that I painted in MMSMP in Kitchen Scale.  The fall leaves are gorgeous, but I didn’t like the way the color looked on the dresser.

Small dresser painted in MMSMP Kitchen Scale

So, once all of those yellow leaves fell, I decided to stage a ‘do-over’ inside the house.

do over close up

I think this gives you a better idea of the true color.  As we all know, Kitchen Scale is my fave, so I want to do it justice.

do over

Maybe it’s my imagination, and it doesn’t really look all that different.  Maybe I just prefer the color when paired with white and grey rather than yellow.

do over with chair

Either way, I’m glad I allowed myself a do-over for this one.

I had planned to add these photos to my craigslist ad for this piece, but there was no need because it sold without them!  I had a lot of interest in this one, so I am on the lookout for similar pieces to make over.  It seems that lots of people out there would love to have a Kitchen Scale nightstand/dresser!

whatever happened to …

I thought perhaps some of my regulars would like an update on various subjects that sort of got left hanging on my blog.

Danube cruise header

My cruise on the Danube is still ahead.  We are going during Christmas Market season, which means we will get to enjoy this …

Vienna Christmas market

And maybe even this …

Budapest winter

I don’t usually choose winter travel, but I’m getting prepared (more on that later) and am really looking forward to it.

Remember the Curtis Jere wall sculpture?  Or as Mr. Q fondly calls it, the deathstar?

Curtis Jere

Yep.  I still have it.  Here’s an update.  I sent inquiries to two auction houses that specialize in mid-century modern.  Palm Beach Modern Auctions would love to take it.  They estimate it would sell for $800 to $1,000.  But, I would have to ship it to them, and then they take a 20% commission.  I also contacted Wright in Chicago.  They estimated its value at $2,000, but they felt it wouldn’t be worth it to ship it to them and pay their auction fees (they did not elaborate on what those are) so they suggested I try to find a local buyer.  I have also contacted two MCM dealers in the Twin Cities, and so far neither of them have followed up with me.  I plan to continue trying to find a local dealer that specializes in mid-century, but meanwhile I am storing the death star!

Remember my grandiose plans for my front hallway?

hallway collage

Well, we got as far as ripping off the carpet and then the whole project was derailed by my decision to have  a booth at Junk Bonanza, and then spring came and I was so busy, and then summer came and I was still busy.  Now fall is here, and guess what?  I’m still busy.  Hopefully I’ll revisit this project over the coming winter!

Now, who actually remembers this one?

Cambridge before

This goes way back to last March.  Mr. Q and I picked it up north of the cities on a frigid winter’s night.  I still have this piece, but I haven’t worked on it.  The plan was to deal with it over the summer when I would have some space to spread out in the Carriage House.  Instead, it keeps getting shoved to the back of the list in favor of pieces that need less work.  Plus, the more I look at it, the more I think it’s a dresser that was “married” to two halves of a dressing table.  Right?  And once you have that visual in your head, you just can’t get it out and the whole piece just looks weird.  I think I need to consider taking these pieces apart again.  What do you think?

Finally, there is this bed.  This came as part of a set.

workshop bed

I already refurbished and sold the dresser and the vanity that went with this bed.  But the bed needs more work.  I have it pulled out front and center in the workshop.  I hope to get to work on it soon.

I think I’ve touched on everything that is left hanging.  Did I miss anything?

I’m not making any promises on any of this stuff … well, except the cruise on the Danube, I’m definitely doing that one!

easy upholstery.

A while back my friend Cathy offered me a vanity bench.  I initially thought it would work with my stenciled vanity/dressing table.  However, when I put them together, they just didn’t suit each other.  The bench is too wide for the vanity.  Nonetheless, it is a fabulous little bench, and I’m sure it will find a good home with another vanity, or maybe just on its own at the foot of a bed.

I painted it with Miss Mustard Seed milk paint in Trophy, and then reupholstered it in a simple linen with a stencil added.

This is so simple to do, and the linen stencils beautifully.  Here are my tools.

bench supplies

A stencil, some craft paint, a stencil brush, paper plate, paper towel, some new batting and some plain inexpensive linen (not pictured).

The original seat to the bench is underneath my supplies.  As you can see, all that was left was a remnant of the original fabric.  I ripped that off, and then cut my linen about 2″ bigger than the seat all the way around.

Now, this next tip is important, so I hope you are paying attention.  You should stencil the fabric on a hard flat surface before you upholster the bench.  You won’t get crisp lines on your stencil if you try to stencil over the batting.  I’ve learned this the hard way.

stenciled fabric

I just laid my linen flat on a table.  I squirted some paint onto the paper plate, swirled my brush in it, and then blotted it on the paper towel.  You don’t want your paint to go on thick and goopy or runny.  You could tape the stencil in place, but I like to live dangerously, so I just hold it in place.  Then, just stipple the paint on.

The Martha Stewart paint I used dries pretty quickly.  I probably only waited about 10 minutes before continuing on to staple the fabric over a couple layers of new batting onto the seat.

stenciled bench close up

The trickiest part of this process was being sure the design was straight before I stapled the fabric in place.

bench no 3

I just came to the realization that I did a pathetic job staging this one.  I meant to go back and add in some accessories, but I got distracted by laundry and then some gardening.  With the end of daylight savings time, it was getting dark out before I remembered and then it was just too late.

Let’s just imagine there is a lovely rug under this bench instead of my dirty photo cottage floor.  Or maybe a cute pair of shoes stashed under there.

stenciled bench again

Try to focus on the pretty upholstery and paint job, OK?

complications in the carriage house.

Carriage House Door poster

Sometimes I wonder if I make it all look too easy.  I want to be sure to share the disasters with you too.  And today I have a good one.

Recently I sent Mr. Q off to pick up an Eastlake dresser.  I love painting these.  I know there are probably some ‘antique’ people out there that cringe when I say that, but I only paint the ones that are in questionable shape.  So this one seemed right up my alley.  Note:  the photo below is not the actual dresser, I borrowed this photo online, but this is the basic style of the dresser and in similar condition.

photo from The Weathered Door

It was a little rickety, but Mr. Q had Ken over to consult, and he thought we could re-glue some key joints and it would be good as new.  So, we threw it up on some horses and started gluing and clamping.

We left everything to cure properly, and Ken said he would check on it the next day while I was at work.

That day, my phone rang at the office and it was Ken.  He was laughing so hard, he could barely get the story out.  Apparently he was going to move some clamps and add some more glue when he bumped the dresser.  He said he watched it, as if in slow motion, fall to the ground where it came apart into a million pieces.  There was nothing to do but laugh.  And laugh.  And then call me and laugh some more.  Note:  the photo below IS the actual dresser!

humpty dumpty pieces

Yep.  We’re going to call this one Humpty Dumpty from now on.

I don’t have all of the king’s horses and all of the king’s men, but fortunately I do have Ken.  And he likes puzzles.

He is actually looking forward to the process of putting it all back together again!  He likes a challenge.  It will make a great winter project for him.  So, it may be a while before you see this one again.  And there is always the possibility that instead of a sturdy dresser, we will just end up with some very expensive fire wood.  I’ll keep you posted!

road trip.

This past Saturday some of my gal pals, Sue & Cathy, and I took a road trip just south of the Twin Cities.  There are some great shops down in that neck of the woods that I have always wanted to check out.

We stopped in Carver first for a visit to Carver Junk Co.  I had met the owners of Carver Junk at the Miss Mustard Seed retailer training that I did last winter.  I’ve always wanted to check out their shop.  Carver is a tiny little town with lots of charm.

Look at this fab gas station.

carver gas station

And this gorgeous house.

Carver house

I got some great stuff at Carver Junk Co.  A scarf, some earrings, and this fab vintage book.

book

I’m not sure what I’ll do with this book, but I just loved the different fonts on the pages.  I hope I can come up with a cool idea for using these pages.

Unfortunately I didn’t get any pics inside the store, but they had some really gorgeous furniture pieces, many of them painted in Miss Mustard Seed milk paint of course.

Our next stop was Shop 501 in Chaska.

welcome

I could have spent hours digging around in this shop.  I’m sure there were lots of treasures that I overlooked.  I did pick up a dyed grain sack from this pile though.

dyed grain sacks

I’m not sure yet what I’ll do with it, but it looks pretty good just draped on an old ladder.

dyed grain sack

They had tons of great vintage pieces in Shop 501 …

vintage dresser

clocks
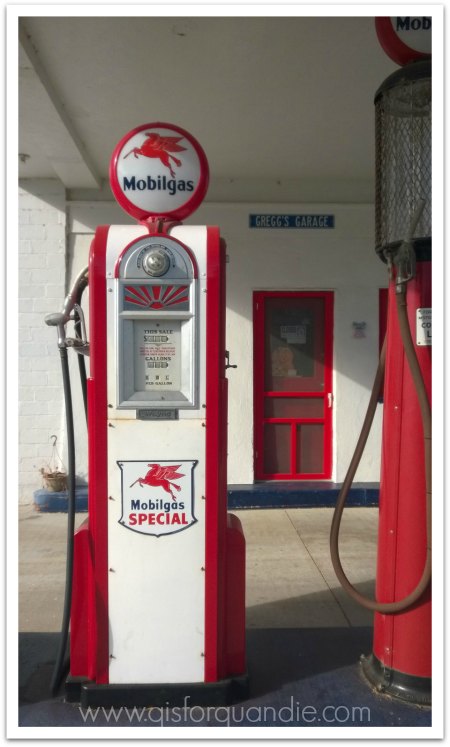
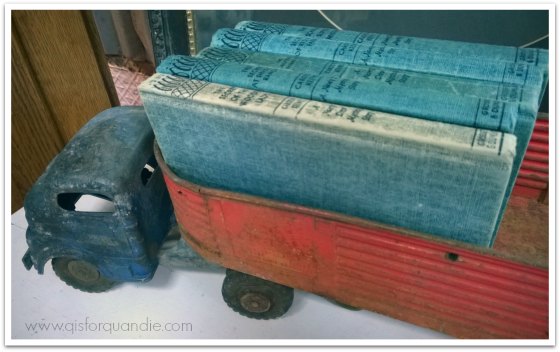
including some great vintage toy trucks.  I’m always on the look out for one in my fave aqua color.  I’d love to have one for display at Christmas time.  My friends spotted one for me, unfortunately at $92 it was way out of my price range!

This one was sweet too.

books in truck

We had a beautiful sunny day for our road trip, and it was interesting to see what other people are doing with their furniture makeovers.  I came away with some fun finds, and some ideas for future projects.

boo!

When hinges creak in doorless chambers, and strange and frightening sounds echo through the halls; Whenever candlelights flicker where the air is deathly still – that is the time when ghosts are present, practicing their terror with ghoulish delight!

Happy Halloween!  I thought this would be the perfect day to share my latest creation with all of you because it’s perfectly bewitching!

boo dresser with bats

Are you scared yet?

halloween closeup

Mr. Q and I picked up this waterfall dresser in the dark of night a couple of weekends ago.  The ‘before’ picture is deceptive.  All looks well on the outside, but dig a little deeper and beware of creepy crawly things on the inside.

waterfall spooky before

Seriously, all Halloween references aside, this dresser looked gorgeous in the light from the headlights on our truck, which was all we had to go by.  Even if we’d had more light, I still don’t think we would have looked past what appeared to be a dresser in pristine condition.  Once we got it home and really started to dig in, I realized that this one needed more work than I thought.  The top drawer was very hard to open and close, and there was some veneer damage along the bottom of the sides.  But it was nothing that I couldn’t deal with.

However, the biggest problem was that the seller must have coated this dresser with something to make it look this pretty.  I could feel an oily residue on it.  I suspected that this would be a problem when using milk paint.  So, I sanded it thoroughly, and then just to be double safe, I washed it with a TSP substitute.  Then I totally ignored the little voice in my head that said “maybe you should switch to chalk paint!”, and I painted it with MMS milk paint in Typewriter.

And as the paint dried, that was when I started to get scared.  It was chipping.  A lot.

waterfall super chippy

I wasn’t planning on super chippy, but super chippy is what I got.  Once I got over the intial ‘oh crap, what have I done’ moment, I realized that it actually looked pretty fab.  If you are an afficinado of the chippy look (and I am), this is really a cool dresser.

Let’s just discuss a couple of details before I unveil the dresser in all of its glory.  You may have noticed the little strips of inlaid veneer on the top and bottom drawers.  I thought they were pretty, so I masked them with tape while I painted.  I love how that worked out.

waterfall hardware

You can also see that I kept the original hardware.  It was just perfect for the dresser.

I also painted the interior behind the top doors black.

waterfall inlay

That interior space could be a nice way to hide a small TV in the bedroom, if one was so inclined.  It would have to be a small one though.  Aside from a TV, it makes a great space for spare folded blankets, or all of your sweaters.  This would be fun piece for a kitchen though too.  Plenty of storage with a more unique look than cupboards.

As usual, I really struggled with getting any sort of pictures that do justice to this dresser.  It’s just so hard to get good photos of black pieces.  And the contrast between the chippy areas and black paint is much more pronounced in photos than it is in person.  I spent the better part of an afternoon trying to improve my results.  I used a tripod.  I changed my aperture, I played around with my shutter speed.  In the end, this is as good as it got.

waterfall full pic

So, what do you think of my perfectly spooky make-over?  Who needs a bewitching black dresser?  Anyone?  Sorry, this one is sold.

mirror, mirror

Who’s the fairest one of all?

Certainly not these two!  At least not yet.

mirrors before

A friend gave me these mirrors.  She was going to chuck them, but asked if I wanted them first.  They actually look nicer in this picture than they really looked in person.  They were kind of chunky/heavy looking, plus they have that 80’s finish on them.  I figured if nothing else, they would be great fun to practice painting techniques on.

Then I saw this pin, and was inspired.

Painted mirror from Reloved Rubbish

And as luck would have it, this pinspiration piece was painted in Annie Sloan’s Louis Blue and Old White, with a wash of Coco, all three of which I happened to have on hand.  Plus, I’ve been wanting to try using a wash, so here was my chance.

I started with two coats of Louis Blue over everything.  As you can see, I never tape off mirrors when I paint the frames.  I just have at it, then go back later with a razor blade to remove the paint from the mirror.  The sharper the blade, the easier this is to do.  I go through a lot of blades, but Mr. Q purchased a package of 200 for me, so I have plenty!

mirror in louis blue

Next I painted Old White around the frame and on the carved details.  At this point the colors are far too crisp for my liking.  You can also see here that I am not super particular about the lines between the blue and white.  I know that later I will be sanding those lines, and adding dark wax in the creases, both of which hide a multitude of sins.  So no need to be overly particular at this stage.

mirror with white added

Next I mixed equal parts water and Coco to make a wash.  The general directions I read about using a wash basically said to paint it on, then wipe some of the wash off with a clean cloth.  This was a super messy process. for me anyway.  Luckily I was able to do it in the yard, so it didn’t matter that watered down paint was splattering everywhere!  Turns out, I’m not so good at this.  I think with more practice, I would improve, but honestly I don’t think there will be many washes in my future.  It gives a finish that just leans a little too much towards that ‘faux’ look for me.

After the wash dried, I hand sanded the edges and the carved details, then used a coat of clear wax followed by some dark wax in the areas I wanted to define further.

mirror close up

So … to recap, this was two coats of Louis Blue, two coats of Old White, wash with Coco, sand, coat of clear wax, coat of dark wax.  Phew!  That is a lot more steps than I am used to doing.  I haven’t even finished the second mirror yet, but I wanted to get some pics for a blog post before I lost the light.

Mirror painted in Annie Sloan Louis Blue and Old White

I think they turned out gorgeous.  However, I don’t think the wash was worth the effort.  I could have gotten just as fabulous an effect with just the dark wax, and I feel like the wax looks a little more natural than a wash.

mirrror final

How about you?  Have you ever tried a wash?  Are you pro-wash, or anti-wash?