adding colorful foliage.

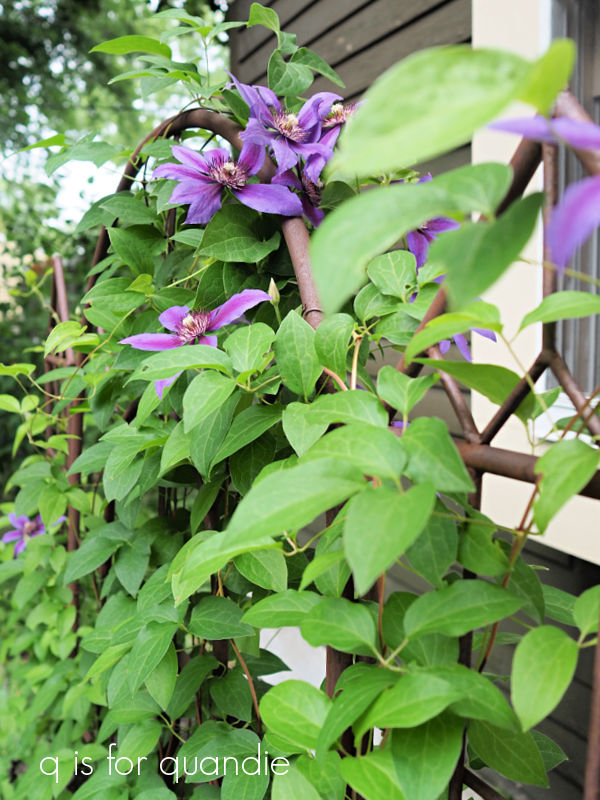
Good morning from the lush, and very wet, garden!

Today I thought I would share the advice that Laura on Garden Answer gives about foliage color.  She says that to create interest in a garden bed you should include something in green, something in yellow, something in blue and something in red.  Unless, of course, you are going for a monochromatic look, such as with an all white moon garden.

You might initially think that would be easy with flowering plants, but impossible to do with plants grown strictly for their foliage.  Aren’t they all just green?

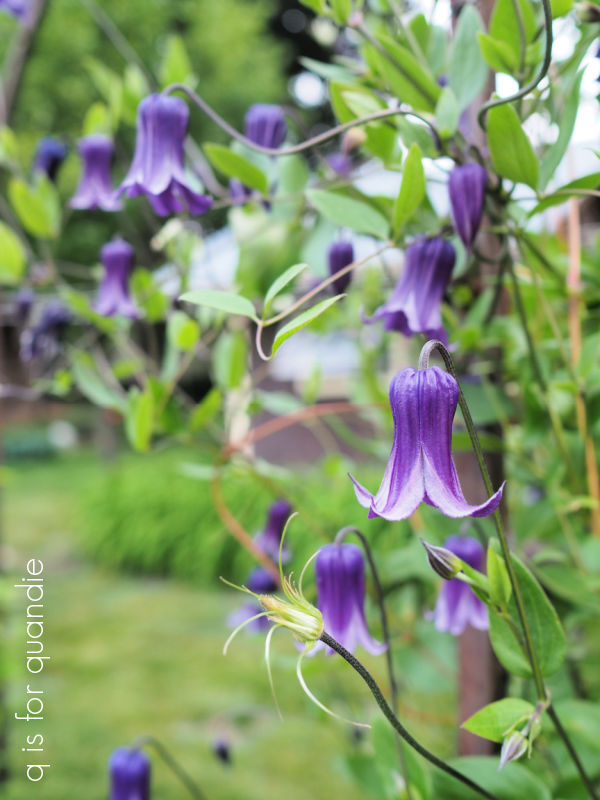
Well, not in garden terminology.  Obviously there aren’t any plants with truly ‘blue’ foliage. But in plant lingo, ‘blue’ means something like this …

And ‘yellow’ refers to a brighter chartreuse-y green, like the color on this Sun Power hosta.

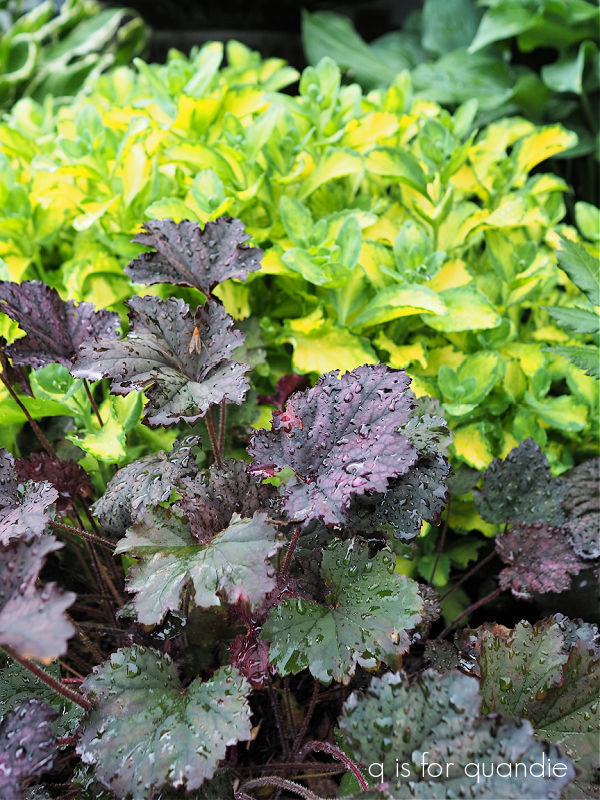
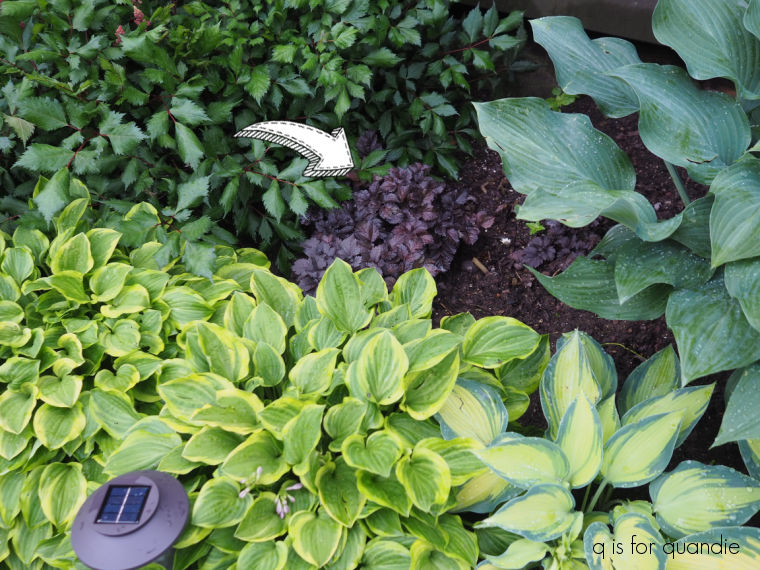
And red foliage can be found in lots of heuchera.

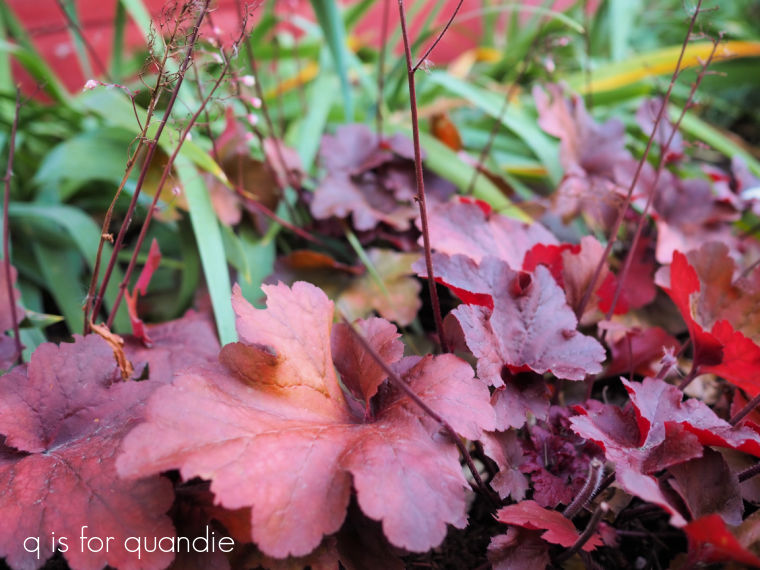
As for ‘green’, well, that one’s easy.

It’s just green.

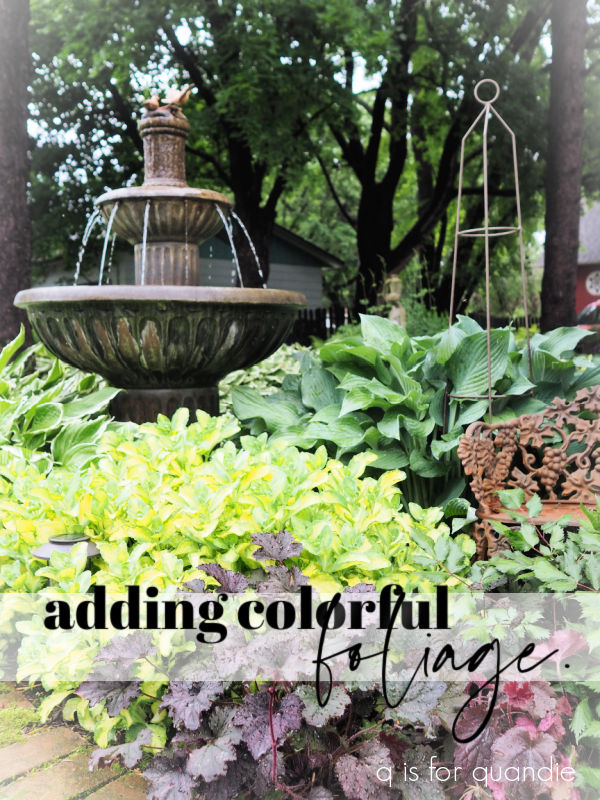
Ever since the first time I heard Laura give this piece of advice, I’ve been trying to put it into practice.  I started with my front garden.

And I really love the results.

I think it packs a lot of punch, even when nothing is blooming which is the case right now.

The ‘yellow’ is provided by the varigated sedum, as well as the Lemon Frost lamium.

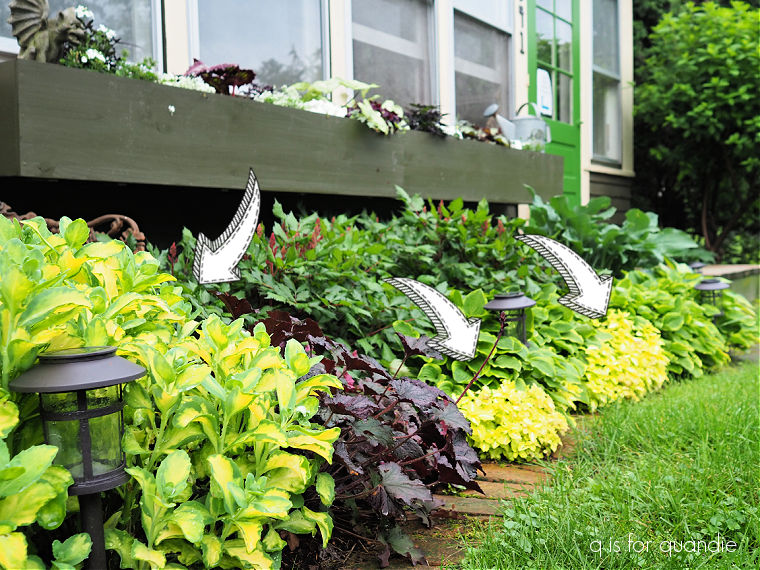
The ‘green’ is provided by the large swath of astilbe in the back.

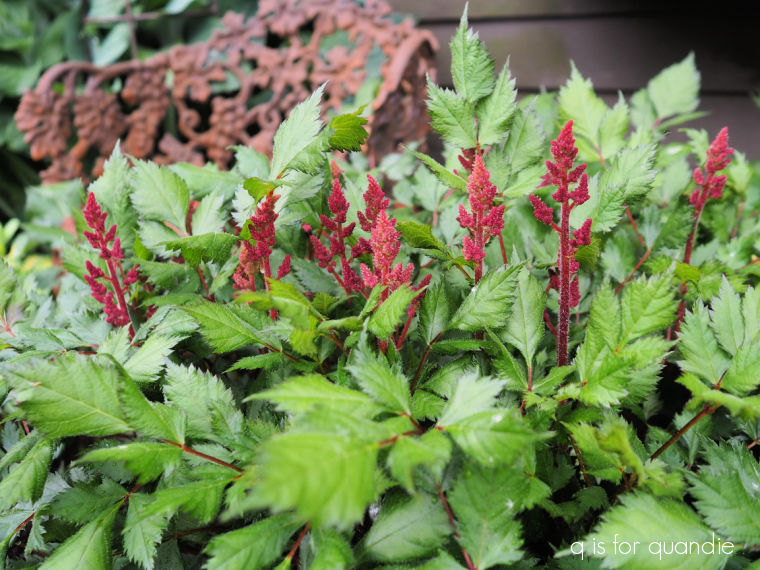
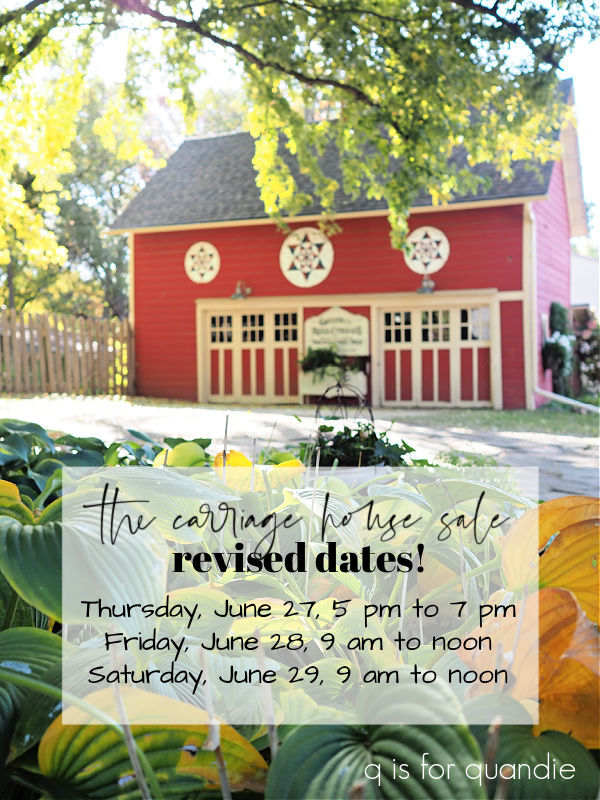
Quick sidebar on that astilbe, I divided it early last year and it had a very mediocre season with just a few blooms last summer.  But this year it has more than doubled in size and is loaded with buds right now.  One bonus of delaying my sale is that it just may be blooming by Thursday, if we ever get any sunshine.

I don’t have a lot of blue in this garden, just three large Krossa Regal hostas anchoring the corners.

Well, I guess I can also include the blue that is in the June hosta as well.

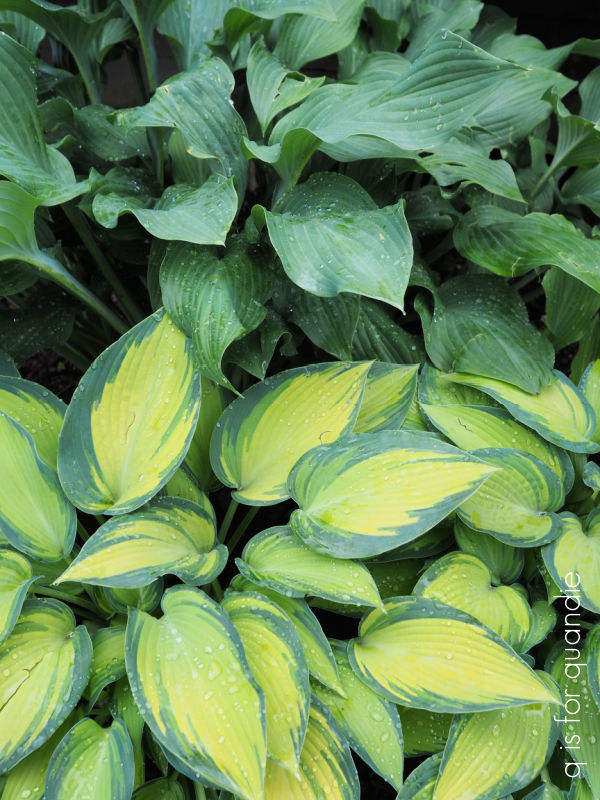
In fact, that one can count as both ‘blue’ and ‘yellow’.  Well, and even just a touch of plain old green.  It’s one of my favorite hostas, isn’t it pretty?

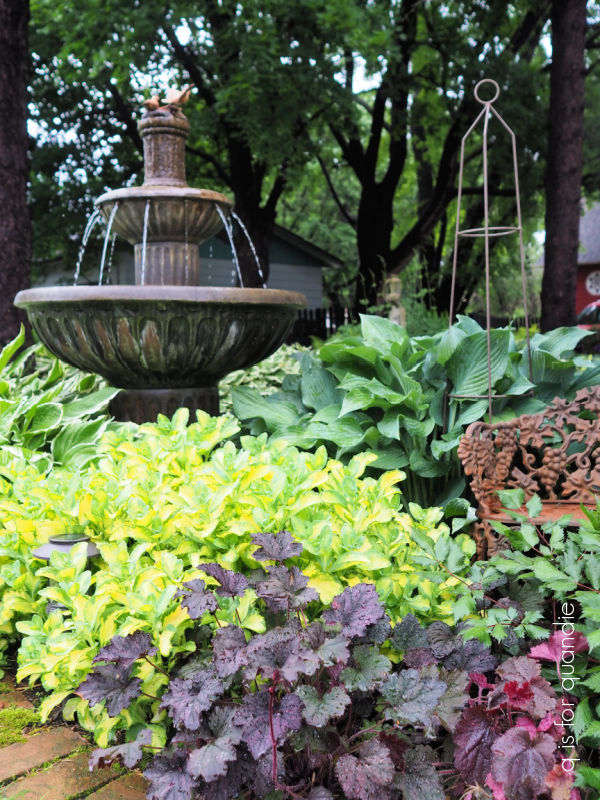
And finally, the ‘red’.  For that element I’ve got a Northern Exposure Black heuchera, along with a Palace Purple heuchera.

It’s only been within the last couple of years that I began to appreciate the impact of adding dark foliage to contrast with the brighter colors.  I had planted a May hosta beside a Palace Purple heuchera and it was ended up being a lovely combo.

When I divided those astilbe that I mentioned a minute ago, I also removed some white flowering astilbe from that spot and replaced them with one of the newer astilbes from Proven Winners called Dark Side of the Moon.

They are looking pretty small so far, this being only their second year (plus, I rather tortured them by moving them three times last summer before I decided on this spot).  But hopefully next year they will ‘leap’ and fill out that space a bit better.

I’ve been so happy with the results in this front garden that I’m planning to systematically apply this approach to my other garden beds as well, starting with the shade garden.

I’m doing pretty good with the blue, yellow and green, but I need a bit more red.  So far I just have a few Black Taffeta heuchera (front right corner of photo).

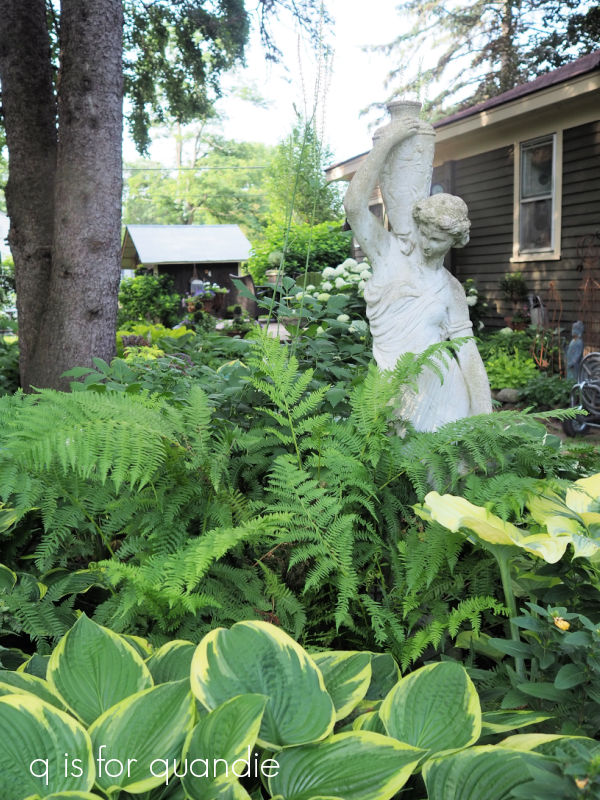
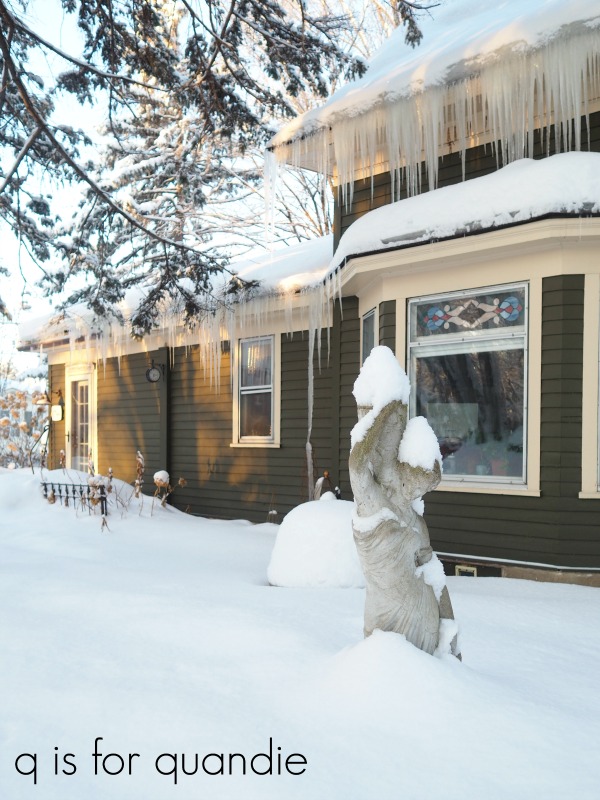
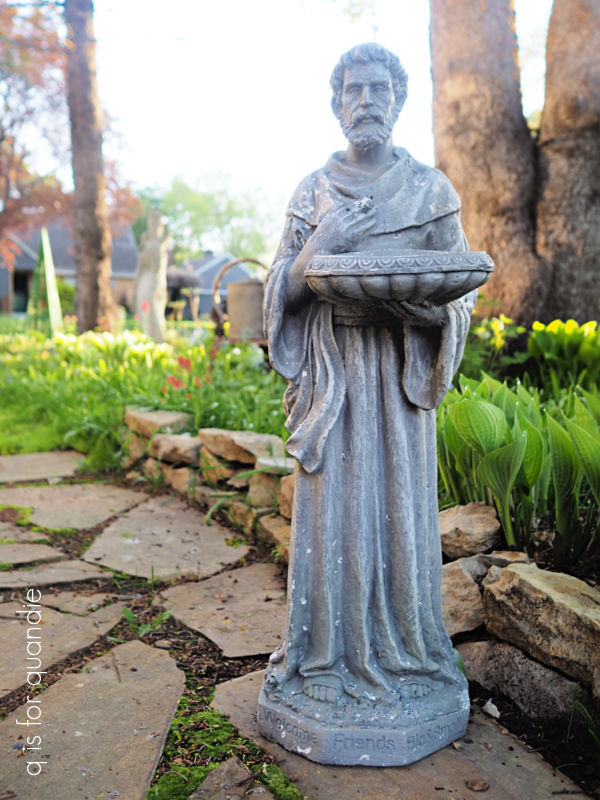
So earlier this week I pulled out the Boston Fern that I had planted in front of my statue, Cossetta, on a whim many years ago (just to see if it would overwinter, and spoiler alert, it did).  I replaced it with some more of that Dark Side of the Moon astilbe (and FYI, I purchased them at Home Depot).

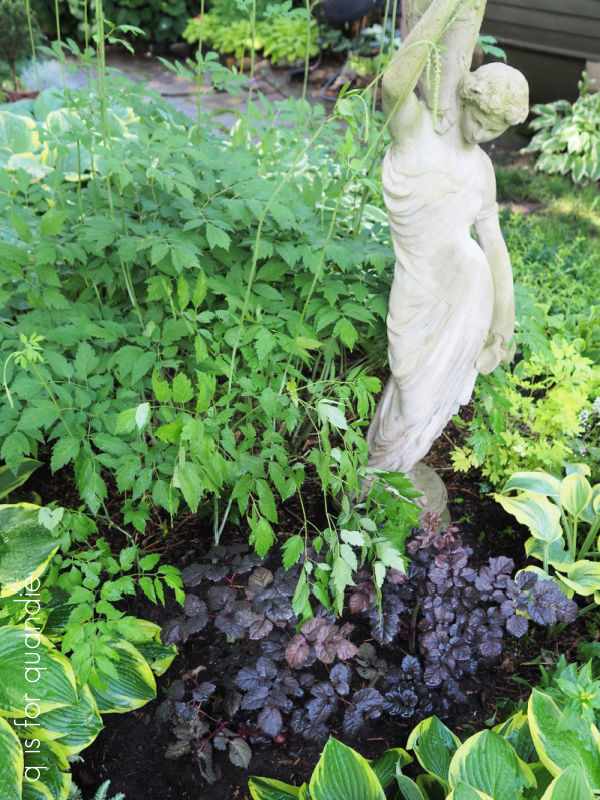
It feels a bit scandalous having revealed Cossetta’s ankles.  Now I have to wait for the astilbe to sleep, creep and then leap.  Gardening definitely requires some patience.

By the way, if any of you locals are planning to come to my sale, please feel free to take a wander around the garden while you’re here.  I won’t mind.

And maybe, just maybe, things will have dried out a little bit by then!

Now, how about you?  Do you try to add all four of these foliage colors to your gardens?  Do you have any favorite plants with blue, yellow or red foliage?

Leave a comment and let me know!

any ironstone fans out there?

Any ironstone fans out there?

‘Cuz we’ve got some at the Carriage House Sale.

We have more than a dozen pitchers ranging in size from small to medium (sorry, no really large ones).

And ranging in price from $3 to $12.

We’ve got some gravy boats for a mere $4 each.

We’ve also got some chamber pots for $15 each.

We also have a whole bunch of these little guys …

Were they originally used for syrup?  I’m not sure, but they seem the right size for that.

But personally, I like the idea of displaying them en masse in a bowl.

And at only $3 to $4 each, you could easily buy them all … and the blue bowl to go with them!

This pretty pitcher is marked at $12, but I keep debating whether or not to keep it.  It makes such a pretty vase.

But for now it has a tag on it.

As a reminder, the Carriage House Sale has been rescheduled to next week due to the potential for severe weather that is predicted for both today and tomorrow.

If you’re local, I hope to see you there!

the naturalist box no. 5.

Sometimes a particular formula just works, and you can’t help but repeat it.

And that’s what I’ve done today with this wooden box.

My friend opK found this box at a garage sale and passed it on to me.

After cleaning it and giving it a good scuff sanding, I painted it with two coats of Dixie Belle’s Sawmill Gravy.

Then I applied a couple of floral transfers from I.O.D.’s Brocante set up the front and over the top.

I finished it off with ‘The Naturalist’s Library’ wording from their Label Ephemera transfer.

If it all feels rather familiar, that’s because I’ve done some very similar boxes before.

Like this one from January 2023.

And this one from May 2022.

In fact, this is the 5th time I’ve used this wording on a toolbox, whether wooden or metal.  I guess it’s fair to say that I really like it.

This box is set up in what I’m calling the ‘science-y’ section at our upcoming occasional sale.  If you’re into the dark academia look, this might be the spot for you.  You’ll recognize some of the items in that section, like my faux apothecary bottles (price:  $5 each).

and the foundry scoop (price:  $12).

You may also recognize my painted books (price:  $12 for this set of 3).

The really cool beaker came from cleaning out a cupboard at nnK’s house (price:  $10).

My sale partner, Sue, brought over a handful of those folding rulers, and they are only $3 each!

If you need some old paintbrushes, you can get a jar with 3 of them for $12.

Sue also brought over this cool old Rx record file box (price:  $10).

It pairs nicely with my 1927 Hayes Druggist Directory book ($5).

Once again, I apologize for any confusion caused by our rescheduling of the sale.

But I promise it will be worth the wait!

a change of plans.

For me, one of the more stressful parts of having an occasional sale in the carriage house is worrying about the weather.

Will it be too hot?  Will it be humid and sticky?  Will it rain?  Or even worse, will we have severe weather?  We did have a sale once when the severe weather sirens were going off, I really don’t want to repeat that experience.

For that reason, we’ve decided to postpone the Carriage House Sale to next week.

Apparently I should have had a sale last year when we were in a drought and barely had any rainy days all summer, because this year is turning out to be quite the opposite.

It has been awesome for the garden.

But not so awesome for having a sale.

The forecast for this week?  Yesterday, severe thunderstorms and rain.  Today, evening storms. Wednesday, storms possible.  Thursday, rain all day.  Friday, more storms.  Saturday, even more storms.

It’s almost comical.  There is wet, stormy weather predicted for this entire week.  I really feel like mother nature is trying to tell me something.

In the past our merchandise has typically sprawled out from the carriage house.

As you may know, I have plenty of room for sprawling.

But sprawling isn’t really possible in severe weather, or even in simple rain.

So, I apologize for throwing a curve ball at those of you who were planning to be at the sale this week.  Hopefully you can make it next week instead, and fingers crossed that the weather will be better by then!

a refreshed bookcase.

OK, OK, I know, I haven’t been doing much furniture lately.  But I am thinking about getting back to doing more of it once my sale is over.  Honestly, that’s really going to depend on whether or not the pieces I have sell.  So we’ll see how that goes.

But meanwhile, I did have this bookcase waiting in the wings for a makeover.

I picked this up at a garage sale last year and it has been out in the carriage house ever since.

So as I was clearing out for the sale, I decided it was high time to get ‘er done.

First up, I removed the damaged fretwork with some help from my handyman Ken.  Even if it had been undamaged, I still think I would have removed it to update the look of the piece.

Next up I cleaned everything thoroughly, and then very lightly scuff sanded.

I followed that up with two coats of Dixie Belle’s Smoky Mountains.

This is such a gorgeous smoky blue green color.

It’s one of Dixie Belle’s Silk paints, so it has a built in primer and top coat.  I was a little bit worried that I may have bleed-thru issues caused by that original reddish stain, but the Silk paint did the trick without needing a separate blocking primer.  I also don’t have to add a topcoat, so after the two coats of Silk paint, this bookcase was almost done.

All I had to do was clean the glass, and then add some new knobs.

I chose these simple gold knobs to go with the new, more updated look.

And it was that easy.

What wasn’t so easy was getting good photos of it without lots of reflections in those glass doors.

I tried every angle.

I also tried getting a shot with the doors slightly ajar.

But the door on the left insisted on being all the way open, while the one on the right kept trying to close.

The best solution I came up with was to edit some of the reflections out using the Clone tool in Picmonkey.

Just don’t scrutinize those glass doors too closely.

What do you think, have I sufficiently refreshed this bookcase?  Leave a comment and let me know.

This piece is for sale, check out my ‘available for local sale‘ page for more details.  Any of you locals can see it in person at my sale later this week (I’m in a suburb of St. Paul, MN), unless someone snatches it up ahead of time.

I will be posting all of the sale details on Wednesday, so be sure to stay tuned!

As always, thank you to Dixie Belle Paint Co for providing the paint used on this bookcase.

from tasteful to tacky.

Good morning from the garden.

When it comes to garden ornaments, do you ever ask yourself ‘how much is too much’?

We’ve all seen them, those yards that have more garden ornaments than actual living plants.

At what point do you cross the line from tasteful into tacky?

When I brought my statue home from a garage sale (yes, I purchased her at a garage sale), I was a little worried that might be the moment when I crossed that line.  But I think she works because I have her tucked in among plants that get nearly as tall as she is.

But even without the plants, in winter she looks quite lovely too I think.

Well … maybe that’s not a good example, lol.  She is half buried in snow.

I do have another smaller concrete ‘statue’, this one is of St. Francis and he is watching over the remains of our two dogs, Buck & Sasha (we’ve buried their ashes at his feet).

I also have quite a few metal obelisks scattered about my garden.

Nearly all of them have also come from garage sales.  Whenever I see one at a sale, I grab it.  I think I might be getting close to the metal obelisk saturation point now.

But will you just indulge me for a moment while I admire that clematis once more?

It is absolutely stunning right now.  I just can’t get over what a little fertilizer will do.

I only have one arbor in the garden.

And that’s probably plenty for my space.  The bell shaped flowers on the Roguchi clematis on the right are just starting to open.

I do also have two fountains.  The larger one was purchased at a garden center …

But the smaller one is from a garage sale.

It does have a repaired crack in it, so I have to add more water about every other day.  But the hostas, irises, astilbe and hydrangea planted near it are all fans of moist conditions so they don’t mind having a leaky fountain nearby.

I’m pretty sure that two fountains is the maximum allowance for a yard the size of mine.

I have two pieces of iron furniture tucked into the garden.

They also provide some good winter interest too.

Then there is my buddha and my Japanese lantern (free at the curb), both of which have been given a paint job using Dixie Belle’s Bronze patina paint.

I also have a couple of concrete bunnies scattered about.

At this point they feel a bit like an invitation for the real bunnies.

I definitely have one living under my deck and she comes out every evening to eat the clover in my lawn, and for that reason we are now calling her ‘Clover’.  I’m willing to put up with her as long as she sticks to the clover and doesn’t start going for the hostas!

And I can’t forget to mention my concrete gargoyle.

Fortunately I don’t have any real gargoyles living under the deck.

I have to admit, I also have three vintage iron bed headboards in my garden.  That might sound like a lot, but two of them are barely even visible.

The most visible one is beside the potting shed and I keep trying to grow a clematis on it.  I’ve had little success so far, possible because I suspect this spot was a former sandbox (the potting shed was a playhouse when we moved in), the soil here is really sandy and doesn’t retain much moisture.

I also have a brass headboard out back in the cutting garden, although once the peonies are at full height you can’t even see it.  And then I have one that helps support the Annabelle hydrangea under the kitchen window, although you can barely see it under there either.

Then there are the vintage watering cans.

There are definitely a few of those scattered about.

After seeing this listing of garden decor, you will probably doubt the veracity of my next claim, but I have been working on editing the number of ornaments in my garden.  I’m definitely getting too close to having too many things.  I’ll be parting with a couple of vintage watering cans at my upcoming sale along with a few other garden items.

I’m planning to sell the concrete basket toting dog that I purchased at the Bryn Mawr garage sales, even though I think he’s totally adorable.  I did think about keeping him, but then I might be crossing that line from tasteful to tacky.

The rusty St. Francis has to go as well.

As well as this planter that I rustied up recently.

I’ve also got another larger planter that I used the Dixie Belle Patina Paint on.

Fingers crossed that they all sell so that I don’t have to be tempted to add them to my own garden anymore!

How about you, are you a fan of garden ornaments?  Do you worry about crossing that line from tasteful to tacky?  Leave a comment and let me know.

some of the stuff.

Over this past week I’ve been working super hard to get the carriage house ready for my upcoming sale.  I’m embarrassed to admit it, but I don’t think I’ve done much cleaning out there since my last sale … 8 years ago!

You should have seen the cobwebs.  Yikes!

Luckily I had some help from Sue, my Carriage House Sale partner.

Now that the cleaning is done, it’s time to start making sure all of my items have price tags and so forth.

As I’m going along, I thought I’d share some of my available merch with you guys starting with the big stuff like this cedar lined trunk.

You may remember that I painted it last summer.  I’d been really remiss about posting it online to sell, and once I’d decided to go back to having my own sale I thought I may as well just hang onto it until then.

I also have this washstand available.

These make excellent nightstands.  We have one like it on Mr. Q’s side of the bed.

I will also have this vintage farmhouse table available.

As well as that pair of white chairs.

I’ve also priced up the topless dresser that I picked up last summer.

I never did get around to figuring out a top for it, and I think it’s time to admit that I probably never will.  So I’m pricing it low and hoping someone else will take it on as a project.  It would be perfect for turning into a bathroom vanity, don’t you think?

I’ve also got a price tag on the rooster cupboard, although I have to admit I am hesitating to sell it.

For one thing, I still kind of love it, I just don’t have anywhere to put it right now.  For another, it is losing paint right and left.  The milk paint is chipping to beat the band.  I originally sealed the piece with Miss Mustard Seed antiquing wax, but it would probably benefit from another coat of wax.

So, anyway.  It’s out in the carriage house with a price tag on it, so if it goes, it goes.  And if it doesn’t, then I’m meant to keep it, right?

I also have lots of signage available for sale including the Garden Herbs sign I painted up a while back.

And several of the signs I painted up for Christmas last year, like this one …

and this one …

The Garden Herbs tote will be available …

as will several other wooden or metal totes.

I have a few painted buckets.

And of course, several tackle/tool boxes.

And don’t forget that flora parisiensis suitcase …

and the sweet flour sifter painted in Dixie Belle’s Cottage Door.

I’ll have this trio of French pitchers …

and a couple of French flower buckets too.

And don’t forget that gorgeous black watering can.

OK, you get the idea.  Lots of the projects that I’ve been sharing over the last 6 months or so will be making their way into my sale.  I hope some of you local (Twin Cities, MN) readers are planning to stop by!

saving the authentic patina.

With most of my toolbox makeovers, painting them is a no brainer.  They are often a rusty, crusty mess when I buy them.

But every once in a while I come across one with a nice authentic patina.  This black toolbox from October 2022 is a good example.  I kept the original paint on the top, but added the I.O.D. Rose Chintz paint inlay to the sides.

Two of the larger metal boxes in the windfall of boxes that my friend Kathy gave me also had a good authentic patina without much rust or gunk to mar them.

After giving them both a good wash, I decided not to fully paint either one.

But that doesn’t mean I didn’t add any paint.  You know I can’t help myself.

Let’s start with the first box.

The exterior is clean, and not terribly rusty.

It has this great mottled green, black and rust coloring.

So rather than paint it, I just gave it a nice coat of Dixie Belle’s clear wax to add a little extra protection.

But then I did opt to paint the interior of the box to clean it up and make it more functional.

I pulled out one of the newer colors in the Dixie Belle Silk Paint line called Acadia.

It happened to nearly match the shade of green that is present on the exterior of the box.

There was a bit of rust on the inside of the box, so I decided to start with a base coat of Bonding Boss to prevent that from bleeding through my paint.  I followed that up with two coats of the Acadia.

Since the Silk paint has a built in topcoat, I didn’t need to add any additional topcoat.

I did however decide to add a segment from the I.O.D. Label Ephemera transfer to the inner lid.

Seriously, how could I resist?  That wording fits this box perfectly.  Even though no one will even see that unless they open the box, I still love it.

Once the transfer was in place, I did add a coat of DB’s clear wax over it to protect it.

Next up is the 2nd large box with its mostly worn off black paint.

Inspired by that previous black toolbox, I decided to keep the worn black paint on the sides and just dress up the top of this box with another paint inlay.

After adding a couple of coats of Dixie Belle’s Caviar paint to the lid, I applied the new-ish Lattice Rose paint inlay from I.O.D.

As you can see, I had some inconsistent results with the inlay.  I’m not really sure why, maybe I didn’t leave it on long enough?

But since I’m leaving the mostly worn paint on the body of the box, I think splotchy results on the lid really work.

I treated the inside of the box to a coat of Dixie Belle’s Bonding Boss, again to seal up any rust, then I added a coat of their Silk paint in Anchor.

I used the last of my peonies to stage these photos.

If only those peonies had a longer bloom time!

Both of these metal boxes would make great storage pieces, whether in a workshop or craft room.

What would you use them for?  Leave a comment and let me know.

q tips for growing clematis.

Good morning from the garden.

Last week I shared some photos of my three earliest blooming clematis, which are doing incredibly well this year.

Especially that one.  Wait, let me back up the camera a minute and show you the entire plant …

See what I mean?  It is spectacular.

Last year it was a bit of a bust, with only a few flowers at the top …

So its performance this year is quite a lot better.

This particular plant is well over three years old, so it’s not just that it finally came into its own.  There have to be other factors at play.

So I’ve been taking note of what I did differently this year (so that I can do it again next year), and there were a couple of things.

First, and probably most significantly, I fertilized my clematis in early spring.  I’d never done that before.  I used the Espoma Plant-tone which is an organic all-purpose 5-3-3 fertilizer.  That’s not precisely the formula recommended for clematis, but it was what I had on hand and I figured something was better than nothing.  To apply I simply sprinkled about 1 cup of Plant-tone around the base of each clematis.

I was also more diligent about helping the clematis climb the trellis this year.  As it was emerging and growing in the spring, I went out every few days and tied stems to the trellis.

According to several sources, the growing end of a clematis vine will stop growing if it can’t find anything to grab onto.  In previous years I left a lot of this plant sprawled into the garden rather than guiding it up to the trellis.  Although, as you can see in that last photo, it still reached the top of the trellis, it just didn’t have many flowers.

So I’m not sure I can attribute its remarkable performance this year to helping it climb.  As an example, here is a clematis in my neighbor Arlene’s garden …

She doesn’t help that one climb at all, it just scrambles over that stump.  And yet, it’s still covered in blooms.

There may some other variables at play when it comes to blooms.  For example, we had a really mild winter and so far lots of rain this spring.

Also, I suspect due to the mild winter, the rabbits must have had plenty to eat because they didn’t nibble on my clematis like they did the prior winter.  That year they systematically chewed through all of my clematis at about maximum rabbit height (a foot or so from the ground).

And that brings me to the subject of pruning.  If you start going down that rabbit hole (pardon the pun) online you’ll find all kinds of info on the different clematis pruning groups.  And if you aren’t sure what clematis you have, or what pruning group it belongs to, you are totally lost.  After a while your head will be swimming.  Or mine was anyway.

But then I found The Frozen North Pruning System from humingbirdfarm.net.  One caveat here, this system is recommended for northern gardeners specifically.  Those of you in the south may not have success with this method.  But here in my Minnesota, now zone 5a, formerly zone 4b, garden I should be OK with this pruning method.

They’ve simplified clematis pruning into two groups; Don’t Bother and Full Prune.

It’s easy to tell which group your clematis belongs to by its bloom time.  Those that bloom in May or early June (the three I have blooming now), are in the Don’t Bother group.  You can prune out the winter kill once you see live buds on your stems, but otherwise don’t bother pruning at all.

All other clematis that start blooming in late June or later , like my Roguchi, are in the Full Prune group.

That photo of the Roguchi is from last year, it does not have any flowers open yet this year.

Jackmanii, a very popular hybrid clematis, is also one that belongs to the Full Prune group (pictured blooming last year below).

For the Full Prune group, simply give them a hard prune by cutting them off about a foot from the ground in late winter or early spring.

In other words, the winter before last the rabbits gave all of my clematis a Full Prune without regard to which group they were in.  That may be why my Don’t Bother group didn’t have nearly as many blooms last year.

Which brings me to the final bit of advice from Hummingbird Farm, no one has ever killed a clematis by making a pruning mistake (including rabbits).  So don’t get too wound up about whether or not to prune your clematis.  Just pay attention to bloom times this summer, and then act accordingly next spring when it’s time to start pruning.  And while you’re at it, give them a little fertilizer in the spring as well.

Do you have any clematis in your garden?  Do you fertilize, or follow the pruning ‘rules’?  Leave a comment and let me know.

rusty pot refresh.

Back in 2019 I picked up a pair of garden planters made out of some sort of molded composite material.

I turned them into faux ‘rusty iron’ planters using Dixie Belle’s Patina Paint.

I used the Iron paint and the green spray to create a rusty look (you can find the details for that project here).

I did not add a protective top coat to them.  Dixie Belle does make a top coat called Patina Guard for the Patina Paint, but it adds a little too much sheen for my taste (you can read about that here).

Even without the Patina Guard, my pots have held up remarkably well considering that they have spent 5 years outside, rain or shine (or snow), hot or cold.

But sitting in wet snow or on damp pavement for long periods has taken a toll on the bases.

The upper parts of the pots still look good though.

So I thought I’d take advantage of some gorgeous, sunny weather we had back in early April (which explains the decidedly not green background in that photo!) and just touch up the bases.

I started by brushing away any dirt, and then I used a scraper to remove the loose paint from the base.

You’ll note that the paint peeled right down to the original substrate.  When I purchased these pots they’d already been painted a dark brown and I have no idea what kind of paint was used, but that original layer of paint is what failed here.

Next up I added a base coat of Dixie Belle’s Midnight Sky.

DB does make a primer that is specifically for use under the Patina Paint …

But you also can just use any of their chalk style paints for the same purpose.

Once the black paint on the base of my pot was dry, I stippled on the Iron paint and then sprayed with the green activator spray while the paint was still wet.

Out of the three patina paints that are offered (Bronze, Copper and Iron), I find that the rusty patina with the Iron paint takes the longest to develop.  Luckily I had some time between when I refreshed these back in early April and the actual arrival of gardening season here in Minnesota.  Initially these pots looked a bit two-toned (as you can see above), but the rust continues to develop over time.  So don’t panic if you try this and immediately think it didn’t work at all.

Today’s q tip:  I’ve noticed that the addition of water will help speed up the rusting process.  With outdoor items, I just leave them outside and wait for a good rain.  But for indoor items I will often give them a spritz of water using my Dixie Belle Fine Mist Spray Bottle once the initial Green spray has dried.

It ended up taking a few weeks for the bases on my planters to rust up enough to match the rest of the pot.

But it looks pretty seamless to me now.

I usually fill this pair of pots with flowering annuals in the summer, but this year I decided to try something a little different.  I wanted to go with boxwood spirals, like these.

I looked all around for a pair of boxwood spirals, and I eventually found some at a fancy nursery in Minneapolis … with a price tag of $249 each!  LOL, if you know me at all by now, you probably know that I wasn’t about to spend $500 for a pair of spirals.

I also found some Eugenia spirals, but even those were $149 each.  I did put some Eugenia topiary pom poms in these pots back in 2022 …

So I knew that Eugenia would work for me, but I still didn’t want to pay $300 for a pair of them.

But then my sister and I were checking out the plants at our local Lowe’s store and I found a pair of Dwarf Alberta Spruce spirals for only $57 each.

They aren’t quite boxwoods, but the added benefit to the Alberta Spruce is that they are hardy down to zone 2 (some sources say 3).  In other words, it should survive the winter here, even in a pot.  A plant needs to be hardy to two zones colder than your zone to survive winter in a pot.  Since I’m a former zone 4b, now zone 5a, the Alberta Spruce should be OK.

I’ve also inadvertently experimented with that.  I put a Dwarf Alberta Spruce in my wheelbarrow fairy garden last summer (to the right of the fairy house).  It came through the winter beautifully.

I did mound leaves on the wheelbarrow, and cover it with some burlap for protection over the winter.  So I may possibly do the same with the spirals, or I may just try to overwinter them in my unheated three-season front porch.  That would be the easiest spot for me to be sure to keep them watered.  I’d love to keep them in their pots for several years.  I should be able to keep them smaller with regular pruning.  We’ll just have to see how that goes.

I underplanted the spirals with some ivy.

I’m looking forward to seeing that fill in a bit more.

But for now I’m quite happy with how my spirals look on either side of the steps to our deck.

I’m also quite happy with how easy it was to refresh my rusty pots!

Speaking of making stuff rusty, I rustied up a bunch of items for my upcoming sale including the St. Francis statue that I picked up at the Tangletown garage sales.

Remember him?

Now he looks like this …

I consider it a vast improvement, but I suppose the rusty treatment isn’t for everyone.

What do you think?  Leave a comment and let me know.