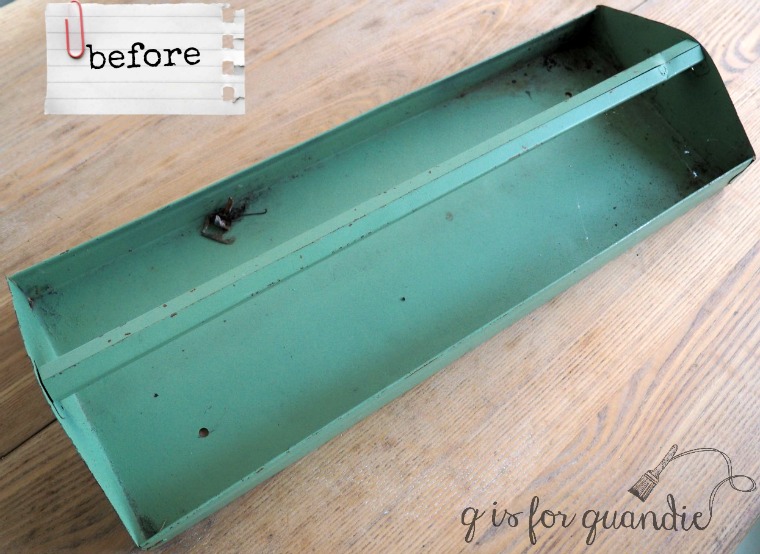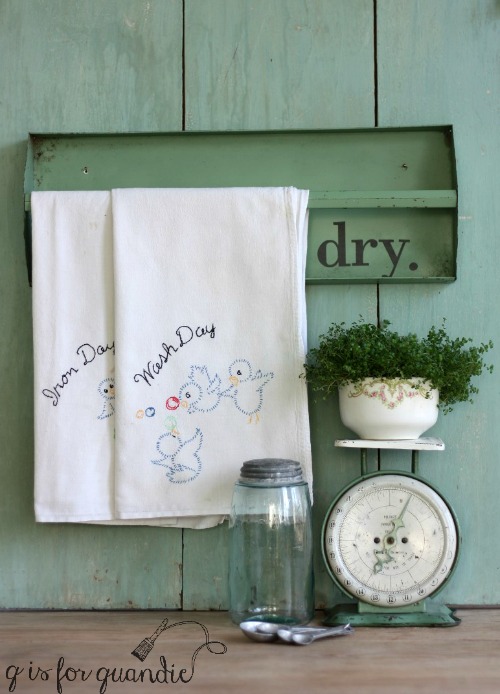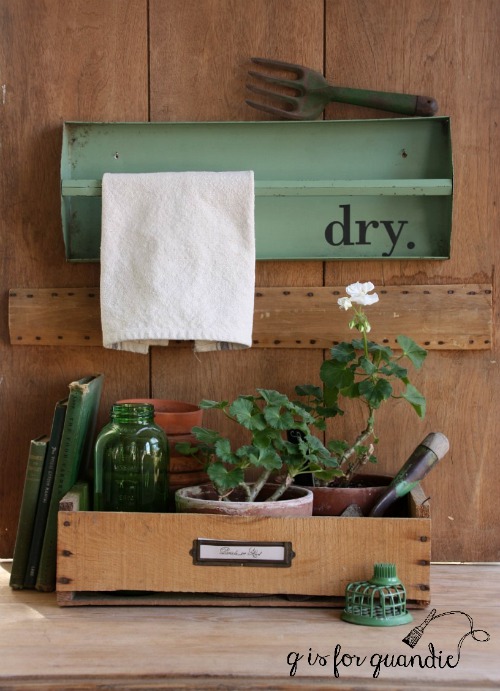
a toolbox towel bar.

Last year I bought quite a few old toolboxes and turned them into planters.  My favorite was this ‘hello fall’ planter painted in Fusion’s Mustard.

This kind of toolbox often comes with a lift out handled tray, like this …

There are lots of fun ways to re-purpose one of these.  You could fill it up with succulents or use it to hold all of your craft paint.

But I like the idea of hanging it on the wall and using it as a towel bar.

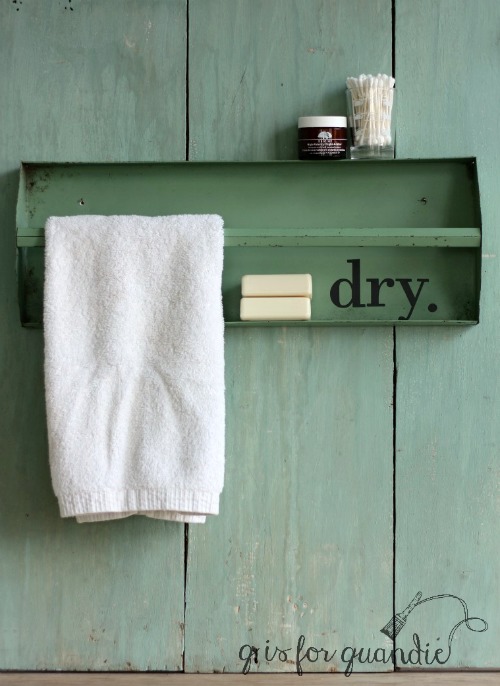
So while I had my Cricut out last week I went ahead and cut out some vinyl letters for this project and after giving the tray a good cleaning, I added the word ‘dry’.

I also drilled a second hole in the tray so that it could be hung with nails or even with screws for more stability.

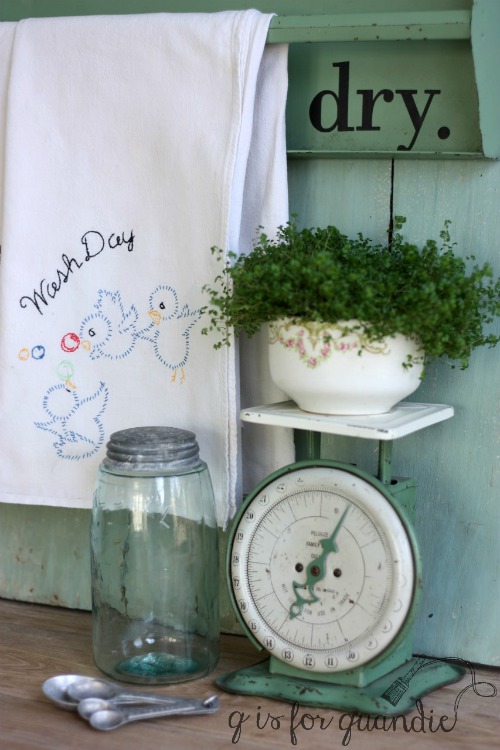
It would be perfect in a kitchen …

but it would work equally well for the bathroom.

It would also be a fun addition to a potting bench, if you are lucky enough to have one of those.

What do you think?  Toolbox towel bar, yes or no?

the door to nowhere.

I have a fondness for old doors, how about you?  I love the original solid six paneled doors throughout my 1904 farmhouse.

bedroom-door

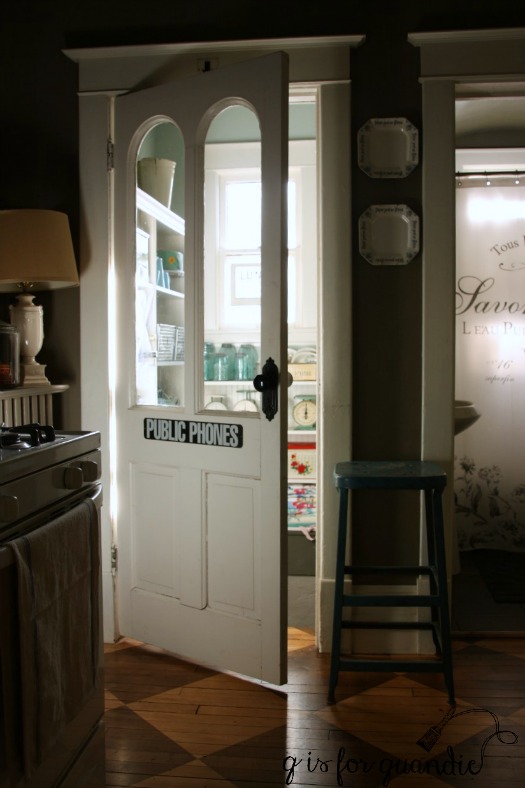
And then there is my pantry door, which is a vintage door that I purchased via craigslist because I wanted a door with a window in that spot to let that amazing light into my kitchen.

pantry-door

When we moved into our house all of the doorknobs throughout the house were a dingy brass except for one pretty glass knob on the closet door in what is now the guest room.

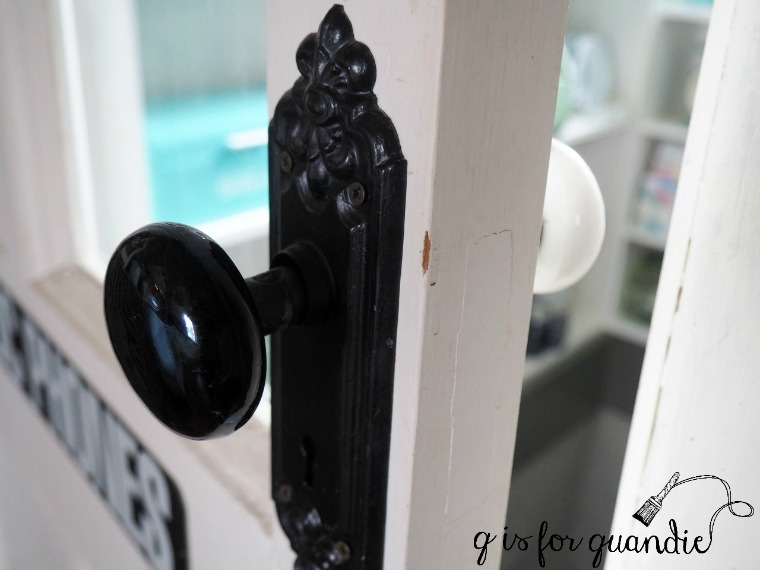
I have since swapped out most of my brass knobs for porcelain knobs.  At first I chose white porcelain, but then I discovered that I really loved the black porcelain too. So I have some white and some black, often on the same door.

Changing out my knobs didn’t happen overnight, it has taken several years of just switching them out whenever I find some.  Believe it or not, I’ve found most of my porcelain knobs at garage sales.  Apparently there are people who remove these fabulous old knobs and replace them with something else.  Check out garage sales in neighborhoods with old homes that are being renovated if you are looking to score some knobs yourself.

If you don’t happen to live in an older home with great doors, I think the next best thing is to bring in a door that goes nowhere.  A beautiful old door that you lean against a wall.

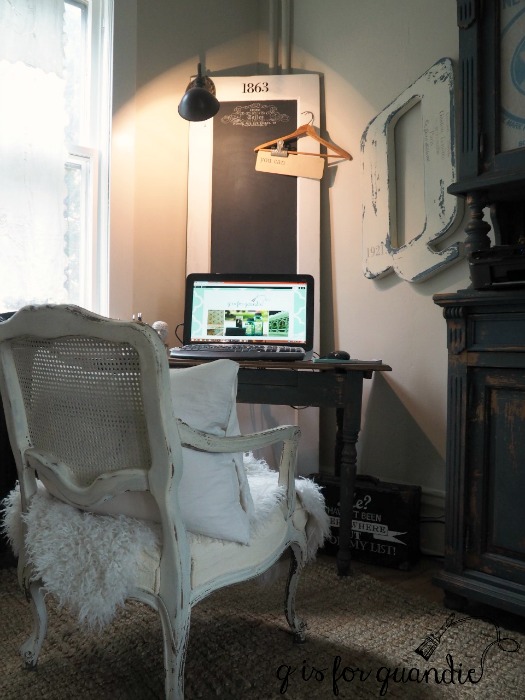
I have one of those too.  It sits behind the desk in my q branch.

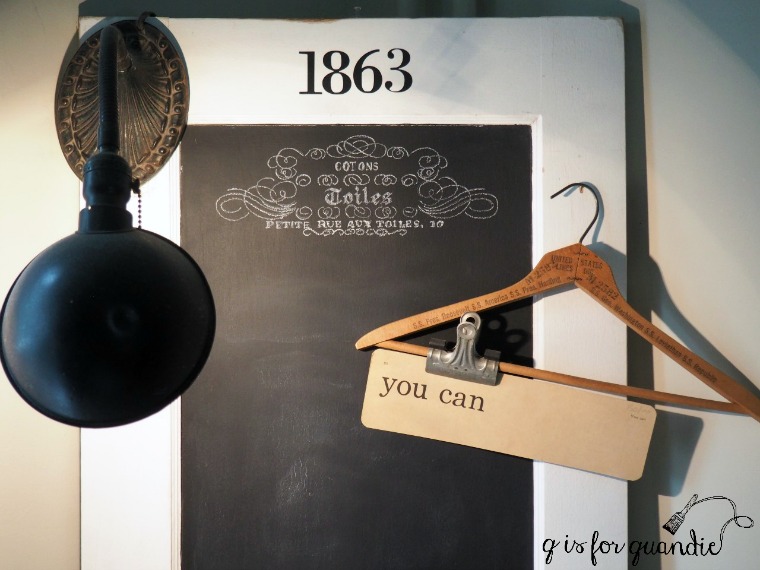
It’s just an old door with the top panel painted in black chalkboard paint.  Placing it on the same angle as the desk creates a good backdrop for the desk and it covers up some radiator pipes that run up the wall in that corner.

 I’ve added a vintage light, some vinyl Cricut numbers and and old hanger with an inspiring message.

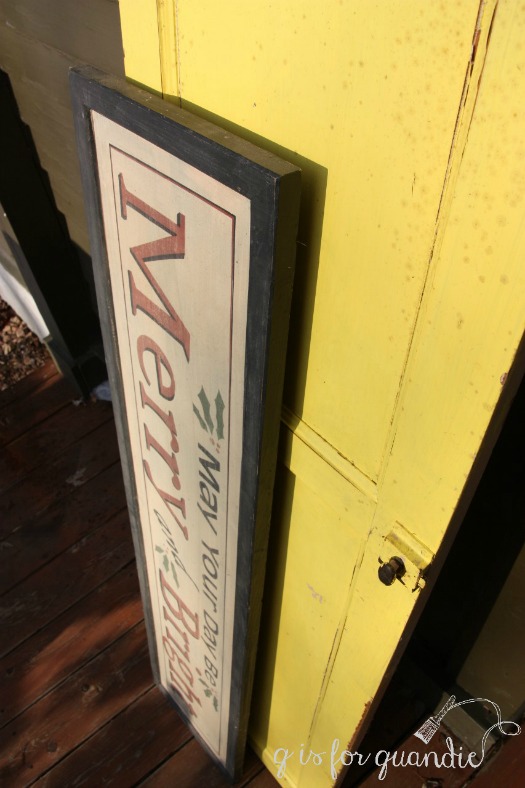
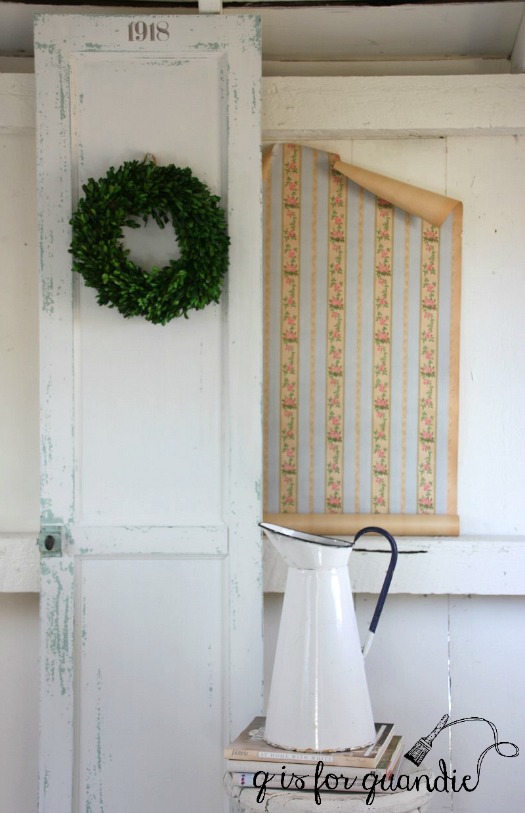
When I saw this tall vintage door (behind the sign) at a garage sale last summer I thought about my own door to nowhere and decided to snatch it up despite its banana yellow paint.

no-vacancy-sign-before

I knew I could cover up that yellow and give it a new lease on life.

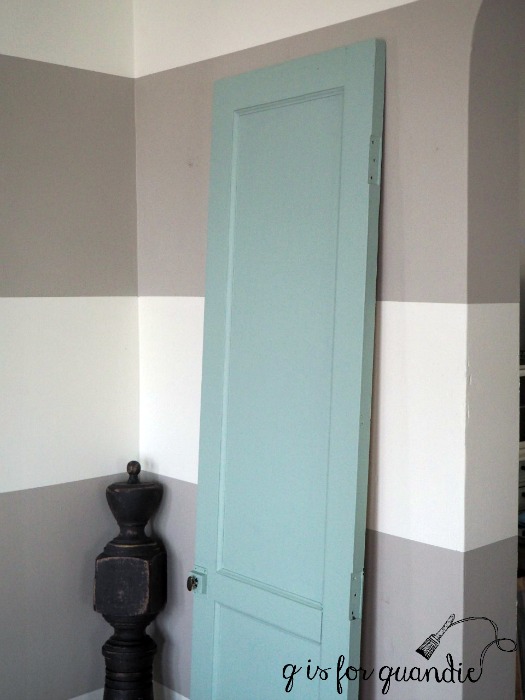
Originally I had a different plan for this door and I painted it with one coat of Fusion’s Coal Black.  That did a great job of covering up the yellow.  But then I switched gears.  I wanted to experiment with my ‘perfect chipping’ method by layering some milk paint over Fusion paint.  So I added another coat of Fusion, this time in one of their new colors, Brook.  This is such a gorgeous color and certainly one that might be found in the many layers of paint on an old door.

Once the Brook was dry, I rubbed a thin layer of Homestead House Beeswax Finish (a.k.a. Salad Bowl Finish) over it knowing that I would get chipping wherever I placed the wax.  And I wanted a fair amount of chipping.

Next I added three coats of Miss Mustard Seed’s Farmhouse White milk paint.  I tend to think that I use more coats of paint than most people.  That’s because I like a really opaque finish.  That’s a personal preference thing.  Some people might have been happy with two coats of the white.

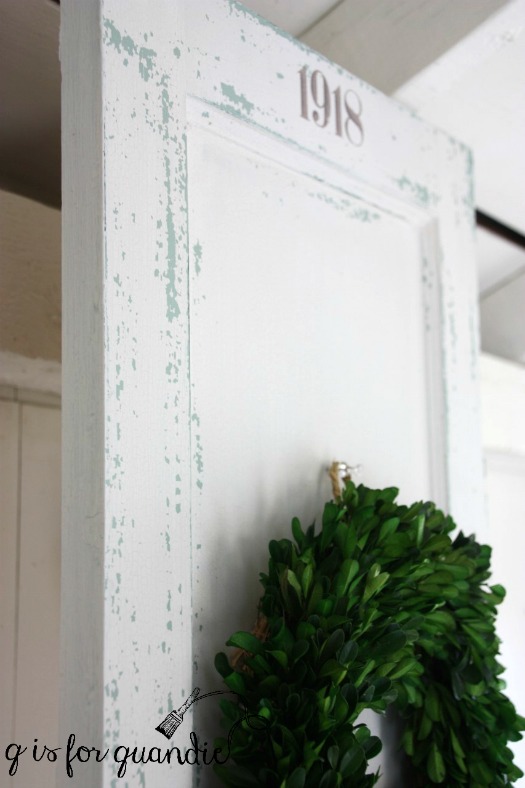
I had a weird thing happen with this project.  I could see flaking paint already with the first coat of the milk paint.  The 2nd coat of milk paint also showed some flaking.  But by the time I got to the 3rd coat, I had plenty of crackling but paint was hardly flaking off at all.  Odd.  Then I pulled out my 220 grit sandpaper and expected some chips to sand off, but no, they didn’t.  Finally I tried the painter’s tape trick; pressing a strip of tape onto the surface and then ripping it off, sort of like using tape to remove lint from your black slacks.  And bingo!  The tape pulled off plenty of chipping paint.

chippy-door

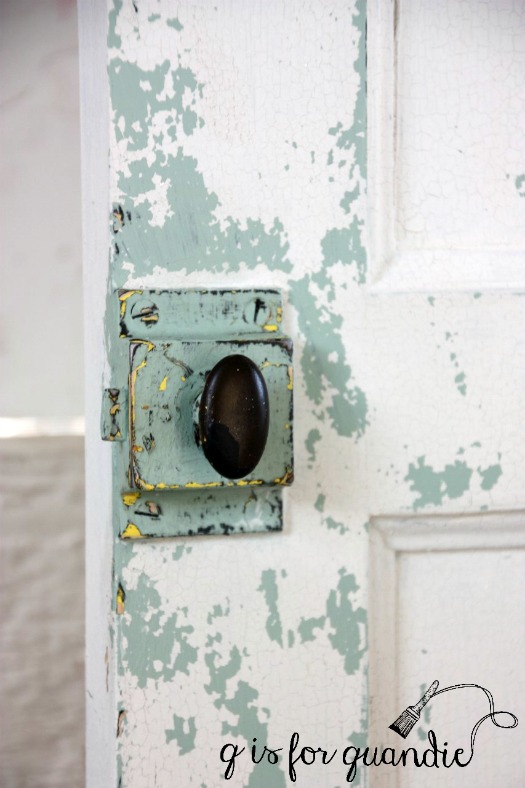
I should also note that I was very careful with sanding the edges of the door.  I did not want to see that banana yellow peeking through anywhere.  Luckily I had that warning coat of Coal Black under the Brook.  If I started to see black, I knew to stop sanding.  The only spot where I ended up with some yellow showing is the door latch.

door-latch-closeup

It actually looks kind of pretty though, don’t you think?

This technique of using milk paint over Fusion paint with a little Beeswax Finish in between could easily be used on a piece of furniture, or anything else that has an original color that you don’t want to see.

Finally, I added a stencil to the top of the door just to give it a little more character.

door-stencil

I shaded the numbers in a slightly darker grey to add depth.

door

It was so fun being out in the photo cottage again this past week!

But today we are expecting a snowstorm here in the Twin Cities.  So much for the faux spring we were all enjoying, right?  I’ll be back inside the house this weekend for sure.

So tell me, do any of you have doors to nowhere in your homes?  Or do you have any clever ideas for how to use this door?  I’d love to hear from you!

all furniture wax is not created equal (and a giveaway!).

wax-title

Back in the day when I first began painting furniture I was totally uneducated about the products I was using.  I started with latex paint, and then upped my game and began using milk paint and homemade chalk paint, both of which needed a topcoat of wax (or something).  At the time, I assumed all furniture wax was created equal.  I purchased some SC Johnson paste wax at my local hardware store and figured I was good to go.  And I spent a summer using that wax out in my carriage house workshop.  The wax had a nasty chemical smell sort of like paint thinner, but I figured all waxes had that smell.  When I wanted to experiment with an ‘antiquing wax’ I ordered some dark walnut Briwax online and mixed that with my SC Johnson wax.  It definitely did the trick and created the look I wanted, but if anything the Briwax was even stinkier than the SC Johnson.  That only confirmed my misguided notion that all waxes smelled bad.

Fast forward to winter.  Back then I usually took a break from painting furniture in the winter.  But I had an adorable little wash stand that I really wanted to paint.  I figured I could paint it indoors and then wax it on my enclosed front porch.  It was warm enough out there, but even with the door shut between the house and the porch, that stink made its way inside the house and it wasn’t pleasant.

So much for winter painting!

But then I discovered Miss Mustard Seed wax.  Eureka!  It has a scent to it, but it’s very mild, not a harsh chemical smell.  I could wax inside the house all day long and not feel like my house smelled like a workshop.

waxes

However, it definitely costs more than the cheapy stuff.

Since I’m a cheapskate, I was determined to find a cheaper choice.  As a result, I’ve tried many different brands of wax and guess what?  They didn’t really save me any money at all because I’d open up the can and realize I was back at stinky wax.  As it turns out, you get what you pay for.  Sometimes.  But other times even the more expensive ‘name brand’ waxes are just as stinky.

Initially my decision to ‘splurge’ on the Miss Mustard Seed wax was really just based on the lack of smell.  But recently it occurred to me that I do A LOT of painting.  I should really be thinking about what kinds of chemicals I am subjecting myself (not to mention the environment) to on such a frequent basis.  This really is about more than just dealing with an unpleasant odor, what about repeated exposure to unknown chemicals?  Just what exactly is causing that stink?

I tried to do some online research into the ingredients in various brands of wax, and guess what?  For a lot of the brands it’s really hard to find that info.  Apparently back in 2009 Senator Al Franken helped introduce a bill called the 2009 Household Product Labeling Act which would have required paint manufacturers to list all ingredients on their packaging, but it did not pass.  But honestly, even if the ingredients themselves were listed, would you know what they are?  I know I wouldn’t.

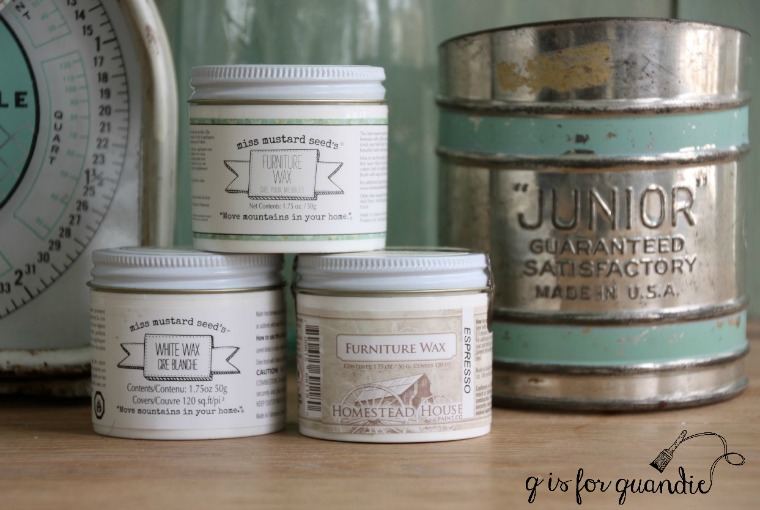
So I went straight to my source, Homestead House Paint Co, and asked the simple question “hey, how come your wax doesn’t stink?” and I got a nice email back from Loree Pringle with lots of info about beeswax and carnauba wax, and about how they need a solvent to allow them to be spread into a thin layer.  Then she put me in touch with Roger Clapham, the co-president of the company that manufactures their waxes.  He gave me a bunch of really science-y info about atoms in a chain and whether or not they hold hands (or something like that) that was way over my head.   But basically he explained that there are two kinds of solvents that can be used for this purpose, aromatic hydrocarbons and aliphatic hydrocarbons.  The aromatic hydrocarbons have that chemical smell like paint thinner, and include Toluene or Benzene.  And guess what?  Aromatic hydrocarbons are considered carcinogens.  Yeah, that means they have been shown to cause cancer.  Both the Miss Mustard Seed waxes and the Homestead House waxes contain no aromatic hydrocarbons.  Instead they use aliphatic hydrocarbons.
waxes-2

So I followed up with the next obvious question, why would any wax still contain aromatic hydrocarbons if they are so bad?  According to Roger, the aliphatic hydrocarbons are weaker solvents than aromatic hydrocarbons.  Products made with aromatic hydrocarbons require less of them to do the job and those products can be more durable and provide more shine.  For example, he does not believe the Homestead House wax is durable enough to hold up to foot traffic on my stairs (although I’m going to try it anyway one of these days).

As Roger says himself, he has a healthy respect for aromatic hydrocarbons and their usefulness as long as people understand what they are working with and take precautions.  If you still want to use one of those products, Roger gave me some safety tips:  Buy a mask specifically designed to protect against aromatic solvents (OSHA certified) and wear it while working with them (changing the filters as directed). Toxins can be absorbed through the skin, so wear rubber gloves.  Pay attention to air circulation, apply the finish outdoors or use a fan and open the window.  On the plus side, the danger is gone once the solvent has evaporated.  So a piece of furniture that has this type of wax on it is no longer hazardous at that point, once the smell is gone so is the hazard.

Since we can’t rely on a label to tell us what kind of solvent a wax product uses, I say rely on your nose.  Give your wax the old sniff test.  Does it smell like paint thinner?

If so, ask yourself if this is really something you want to be working with on a regular basis?  And are you using the proper precautions?

As for me, I’m not a fan of gloves and gas masks.  Working outdoors is only an option about six months out of the year here in Minnesota.  So I finally tossed all of those stinky waxes and am going to stick with the non-smelly stuff!

Now for the fun part!  Here is your chance to give the non-smelly stuff a try yourself.  When I told the people at Homestead House that I wanted to post about this subject, they graciously provided me with a truckload of free samples to giveaway.

truckload-of-waxes

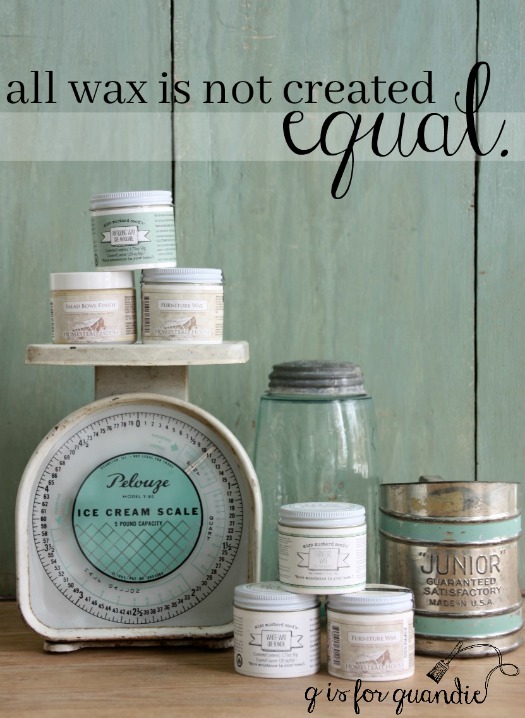
I have 8 small jars of wax and I thought I’d give them away in pairs, so 4 lucky winners will each get 2 jars of wax.  I have a variety of different waxes including Miss Mustard Seed White Wax, Antiquing Wax and Furniture Wax, Homestead House Furniture Wax in clear, Espresso and Black, and a couple jars of Salad Bowl Finish.  I will draw 4 names at random from the comments left on this blog post by Sunday, January 29 at midnight (central time), so all you need to do is leave a comment to get your name in the running to win.  Best of luck to you!

Note:  the Safety Data Sheet for SC Johnson paste wax lists Ethylbenzene and Naphthalene as ingredients (both aromatic hydrocarbons).  Briwax contains Toluene, however they do offer a Toluene free version of their product, but I was not using that version.

Also please note that I have not been paid by Homestead House for this post but they have provided me with free samples of their waxes and other products including Fusion paint, Homestead House milk paint and Miss Mustard Seed products.  In addition they provided me with the waxes that I am giving away with this post.

baby, it’s cold outside.

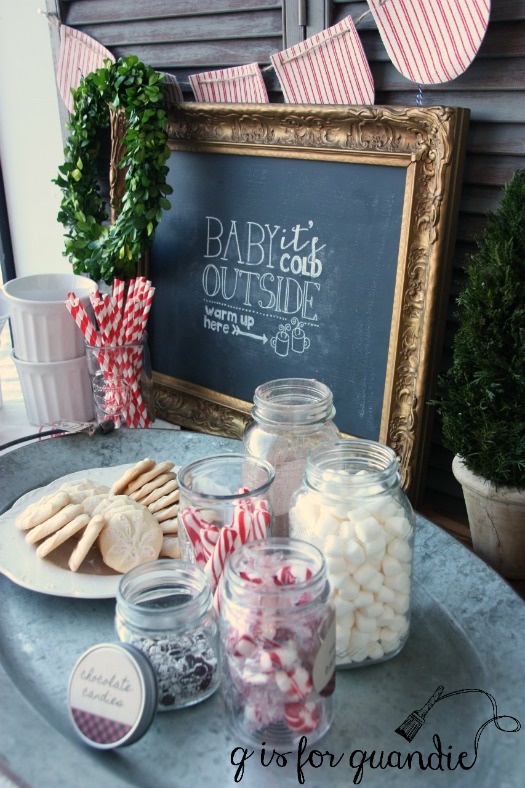
I had some fun working on a blog post for Reclaiming Beautiful last weekend.  The owners, Monique & Susan, wanted to pull together a hot cocoa bar in the shop.  With the ice castle opening up in Stillwater this week, they want to encourage people to stop in after visiting the castle and warm up with some free hot cocoa!

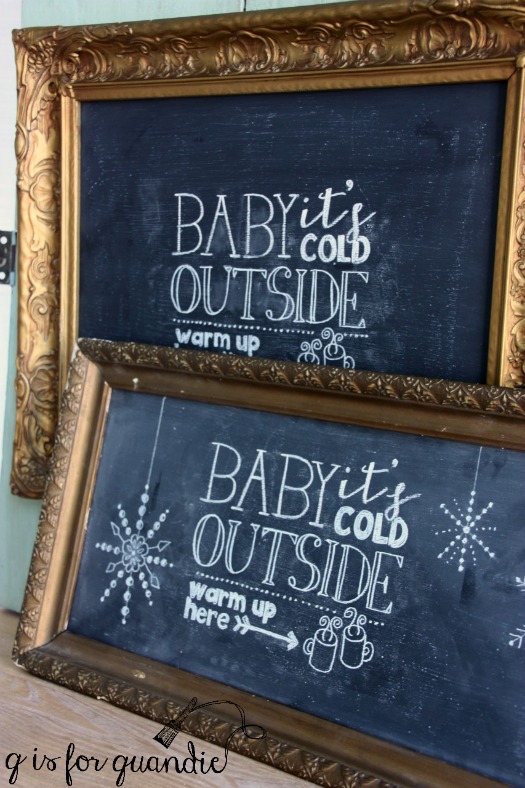
So I whipped up a couple of chalkboards to use in the photos for their blog (and they will be for sale there as well) using a design I downloaded {here}.

baby-its-cold-outside-2

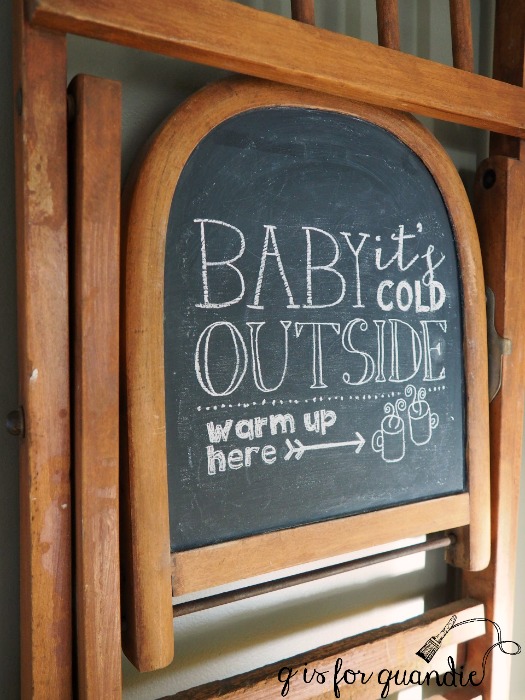
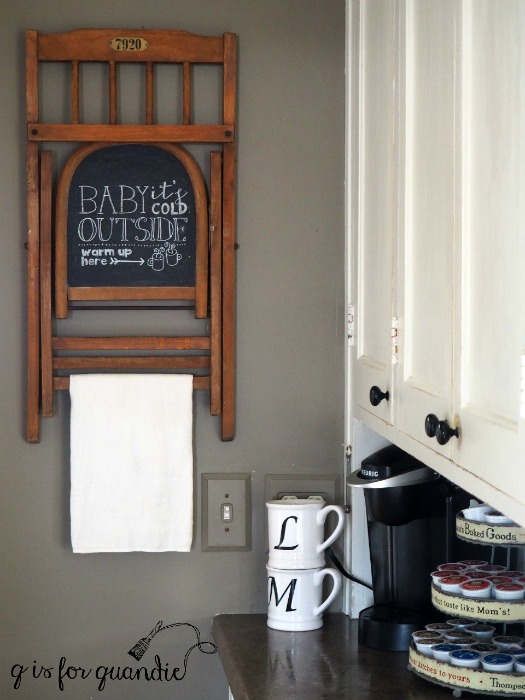
I liked the design so much that I decided I needed it on the chalkboard chair that hangs in my kitchen.  And since the chair hangs right next to my Keurig, the arrow even pointed in the right direction.

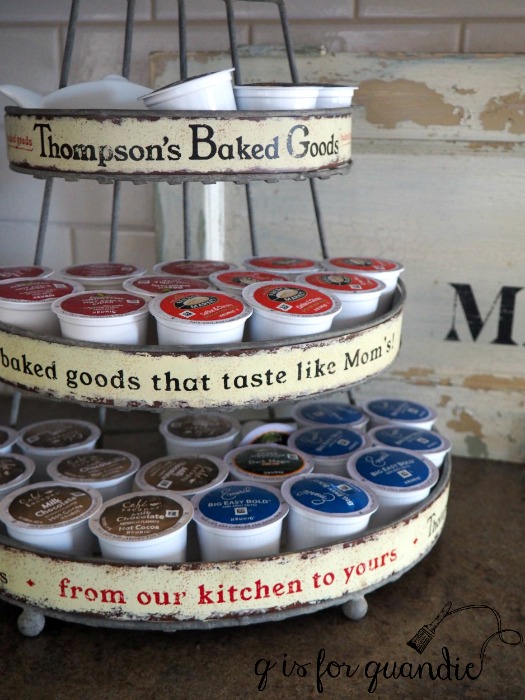
I keep lots of hot chocolate on hand for my Keurig because my sister and niece don’t do coffee.  We’ve also found a pretty yummy hot apple cider that we like this time of year.  I keep my k-cups in this adorable faux vintage rack that I purchased at Reclaiming Beautiful last year (by the way, they have another one of these in the shop now).

So although we are expecting a high of only 1 degree today here in the Twin Cities, it’s easy to warm up at my house!  Just pop your beverage of choice into the Keurig.

Be sure to head over to the Reclaiming Beautiful blog and check out my post there.

window-bar-4

a magic wand.

My sister, my niece and I were out shopping before Christmas and one of the items we came across was a magic wand for turning on the Christmas tree lights.  I have to admit that I kind of loved that idea.  In practice it was a little clunky though.  You had to actually push a button on the wand while waving it in the general direction of the tree to get the lights to come on and obviously the waving part was superfluous.  It wasn’t a real magic wand, but it did make a fun magical sound.

magic-wand

There was a lot of eye rolling taking place between my sis and my niece as I stood there admiring that magic wand.

But seriously, I could really use one.  Except I don’t need it to turn my Christmas tree lights off and on (although that would be handy because every time I lean in to plug in those lights I worry that I’m going to knock a fragile vintage ornament off the tree).

  What I really need is a magic wand for redecorating my house.  I have so many ideas rolling around in my head and only a very limited amount of time (and money) to execute them all.  If only I could wave my magic wand and have a ship lap wall in my bedroom, or wave my wand and have my bathroom repainted in the charcoal grey that I originally wanted instead of the dark greenish gray that I ended up with.  Or wave my wand and have my yellowing maple floors refinished.

But no, we all know it doesn’t work that way.  Unless of course you have an unlimited budget and can pay someone else to do the work for you while you spend a day at the spa.  I assume it goes without saying that I do not fall into that category.

I’ve often written about how much I enjoy blogging, but there is one aspect to it that I find difficult and that is my compulsion to compare my home to other bloggers out there and find it lacking.  Between a full time job, writing a blog (or two if I count the Reclaiming Beautiful blog) and painting furniture there is very little time left over for redecorating my home.

I really struggled with that this year as I was trying to take photos for a “holiday tour” of my house.  I felt like none of the photos were quite good enough.  All I can see as I look around are the projects that I haven’t had time for.  I do OK with a staged shot of a particular spot …

But trying to get a good photo of an entire room escapes me.

ct-kitchen-1

In the end I gave up on the idea of a full on Christmas ‘tour’ of my house.

So for now I’ve decided to cut myself some slack and go back to focusing on what I’m good at, and that’s painting furniture.

What I love about painting a piece of furniture is that I can generally go from conception to completion in about a week.  That’s about perfect for me.

pink vanity angle

I can stage a piece of furniture in any style that currently appeals to me, take some lovely photos of it, and then cross it off my list as ‘done’.  I’m a big fan of crossing things off the to-do list.

wash stand 3

So coming up in the new year on q is for quandie, expect to see more furniture transformations and don’t hold your breath waiting for home improvement projects.  Deal?

let it snow.

let-it-snow-title

I’ve mentioned it once or twice here before, I think, but not only does my neighbor Ken do all of my furniture fixes, but he also snow blows our driveway for us.

Honestly, I have no idea how I got so lucky to have such an amazing neighbor.  Clearly I did something pretty darn fantastic in a previous life.

Ken is generally pretty camera shy.  He does not want to be famous (as if writing about him on my blog would make him anywhere near famous).  But I think I’m safe with this shot of him in action …

ken-in-action

He has a pretty heavy duty snowblower.  He can get our whole driveway in just three or four passes.  He often goes across the street and gets nnK’s driveway as well.

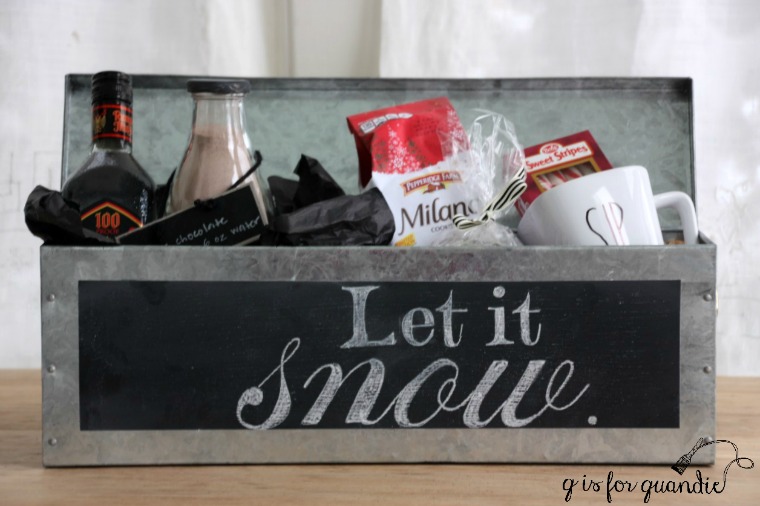
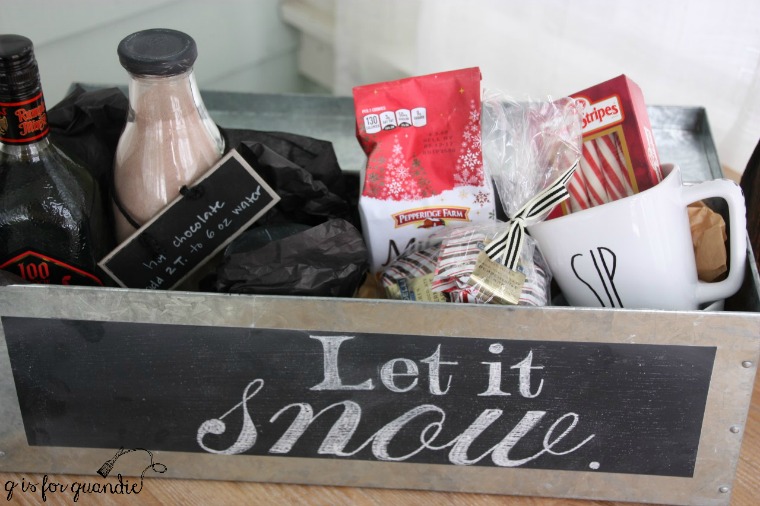
Mr. Q and I always make a point of thanking him profusely, and Ken always underplays it and says it’s nothing.  But it really is something to have a neighbor who just does this for you.  So I try to get him a ‘thank you’ gift each year.  This year I put together a hot cocoa bar so he can go inside and warm up from the inside out when he finishes all of that snow blowing.

let-it-snow-gift-1

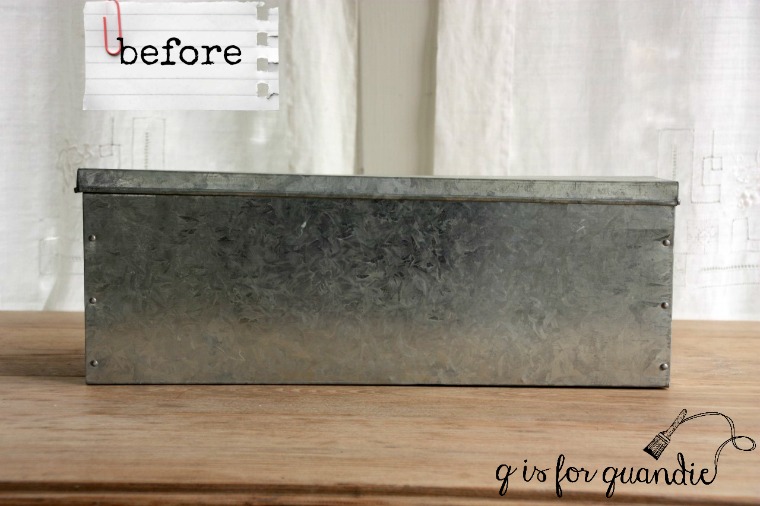
I started with a galvanized box that I purchased at a garage sale some time ago.

let-it-snow-before

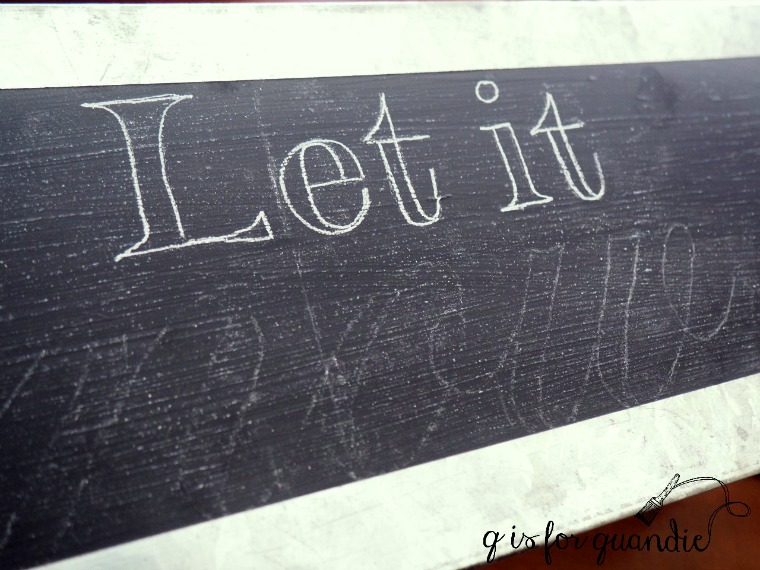
I taped off a rectangle on the front of the box and painted it with black chalk board paint.   Once dry, I ‘seasoned’ it by rubbing chalk all over and then wiping it off.  Next, I used my ‘cheater’ method of adding some chalk lettering.  I printed a design on paper and then rubbed white chalk all over the back of the paper.  I placed the paper over my chalkboard rectangle and traced around it with a pencil, thus transferring a slight chalk outline to my box.

Then I used a sharp chalk pencil to darken (lighten?) up that outline.  I’ve done that on the ‘Let it’ above, but not the ‘snow’ yet.  Just to give you an idea how faint the design transfer will be at first.  Lastly I fill in the design with sharpened chalk (I use an old lip pencil sharpener to sharpen the chalk).

If you’re one of those people who always feels like your own hand drawn writing just isn’t quite good enough, this is a great way to fake it.

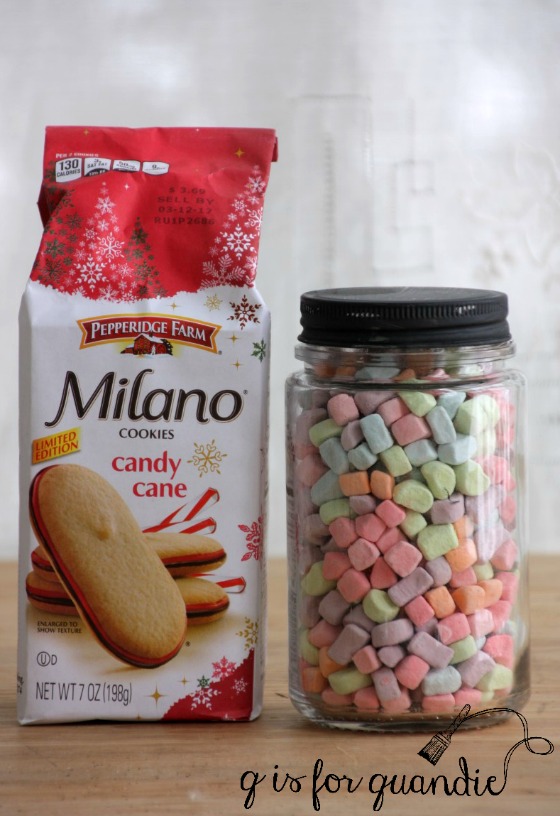
I filled the box with the ingredients necessary for a Peppermint Patty.

peppermint-patty

If you’ve never had one, it’s basically hot chocolate with peppermint schnapps.  You can doctor it up however you wish; whipped cream, marshmallows, peppermint stir sticks, and so on.

cookies

I added these adorable cups that my Carriage House sale co-hostess Sue made.

cups

Now Ken is all set for the next big snow.

let-it-snow-3

And I hope he knows how much we appreciate him!

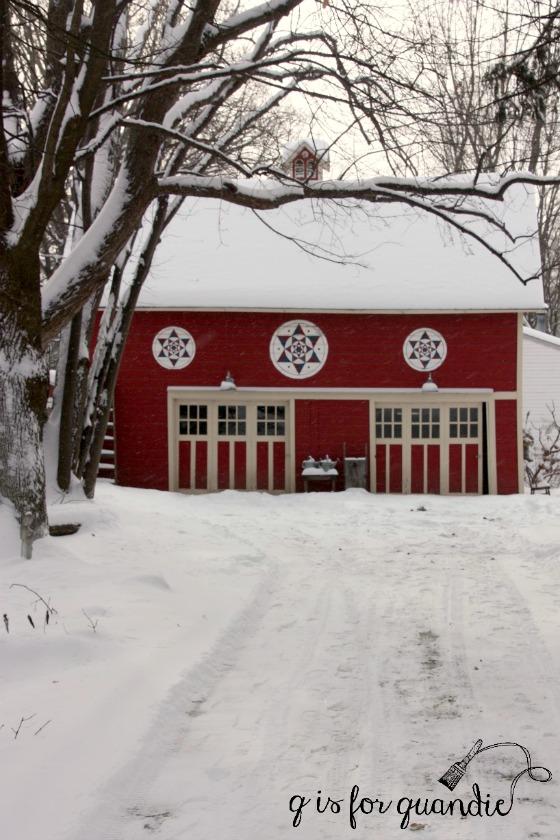
snowy-carriage-house

a very merry.

Just wanted to take a moment to wish a very merry Christmas to those of you who celebrate the holiday.

merry-christmas

I’ll be making merry with family and friends this weekend and feeling grateful for all of the amazing people I have in my life, including all of you!

vintage-books

But I’m not gonna lie, I hope Santa brings some fun stuff to fill up my Christmas stocking too.

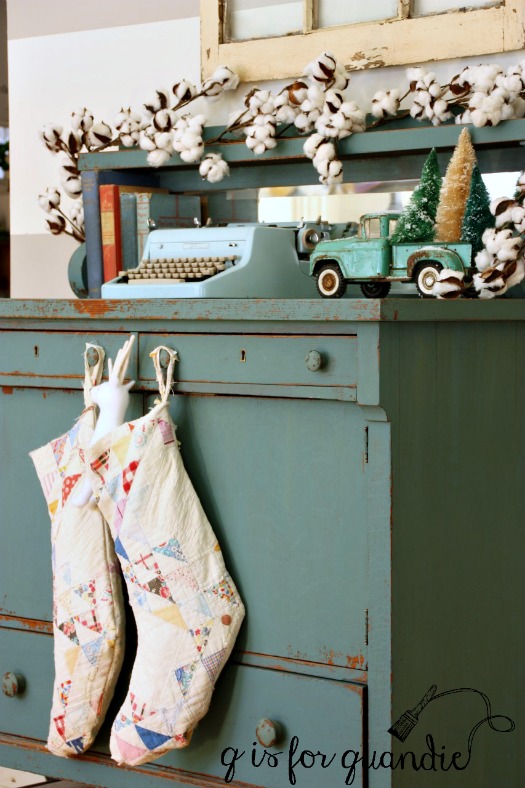
christmas-stockings

I have some great posts in store for you next week, so I hope you’ll check back.

christmas-buffet

christmas-truck

But in the meantime, happy holidays to you!

christmas-1

dreaming of a white Christmas.

Dreaming is no longer necessary, we are definitely having a white Christmas here in the Twin Cities.  We received a lovely 6″ or so of snow last weekend and we might get some more on Friday.  Fingers crossed.

However, when I took the original photos for this post we had barely a dusting of snow.

ct-planter

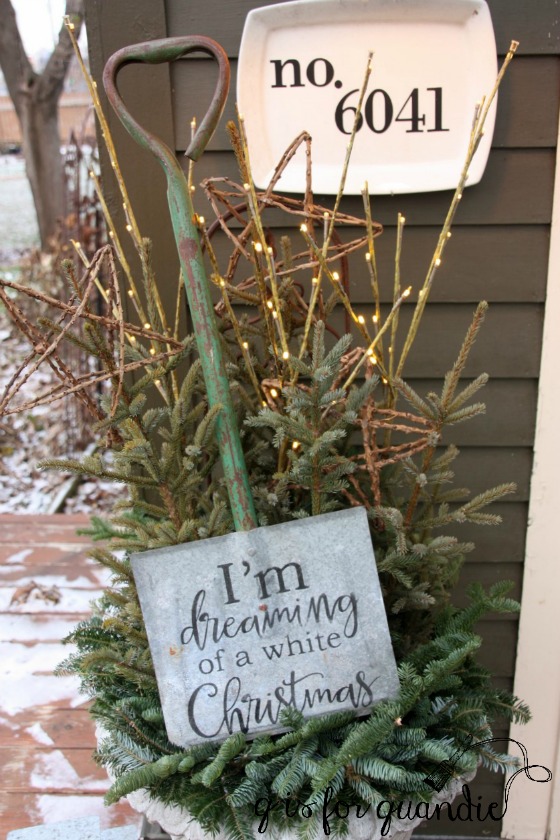
I didn’t do too much with outside decorations this year, but I did take a few minutes to add some spruce tops and evergreen branches to the planter outside my door.

Then I added some lights and some twig star ornaments that I found at Target.

The real star of the show though is this adorable vintage kid sized snow shovel.

shovel-with-stencil-1

I purchased it some time ago at a vintage sale and then added the stencil myself.

Shortly after I put it outside we got that 6″ snowfall that I mentioned.  Apparently someone was listening!

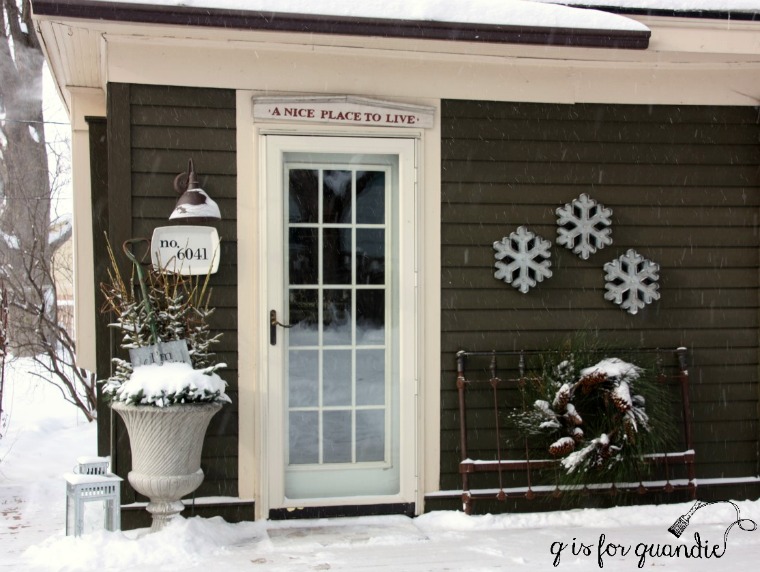
snowy-porch

Now you can barely even see that stencil.  Which is just as well since obviously I no longer have to dream of a white Christmas, it’s pretty much here!


a pepperkakebyen.

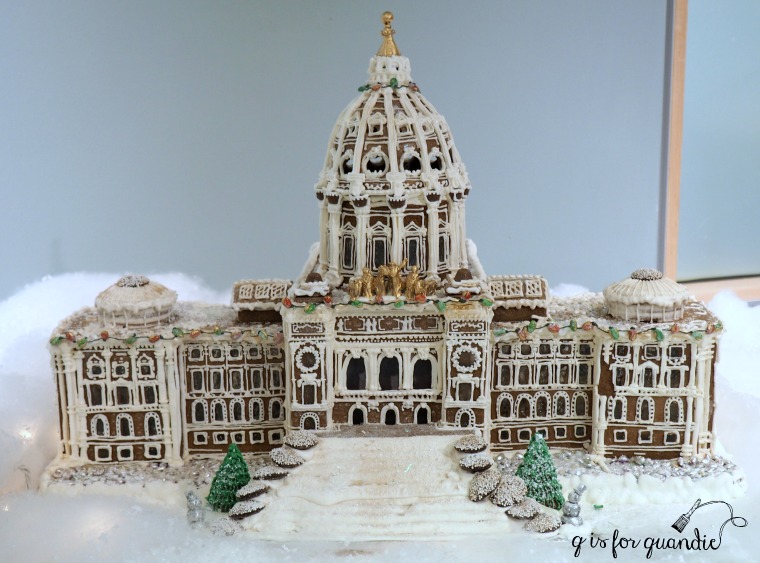
Hey you local readers, have any of you been to the Gingerbread Wonderland at the Norway House?  This is the second year that the Norway House in Minneapolis has invited bakers to contribute a gingerbread creation based on an actual structure in the Twin Cities to their pepperkakebyen (gingerbread city).

baker: Karen Tuzcu

My sister read about this in a local community ‘stuff to do’ type magazine and she suggested we check it out.  So last Saturday Debbie, Kris and I headed into the city in search of the Norway House.

Once there we paid our $5 admission fee and prepared to be amazed by gingerbread.

The structures ranged from relatively simple (and keep in mind that I say ‘relatively simple’ while realizing full well that I would not be able to achieve even this level) …

baker: Nancy Olson

to this insanely elaborate model of our state capitol building …

baker: Honey and Rye Bakery

I can’t even imagine the amount of time that must have gone into some of these.

baker: Colette Bartkowski

Technically the bakers were supposed to copy a real building or structure in the Twin Cities, and there were some pretty amazing results.

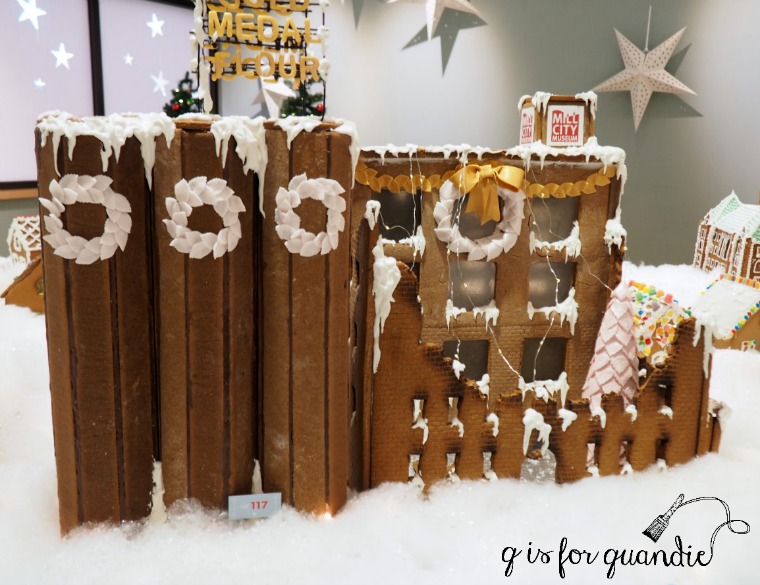
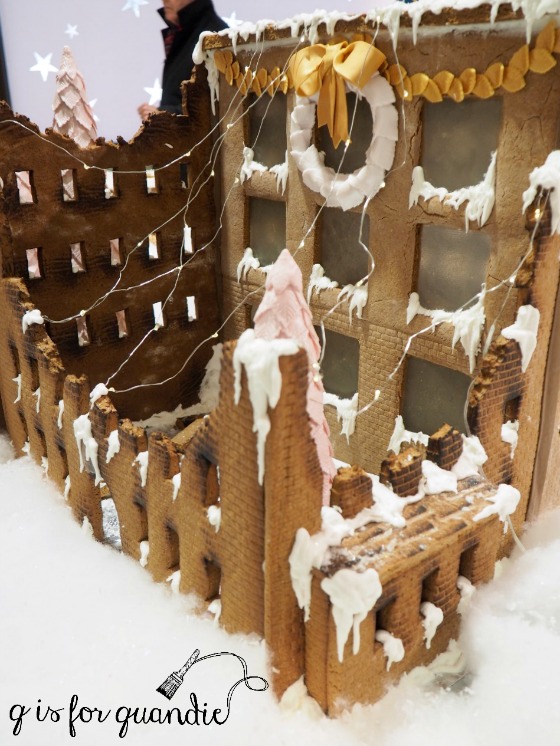
One that really impressed me was the Mill City Museum.

baker: Sweet Retreat

If you aren’t familiar with the Mill City Museum, it was created out of the ruins of what was once the largest flour mill in the world (google it to see photos and read more about it).  The building was destroyed by fire in 1991.  The remaining walls were later fortified and the structure was developed as a museum.  I don’t know about you, but I love a good ruin.  And I think it’s pretty fantastic how this baker recreated that look complete with scorched gingerbread.

Are any of you non-locals familiar with the iconic Minneapolis landmark, the cherry on a spoon?  It’s a giant sculpture of a cherry balanced on a spoon at the Walker Art Center in Minneapolis.  And here it is recreated in gingerbread …

baker: Sharon Born

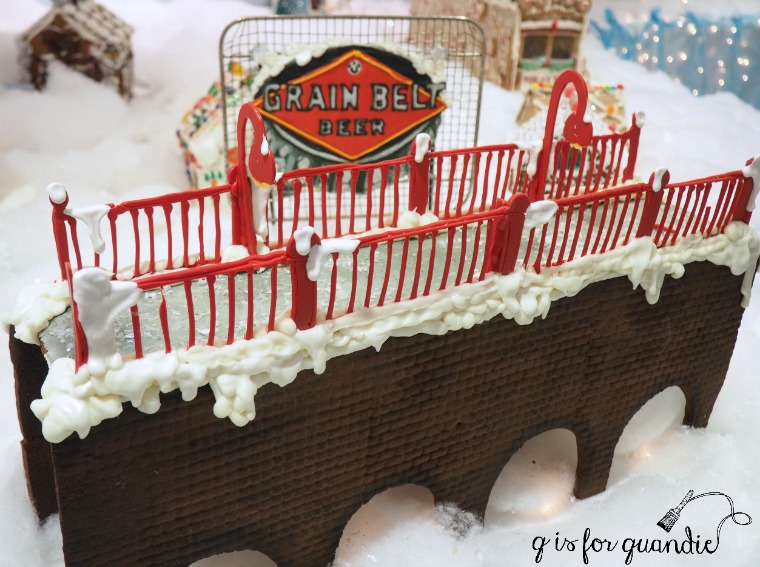
The Stone Arch Bridge …

baker: Taste of Love bakery

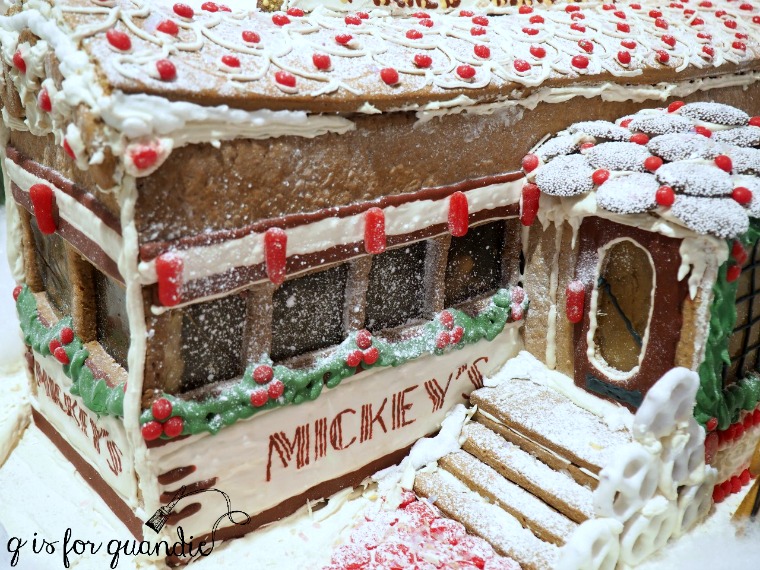
Mickey’s Diner …

baker: Common Roots Catering

Minneapolis City Hall …

baker: Heather Vick

Although technically not in Minneapolis or St. Paul, I guess this year’s display would not have been complete without a gingerbread Paisley Park complete with purple snow instead of purple rain.

baker: Thumb’s Cookies

And of course, the new Vikings stadium had to be included as well, complete with the football field inside.

baker: Crave Catering

If you are going to attempt some gingerbread houses this year, but want to keep it a little more low key, there are still some fun details you can copy.

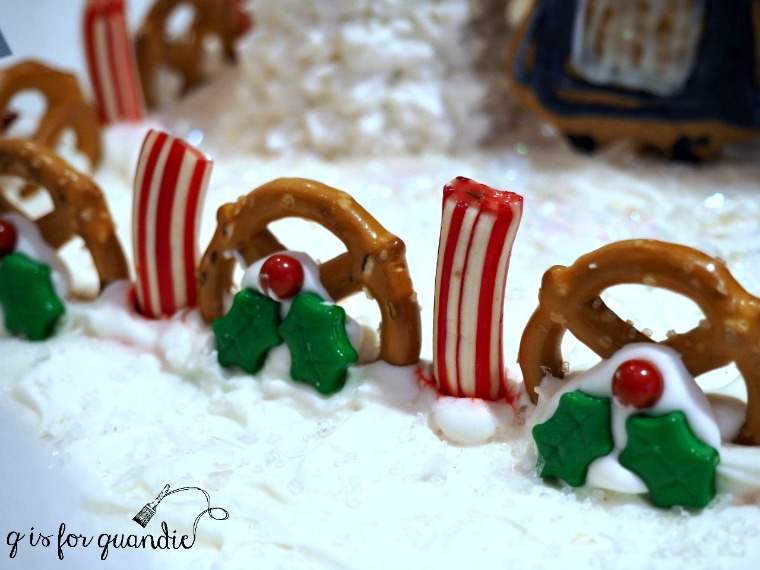
For example, this fence detail is adorable.

Or how about adding some candy cane toboggans for your gingerbread people to ride down the hill on.

The detailed frosting on some of the houses was gorgeous.

baker: Zeynep Tuzcu

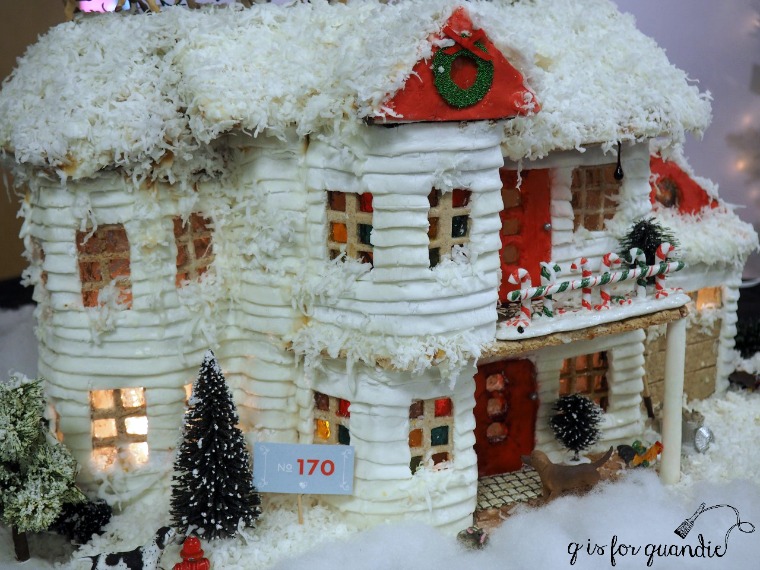
Have you considered frosting the entire gingerbread house in classic white?

baker: Breta LeVasseur and Penny Birdsall

 Or blue …

baker: Soni Styrland

Yellow is pretty too.

baker: Kris Peterson

I used google translator to learn that ‘strikkelykke’ means ‘knitting happiness’.  So maybe that pile of stuff on the ground in front of the people is yarn?  And I can see mittens, and a scarf draped over the bench.

I hope you enjoyed seeing the pepperkakebyen!  Did you have a favorite building?

If you are local, I highly recommend checking it out in person.  I only shared some of the buildings, there are quite a few more that I didn’t include here (there are 71 structures in the display).  The exhibit is open through January 6.  You can find more info on Norway House’s website {here}.

I’ll have a blue Christmas.

This year I’m having a blue Christmas, aqua blue that is.  It’s one of my favorite colors, so why not use it for Christmas too?

My friend/co-worker/Carriage House sale partner Sue gave me this rusty aqua blue truck for my birthday last month.

aqua-truck-1

It didn’t start out in my favorite color, it was originally green.  But Sue painted it and added that adorable Christmas Tree Farm sign on the door.  Keep this in mind if you ever happen to find a vintage toy truck that isn’t quite the color you want.  Just paint it.

The truck looks adorable filled with vintage aqua and white Christmas light bulbs.

aqua-truck-2

My friend/co-worker Jodie gave me this authentically aqua rusty toolbox …

aqua-toolbox-1

It’s the perfect color to house my vintage aqua ornaments.

aqua-toolbox-2

My friend/co-worker Cathy gave me this charming trio of tiny glasses.

aqua-glasses

Aren’t they sweet filled with tiny Christmas ornaments?
I put together this ombre box of shiny brites myself …

ombre-shiny-brites

As far as I know, Shiny Brite didn’t make an ombre box of ornaments, but maybe they should have!

I couldn’t leave out my other rusty aqua truck, so I added some seasonal cargo to the truck bed.

aqua-truck

The sprinkling of snow adds the perfect touch.

aqua-truck-close-up

 We’ve had some very gloomy days this past couple of weeks, but I’m hoping to see just a little hint of sunshine this weekend so that I can get some photos of my house decked out for the season.

I’ve also got another house tour planned for the coming weeks.  My fellow Reclaiming Beautiful vendor, Amy, is graciously welcoming me into her home this Sunday for a photo tour.  I hear that she really does it up for Christmas, so I’m definitely looking forward to seeing her place and then sharing it with you here on the blog.  So be sure to stay tuned next week!