so fickle.

Who remembers way back in January 2014 when my blog was still fairly new, and I posted about the trend towards gold?  I mentioned how I couldn’t imagine ever being drawn to using gold again, having lived through it once in the 80’s.  However, I also knew myself well enough to say “never say never.”  Let’s face it, tastes change … or shall I just admit that I am fickle?

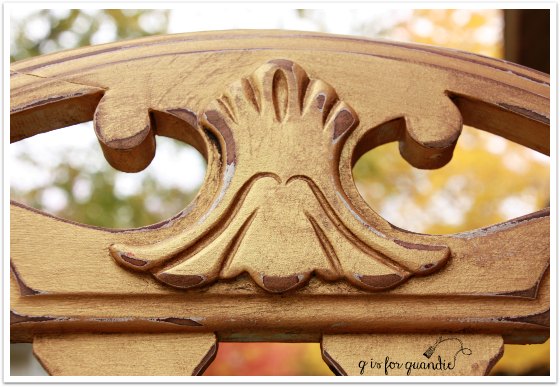
gold chair close up

Now here it is almost two years later and I’ve got a stash of gorgeous metallic paint from Fusion’s new Matthew Mead Studio Metallics line.  What is a girl to do?

Find a chair to paint, that’s what!

So I found this chair on craigslist and sent Mr. Q off to pick it up.

gold chair before

I would have preferred a chair that wasn’t already painted, but I really liked the details on this one and the price was right.  Plus sometimes I’m just not patient enough to wait for the exactly perfect piece to come along.

I removed the seat and sanded the life out of this chair with my palm sander.  I knew that when I distressed it later I wasn’t going to want to just see that white under it, so I tried to get most of the edges back down to the wood.  Then I started painting.  It took three coats with the Pale Gold Fusion paint to get that white covered up.  I might have gotten by with two coats if I was painting over a darker wood.  By the way, the first coat really looked like crap.  So if you are going to do some experimenting with this paint, don’t panic if it doesn’t seem to cover at first.

After three coats, here is how the chair looked.

gold chair fresh

gold fresh close up

Not really a look that works for me.  A little too bright and too clean.  I like things that have a bit more age to them.  So I sanded the edges and then added some of Miss Mustard Seed’s dark wax.

gold closeup

Ahhhh, so much better.  The wax highlights the texture a bit more giving the gold more depth.

Now remember, this is Fusion paint, so you don’t have to wax it if you don’t want to.  But in this case I was waxing to get a certain look, not to protect the finish.  If you are wondering if the wax goes on the same, I would say that the Fusion paint is less ‘absorbent’ than milk paint or chalk paint so the wax goes on a little more smoothly, if that makes any sense.  It doesn’t soak in as much.  Clear wax also doesn’t alter the color as much with Fusion as it does with the other paints.  It’s also easier to work with the dark wax because you can buff it back out more easily if you over-apply.

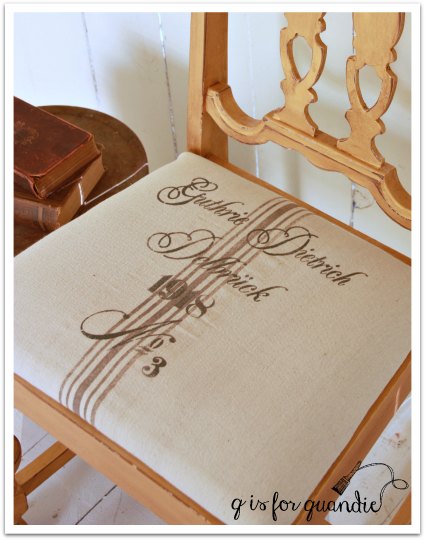
With the painting done, I moved on to the chair seat.  I tried a number of different fabrics that I pretty much hated with the gold.  I finally decided to go with a faux grain sack look.  I used some drop cloth material and painted on some grain sack stripes and then added a stencil.

gold chair seat

I think that the more rustic look of the faux grain sack provides a nice balance for the gold paint.

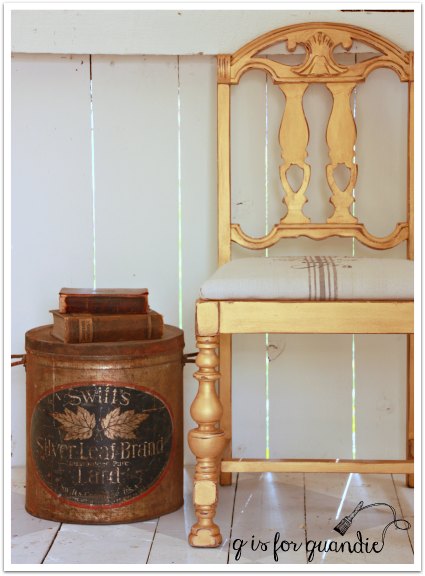
gold chair 2

I’ve staged it with an old Swift’s Silver Leaf Brand bucket that I bought at a garage sale a few weeks ago.

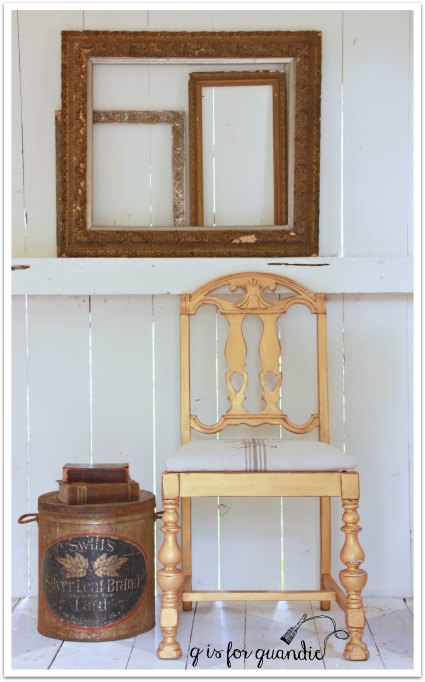
And some old gold frames …

gold frames

So, what do you think?  Do you need a touch of gold in your life?

gold chair full

This chair is available if you are local.  Leave me a comment if you are interested in getting the details.

Sharing at:  French Country Cottage and The Curator’s Collection


the Pinocchio hutch.

Remember the Humpty Dumpty dresser?  All the kings horses and all the kings men may not have been able to put it back together again, but Ken was!

Well, I thought I would add another fairy tale piece to my line up, so I’m calling this one the Pinocchio hutch.  You all know the story of Pinocchio right?  The puppet that wanted to be a real boy.

pin phones

Well first of all, this was one of those Craigslist transactions that wasn’t quite a smooth as it could have been.  The gal selling it was only available during strange small windows of time.  Between 11 and 1 on Thursday, for example.  In the end, I had to send Mr. Q on his own.  When he got there, the seller said she wouldn’t be able to help load it, and it was on the 2nd floor of an apartment building without an elevator.  Egads.  That might have been something she should have mentioned in advance, do you think?  Fortunately, she also had another buyer coming at the same time for a sofa, and he was a nice guy.  Mr. Q helped with the sofa, and then he helped with this hutch.

hutch before

The piece was advertised on Craigslist as an ‘antique hutch’.  It looked pretty fab in the photos, but I’ll admit I was a little suspicious of the ‘antique’ part.  Of course, some people think that items from the 1970’s are antiques now.  For the record, if we’re talking furniture, they are not!  If this was a car, you could get away with calling it an antique, but furniture needs to be at least 100 years old to be ‘antique’ and this one definitely isn’t.

I had also asked the seller if this piece was real wood before sending Mr. Q, and she assured me that it was.

Had I been with Mr. Q when he picked this up, I would have nixed the purchase.   Why?  Because it was made out of that … well … I’m not really knowledgeable enough to know what this stuff is called.  It’s definitely a thin veneer of something on top of what is likely a cheap wood or possibly even particle board.  I’m not sure what that veneer is made out of, but it doesn’t feel like real wood, it doesn’t look like real wood, and it doesn’t hold paint like real wood.  It’s not quite the same as a plastic laminate though.  So what is it?  Does anyone know?  I think some of the veneer might be real wood, but a lot of the parts definitely are not real wood.

pin before inside

So anyway, yes, this hutch is akin to the puppet that wanted to be a real boy!  It wanted to be real wood, but most of it just isn’t.

The biggest problem with this sort of material is that it doesn’t hold on to paint like real wood does.  So, had I been there, I would have said ‘no’ to it because it is a lot more work to paint than is practical for me (which is not to say that it can’t be done!)  But since I wasn’t there, and Mr. Q thought it looked pretty good, it came home with him.  Fortunately, it does have some good lines.  I love the simple triangular pediment at the top, and the details on the sides of the bottom.  It has a very classic appeal.

Flash forward several months.  With winter just around the corner, I knew I had to get this one done while I could still work on it in the unheated Carriage House.  I also decided this was an ideal opportunity to try Fusion’s Ultra Grip primer.  Please follow this link to Fusions’ own blog post about this product if you want to read the details about how it works.

I decided I should probably follow all of the rules on this one, just to be sure I was getting the best end result possible.  To begin, I sanded everything … which seemed to take forever.  There are nine shelves!  Sanded top and bottom.  Three drawers.  Hutch top inside and out, plus a base.  Once sanded, I wiped everything down with TSP substitute.  Next I painted a coat of the Ultra Grip on everything.  Then I had to wait 12 hours.  Which in my world really meant the next day.

Meanwhile, I removed the chicken wire from the doors.  It was coming loose in spots anyway, so I knew we (and by we, I mean Ken) would have to remove the stops to fix that anyway.  It was easy to coat the chicken wire with some off-white spray paint once it was removed.

pin chickenwire door

OK, so once the Ultra Grip had met its official drying time, I next painted two coats of Fusion’s Limestone on the outside.  Yep, two coats did the trick.  I had to wait for the Limestone to be completely dry before moving on to the Inglenook for the inside of the cabinet.  Why?  Because I was using tape to get a clean line where the Limestone met the Inglenook in some spots.  I then painted two coats of the Inglenook on the inside of the hutch, and on all of the shelves.

pin inside

Are you tired yet?  This was definitely one of those projects that takes a lot of time, but most of it is spent waiting for things to dry.  Painting one side of each shelf took about 5 minutes, but then I had to wait several hours before adding a second coat.  Then, another several hours before flipping them over to repeat the process on the other side.  Have I sufficiently driven home the point that this was a much more lengthy process than usual for me?

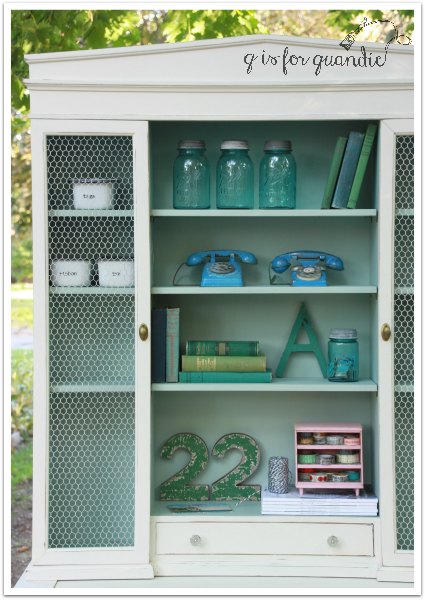
So, after all of that, here is the finished product.

pin after

A massive improvement over the original.  At least I think so.

I changed out the hardware to try and add some more charm.  I used glass knobs on all of the drawers, but I couldn’t use them on the cupboard doors because they lie flush against the dividers that are behind them and the glass knobs have a screw with a nut that extends out the back side of a drawer or door.  So for those I used some cool vintage brass knobs that I had in my stash.
pin inside corner

While writing this post, I kept waffling about what I should call this piece.  I settled on hutch, but technically this is a desk!  Yep.  It has a pull out desk top.

pin desk top

As I was staging it for these photos, I realized this would make an awesome scrapbooking station.  You could keep all of your supplies in it, and then just pull out the desktop when you are ready to create!

pin scrapbooking

The shelves are adjustable, which can be handy.

pin angle

If not being used as a scrapbook station, this could be used in the kitchen filled with your ironstone collection and cookbooks.  Or put it in your study where you can put your computer on the pull out top and write your memoirs.  So many possibilities for this piece!

As for the Ultra Grip, so far it is looking really good.  I have inserted and removed the shelves several times and that hasn’t resulted in a single scratch.  I slid books onto and off of the shelves, and ditto, no scratching.  The desk top slides in and out of place, and no scratches have resulted from that either.  Of course, only the true test of time and regular use can really tell, but so far I am impressed with the how the paint is adhering.

pin before and after

This hutch/bookshelf/desk is for sale.  If any of you local readers are interested, leave me a comment and I can get back to you with the details.  And FYI, it does come apart into two separate pieces for easy transport.

pin books

the drop leaf table.

I’ve mentioned this table in a couple of posts now.  I picked it up at a garage sale on my lunch hour.  Well, technically I purchased it on my lunch hour, but sent Mr. Q to pick it up later in the truck.

farm table 1 before

It was a little wonky when I got it.  Two of the legs were wobbly, plus the top of the table had a big gap in the center.  I suspect it used to have some leaves for making it bigger, but those were long gone.  So Ken took it over to his workshop to shore it up.  He is a fan of taking a piece completely apart and then putting it back together the ‘right’ way.  With glue and pegs.  And that is what happened with this piece.  He took it all apart and then put it back together again.  It couldn’t be sturdier now.

I already posted about having Ken permanently remove the leaves, which became Farmer’s Market signs.

drop leaf green

My original plan for the table was to paint just the base and leave the top as is.  I thought the finish looked fairly good.  Rustic and beat up, but in a good way.

So, I painted a base coat of MMS milk paint in Boxwood, then added two coats of Shutter Grey on top of that.  I should mention at this point that my preferred method of painting table bases is to flip the table upside down on some horses and paint it that way.  When I had the painting all done and I flipped the table back over … well … I just wasn’t loving the way the original finish on the top worked with the paint.  It was too orange-y and too shiny.  That meant I had to strip the top after all.  So I carefully stripped it with some citrus stripper.  Once stripped, I sanded it down and add a coat of clear wax followed by a coat of MMS white wax.

table close up

I really prefer the lighter colored top with the Shutter Grey on the base.

drop leaf table 2

I also think the way the table is put together with mismatched grain on each plank of wood is very charming.  There are still a few dings and gouges that show the age of this piece, and the original casters are still in place.  They work quite well too.

table top

This is another piece that would work great as a desk, or even as a large bedside table

drop leaf table 1

How about it?  Any of you in need of a desk?  Or a table?  This one is available.

a trip to the winery and a sneak peek.

winery title

This past Saturday was absolutely gorgeous here in Minnesota.  Blue, blue sky with plenty of sunshine and a high in the 70’s.

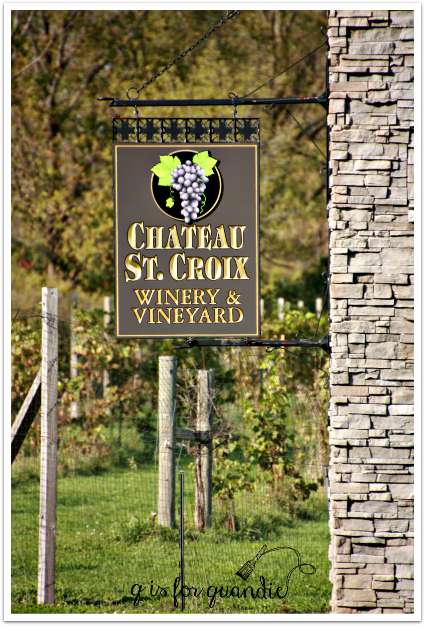
winery sign

Mr. Q, my sister Debbie and my niece Kristine and I decided to take a short road trip into Wisconsin for the Chateau St. Croix Winery’s Fall Harvest Festival.

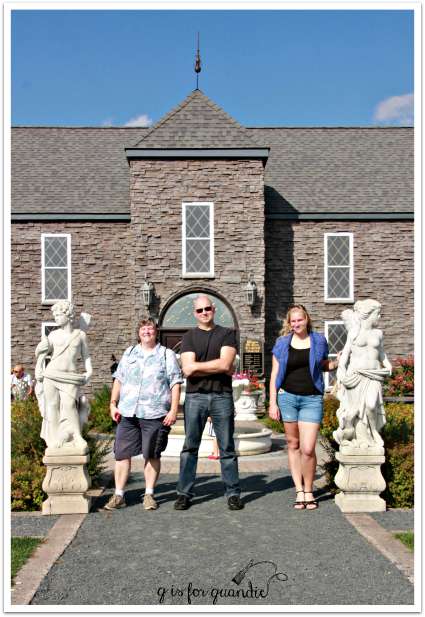
winery group

Chateau St. Croix Winery is located in St. Croix Falls, Wisconsin in the most bucolic of settings.  You drive through the tiny town and then out into the countryside with farms on either side, so it’s a little bit comical when you pull into the winery and see the ‘faux chateau’ and all of their statuary.  It kind of sticks out like a sore thumb.

winery lion

But they sure do have some tasty wine.  I really liked the Wild River Rose and the Chateau Rouge.  My favorite was a port though.  The Jaune d’Or Port, a golden port aged in French oak caskets.  They suggest serving it with creme brulee.  My favorite dessert.  Yum.
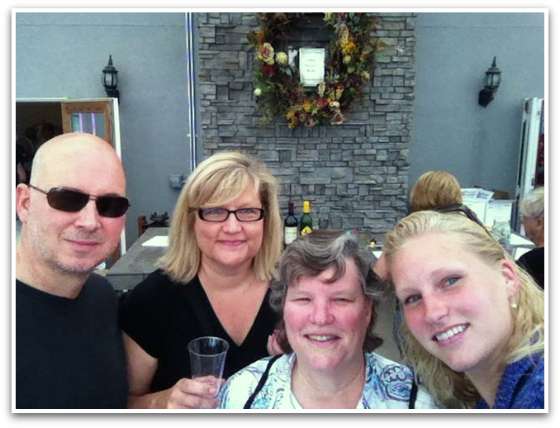
winery selfie

Hey, wait a minute, why am I the only one with a glass in my hand?

Well, it goes without saying that when I’m off sampling wine on a beautiful Saturday, that means I’m not in the workshop.  So I have no more finished projects to share with you today.  And furthermore, I have plans both days this coming weekend, so again, not much time for painting.  However, here is a sneak peek of upcoming features.

First, I’m working on a giant hutch.  I’ve been working on this one for several weeks now.  It’s been a bear to paint!  But it’s almost done, hopefully I’ll be able to share the finished product soon.

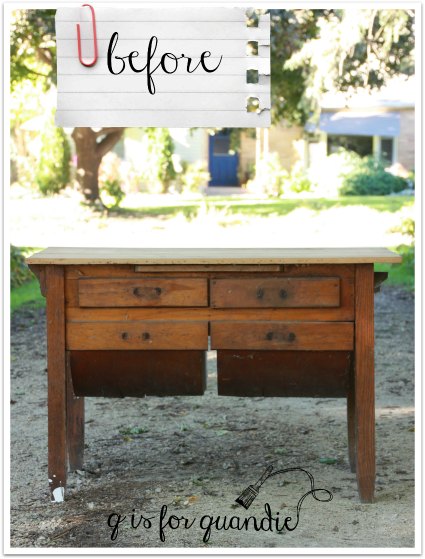
hutch before

Next, I just brought home two fabulous tables.  A farmhouse table with leaves that will get a simple makeover.

farm table 1 before

And a possum belly table that needs just a little work, well OK, a bunch of work.  Thank goodness for Ken.

possum belly table before

And finally, I have a mid-century coffee table that will be a fun makeover.  I think the cane inserts have to go.  Once they are gone, I have a great idea for a paint job.

mcm coffee table before

Stay tuned!

a perch for painting.

stool title

I think you all know that I do a lot of painting.  To save my back, I usually use a small child size chair to sit on when I paint towards the bottom of pieces of furniture (unless I put them up on saw horses).  It really works great, but the other day nnK brought something home for me that I think will work even better.  And old doctor’s stool.

stool before

The seat goes up and down and I can just scoot around the piece of furniture on it.  Fab, right?
Now, I could have just used it as is.  The color isn’t terrible and I’m only using it in the garage (and probably in the house come winter).  But looking at that seat I had an idea.  We’ve all seen people paint leather or vinyl chairs with chalk paint, right?  Well, although it always looks great when it’s freshly done, I can’t help but wonder if it really holds up over time.  This stool gives me the perfect opportunity to test it out.
I got out my chalk paint and mixed up my own color using some of Urban Rooster’s Jaded Rooster and a lot of Annie Sloan’s Old White.  I wiped the seat down with some TSP substitute and that was the only prep I did.  Then, I painted on three coats of paint.  Once dry, I added a stenciled ‘2’ just for fun.  Once that dried, I sanded the seat lightly with 220 grit paper and used Fusion’s bees wax to seal it.

And voila!

stool 1

Dang!  Isn’t it cute?

stool 2

It turned out so fab that I almost hate to use it as a perch for painting now.

Freshly painted it looks fantastic.  The paint seems to be adhering (I’m pretty sure this is vinyl by the way).  Here is a nice close up photo where you can see the texture of the material.

stool seat close up

And you can see where I distressed around the edges as I sanded it.

So now the test begins.  I’ll use this stool for a few months and then report back.  We’ll just have to wait and see whether or not painting vinyl with chalk paint will stand the test of time.


a waterfall coiffeuse.

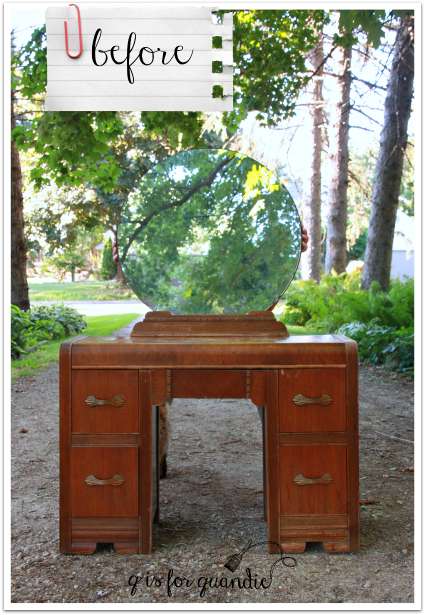
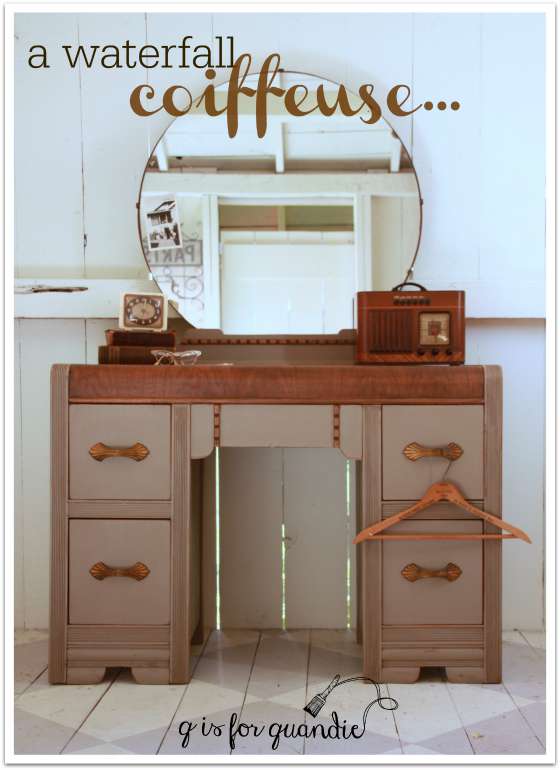
For those of you not in the know, ‘waterfall’ is a style of furniture that was mass produced in the 1920’s – 1940’s.  The waterfall name comes from the curved front edge that the pieces all have.  In it’s day, it was inexpensive and was marketed to newlyweds.  In 1930, a couple setting up housekeeping could buy an entire matching bedroom suite of furniture including a bed, chest of drawers, dressing table and nightstands for less than $50.  Bedrooms suites were most popular, but you can also find dining room sets and other pieces.  As I was researching the history of waterfall furniture, I came across a new word, coiffeuse.   Apparently this is the French word for dressing table or vanity, and literally means a place with a large mirror where a lady could dress her hair.  In which case, today’s piece is definitely a coiffuese.

coco vanity before

I seem to have a soft spot for waterfall pieces.  Something about their art deco style really appeals to me.  I used to have a waterfall buffet in my dining room, although I sold it last winter to make way for my dining room makeover (still in progress!)  A little while ago one of my readers, Victoria, mentioned that she isn’t terribly fond of waterfall style vanities, especially the ones with big round mirrors.  Ahem.  Well, I thought this piece would be a good chance for me to try and change her mind.

Once again, I went with stripping and staining the top in dark walnut.  The finish was in terrible condition!  But once I got it stripped, I could see that the veneer was quite pretty and in good shape.

coco vanity glasses

There was also an interesting sort of dentil molding on the mirror and on the center drawer, and I decided to strip and stain that as well.

coco top

There is that distinctive curved edge I was talking about.

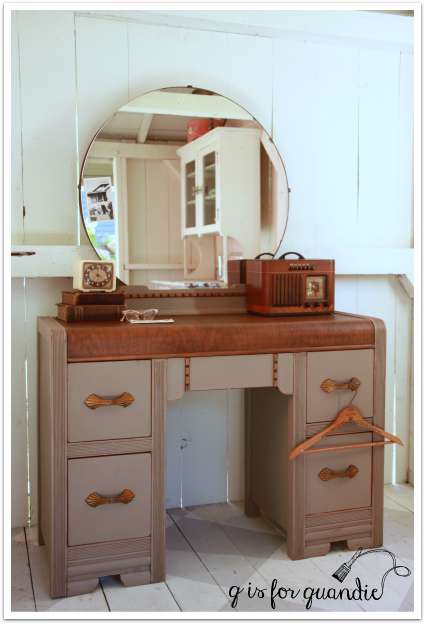
I painted everything else in Annie Sloan’s Coco.  This color is the perfect warm, greyish, brownish, neutralish, darkish, sort of rich color.  I would never have thought I’d like it until I saw it on another waterfall piece a couple of years ago.  Since then I’ve painted several pieces in this color.  I think I’m on my third can of it.

coco vanity angle

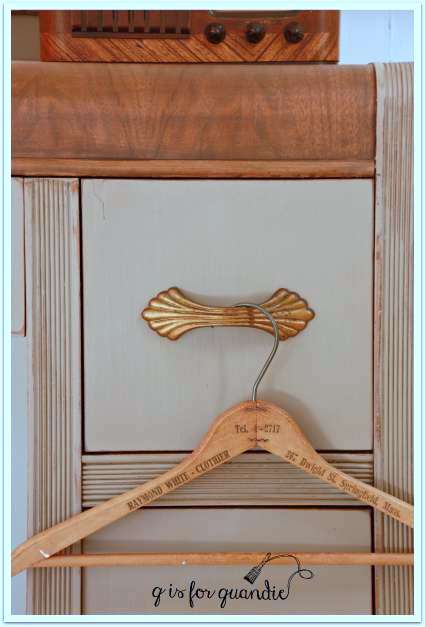
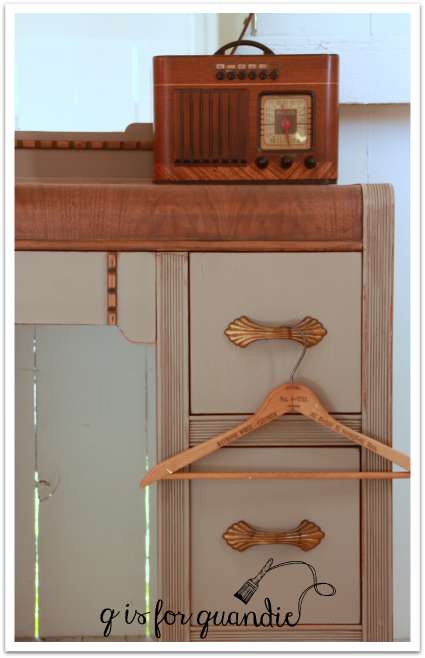
Another thing that waterfall furniture is known for is unusual hardware.  Oftentimes these pieces have drawer pulls made of bakelite.  My buffet had metal handles with bakelite inserts.  The pulls on this piece aren’t bakelite, but they are pretty fab.  I had to keep them as they add so much personality to the piece.

coc vanity drawer close up

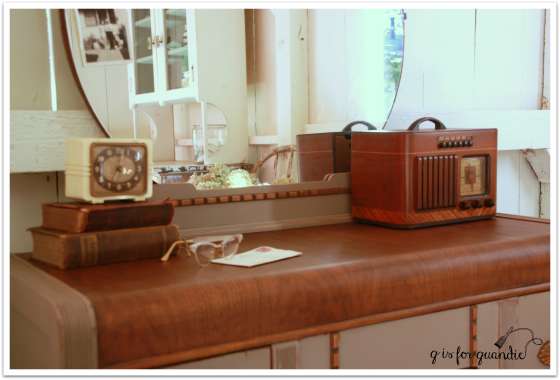
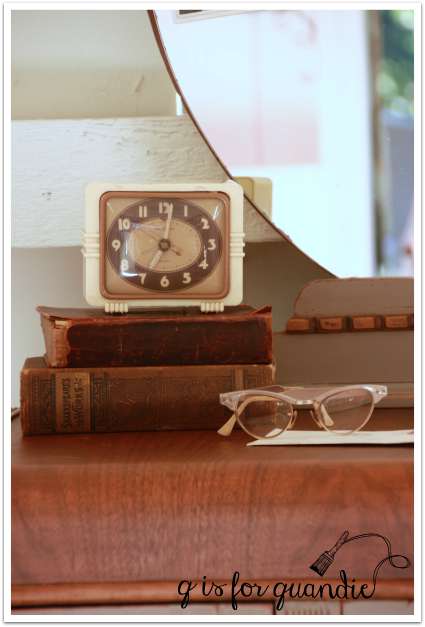
Remember the vintage radio I scored at a garage sale earlier this summer?  It was perfect for staging this piece!

coco vanity right side

As was my bakelite alarm clock …

coco vanity clock

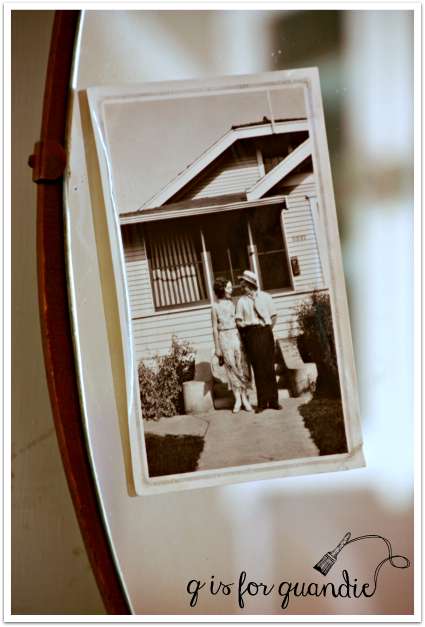
I’ve used this old photo before for staging pieces.  This came from a big tub of family photos that my relatives in South Dakota have.  No one knows who this couple is, but they are standing in front of my grandparent’s home in So. Minneapolis.

coco vanity photo

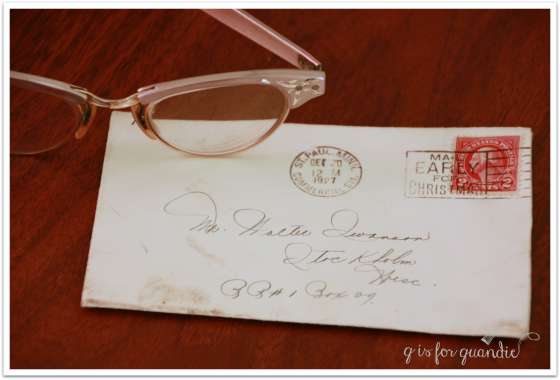
I wish I knew who they were.  Don’t they look like a really fun couple?  I’m sure that she sat at a similar dressing table and made sure the wave in her hair was just right before this festive gentleman came calling.  She might have been listening to Bing Crosby or Glenn Miller on the radio.  She probably pulled on those fabulous cat eye glasses to read the love letter he sent.

coco vanity letter

They were likely heading out to catch a street car to Lake Harriet for the afternoon.

Her waterfall style dressing table probably wasn’t painted.  But I bet if she’d seen this one, she would have loved it!

coco coiffeuse

Well Victoria?  Still not a fan of the waterfall vanities with big round mirrors?

Sharing at Finding Silver Pennies Sunday.

eat, drink & be merry.

eat drink and be merry

I hope today’s post is better late than never!  Usually I have my posts scheduled in advance for 7 a.m., but the rainy weather we’ve had of late here in Minnesota has not been conducive to photo taking.  Plus I’m working on a huge piece that is taking forever to finish, so I don’t have a lot to share.

Today I am playing hooky from work (it’s OK, an authorized vacation day).  So far it has been quite blissful.  Coffee in bed with a good book at 7 a.m., sold the marble topped dresser at 9:30 a.m., staged today’s photos at 10 a.m. and now I’m enjoying the Diana Krall station (any other fans?) on Pandora and pulling together this post while eating a fluffer nutter.  Anyone know what that is?  A peanut butter and marshmallow fluff sandwich.  I hope you aren’t reading my blog looking for healthy eating tips because you clearly won’t find them here!

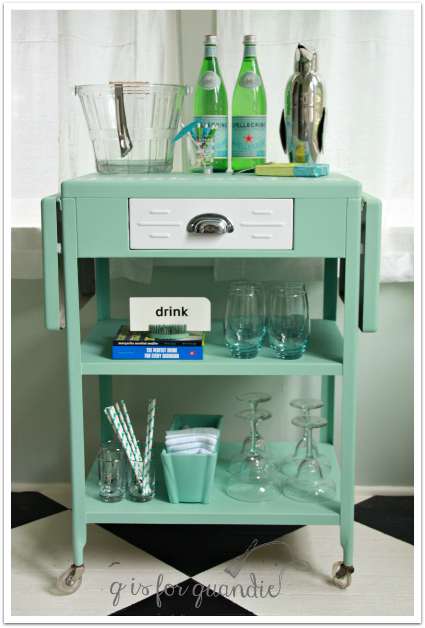
Alright, on with today’s feature item.  Way back in June my friend Cathy nabbed this 50’s metal cart for me (thanks again Cathy!)  When I got it, it was plain white, and rather beat up.  The wheels didn’t say on and one of the drop leaf sides wasn’t working.

I started by painting it with Fusion’s Laurentien.  I just adore this color (have I said that too many times?) and it helped play up the mid-century vibe.

edm 6

I painted the drawer front in Fusion’s Picket Fence, a nice crisp white.  I also changed out the original hardware, which was a tacky black plastic drawer pull.  This chrome cup pull is a much better choice for this piece.

Once the paint job was finished I decided to have a little fun!  I cut “eat, drink and be merry” out of white vinyl on my Cricut and ran it across the top.

edm 1

Thus officially turning this into a bar cart!  The fact that the Fusion paint is fully washable after 30 days of curing time makes it perfect for this piece, because we all know that there will be spilled drinks!

edm 7

I stocked it with some bar essentials; glassware, straws, ice bucket, etc.

edm 4

edm 2

I also painted inside the drawer just to clean it up a bit.

edm drawer

The leaves can be folded down …

bar cart 8

or left up.

vintage bar cart

This cart would be so much fun for holiday entertaining, easily rolled out to where you need it.

Well, I’m off now to enjoy the rest of my vacation day.  I believe I shall eat, drink and be merry!  In fact, I’ve got the entire weekend in front of me for that.  How about you?

And P.S. the bar cart is for sale.  If you are an interested local (Twin Cities), leave me a comment and I’ll email you with details. SOLD.

Sharing at Finding Silver Pennies Sundays!

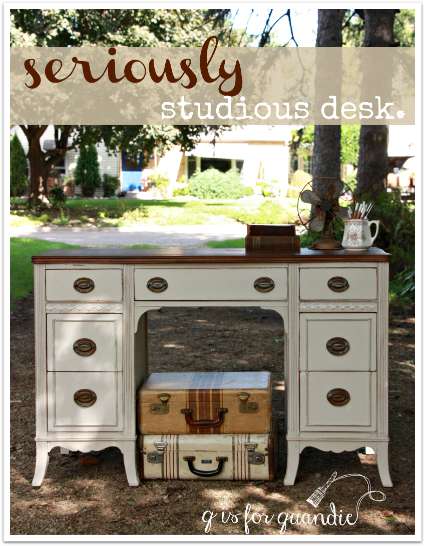
seriously studious.

seriously studious

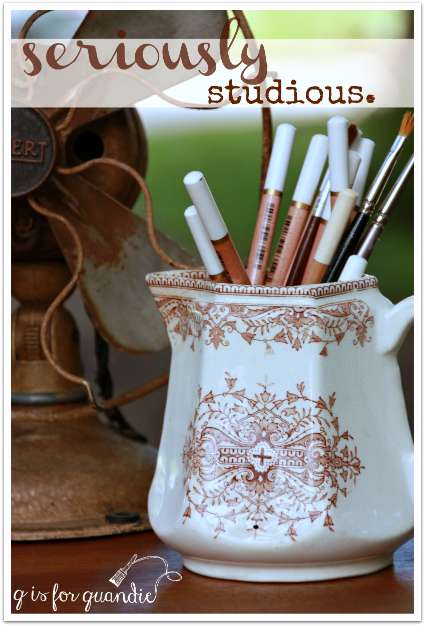
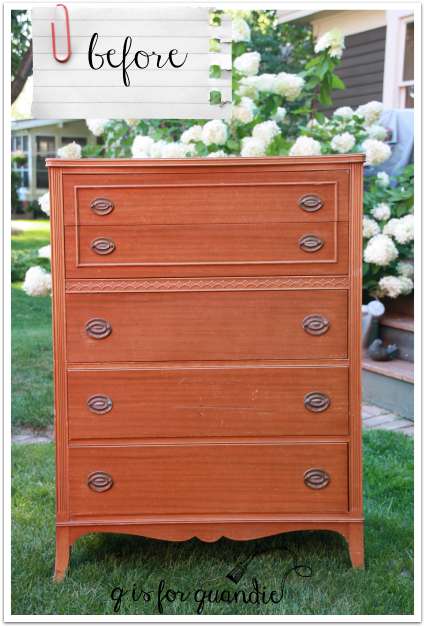
Today’s piece began life as a vanity/dressing table.  I wasn’t terribly fond of the mirror that was attached to it though, so I took it off and decided to reinvent it as a more serious piece of furniture.  A desk.  I don’t have a ‘before’ picture of it, but it was part of the matching set that included the dresser I painted last week.

grey dresser before

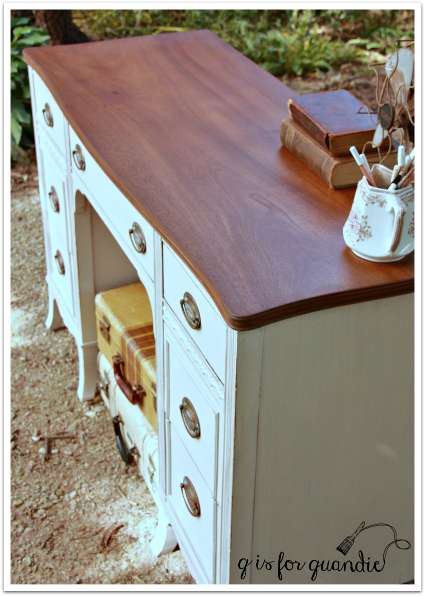
This gives you some idea of the color of the finish; kind of a yucky orange.  Looking at the top though, I could see that the grain was quite pretty and I thought that maybe I could salvage it.  So I stripped it, sanded lightly, and then used a Dark Walnut gel stain on it, followed by a coat of Cece Caldwell Aging Cream.

desk top

So pretty, and such a nice rich shade of brown now.  Here is a tip for those of you who don’t already know this.  Always do the stripping and staining of the top first.  It will likely be at least a little messy, and that way you don’t have to worry about messing up a freshly completed paint job.

After seeing the end result on the top, I knew I wanted to paint this with MMS’ Marzipan milk paint.  The same lovely almond color that I used on the Ironstone and Almond dresser.

However, I did suffer a little hiccup in the process.  First, let me explain that the veneer at the bottom of the sides on this piece had gotten a bit of water damage.  As a result, it was quite warped.  I have a little cheater method of dealing with that problem.  I run a blade horizontally just above where the veneer is loose, then I remove the veneer up to that line.  Then I use some wood filler to smooth over the transition from veneer to no veneer.  It’s not a perfect method, but it’s fairly well disguised once it’s painted and it gives new life to the piece without completely removing or  replacing veneer.  I use this method when the veneer is too warped to re-glue.

So, that’s what I did on this piece and I used a different brand of wood filler than normal.  I decided to try this brand when my last bit of wood filler ran out.  It is Elmer’s Carpenter’s Color Change Wood Filler.  The packaging says it is paintable and stainable.  It goes on purple and when it turns white you know it’s dry.  Sounded like lots of fun at the time.  So, I applied it and waited until it turned white, sanded it smooth and then started painting with the MMS milk paint.  And yikes!

purple filler

You guessed it!  The watery milk paint reactivated the purple!  Good gracious.  I probably should have seen that coming, but I didn’t.  I then got out the MMS Tough Coat Sealer and put not just one, but two coats of sealer over the purple.  Unfortunately, that did not do the trick either.  After it was dry, I painted over it and again, the purple bled through.  At that point I wasn’t going to mess around anymore.  I got out the spray paint primer.  Yep, you read that right.  Spray paint.  This is one of my oldest tricks for dealing with bleeding of any kind.  Spray paint will seal it up in no time.  And in this case, I really just needed to spray a quick coat over the areas with filler.  It did the trick perfectly, and once that was dry, my milk paint covered it up just fine.  It would be super clever if I had remembered to take a photo of the finished repair for you, but nope, I forgot.  But, you now don’t have to learn this the hard way.  Don’t use the filler that starts out purple if you’re going to use milk paint over it!

desk corner

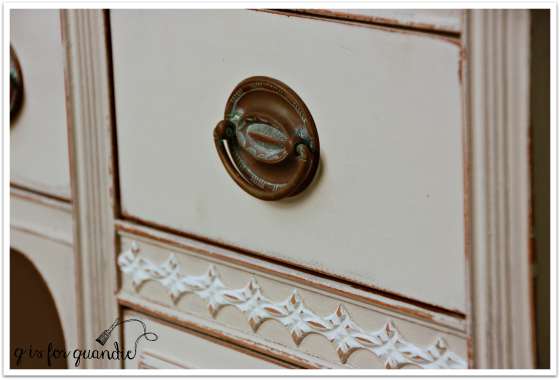
I again kept the original hardware with its fab patina, and I highlighted that raised trim detail with white paint.

desk hardware and trim

desk angle

Although the rest of the piece is all painted with the same paint color, I feel like the drawers are just a hair lighter than the body of the desk.  Sometimes that happens with milk paint.  Even though I mixed the paint all in one batch, I painted the drawers entirely first (while waiting for those veneer repairs to dry on the body), then painted the body last.  Some darker pigments must have settled to the bottom.  But, I do think that it works on this piece.  It’s just a slight difference and it gives a very subtle two-toned look to the desk.

seriously studious desk

So there you have it.  A seriously studious desk.  What do you think?

let’s give thanks.

OK, maybe it’s a little early to start thinking about Thanksgiving.  Although obviously this year I will be giving thanks that my sister and niece live here in Minnesota now and will be celebrating with me!

give thanks 1

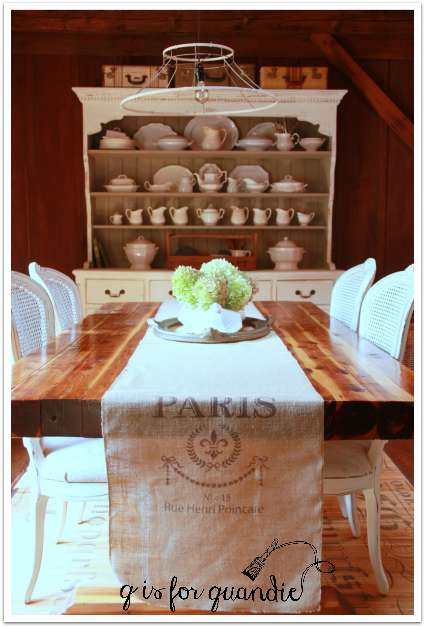
 But let’s not get ahead of ourselves, this post is about giving thanks that the next step in my dining room makeover is complete!  The table.  Here’s a reminder of how it looked before.

hutch 2

Mr. Q made this table about 20 years ago.  At the time a co-worker of his was selling some 4″ x 4″ cedar boards so Mr. Q decided we needed an extremely heavy, indestructible table.  He’s added several coats of shiny poly over the years to make sure it remained impervious to damage.  I’ll be honest, this has never been my favorite piece of furniture (sorry hon!).  If you’ve read my blog, you’ve seen my style and probably realize that this isn’t exactly ‘me’.  But one has to make compromises in marriage, and this was one of mine.  It wasn’t until I started my recent dining room update that it occurred to me that even though Mr. Q is quite fond of the table, maybe he wasn’t ‘married’ to the finish.  Eureka!  How did this not occur to me sooner?

So I asked him how he felt about me giving it a fresh new look.  Turns out he was on board (pardon the pun)!

The first task was stripping all of that poly off.  Egads.  It took 4 passes with the citrus stripper to get that stuff off.  It was a messy and time consuming process.  I probably could have sped up the process by using a more heavy duty chemical stripper, but since I was doing this inside the house I didn’t want to add toxic fumes to the mix.  Once it was stripped and then cleaned with buckets and buckets of fresh water, I sanded it down a little to get a smooth surface.

Meanwhile, in between passes with the stripper, I dug out some scrap pieces of the original wood from the back of the carriage house and tested some possible finishes on them.

I started out by purchasing two different shades of grey stain.  I really didn’t like the way the stain went on, something about it just felt off.  It was partially the sheen, partially the colors, and partially the streaking that I couldn’t seem to get rid of.  Honestly, staining just isn’t my forte.  I’m sure that there are expert woodworkers out there who could have achieved the look I was was going for with stain, but I’m not one of them.

So I went back to the drawing board.  I gave some more thought to what I was hoping to accomplish.  I wanted to tone down that orange color of the cedar, maybe get a sort of sun bleached look, lighten up the entire piece and give it some more ‘age’.  I didn’t want to entirely cover up the grain, but I wanted to minimize it a little.  I did some more research on pinterest looking at many different approaches to faux-aging wood.  And finally I realized that I should just stick to what I know, paint!  I decided to pickle the wood on the top of the table, and then just paint and distress the base (there was no way I was going to attempt to strip the base!)

There are a myriad of choices for pickling methods out there!  There are even special products made just for pickling.  I stuck to the basics.  I used Annie Sloan chalk paint in Old White, and diluted it about 50/50 with water.  I wish I had diluted it even a little more for a more sheer look, but hindsight is 20/20.

pickle 1

As it turns out, pickling is incredibly simple.  I applied the watery paint with a brush and then wiped it off with a paper towel.  The paper towel probably breaks some official rule that requires a lint free cloth, but it worked for me.  I’d use caution with that if you use a darker color.  I worked board by board because I didn’t want to have any weird overlap lines.  I wiped off quite a bit of the paint, and I really rubbed and smoothed with the paper towel to get rid of any streaking and to work the paint into the wood, frequently changing to a fresh paper towel.  I did just one coat.  Once it was dry, I went over it with my palm sander and some fine (220 grit) sandpaper.  Then I waxed with Miss Mustard Seed furniture wax.

pickled table top

Well?  What do you think?  An improvement over the shiny cedar look?  I really love the new look, it is almost exactly what I was picturing in my head for the table top.

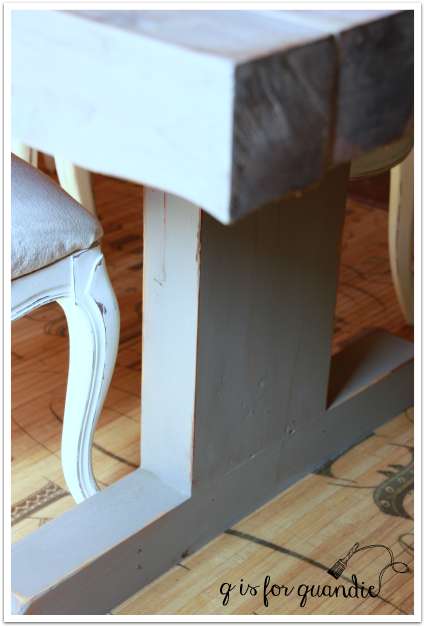
For the table base, I just sanded the original finish lightly and then painted it with Annie Sloan chalk paint in French Linen.  Once dry, I distressed and then waxed with my custom blend dark wax.

table base

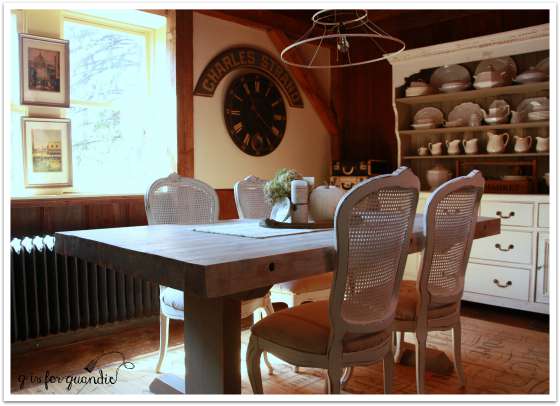
I’m really not sure I like the way the French Linen on the table base is playing with the Fusion Linen on the inside of the hutch or with the bamboo rug.  It’s funny because I would have called both of these colors a ‘greige’, or warm beige/grey.  But when you put them in the same room with each other the Fusion Linen has a warm green undertone, while the French Linen has a cool blue-ish undertone.  I debated using the Fusion Linen on the table base, but I thought that would be too ‘matchy-matchy’.

dining-table-after

Maybe I should have just stuck with the Old White on the table base?

Well, water under the bridge.  After nearly cramping every muscle in my body while crawling around under that table to paint the base, I just don’t have it in me to change the color just now.

dining table 2

I’m choosing the live with the colors for now and see how they grow on me.  I’ll be honest, this table still isn’t going to make it to the top of my favorite furniture list, but is is vastly improved.  And Mr. Q is happy with it too!

There is still one more big project that I’ll be tackling in the dining room, plus a few smaller tweaks here and there.  But I’m checking things off one by one, and before you know it, I’ll have this project completed!


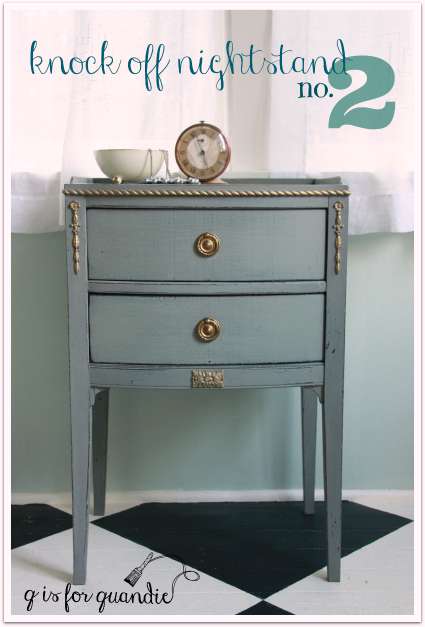
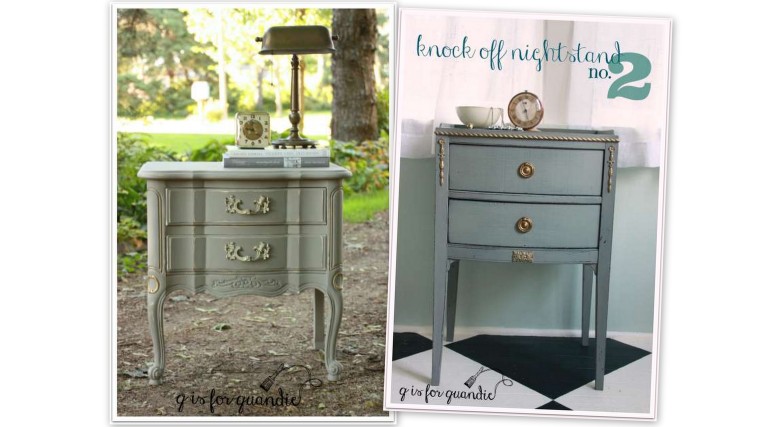
Neiman Marcus knock off no. 2

You all were very kind in leaving positive comments about my first Nieman Marcus knock off nightstand.  Thank you for those!

But I knew I could do better!  So last weekend while garage saling in Lake of the Isles, I picked up another candidate for the Nieman Marcus look!

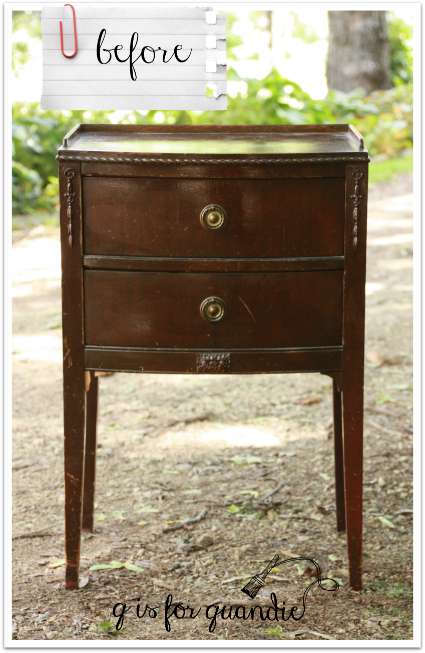
NM 2 before

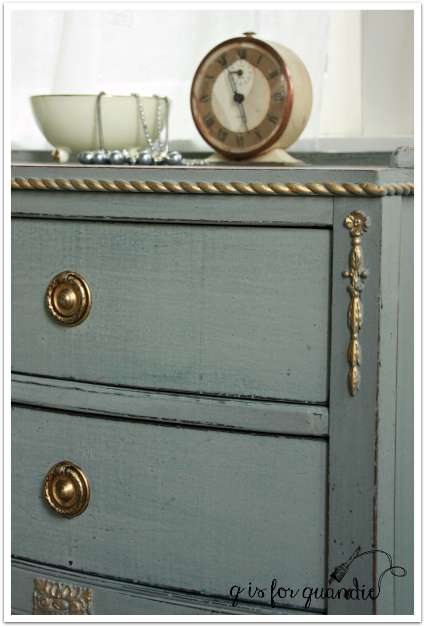
This one has more delicate features and it has some great details that I knew would be lovely highlighted in gold.  Someone had done a rather awful ‘make-over’ on it in the past.  It had a coat of drippy, shiny, poorly applied poly on it.  In fact, it looked as though they hadn’t even bothered to remove the drawer pulls, but just poly’ed right over them!

This time I did use MMS milk paint in Trophy!

NM 2 corner

And this time I added gold to all of the details, the braided trim around the top edge, the carved bits on the sides and bottom of the front and even the drawer pulls.

nightstand details

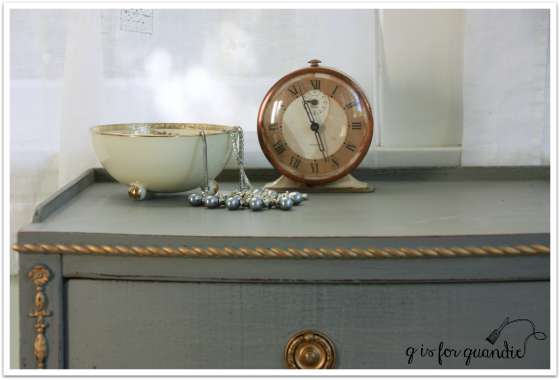
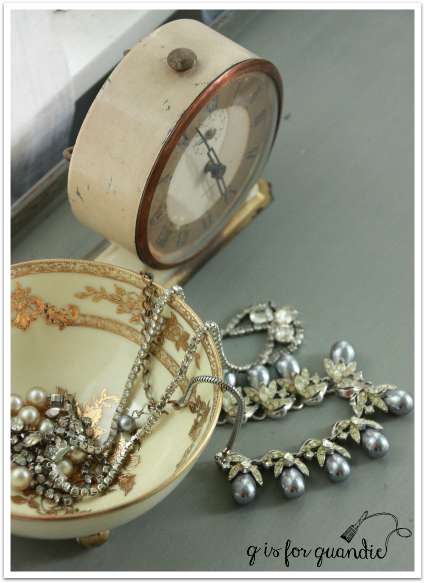
I staged it simply with an alarm clock and some lovely vintage jewelry in a gold rimmed bowl.

NM 2 staging

nightstand jewelry

I am much happier with this version of my Neiman Marcus knock off nightstand!

knock off nightstand no 2

Which is your favorite?

nightstand collage 2

Linking up with the Making Broken Beautiful party at The Curator’s Collection.