garage sale weight lifting.

Turns out, this past weekend was a really good one for garage saling.  There were multiple city-wide and neighborhood sales to choose from, including one of my favorites, MacGrove.

But first, my friend Sue gave me a heads up text about a sale that was just a few blocks from her house.  I popped over there quick on Friday morning and found some great furniture!

I purchased it all in the morning, but had to make two trips back later with Mr. Q and the van to pick it all up.

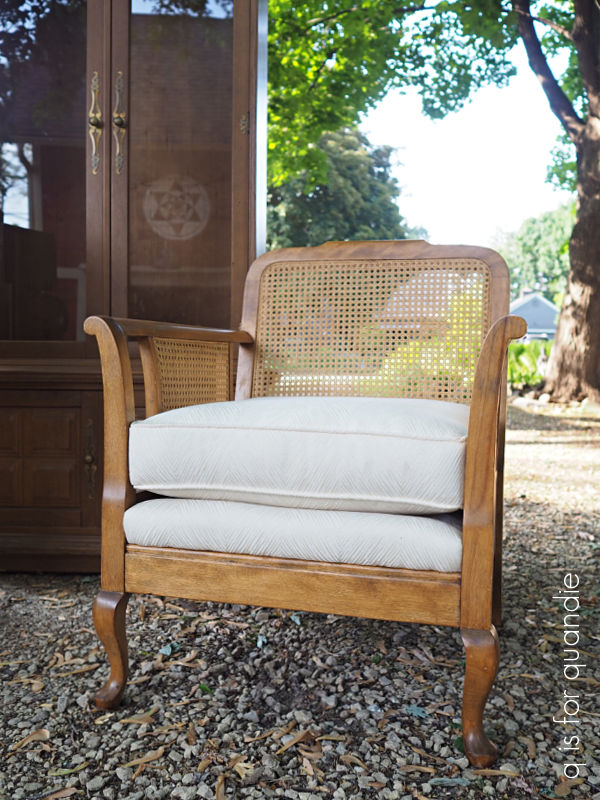
I was lucky to have his help because they were all fairly heavy pieces.  Even that cane back chair is surprisingly heavy!

The hutch was not only heavy, it was also cumbersome because of its size.

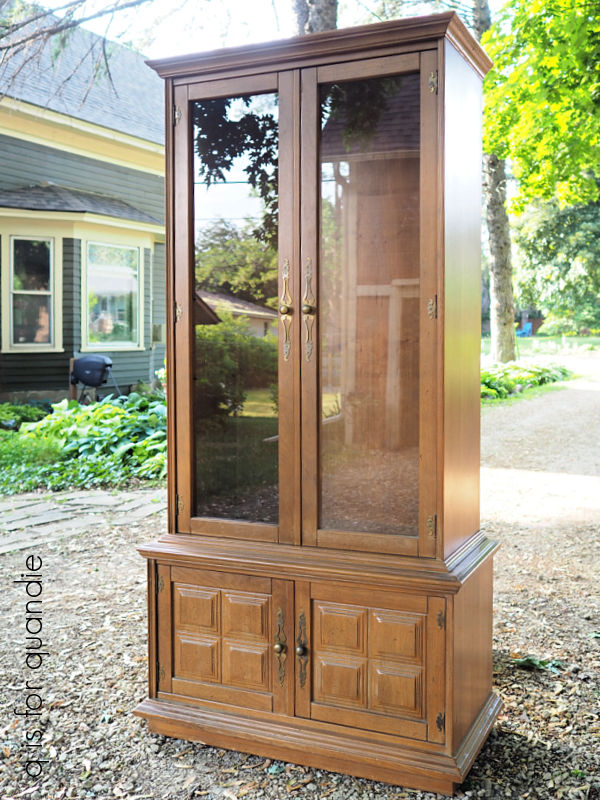
That’s going to be a fun one to paint up though.

Believe it or not, the dresser was the lightest of the three pieces.

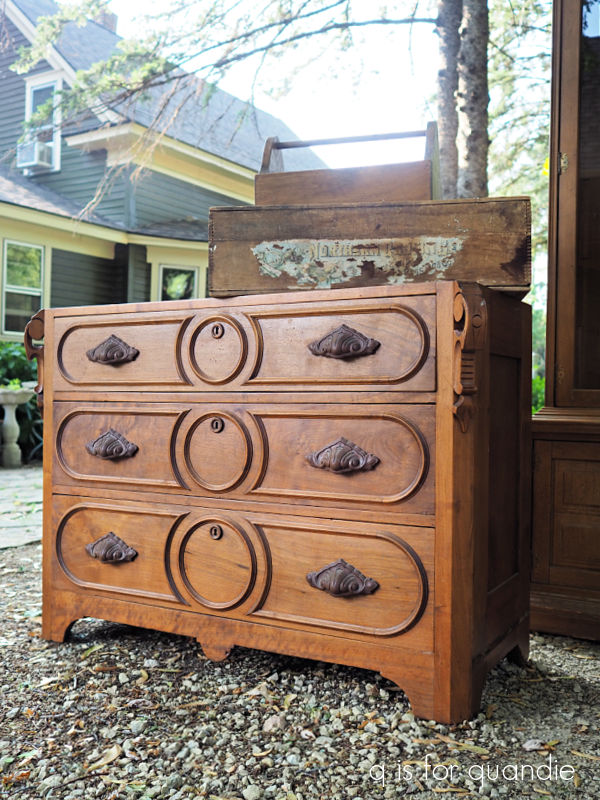
Possibly because it doesn’t have a top.

Apparently it originally had a marble top, but it broke at some point and was discarded.  I’m not exactly sure what I’m going to do for a replacement top, but I think I can come up with something.

But seriously, that wood is gorgeous.  I am definitely not planning to paint this piece, although it’s possible it will end up with a painted top of some kind.  We’ll see.

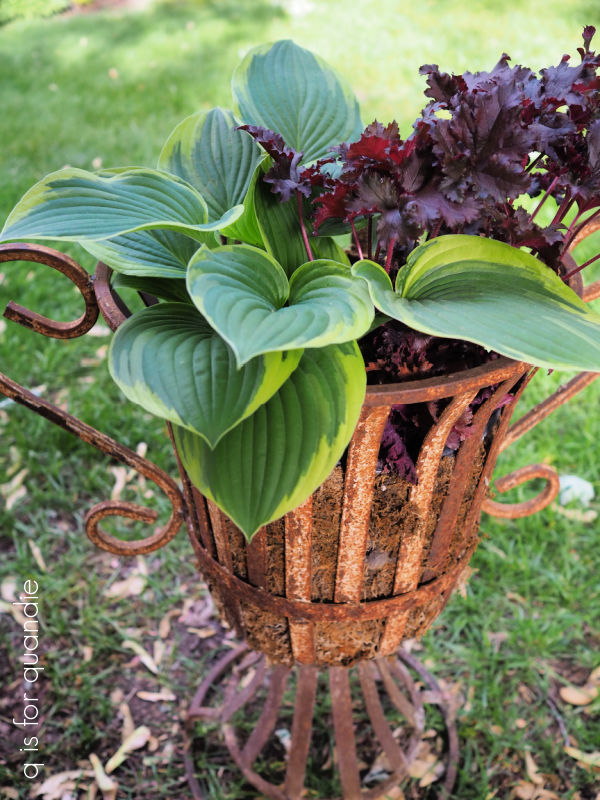
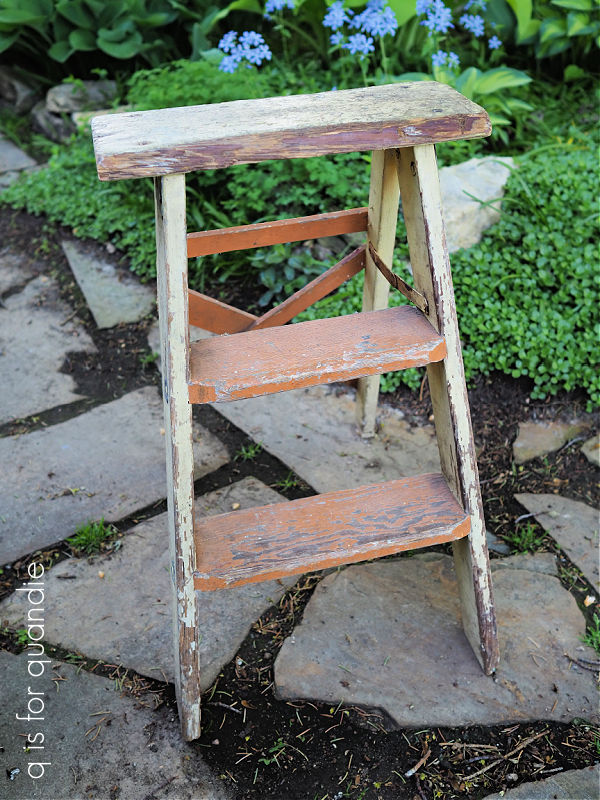
I did purchase just a couple of smaller items at this sale as well.

Those will both become painting projects at some point down the road.

On Saturday my sister and I went to the MacGrove neighborhood sale in St. Paul.  I did not have high hopes for this one because it had started on Friday.  Oftentimes all of the good stuff goes on day one.  But I did come home with a few goodies.

There was definitely a garden theme to this haul, but several of the items fit into the ‘heavy stuff’ theme I already had going from the previous day as well, starting with those chairs.

They are made out of wrought iron and are much heavier than they look.

And these garden edgers are also heavy wrought iron.

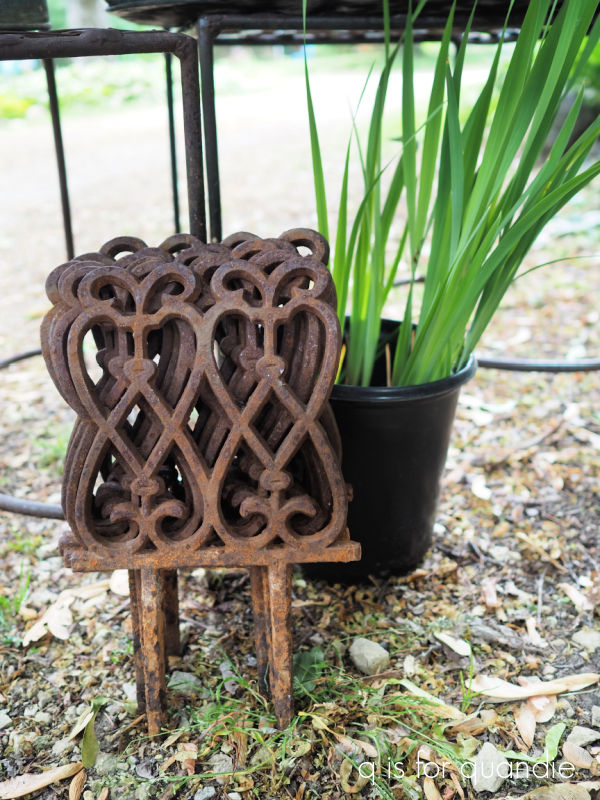
The plant behind them is a Japanese iris.  I’ve gotten quite a few of the plants in my garden from garage sales.  You always know that when a gardener has excess plants to get rid of, that means they must do well in our particular zone.

In keeping with my garage sale weight lifting plan, one of the last sales we went to had a fantastic pricing strategy.  Anything that you could pick up with just one hand was $2.

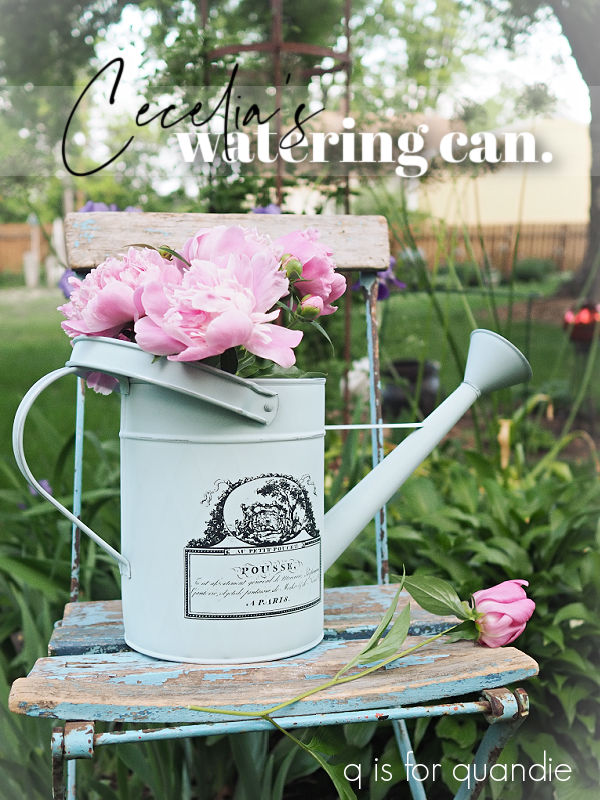
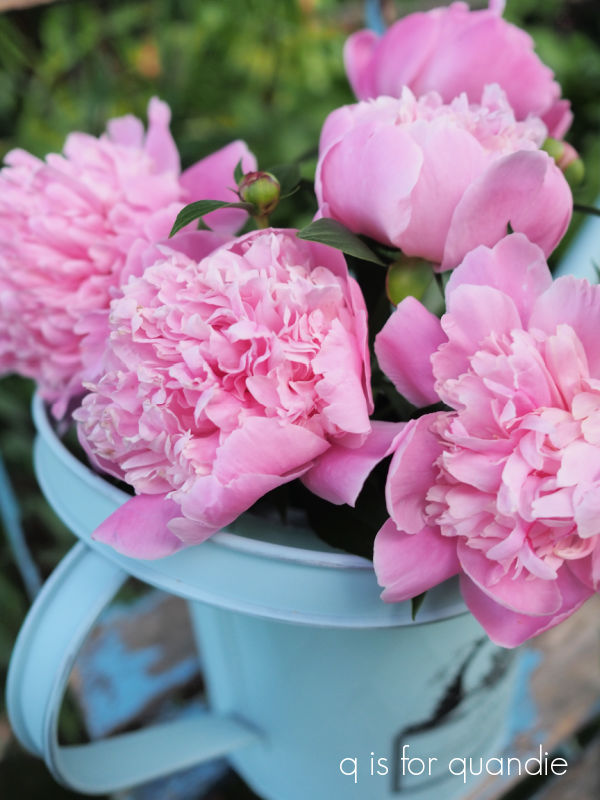
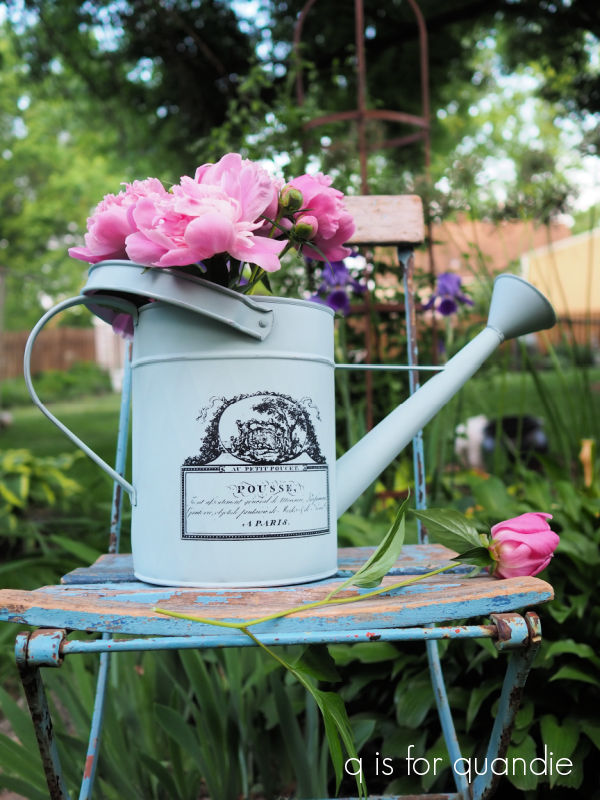
As it happened, they had quite a few things that I could pick up with just one hand, like this watering can.

And this copper boiler.

It conveniently already has holes drilled into the bottom so it can easily be turned into a planter.  The one I have on the side of the carriage house is starting to rust out quite a bit …

so I think I’ll just keep this one waiting in the wings as a replacement.

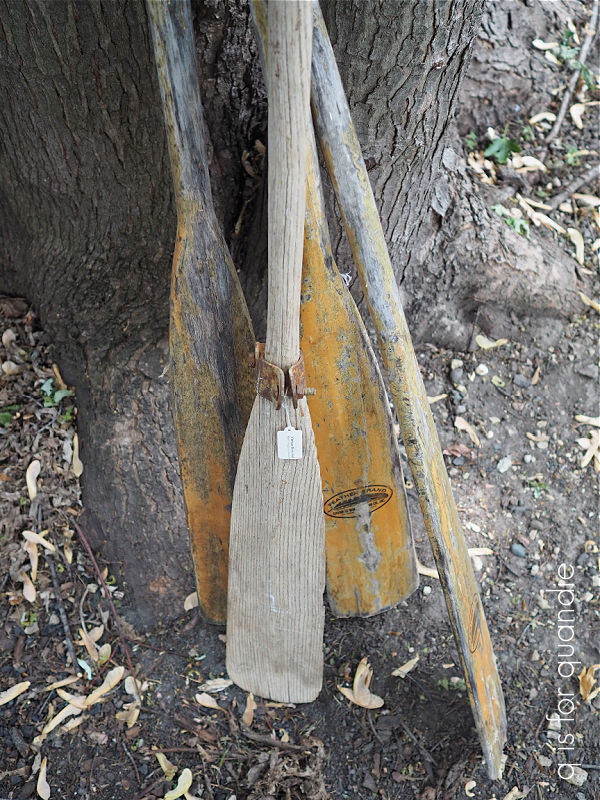
I also grabbed a bunch of old oars that were pretty easy to pick up with one hand.

Last up from the MacGrove sales is the garden obelisk.

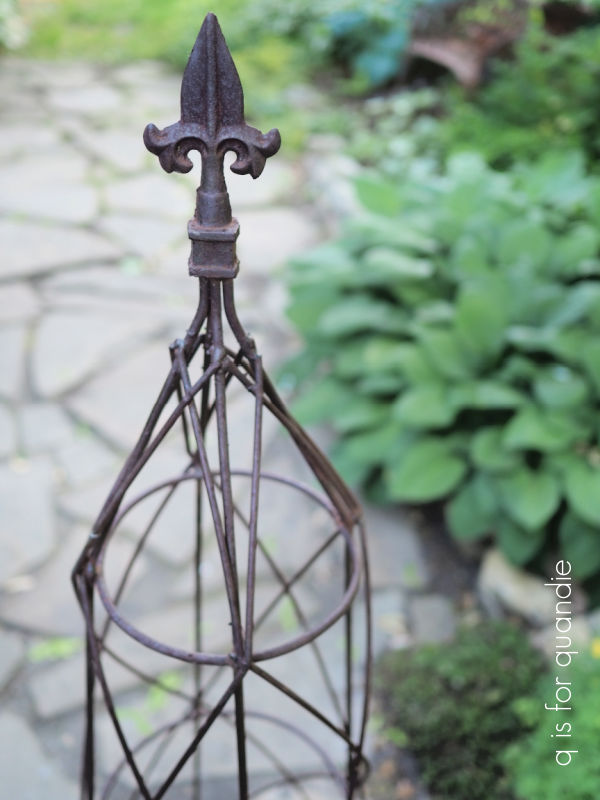
I have a few of these in my garden, all of which have come from garage sales.  This one felt ‘expensive’ by garage sale standards at $20, but I know they are quite a bit more new.  It’s a nice, quality iron and not a cheap knockoff version.

All in all, I definitely think I got my workout in lifting all of these heavy (and some not so heavy) items.  Also, I’m just realizing now that nothing really stands out for me as the ‘find of the day’, so maybe I’ll let you guys pick.  Which of these items would you call ‘find of the day’?  Leave a comment and let me know.

the cutting garden.

I know I’ve mentioned it here before, but for those of you who don’t know, I have a cutting garden out behind our carriage house.

A cutting garden is full of plants grown specifically for harvesting fresh flowers for arrangements.  It’s usually in an inconspicuous place where it won’t matter if you cut all of the blooms off of your plants (hence, behind the carriage house which is the big red, barn-like building in the photo below).  It’s really just a good place to grow things that don’t look that great in the garden except when they are in bloom, like peonies.

I know, I know, some people think that peonies are pretty plants even when not in bloom, but I don’t.  And they only bloom for maybe two weeks tops.  Plus, mine always end up with powdery mildew by the end of July and then really start to look terrible.  So I’m happy to have them tucked away out of sight.

There are really only two periods in the growing season when my cutting garden looks good.  One of them is later in the summer when the huge Annabelle hydrangea I have back there is blooming.

And the other was this past week or so while the peonies and Siberian iris were blooming.

Somehow, this year it looked particularly fabulous, but I’m not sure why.  Maybe just because everything back there is firmly established now and can pretty much be left alone.

The Siberian iris are super tall, and full of flowers.  Last year I got relatively few flowers, this year it’s loaded.

I am hoping you can sort of judge the size of them in this next photo.

That is them on the left, then I have a white peony in the middle and the big mass on the right is the Annabelle hydrangea.  That thing has gotten huge this year as well.

The peonies back there all did really well this year too.

Another thing you can see in if you look closely at my photos is that I barely bother to weed back there.  Mr. Q and I usually go through once or twice a year and pull out the big weeds but we haven’t done that yet this year.  So far it doesn’t seem to be impacting the plants.

I have two top favorites amongst my peonies.  The first is this one …

It’s the most beautifully pale, blush pink in the center that gradually turns white towards the edges.  I love how delicate the color is.  I’m fairly sure that this one is called Raspberry Sundae, but don’t quote me on that.

Then, in direct contrast, my other favorite is this one.

The color on that one is so vibrant that my camera doesn’t even know what to do with it.  It ends up almost looking fake.  It practically glows out in the garden.

I’ve come to realize lately that I much prefer the double peonies over the singles.

Single peonies have one or more rows of the larger petals, known as guards, or guard petals, surrounding a center of stamens.

I currently have two single peonies; the one shown above and a bright pink one that I purchased without reading the fine print (I thought it was a double).

They look surprisingly like a tulip before they open …

But once they open up I don’t particularly like them.

I’m planning to dig up both of my single peonies in September and give them to my neighbor, nnK.  FYI, September is the best time to move established peonies if you must.  But be warned that peonies do not like being moved and it will take them a couple of years to bounce back afterwards.

I much prefer the double peonies with their many layers of petals and relatively insignificant stamens.

I’ve decided that life is too short, and my garden space is too limited, to have plants that I don’t like in my garden, so once the single peonies have gone I’ll replace them with more doubles.

Since I’m sharing peony photos today, I just had to include this peony that I saw growing in a MacGrove alley during their neighborhood garage sales yesterday.

Isn’t that something with its pink guard petals, white inner petals and pink stamens?

There are so many incredible options to pick from out there!

Speaking of peonies, some of you may not have been following me back when I experimented with keeping unopened buds in the fridge for a few weeks (or a couple of months), and then taking them out to use in an arrangement.  It worked out great when I did it correctly and you can read all about that process here.

Then last year when I attempted to do this again I messed up.  I wrapped the buds in damp paper towels inside the ziploc bags, and I ended up with a gross, moldy mess.  So follow that first process that I linked above if you want to try it.

Rather than save any of my peonies this year, I decided to just enjoy all of them right away.

So I’ve been cutting them and bringing them in the house to enjoy their wonderful scent.

Unfortunately, peony season is short and most of mine are already done blooming.  There will be a few stragglers left here and there for a few more days, but that’s it.  I did my best to enjoy them while they lasted though.

How about you?  Do you grow peonies?  Do you have any favorite varieties that I should know about?  Leave a comment and let me know.

a pair of camp-ish buoys.

Remember the buoys that I found while thrifting way back in March?

I have to admit, they look pretty good in that photo.  And they were pretty good.  Except that up close and personal they looked a little too fake to me.

I had tucked them aside for summer, and when the shop where I sell (Reclaiming Beautiful in Stillwater, MN) decided to have a Ralph Lauren-ish summer camp sort of theme in their window this weekend, I decided to give them a quick makeover.

When I hear Ralph Lauren, I automatically think red, white and blue.

I don’t know, is that just me?

Well, either way, that’s what I decided to go with on my buoys.

I painted one of them in Dixie Belle’s Honky Tonk Red

and the other in their Deep Sea.

After two coats of paint were dry, I sanded well to distress them.

Today’s q tip:  Always, always, always sand a dark color first before adding a white detail over it.  I’ve learned the hard way that if you sand a dark color (and especially red) and a white at the same time, you’ll end up smearing the dust from your color into the white.  And that never looks good.

So I sanded, wiped the dust away, and then used painters tape to add some stripes in Dixie Belle’s Endless Shore.  I then also stenciled some numbers onto the taller buoy with that same paint.

I have to admit, in hindsight I’m guessing that quite a few of you would have preferred I left them alone.  But they definitely have more of a hand-painted look now.

I’m also wondering if I got Ralph Lauren mixed up with an Americana sort of theme.

But then, Ralph Lauren and the American flag kind of go hand in hand.

And the shop certainly turned out fabulous …

There are my buoys, see them in about the middle of the frame?  I think they fit right in.

And here’s what’s in the window.

Lots of stuff that would be fabulous in your lake cabin, or on your three season porch.  Or maybe even just in your cabin themed guest room.

If any of you locals are looking for something fun to do this weekend, I recommend heading into Stillwater and checking out Reclaiming Beautiful (open 10 a.m. to 5 p.m. Thursday, Friday and Saturday, not open Sunday).

Thank you to Dixie Belle Paint Co for supplying the paint used for today’s project.

cecelia’s watering can.

A friend reached out to my husband the other day asking if I’d like to have a watering can that she was getting rid of.

Most of you know that I have a thing for watering cans, and I have quite a few in my non-collection (so called because I’m in denial that I collect things).

But I usually stick to vintage watering cans, and Cecelia was discarding a new watering can.

Still, she was giving it away, and Mr. Q was happy to go pick it up from her.  We hadn’t seen Cecelia in quite some time.  So I said yes.

Cecelia had purchased this can planning to actually use it for its intended purpose, but in the end it wasn’t really very functional.  The water sort of trickled out and dripped all over.  I know how she feels, I purchased a new (and rather expensive) watering can myself last year intending to use it for fertilizing my flower pots with a water soluble fertilizer and it also doesn’t really work very well.

I know, I know, you are now wondering why in the world I would purchase a new watering can rather than using one of my many vintage ones.  Well, that’s because most of those don’t actually hold water anymore.  The bottoms have rusted out, or the seams have deteriorated.

That being said, I did find one at a garage sale last year that works beautifully.

In fact, I considered it my find of the day back then because it’s perfect for my fertilizing needs.

So now the expensive new one is gathering dust in my workshop.

But I digress, back to Cecelia’s watering can.

As you can see in the ‘before’ photo, the finish was pretty slick and shiny.  So rather than attempting to paint it with my usual Dixie Belle paint, I decided to spray paint it.  Spray paint will do the best job of sticking to a surface like this one.  Plus, I happened to have a can of the Rust-Oleum Chalked paint in Serenity Blue on hand.  I have to admit, if I’d had to purchase the paint I probably would have come up with another option.  Have you seen the prices on the Chalked spray paint these days?  The cheapest I’ve found is $10.39/can at Target, but most places are charging nearly $12 per can.  And one can doesn’t go that far.

Once the paint was dry, I added one of my favorite Classic Vintage Labels transfers from re.design with prima.

I did a little light sanding on the edges to add some slight distressing, and then finished it all off with a coat of clear wax.

Next I filled it up with some of my earliest peonies.

I took these photos last Saturday morning, and as of then only my old-fashioned pink peonies were open.  These are peonies that came with the house, so I have no idea what variety they are.  Plus, they are at least 34 years old, and likely much, much older than that.

As seems to be the case nearly every year, the opening of the peonies coincided with a hot spell, which speeds up the peonies.  By Monday morning I had flowers open on almost all of my peony plants.  I’ll be sure and post a peony update sometime later in the week.

But for now, how do you like this quick and simple watering can makeover?  It may not work well for actually watering things, but it makes a great vase for peonies!

a rookie mistake.

I finally got out to do some serious garage saling this past weekend.  I started out on Thursday by myself.  It’s a new thing I’m trying, going by myself.  I just wanted to spend a couple of hours, and then move on to do other things with my day.  The jury is still out on whether or not going out alone is going to become a thing, we’ll see.

I went to the city wide sales in Roseville, MN.  I probably made it to about 20 sales, and I came home with just one thing for myself.

Yep, that’s it.  A vintage doll crib.  I have a fun plan for it though, and you’ll see that here soon.  But um, yeah, Roseville was pretty much a bust.

Then on Saturday my sister and I went to the Nokomis neighborhood in Minneapolis.  We always try to make it to that one because our parents both grew up in the Nokomis neighborhood, so it’s fun to take a trip down memory lane and drive past the grandparent’s old houses.

I have to admit, I didn’t have high hopes for Nokomis.  Last year it was a total waste of time.  But lo and behold, this year we filled up our vehicle.

I found some really fun things, but I also made one sad, rookie mistake which I’ll share in a minute.

But first, the good stuff.  I found a pair of kid sized wooden chairs.

I’m always on the lookout for these.  I’ll put them away until Christmas, and then paint them up for the holidays like these …

I’ll also hang onto the sled until the holiday season, when it will receive some sort of paint/stencil treatment.

And of course I will remove that bright yellow polyester rope and either replace it with something more appropriate, or just leave it off altogether.

I even came home from this sale with a piece of furniture to paint.

You can sometimes get the best deals on furniture at garage sales.

This next item was one that I just couldn’t pass up.

There’s just something about vintage dollhouses that speaks to me.  I only have a few memories of my aforementioned grandparents, but one of them is of my grandpa storing my mom’s old dollhouse in the rafters in his garage and bringing it out for us to play with when we visited.  It seemed quite magical at the time.  Plus, this one was priced at a mere $5.  How do you walk away from that?  I think it will be perfectly charming with a good cleaning, a couple of repairs and a fresh coat of paint.

I purchased the next item, a slightly cracked stoneware bowl, for one specific reason …

to house those blue and white bocce balls.

I’d had them for quite some time and had never found just the right ‘container’ to put them in.  I thought the stoneware bowl would be the perfect size, and so it is.

I added a small segment from one of the I.O.D. Traditional Pots blue transfers to the rim.

And it all goes perfectly with the grain sack fabric that I also purchased at the Nokomis sales.

Next up is this pretty trio of watercolor prints.

It’s really hard to read the titles and signature in the bottom right corner …

I had to take a photo and enlarge it on the computer to read it.  But eventually I could see that one says ‘Højbro Plads’ and another is ‘Nikolaj Plads’.  I couldn’t read the third one at all though.  I thought that perhaps the signature was something like ‘Mads Stage’, but I didn’t think that could be a real name.  So I googled it figuring I’d find something close, but in the end it actually is Mads Stage, who apparently was a Danish artist from Copenhagen.

I’m not sure what I will do with them, I may re-paint the frames, or I may just leave them ‘as is’ and sell them on.

Tucked in behind the prints is a pair of large gold frames.

I plan to just try selling those as is, with nothing in them.  One could hang them on the wall, and then hang a smaller item inside the opening like in this example I found on pinterest.

I also grabbed these three urns at the sale that had the gold frames.

They are a bit on the small side, but still pretty fab.  I am planning to give them the rusty look.

That sale also yielded this little pile of goodies.

You gotta love a good tray, and a good crown.

I’m not sure what I will do with the three crowns, although you never know when you may need to crown a gargoyle.

I think my love of zinc crowns can be traced back to Jeanne d’Arc Living magazine.  Are any of you fans of that one?  If so, you probably know exactly what I mean.

In fact, I’m going to call the crowns my find of the day because I simply love them.

Unfortunately, this sale is also where I made that rookie mistake that I mentioned earlier.

I purchased this sweet little angel perched on a sphere.

I thought he would be totally amazing with a rusty patina.

It wasn’t until I got him home that I realized he was missing a wing.

Dang!  How did I miss that?  I really should know better!  I’m so disappointed that he isn’t whole.  I may still rusty him up and put him in my own garden, but I won’t be able to sell him on with only one wing.

Hey, maybe if I add a crown no one will notice that he’s a one-winged cherub.

What do you think?

So, tell me, which of my finds would you have picked as the ‘find of the day’?  Leave a comment and let me know!

a garden fail?

Rather than bring you another post about how fabulous everything looks in the garden, I thought I’d keep it real this week and share one of my garden fails.

It’s called heuchera (or coral bells), and it’s all the rage these days.

If you go to your local garden center you’ll likely see row after row of heucheras in nearly every color of the rainbow.

It’s hard not to be seduced by that amazing variety of foliage color.  Especially for someone like me who gardens mostly in shade and tends to choose plants for their foliage rather than their flower.  Heuchera do flower, but the flowers aren’t at all showy.  They usually send out tall spiky stems with little bitty flowers on them, although there are varieties with flowers that are a bit showier than these …

In fact I often just cut the flower stalks off, much like I do with hosta flowers.

Isn’t this leaf color amazing though?

That variety is called Fire Alarm, and you can see why with that bright red foliage.  I planted three of them in the garden near my carriage house last year and the red was perfect there.

But here’s what they look like so far this year.

Yep, pretty sad.  Not entirely dead, but really barely there.  The third plant is so tiny that I had to add an arrow to the photo just so you could make it out.

I also planted five heuchera in front of my wrought iron bench last year, and here’s how they are looking now …

Also pretty sad.

When I get results like these with a plant I tend to immediately think ‘hmmm, what did I do wrong?’

But in this case, I’m hearing some of my favorite garden youtubers mentioning that heuchera does not reliably come back for them either, especially the newer cultivars.    I’ve also read that although they are said to be hardy to zone 4, they really do better in no less than zone 5 (and I’m a 4b).

Heuchera also have a tendency to ‘lift’ over the winter, and you can see that on this one that’s in my front garden …

When that happens you can dig them up and replant them level with the soil, or simply add more soil around the crown.  I dug that one up, pruned off some dead bits and replanted it.

Now I just have to wait and see if it will catch up with its neighbors (the plants in the foreground are the same variety of heuchera, just much bigger).

Overall, I’m pretty disappointed with the performance of the heuchera I’ve planted.  And honestly, I’ve gotten similar results for several years in a row now, so it’s not just a one-time weather based anomaly.

There is one possible solution to the heuchera problem and that is to treat them like annuals and put them in a pot.  I saw lots of them in window boxes when we were in Charleston last year (that pop of bright chartreuse is a heuchera) …

That being said, they are usually priced as perennials and thus make a rather expensive annual.  They definitely won’t survive the winter in a pot in our climate.  Coleus will give you a very similar look, also comes in a wide variety of foliage colors, and is quite a bit cheaper, so it’s probably a better choice for pots.

However, when you happen to find a bunch of Black Taffeta heuchera in the clearance aisle at Gerten’s for $5 each, well, then it does make sense to treat them as an annual.

So I put them in a couple of my rusty pots along with some Summer Wave torenia.

I also paired one of the heuchera with a hosta that I dug out of the garden for this pot.

These days I’m finding that we have a lot more shade on our deck than we used to, the trees are getting bigger every year!  So I’m giving up on trying to grow sun loving annuals in those pots.  I’m experimenting this year to see what I can do with more shade, so maybe hosta, heuchera and torenia will be a good combination for that.

Aside from the discount heuchera, I think I’m going to stop throwing my money away on heuchera though.

How about you?  Have you had much luck with heuchera?  Are you tempted by all of those gorgeous foliage colors?  Leave a comment and let me know.

a step ladder update.

Last week I shared the chippy step ladder that I picked up while garage saling.

As much as I like the chippy look, I didn’t love the color scheme.  Orange and yellow have never been my favorites.

I wanted to ‘save’ the chippy-ness, but give it a new color.  So I sanded off all of the loose paint, wiped it down with a damp rag, and then added two coats of Sweet Pickens’ In a Pickle milk paint.

Once dry, I sanded it again.  Most of the new paint on the top chipped off.

But that’s exactly what I wanted, it looks authentically chippy … and authentically green.  I’ve successfully covered up most of that yellow and orange, although there may be little bits of it peeking out here and there.

Before adding a topcoat of clear wax, I added a couple of stencils to the lower two steps.

and to the back …

That stencil is from the Grain Sack Minis stencils from JRV Stencils, fyi.

This step ladder is a bit too rickety to actually use as a ladder, but it would make a fabulous ‘side table’ on a covered porch.  Or possibly a plant stand.

I staged up these photos with the last of my lilacs.

Don’t forget, the time to prune lilacs is immediately after they are done blooming.  I’ll be getting to that in a couple of days.

In the meantime, how do you like the step ladder makeover?

Do you agree that green is better than orange and yellow?  Or maybe you preferred the original color.  Leave a comment and let me know!