
Before I get into today’s post, I have to mention … Fusion’s Park Bench green on mid-century pieces seems to be a magical combination. The dresser I posted on Wednesday is already sold. Once again, less than 48 hours from posting on Craigslist to being sold. I’m going to have to start painting everything green! How boring would that get for you guys?
Well, not to worry, today’s pieces aren’t green, and in fact they aren’t even painted … yet.
Do you guys remember the day for chairs last September? I ended up bringing home 8 chairs from a neighborhood garage sale.
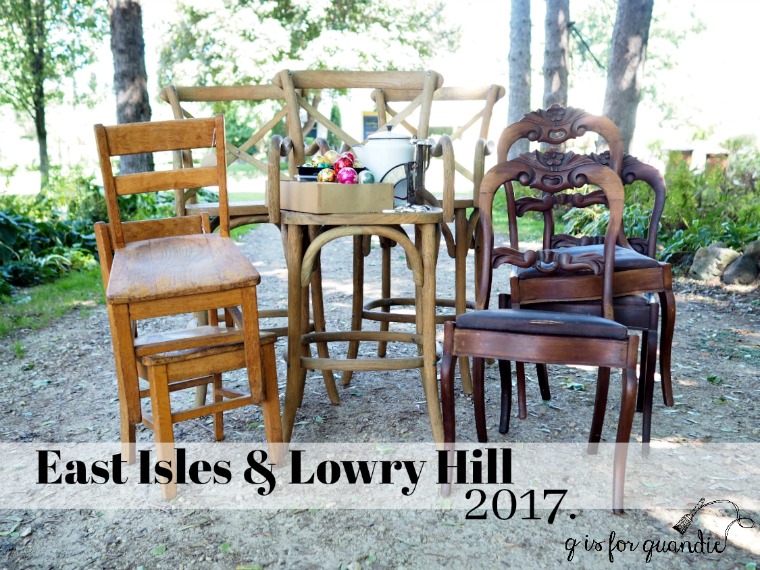
I love the carved detail and the pretty curvy legs on this trio of chairs.

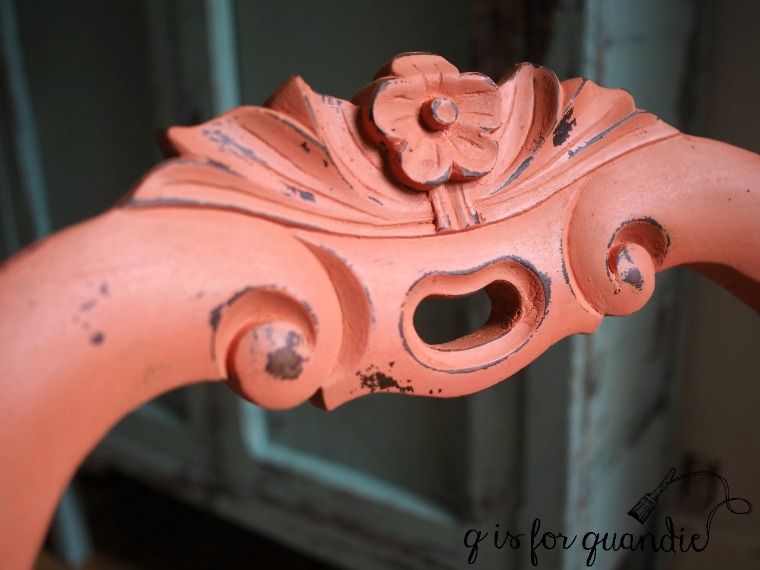
Shortly after bringing them home I decided to save two of the chairs to deal with later, but paint the third chair for my guest room.

I used Miss Mustard Seed’s Apron Strings milk paint and the milk paint did its fabulously chippy thing.
My plan all along was to paint and reupholster the remaining pair, using the Iron Orchid Designs Decor Stamps on some basic muslin fabric for the upholstery.

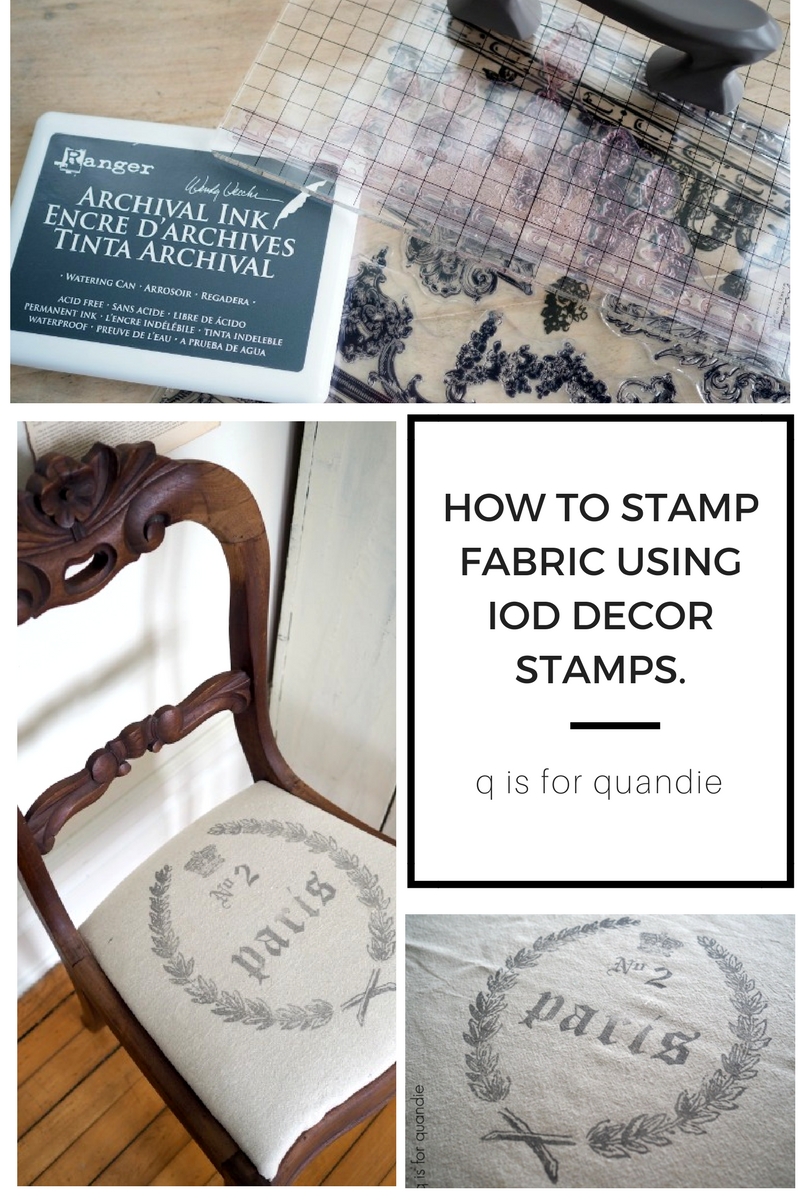
Here’s the Decor Stamps how-to.
Step no. 1 – pull out your fabric, ink and stamps and do some test runs to be sure that the ink you are using will work well on fabric, and that you like the color combo.

Not all stamp inks are appropriate for use on fabric, so it’s always a good idea to test your ink first (or read this great article comparing various ink brands for use on fabric). It’s also a good idea to see exactly how your ink color will look on your fabric before committing fully as well. I was totally expecting that I would use the Sepia colored ink for this project, but after trying both that and the Watering Can I realized that I much preferred the latter.
Also, I have to note here that I like to use ink rather than paint for any stamping project (whether it’s on fabric, wood or paper). Paint can be sloppy and harder to control than ink. I get a much crisper image with ink. That might just be my personal experience, but if you’re going to use paint be sure to fully test it on some scrap material first and make sure you like how it looks.
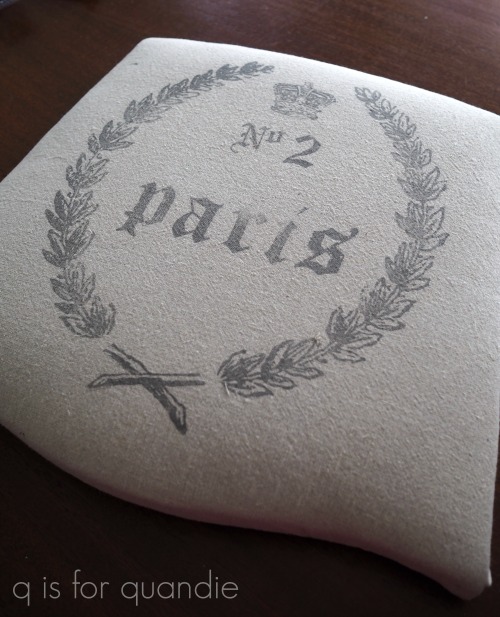
Step no. 2 – lay out your stamped design on the chair seats, making sure it fits properly.
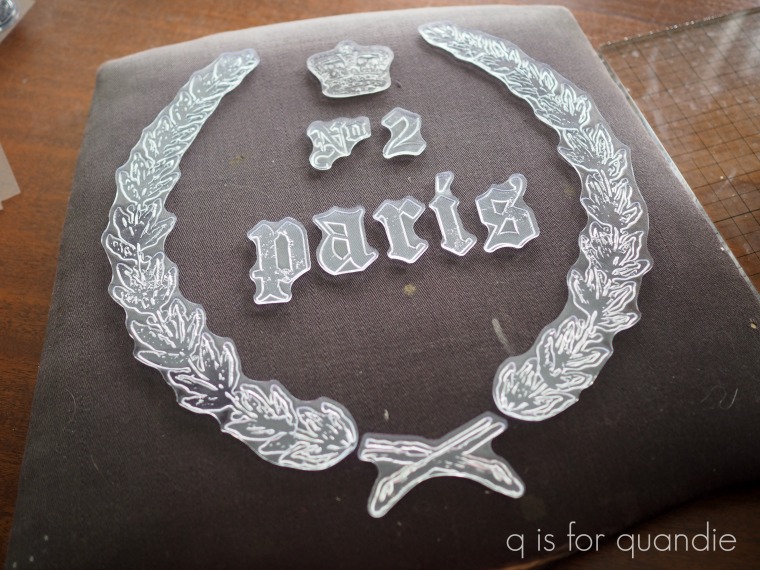
I used stamps from two different sets of IOD Decor Stamps; the letters and no 2 are from the Alpha II set and the wreath and the crown are from the Grain Wreath set (by the way, the smaller wreath and rooster I used for my test are also from the Grain Wreath set).

Be sure that you have placed the pieces stamp side down with the smooth flat side up. If you have any letters or numbers in your design you should be able to read them as shown in my photo above.
Once your design is laid out just place your IOD 10″ x 12″ acrylic stamp block over them and press down lightly. It picks up the stamps almost like a magnet. That smooth side of the rubber stamp will easily cling to the acrylic block. At this point you could still change the placement of any of the stamps if you want to by pulling the individual stamp off and re-positioning it.
Now it’s time to ink up your stamp by pressing it into the stamp pad making sure it is evenly covered with ink (hold it up to the light and you can easily see if it’s well inked). Place your fabric on a flat, hard surface. The surface under your fabric is going to determine how well your stamp works so make sure it is flat and doesn’t have any concave spots. Place your stamp where you want it on your fabric (I tried to keep mine centered on a piece of fabric that was about 3″ bigger than my seat all the way around). Then press firmly on the block over all of your design trying not to rock the stamp, just press straight down. Use your hand to press down on the acrylic block above anywhere there is a stamp.
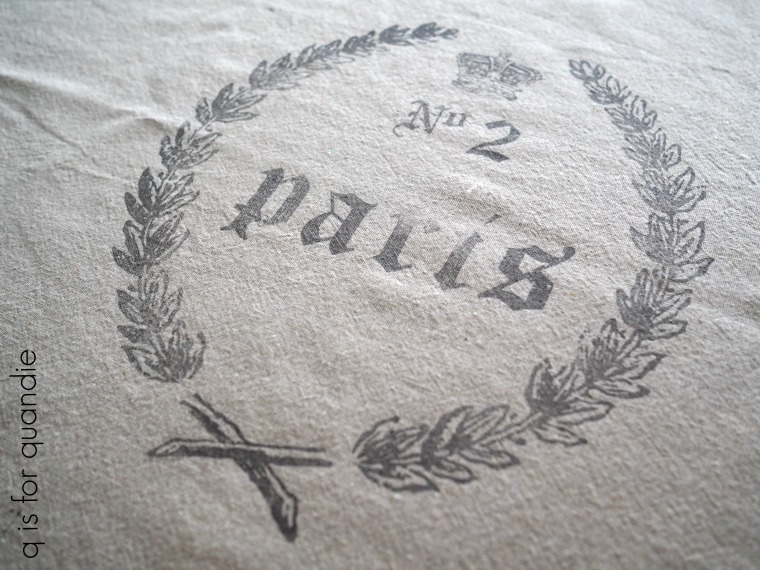
Step no. 3 – place the fabric over the chair seat, centering the design appropriately. Staple your fabric in place, and voila! you are done.
Once I had the seat reupholstered I decided to just pop it on the as-yet-unpainted chair quick to see how it looked. That’s when something really unexpected happened. I kind of liked it as is.
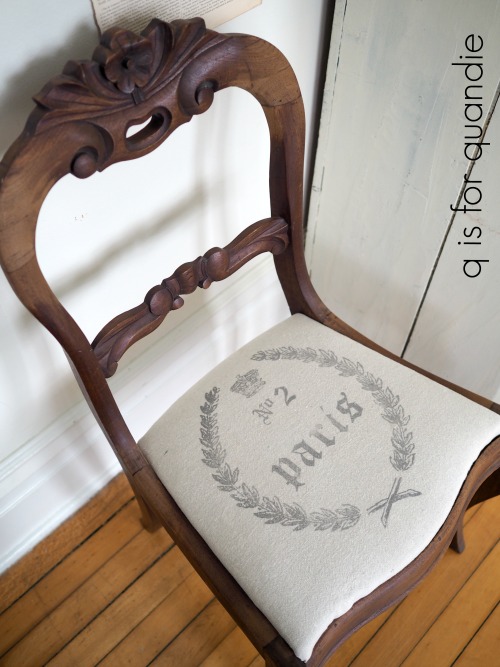
I totally did not see that coming. The finish is worn away in some spots and I think that is part of what I like about it.

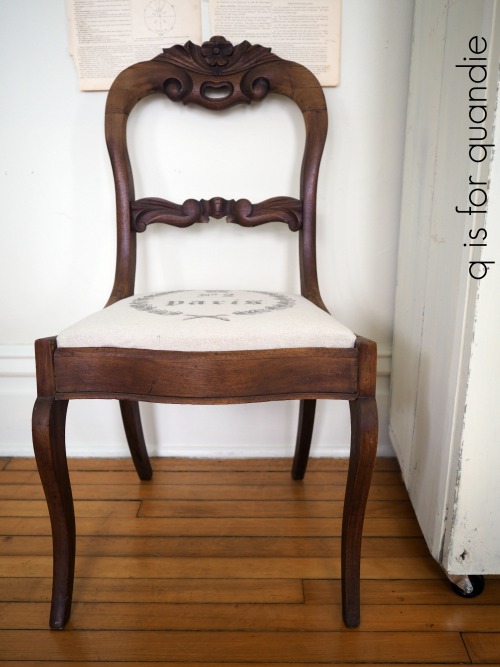
So now I have to make a decision. Do I leave these chairs unpainted? In which case I would clean them up and maybe add a coat of hemp oil or wax for some added protection.
Or do I paint them? Most likely in a chippy look using milk paint in white, or maybe pale grey (check out my pinterest board full of chippy chairs for inspiration)?
Any thoughts? What would you do? Let me know with a comment.

And in the meantime, be sure to pin this post for future reference!

I’d leave them too, they look beautiful. Of course if they don’t sell, you’ll always have the option to paint. Can’t wait to come see your guest bedroom, love how it’s coming together! Maybe there will be a post on the cabinet door project? 😉
LikeLike
I always try to make the decision about painting before I add wax or oil. Once the wax or oil is on, it becomes much more difficult to paint. But true, down the road if they don’t sell ‘as is’ I could eventually paint them. I like your thinking on that. As for the guest room, I’m waiting for something from Prima Marketing for that spot above the headboard … as soon as that gets here, I can proceed with my plans (insert evil mastermind laugh here).
LikeLike
I need to get busy with my IOD stamps. I used Fusion Mineral Paint and it worked well. I poured it into a sponge and used it as a stamp pad. I want to try ink so thanks for the link to compare some brands.
Those chairs are beautiful as is. I like when they have some of the finish worn off. I have 2 of my parents dining room chairs that are worn. I use hemp oil or lemon furniture oil every 3 m months to keep them hydrated.
Your chairs would also look amazing painted, but today I’m voting to leave them.
LikeLike
I’m so glad to hear from others who like that worn finish! It didn’t look great with the dull, ripped up fabric that was on the seats, but somehow adding the stamped fabric totally elevated the look. Yes, try the ink and see what you think. I know lots of people also use Fusion paint to stencil with good results, but I prefer a thicker craft paint for that as well. Perhaps I’m just messier than most and need a more controllable medium to get a clean look 😉
LikeLike
Oh- don’t paint! I have a pair of similar balloon chairs and I hemp oiled them and reupholstered the seats. The original wood is just too pretty to paint!
LikeLike
I love that I’m getting all of these votes for not painting. I was a little worried that it was plain laziness that had me thinking I wouldn’t paint them 😉
LikeLiked by 1 person
Hi Linda! My first thought when I saw the photos of the chairs was to leave those pretty carved ones wood.
LikeLike
It seems pretty much unanimous so far!
LikeLike
I vote as is! Love the slightly worn finish and for some reason, I’m loving warm wood tones lately. Normally I’m all about paint but changing the seat cover really brought a fresh look to this pair!
LikeLike
I’m with you Sheri, normally all about paint … but I think these will stay unpainted 😉
LikeLike
Well, I was shocked that I, too, love them as-is! They are beautiful!!!
LikeLike
LOL, I know, slightly shocking right? We’re painting people! But sometimes wood is good 🙂
LikeLike
I vote to not paint them. The wood looks beautiful! Love them!! I could not get rid of these!
Blessings
LikeLike
Another vote for no paint!
LikeLike
I am on the “no paint” side. The wood is warm and has depth as it ii and the carving is beautiful!
LikeLike
It does help that the wood is a decent color, not too red or too orange.
LikeLike
I love it Linda ! So glad you left the old wood as is and with the lighter seat cushion it brings out the beautiful wood carving ! Beautiful job ! I may have an old rocking chair for you to look at and see what you can do for it . Let me know next time you’re in my neck of the woods.
LikeLike
I think I might be in your neck of the woods today. I’m dropping my car off for service and then my sister and I are going to hang out, maybe do some shopping over your way.
LikeLike
The chairs are beautiful and more lovely with your new stamped upholstery. Since they are in such nice condition and beautiful wood, I vote to leave them unpainted. Great job. Thanks for the tutorial.
LikeLike
I have to say, up close the wood finish is not in great condition. It’s quite worn away in spots, you can see that more easily in the ‘before’ photo. But that’s sort of what I like about it, so I will just add some hemp oil or wax and call it good!
LikeLike
Voting for no paint, they are beautiful with the warm wood tones. The carving is so deep that it does show up well and there is just something about the light seat with the wood that really looks great. These are more French country than cottage and French country is a lot more wood. Cool stencils too. You van re-use them unlike the rub on designs! Always a plus for me.
LikeLike
Yes, I was going to point that out about the stamps in my post but neglected to do so. The stamps are much more versatile than either a rub on or a stencil. The sky is the limit with arranging them into your own designs. The only caveat with the alpha stamps is that you only get one of each letter, so words with the same letter twice would be a bit trickier to line up. Of course, you could still do it by stamping twice. And you are so right about french country, love that!
LikeLike
The wood is stunning, so I also vote to leave, as is. Good job, Quandie!
LikeLike
Thanks Joni!
LikeLike
I vote no paint. The wood is so elegant and rich looking. I’d be worried paint would make them look like a cheap knockoff, and I’m guessing they’re the real deal? I think they’re beautiful as is. Thanks for the great tutorial!
LikeLike
Yep, the real deal. And still quite sturdy, which is nice in an older chair.
LikeLike
Love these “as is”. I think it will be hard for you to leave them alone though. Lol. When you get the urge to paint them, just start a different project……😉
LikeLike
LOL, you know me so well Terri 😉
LikeLike
With your stenciled fabric, which is gorgeous btw, I LOVE the look of the wood. Perfect as-is! 🙂 XO
LikeLike
Thanks Denise!
LikeLike
I love woods and white! Leave the chair as is.
LikeLike
Another vote for no paint!
LikeLike
Love the patina of the wood. The upholstered seat looks beautiful with it. Leave unpainted.
LikeLike
That wood does have a nice patina 🙂
LikeLike
Well I vote for Paint I love painted furniture
LikeLike
Finally. A vote for paint. This being a painting blog, I did think I’d see more votes for paint. But for now I think you are out-voted 😉
LikeLike
Paint it! Even though it’s very pretty unpainted, everything that you paint always looks super extra!
LikeLike
Thanks so much! Well … for now I’ll probably leave them unpainted, but I think they would also look amazing painted. Probably can’t really go wrong with these chairs, right?
LikeLike
Oh, I am so in the minority usually on this question! Unless it looks horrible, never, ever, ever paint good, beautiful wood. I have stripped too many DIY items that were painted avocado green and antiqued back in the ’70s to every paint something cute. These are great chairs as is:) And you usually are rehabbing a bad wood job when you do paint, so all is forgiven.
LikeLike
Normally you are in the minority, but today it seems that you are with the majority!
LikeLike
I like them unpainted with the new seats.
LikeLike
Thanks sis!
LikeLike
Oh they are sooo pretty as is but they would look so sharp painted black too.
LikeLike
They would be gorgeous black. Actually, I originally had a different fabric picked out for the seats and had I gone with that fabric I probably would have painted them black.
LikeLike
You are sos smart, I love those chairs.they are absolutely beautiful.Bettyfrom Ontario
LikeLike
Thanks Betty from Ontario!
LikeLike
I would paint anything, but not these chairs. For some reason, they just seem perfect as they are.
LikeLike
I think I’m convinced to leave them unpainted!
LikeLike
I love these chairs! The stamps are awesome. I like the stamps on fabric better then on furniture. What a great idea for the stamps. Thanks for the info.
LikeLike
The stamps are great for fabric. You could use them on table runners, window treatments, even clothing!
LikeLike
Lovely as it is!
LikeLike
Thanks Debbie!
LikeLike
The chairs are beautiful as they are, love the cushion cover.
LikeLike