how to minimize weeding.

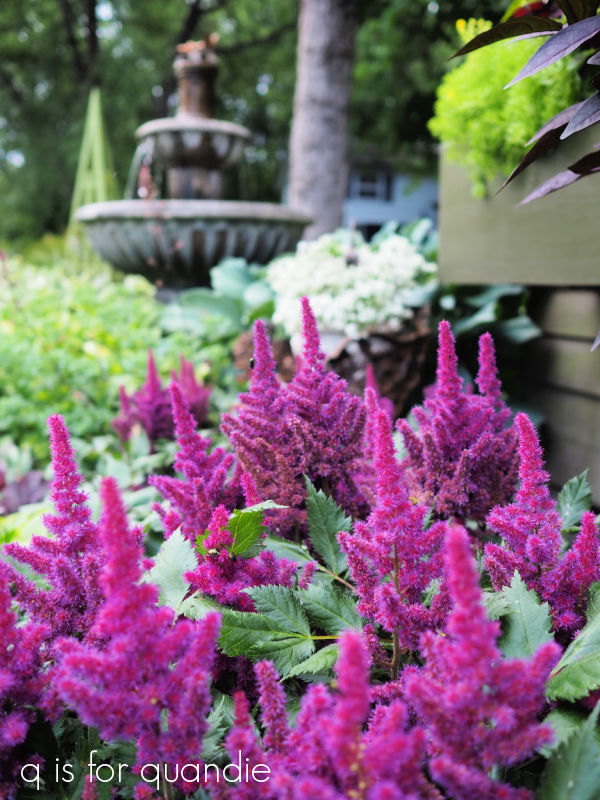
Welcome back for another Sunday morning in the garden.  Today I thought I’d share one of my secrets for minimizing the amount of weeding necessary in my gardens.  Groundcovers!

Well … groundcover plants I mean.  And it’s probably not really a secret.

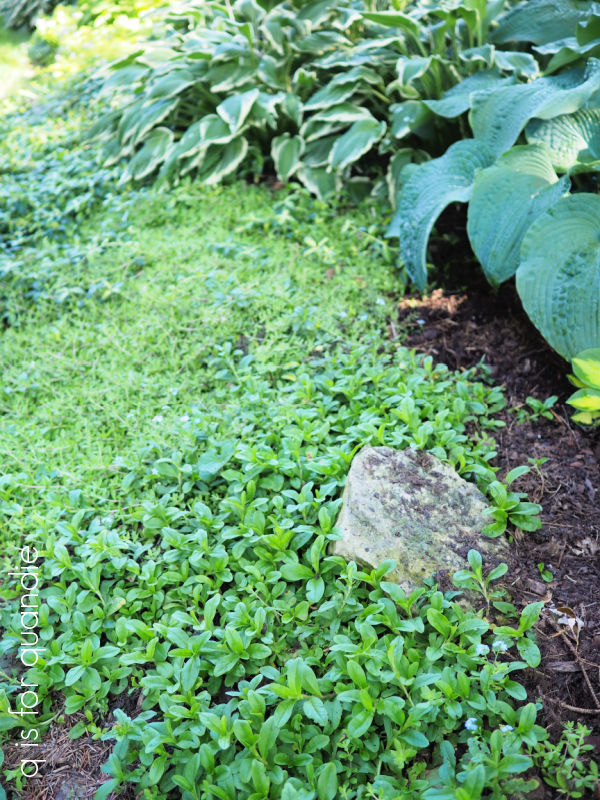
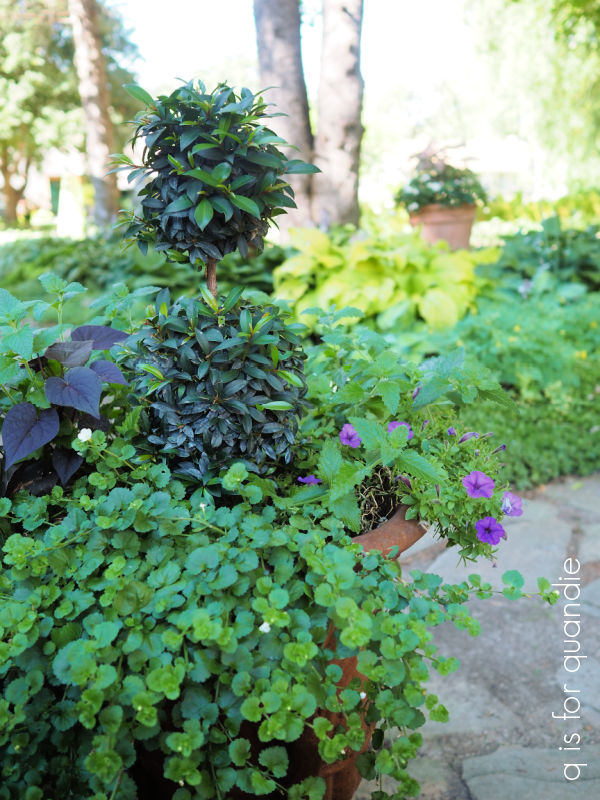
I love using groundcover plants along the edges of my perennial borders.  As they mature, they fill in all around the taller plants, and they spill over the edges softening the line between lawn/patio/walkway and garden.  Once they fill in, they don’t leave any room for weeds to grow.  Sure, you’ll get the occasional clover popping up, but it’s super easy to pull those out.

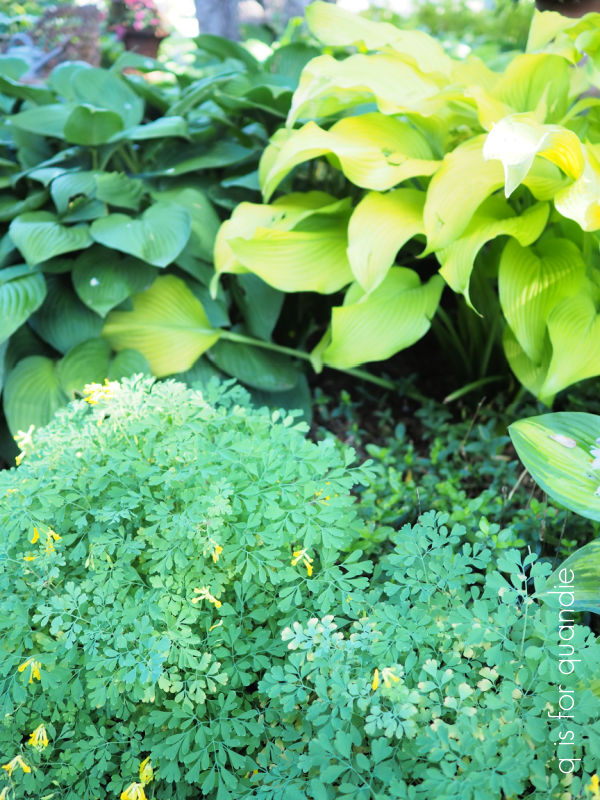
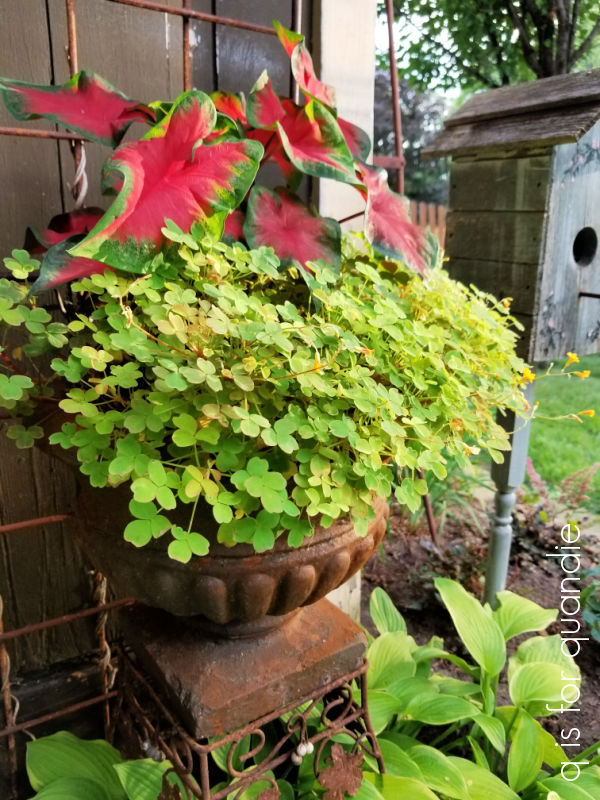
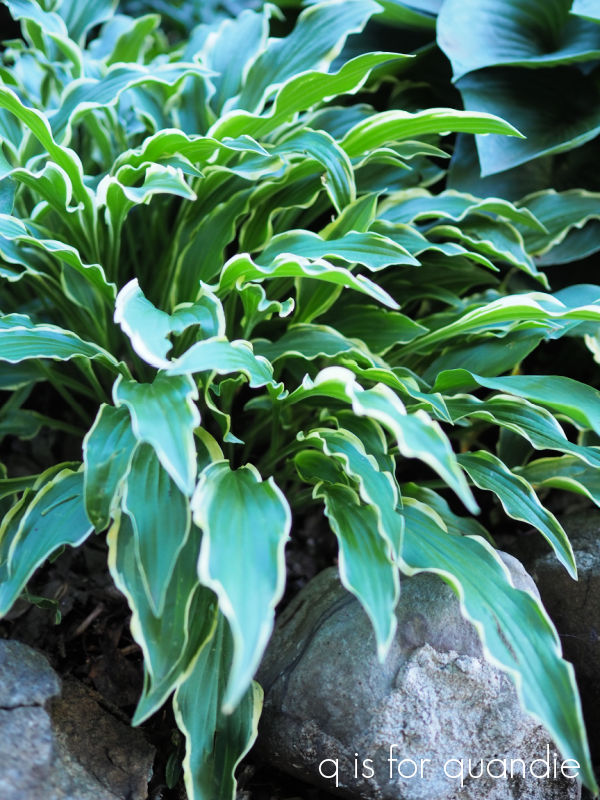
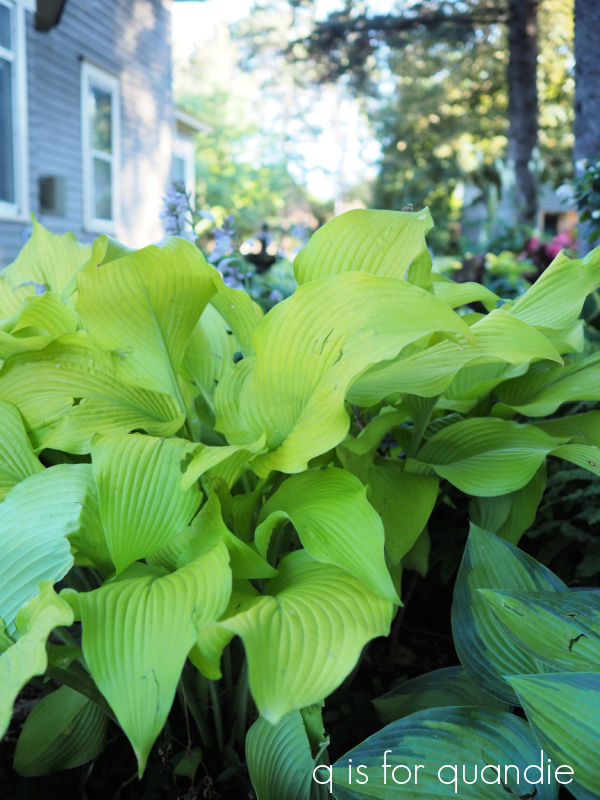
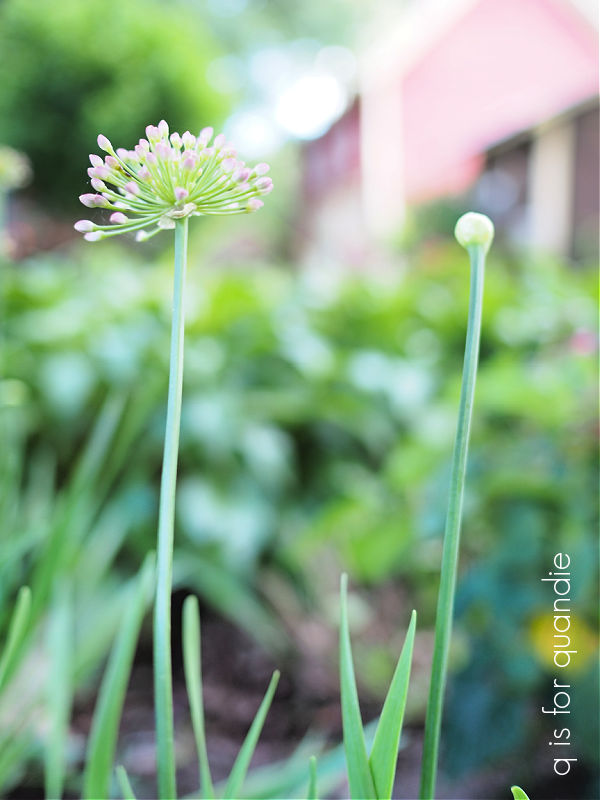
The one shown above is a lamium (or dead-nettles).  I used to have the Pink Pewter variety of this plant and to be honest, I didn’t care for it.  I thought it was rather unattractive with the silvery color of its leaves.  I pulled all of that out one year, and now I just have the Lemon Frost variety.

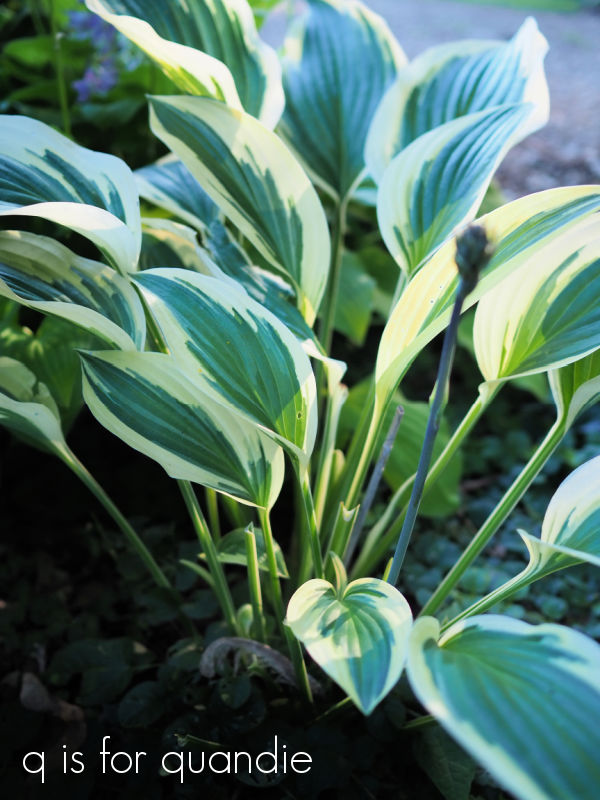
The clump that gets a little more sun is much more yellow (above) than the clump in the shade (first photo).  I love the pop of brightness this lends to the garden.  And this stuff seems to be super hardy.  In warmer zones than ours it is considered evergreen, but oftentimes as the snow melts away in the spring I’ll find this stuff still looking somewhat green.  However, it is considered deciduous here in zone 4.

I originally purchased just one of these plants, and since then I have divided it multiple times and moved it to about five different spots in my garden.  I’ve also given chunks of it away to friends.  It definitely likes to spread.

It wasn’t until I started putting this post together that I realized just how many groundcover plants I have in my garden, so let’s take a look at some more of them.

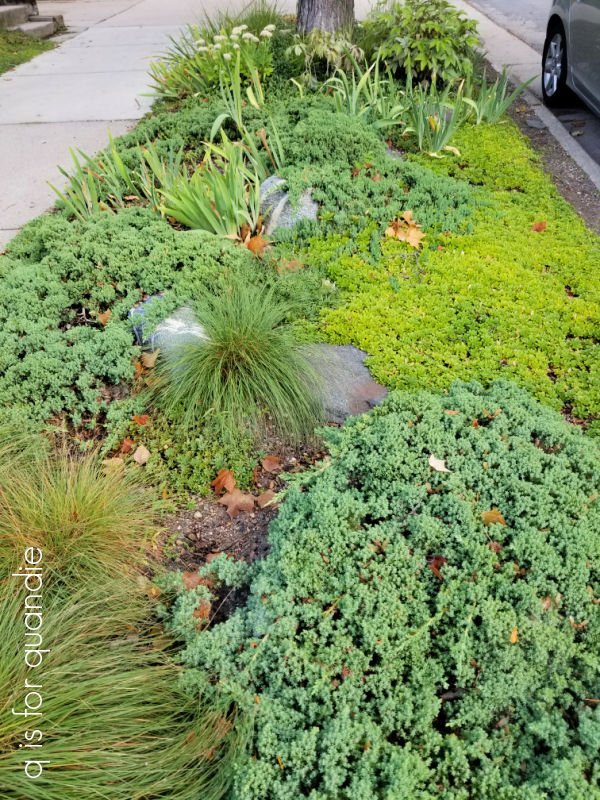
First of all, that one above is a sedum or stonecrop.  I’ve had that one forever, so I’m not precisely sure which variety it is, but it’s likely Golden Creeping Sedum.  It has a yellow flower in early summer, but for most of the growing season it is just green.

Stonecrop prefers a full sun location, but it will tolerate some shade.  As I’ve mentioned in the past, I have very few full sun locations in my garden so my stonecrop is in partial shade and it seems to do fine.

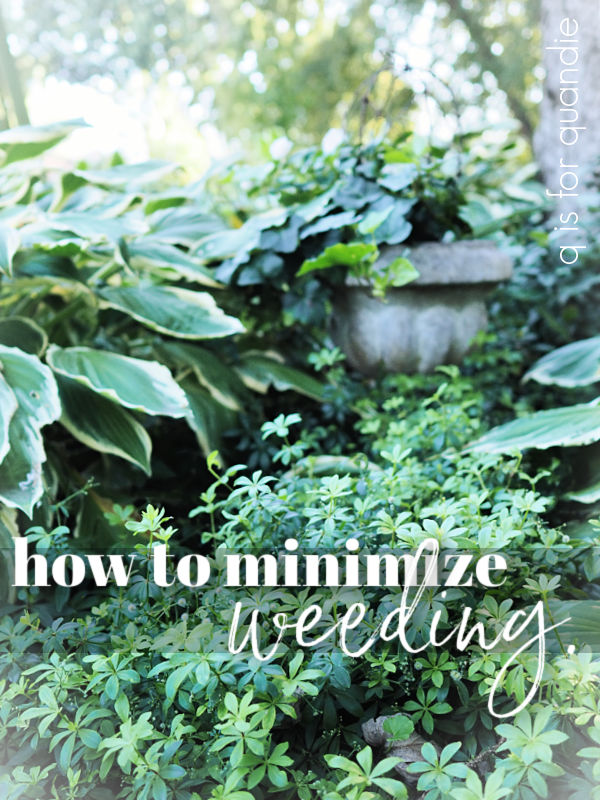
Next up is sweet woodruff.

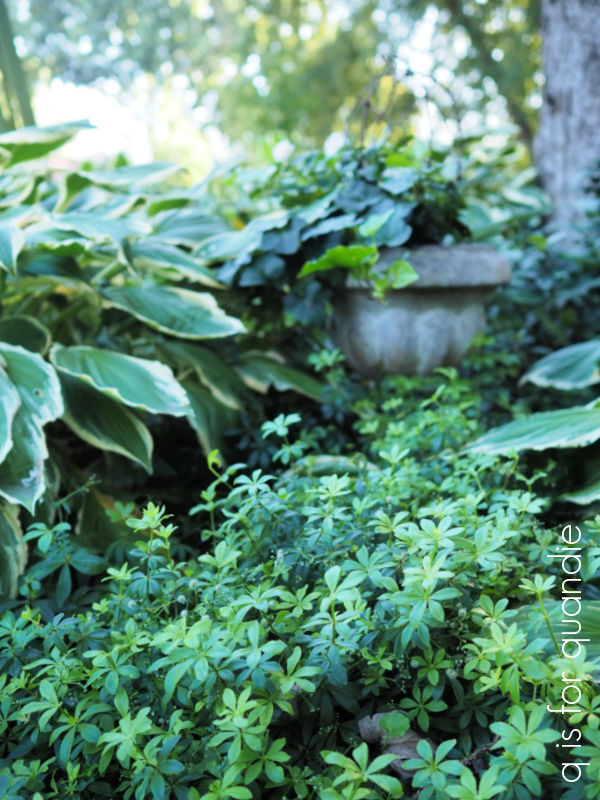
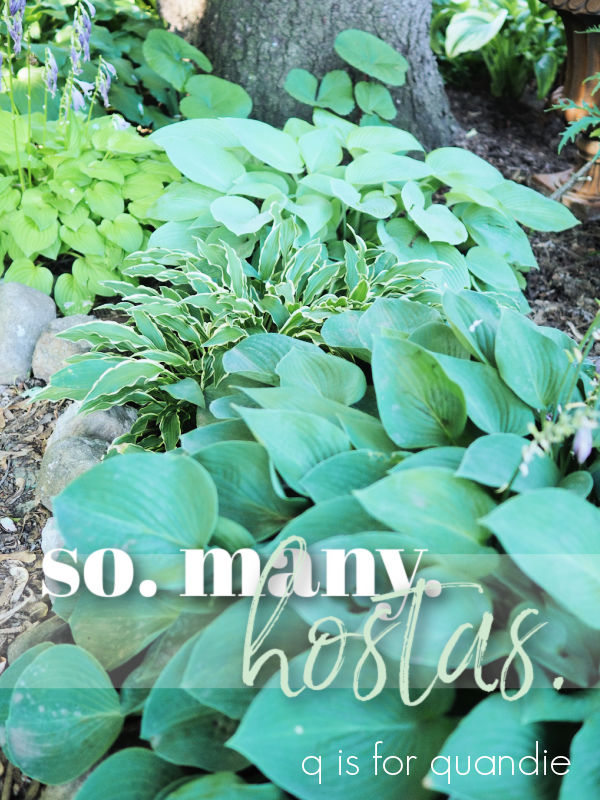
Sweet woodruff is a shade loving ground cover that spreads by runners.  So yes, it can get invasive.  Mine is planted with hostas which do a good job of holding their own against a ground cover.

This plant also flowers in early summer, and it has a pretty little white flower.

I planted some ajuga (or bugleweed) just two years about and it’s already filling in the area where I put it.

I’m not sure which variety I have, but it gets a spiky blue-ish flower on it in late spring.  You can also get ajuga with pink or white flowers.  This is another one that can be invasive, so it’s a good idea to plant it in an area where you can easily control the spread.  Mine is separated from the lawn by a brick border and so far it doesn’t seem to want to jump over that.

Another ground cover in my garden is English Ivy.

I hadn’t realized that one could grow English Ivy outdoors in our climate until I saw it growing in someone’s garden who was having a garage sale.  I asked her about it, and she kindly offered to dig up a chunk of it for me.  I’ve had it ever since, and that must have been nearly 20 years ago or more.

I love the look of ivy growing over stone walls, it feels so very … well … English.

There are lots of articles out there on the web about how to kill English Ivy, or how to remove it from a brick wall.  In other words, it can be very invasive and it can do damage to masonry.  But here in my zone 4 Minnesota garden, it seems to just barely hang on from year to year.  As I’ve mentioned, I’ve had it for at least two decades or more and it hasn’t really even filled in the small bed where it’s planted.  I also have to admit that it doesn’t do a great job of weed suppression because it doesn’t fill in enough to cover all of the ground.  So more weeds pop up under this one than the others that I’m mentioning in this post.

I’m going to try a little experiment this winter with some English Ivy growing in a pot.

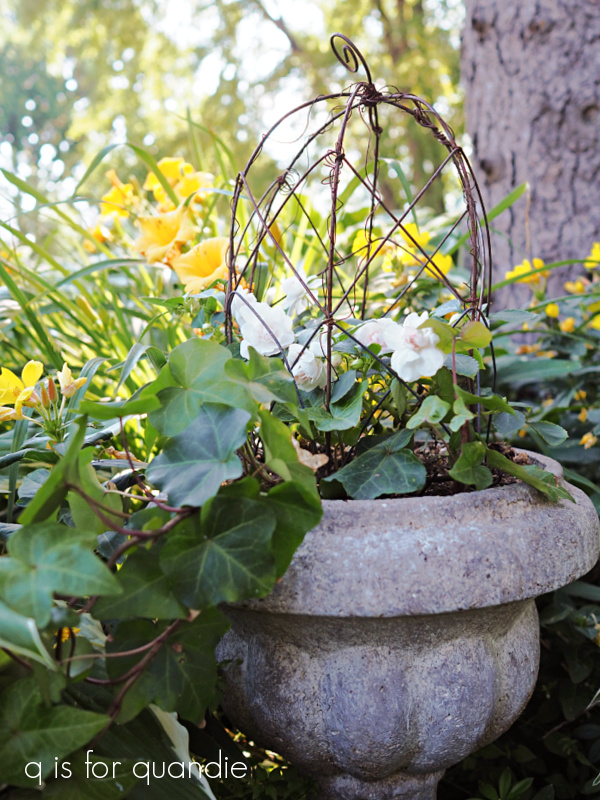
I don’t think it will survive the winter in a pot, but I’m going to leave it in there and see what happens.

Probably the most invasive of the ground covers in my garden is this variegated vinca.

This is one that I have to beat back on a regular basis.  So if you’re looking for a ground cover that will fill in quickly, cover a large area and not need much care, this one is a good choice for that.

How about you?  Do you have any groundcovers in your garden?  Do you have a favorite that I haven’t mentioned here?  Leave a comment and let us know, and then get out in your garden!

the gardens of east isles.

Once again this week I’m bringing you my ‘sunday mornings in the garden’ post from somewhere other than my own gardens.  As I mentioned on Monday, last weekend my sister and I went to the neighborhood garage sales in the East Isles and Lowry Hill neighborhoods in Minneapolis.

This is one of my favorite neighborhood sales simply because the homes are so gorgeous.

These aren’t newer homes, most of them were built between 1885 and 1930.

And they aren’t cookie cutter houses where they all look vaguely the same.

Each one is unique, and there are a number of different styles of architecture represented.

I enjoy looking at the gardens just as much as the houses (well, or possibly more).

I’m betting that many of them are professionally designed (and possibly also professionally maintained).  So it’s a great opportunity to get some fabulous ideas that I can possibly translate into my own garden.

One thing that always jumps out at me in these small gardens is their use of small trees and shrubs.  Right in the middle of that photo above is a gorgeous Japanese maple.  As much as I admire them, I’ve never been brave enough to add a Japanese maple to my garden.  Most of them are hearty in zones 5 to 9, but they have been developing varieties that are more cold tolerant and are rated for our zone 4.  But they are pricey (usually $200 or more), and I am reluctant to spend that much on a tree that needs to be babied to survive here.

I added a Pagoda Dogwood to our shade garden about a month ago in an effort to add more small trees to our space.  We’ll see how that goes first.

I’m also trying to absorb some ideas for upping my game when it comes to small evergreens.

I definitely saw some fabulous specimens, but haven’t had a chance to research what they are yet.

If any of you recognize these varieties, be sure to shout it out in a comment.

There were some great examples of planting you can do in the boulevard (a.k.a. verge, tree-belt, the section between the sidewalk and the street, what do you call it?).  These areas can be especially difficult here in Minnesota because this is where the big banks of snow end up when they plow the streets.

I love the example above with its low-growing ground covers combined with poufy tufts of ornamental grass.

This next one features slightly taller plants.

Isn’t that an interesting combination with shade loving hostas mixed in with sun loving phlox and sedum.  And they all seem to be doing well.

Some of these gardens can definitely give the gardens that I admired in Charleston a run for their money with their wrought iron fences and formal hedging.

I would say that this is the style that most appeals to me, but I don’t have anything formal in my own gardens.  I think a formal garden would be out of place next to our 1904 farmhouse.  But I do love them.

This sort of secret garden look is probably more suited to our house.

This next one is a good example of getting creative with the space you have.

That house sits on a triangular shaped lot that tapers to a point and has a street both in front and behind the house.  They’ve adding hedging to the point and a trio of hydrangea standards that will be stunning when they get a bit bigger (that’s a flag pole in the foreground, fyi).  Since there isn’t really a backyard, they have an area to the side of the house that is enclosed in a privacy fence and looks to have a patio set with an umbrella for outdoor dining.

By the way, it’s not all single family homes in the neighborhood.  Just check out the Claridge.

I so love seeing old apartment buildings like this one that have retained their charm, at least on the outside.

I tried to find some photos of the interiors, and the ones I found online looked totally modern which is a bit of a bummer.

I always feel like a neighborhood sale is an open invitation to wander around these beautiful historic neighborhoods without looking suspicious.  But really, these are public sidewalks and anyone can walk around here and admire the houses and front gardens.  I totally recommend doing something similar where you are if you want to gather some garden inspiration yourself.  In the meantime, I hope you enjoyed this visit to East Isles and Lowry Hill as much as I did.

the arb.

This week my Sunday mornings in the garden post isn’t coming to you from my own garden, instead I’m sharing the Minnesota Landscape Arboretum in all of its glory.

The Arboretum, or the Arb for short, was founded in 1958 by some local community sponsors in partnership with the University of Minnesota.  Their mission is to ‘welcome, inform and inspire all through outstanding displays, protected natural areas, horticultural research and education’.

If you’ve ever enjoyed a Honeycrisp apple you can thank the Arb for that.  It was developed here by the U of M, and was later named the Minnesota State Fruit.  I have to admit that their newer Zestar and SweeTango apples have taken over as my favorite varieties though.

My niece, Kris, had a day off mid-week last week and wanted to do something fun so she suggested a visit to the Arboretum.  I usually get out there about once a year, and every time I go I think “I should get out here more often!”  It really is worth the 50 minute drive.

There are two things I love about the Arb.

No. 1 – it’s simply a beautiful place to walk around and admire the lovely gardens.

One of my favorites is the Japanese Garden.

It’s so serene, and you know me, I like a garden that is mainly just green.

I was recently telling my bff that I’d like to visit Japan one day, but my problem is that I’d expect the entire country to look just like that photo.  I strongly suspect that it doesn’t though.

If you love color, the Annual Garden stands out in stark contrast to the Japanese Garden.

Every year the Arb does a different design for the annual garden and this year landscape designer Duane Otto decided to go with bright yellows, reds and oranges.

They’ve carried these colors to the area around the front of the visitor center building as well.

While I fully admit these beds of annuals are pretty darn spectacular, they aren’t my style at all.  I have very few bright colors like this in my own gardens, and when I do have color I tend to prefer the cooler versions rather that these hot colors.

Another favorite of mine though is the Knot Garden.

I’ve always loved the symmetrical and somewhat formal look of a knot garden.

The Rose Garden is really lovely as well.

I’d kind of like to know what they are doing to keep the Japanese beetles at bay though.  I saw very little damage from beetles on their roses, although there was some.

I don’t know that this next area has a specific name (at least not on the map I have), although it seems to be mainly conifers.

It has a ‘north woods’ feel to me for sure.

It also reminds me a lot of the Japanese Garden, but with a more natural feel.

The thing that all of these gardens have in common is that I won’t likely ever have a space like them in my own garden, but I still enjoy admiring them.

And that brings me to the 2nd thing I love about the Arboretum.

No. 2 – In addition to providing beautiful eye candy, the Arb also aims to educate.  It is part of the University of Minnesota after all.  I get lots of ideas for plant varieties, or plant combinations to add to my own garden when I visit.

Kris and I spent a bit of time checking out the Herb Garden.

I was trying to pick out some different herbs to add to my herb planter next year.

Although my herbs grew really well this year, the reality is that I don’t cook much so they felt really rather wasted.  So as we were going through the herb garden, especially the section with the scented herbs, it occurred to me that I might enjoy growing some herbs for their scent rather than for cooking.

My herb planter is situated right next to our outdoor dining table on the deck and I’ve noticed how the scent of the basil and the mint drift over while I’m seated there.

So next year I’d like to try growing some lemon balm, lemon verbena, and definitely one of the scented geraniums, like the chocolate mint.

I also thought this Society Garlic plant looked really nice in a clay pot.

That would be a fun addition to my deck as well.

I’ve never really grown hostas for their flowers, but while in the Japanese garden I noticed a hosta that had a deep purple flower that was really pretty en masse.

I was able to locate that hosta in the hosta glade where it was labeled as hosta clausa.

So now I can add that one to my wish list of plants for my garden.

I’d recently been wondering if I could grow a Japanese Forest Grass, or Hakonechloa.

I’d done some cursory research online and mostly found varieties that grow in zones 5 to 9.  I wasn’t sure if I could put one in my zone 4 garden.  But hey, if the Arb can grow it, so can I (theoretically).  Further research online tells me that this particular species, H. macra, is the most cold hearty of the bunch.  This is also one of the few ornamental grasses that perform well in the shade.  This plant is also definitely being added to my plant wish list.

In addition to the garden layouts in the central part of the arboretum, they also have educational and demonstration areas further out including a hedge display that showcases different varieties of plants suitable for use as hedging, the shrub walk to show different varieties of shrubs that will grow in our area, a weeping tree collection, an azalea and rhododendron collection, a crab apple tree collection, an iris garden, a peony garden, a section showing varieties of ornamental grasses, and one of my favorites, a hydrangea collection.

I had to laugh when I saw this in the hydrangea area …

What you’re looking at in the foreground is the Endless Summer hydrangea which is supposed to be a macrophylla hydrangea that blooms on new wood, and thus will bloom in our northern climate.  Behind it are all of the paniculatas that actually do bloom well in our climate.  I feel like this one picture says it all and I can get off my Endless Summer soap box.  Apparently even the Arb can’t get it to bloom!

They also have a dahlia trial garden at the Arb, and although I don’t grow dahlias myself (they are way too high maintenance for me), I couldn’t resist stopping to take a look.

I can definitely see why dahlias have seen a resurgence in popularity lately though.

They certainly can be magnificent.

Some of the flowers on these are the size of dinner plates.

How about you?  Do you grow dahlias?

There is so much more to see at the Arb than what I’ve touched on here, but I figure this post has gotten long enough.  I hope to make another visit there when the fall colors arrive, so stay tuned for a potential post on that.

The MN Landscape Arboretum was named the Best Botanical Garden by USA Today in 2017 and 2019.  It really is pretty dang fabulous.  The next time I am whining about the fact that we don’t have any amazing gardens here in Minnesota like the one I visited at Dunrobin Castle in Scotland

would you please remind me that although we may not have any castles here, we do still have some pretty amazing gardens!

harvesting hydrangeas.

Good morning, and welcome back to Sunday mornings in the garden!

Last winter I didn’t quite get to filling my window boxes for winter until mid-December.  I’d left all of my hydrangeas on the bushes up to that point.

Don’t get me wrong, I always leave lots of hydrangea blooms in place for winter interest and I don’t prune them off until early spring.

But I usually get some cut off the bush by early October for my winter window boxes.  I’m cutting myself a bunch of slack on that one for last year though.  If you’ll remember, I was in the midst of trying to deal with an increasingly unpleasant work environment and ultimately making the decision to retire early on November 30.  So last fall doesn’t count.

I did find that the hydrangeas had really lost all of their color by the time I got around to gathering them for my window boxes though, especially the Annabelles.  So this year I’m going to be more intentional about drying them for use later in winter arrangements.

I did a bit of online research and learned that the best time to harvest hydrangeas for drying is when the blooms are past their prime and starting to dry and/or change color on the bush.

That timing is going to be different for different varieties of hydrangeas because of their bloom times.  My Annabelle hydrangeas started blooming back at the end of June.  Their flowers went from white, to green and are beginning to show a bit of brown here and there.

That, combined with the fact that we’ll have roofers here in the coming weeks doing who knows how much damage to plants, made me decide to go ahead and harvest them a week or so ago.  Especially the ones in the cutting garden.

For those of you who may not already know, my cutting garden is out behind the carriage house.  You can’t see it from the rest of our yard.  Everything I grow there is meant to become a cut flower and it doesn’t matter how the garden itself looks.

You can see where the roofline of the lean-to is in the above photo, very close to that hydrangea.  It’s unlikely it will survive the new roof unscathed.

So, while I probably could have waited a couple more weeks to do this, there’s no time like the present … at least for the Annabelle’s.  I’ll continue to let the paniculatas color up a bit more before I cut any of them to dry.

There are probably tons of different methods for drying flowers, but let’s talk about the 4 most common ones.

First, you can hang them upside down in little bundles.  This works great with flowers like roses where the blooms will droop if you dry them upright.  For the most part, you don’t really need to worry about that with hydrangeas.

Second, you can use silica gel or powder.  That’s not really practical with hydrangeas since you have to completely surround the bloom with the silica, can you imagine how much silica I would need to dry all of these?

That leaves the two most popular ways to dry hydrangeas, with water and without water.

Basically the only difference between the two is whether or not you put a little water in the vessel you are drying them in.  Otherwise the technique is the same.  Cut your hydrangeas with a longish stem.  You can always shorten it later when you arrange the flowers, but you can’t add any stem back on.  Remove all of the leaves, and then place the stems upright in a container of some kind.  If you’re using water, only put a couple of inches of water in your container.  Next, place the container in a cool, dry location away from sunlight.  Once the water is gone, your hydrangeas should be dry.

I did a little experiment to see if there was a noticeable difference between the hydrangeas dried with water, and those without.  From what I’ve read, the water option allows the hydrangeas to dry out more gradually thus providing a better result.  So here we are a little over one week later.  The water is mostly gone from the jar with water, and here is a comparison of the dried blooms.

The difference is very subtle.  However, I was surprised to find that the hydrangeas dried without water kept just a little bit more of their green color.  But honestly, I don’t think it’s enough of a difference to matter.

In addition to the hydrangeas in the jars, I also tucked that entire basket full of cut hydrangeas into a dark corner of the carriage house to see what would happen with them.

And they look pretty darn good too.

Obviously this little experiment could be a one off.  Or maybe it’s just Annabelle hydrangeas that dry just as well without water as with water.  I think I’ll do a similar test with my Limelights after they develop some of their fall color and see how those turn out.  I’ll be sure to keep you posted on that one.

In the meantime, I’m looking forward to having tons of beautiful dried hydrangeas to use in my winter window boxes.  How about you?  Do you dry any flowers from your garden?  Leave a comment and let us know.

perennials that bloom all summer.

Good morning gardeners!  Today’s ‘Sunday mornings in the garden’ post is going to be a short one because I’m sharing a rather short list of plants today; perennials with long bloom times.

While the upside to perennials is that they come back year after year (so you only have to buy them once to enjoy them for years), the downside is that most of them have a rather short bloom period.

As you know, my absolute favorite perennial flower in the garden is the peony.

And the bloom time for peonies is notoriously short, and made even shorter when we inevitably suffer a spell of hot, humid weather as soon as they open.

As you may remember, last year, in an attempt to extend peony season, I experimented with saving peony buds in the fridge and I had good success with that.  So much so that I did it again this year with even more peony buds.  And … um … well …

I didn’t follow my own instructions!  I wrapped these in a damp paper towel, and then put them in the Ziploc bag.  As you can see, they got moldy.  Last year I just put them directly in the Ziploc, no damp paper towel.  I’ll have to try again next year, with no damp towel!

Another of my favorites, lilacs, also have a pretty short bloom period.

And unfortunately, I don’t know any tricks for saving them for later.  In fact, I haven’t even found any tricks that work for making them last more than 1 or 2 days as cut flowers.  If you know of anything that works, leave a comment and let us know.

Roses are another of my favorites with a short bloom time.

However, I grow very few due to Japanese beetles. Those beetles just love roses!  I never had time for fussing with insect control in the past, so I took a few things out of my garden that the beetles loved including roses, a grape vine and some Virginia creeper.  I do have this one last pink shrub rose that was given to me at least 20 years ago or more.

But wait!  I went off on a tangent, this post is supposed to be about perennials with a long bloom time, not without one.

I’m tempted to start the list with panicle hydrangeas.

They definitely have a longer bloom time than peonies, lilacs and roses.  However, they only just started blooming in mid-August, so while they will continue to look amazing for the rest of the season, they missed most of the summer.

I do have a handful of perennials in my garden that bloom for a good portion of the growing season though, starting as early as May and continuing through the first frost.

Corydalis lutea is one of them.

This is a plant that I purchased at a garage sale not really knowing what it was.  Frankly, I don’t love yellow flowers.  But I let this one do its thing because it’s such a constant bloomer.  Mine starts blooming in late spring and it’s still blooming now.

You do have to be slightly cautious with this one as it self-seeds quite easily and will take over if you let it.  I pull out good sized chunks of it every year, and it is very easy to control that way.  It’s a great companion plant for hostas, and I have it growing in dappled sunlight.

Lamium Aureum is another perennial that blooms from May through frost.

I’ve even seen this one pop up through the snow with some flowers on it!

But I have to admit, I grow this ground cover for its foliage not for its flowers.  I don’t actually like the flowers, but I love the bright lime green leaves.

It’s another great companion for hostas as it will grow in full shade to part sun.

Another long blooming perennial that I purchased at a garage sale is Dicentra ‘Luxuriant’, sometimes called fern-leaf or fringed bleeding heart.

Unlike the more common varieties of bleeding heart that bloom in the spring and have pretty much died back to the ground by now, this variety blooms all summer.  As you can see, the flowers look slightly different (and aren’t as pretty, in my opinion) and so does the foliage.  The foliage is rather fern-like, hence the name.

The plant is much more compact that your typical bleeding heart, and it doesn’t get straggly and unkempt looking in late summer like the others.

This plant will also self-seed, although not quite as readily as the Corydalis, at least not in my garden.  I do have one volunteer plant that popped up in a spot where it doesn’t belong and I haven’t had the heart (pardon the pun) to pull it out yet.

Last on my long-blooming perennial list is Myosotis sylvatica, or Forget-me-not.

This is another ground cover that can lean towards invasive.  However, I have mine interplanted with a number of other ground covers, the Lamium, a varigated vinca vine and a very small sedum.  All of them tend to battle for dominance and so far no single plant has won out.

I do love those pretty little blue flowers.  But ‘little’ is the key word here.

An honorable mention goes to my new Roguchi clematis.

I just planted it back in May of this year, but it hasn’t quit flowering all summer and is still going strong.  I just have this one growing season to go by, but so far it seems to be a winner.  Once again, it’s not the most flamboyant of the clematis varieties, but I love that it has bloomed all summer.  I think the little purple and white bell shaped flowers are super sweet too.

One thing to note about the Roguchi is that it’s a non-vining clematis.  It won’t climb its way up a trellis on its own, but you can train it (which is what I have done).  Or you can let it spill over the sides of a retaining wall, or scramble through your perennial beds.

One thing all four of these plants have in common is that they aren’t terribly showy.  Perhaps that’s the trade off here, more subdued flowers in exchange for a much longer bloom time.

How about you?  Do you have any recommendations for perennials that will bloom all summer?  If so, be sure to leave a comment and let us know.

show stopping hydrangeas.

Good morning from the garden!  Today I’m going to share my favorite flowering shrub, hydrangeas.

There are five main types of hydrangeas, so let me first mention the two that I don’t grow.

First up is hydrangea quercifolia or oakleaf hydrangeas.  Although some gardeners do attempt to grow this one in our zone 4b, it’s a tricky one.  They require hot, sunny summers in order to produce blooms and Minnesota doesn’t always provide that.  They also bloom on old wood, so getting them to bloom in our climate is challenging.  I’m not into tricky gardening, I prefer to grow plants that aren’t so finicky.

Next up is hydrangea petiolaris or climbing hydrangeas.  These will grow in zones 4 to 8, but also bloom on old wood.  I don’t really have a good spot for a climbing hydrangea, so I’ve never even attempted one.

Next up is a variety that I do actually grow, but not successfully.  Hydrangea macrophylla or mophead hydrangeas are absolutely gorgeous … when grown in the right climate.  These are those beautiful hydrangeas whose bloom color changes depending on the pH of the soil they are grown in.  When I visited the Jersey shore a few years back I saw lots of these and they were stunning.  Every bush was absolutely loaded with blooms.

Typically these hydrangeas do well in zones 6 – 9.  They bloom on old wood, so in other words if they die back to the ground every winter you’ll never get any flowers.  Ventnor City, New Jersey, where I took that photo, is a zone 7b.

So imagine my excitement when Minnesota’s Bailey Nurseries developed a macrophylla that bloomed on both old and new wood, the Endless Summer hydrangea.  Gardeners all across the north rushed out to buy these hydrangeas, including me and pretty much all of my gardening friends.  I initially planted two of them.  But their performance for me has been pretty sad.  I think 2016 was the best year for them and I got six or seven flowers that year.

And as you can see, the colors on my Endless Summer flowers weren’t nearly as spectacular as those Jersey hydrangeas.

  I pulled one of my Endless Summer plants out a couple of years ago, but I still have one in my back garden.  Last year I didn’t get any blooms at all on it, and so far I don’t see any this year either.  But hope springs eternal and I haven’t dug up that last one quite yet.  I have read that you can grow these in containers, bringing it into a sheltered area for the winter to prevent it from dying down to the ground.  Maybe I’ll dig mine up and try that.

Do any of you grow a macrophylla in zones 4 or 5?  And if so, have you had luck getting it to flower.  Leave a comment and let us know.

Next we have hydrangea aborescens or smooth (or wild) hydrangeas.  The most common, and more old fashioned, of these is the Annabelle hydrangea and I have two of them.  Mine started blooming back in early July (or maybe it was late June).  Here is one of them behind the fresh flowers cart …

The flowers on the aborescens are more rounded in shape than the paniculata (which we’ll talk about next), and they start off white and by this time (mid-August) they have aged to a green color.

They produce tons of flowers each year (they bloom on new wood), and they make great cut flowers.

However, they are less than ideal in the garden.  The stems tend to be weak and thus they flop when loaded down with big blooms.  I have an old brass bed frame supporting the Annabelle by our deck …

but I just allow the ones out back in the cut flower garden to flop away.  They can look quite bedraggled after a rain.

There is a new and improved version of the Annabelle called Incrediball that supposedly has stronger stems.  I have not grown that variety myself, but in a recent video Laura from Garden Answer mentioned that although the Incrediball is an improvement over the Annabelle, it still tends to flop a little.

In my opinion, why bother with that when you can grow my favorite variety, hydrangea paniculata or panicle hydrangeas?

Paniculatas are the most cold hardy of the hydrangeas and can be grown as far north as a zone 3.  They have more of a cone shaped flower (compared to the more rounded flowers of the Annabelle), and they bloom on new wood.  That means that in my zone 4b garden they are absolutely loaded with flowers every year no matter how harsh the winter may have been.

I grow four different varieties of paniculatas; the Limelight, the Little Lime, the Vanilla Strawberry and the Little Quick Fire.

As the names imply, the Little Lime and the Little Quick Fire are dwarf versions of Limelight and Quick Fire.  I put in one Little Quick Fire last summer, and another one this year, and so far, obviously, they are still pretty small at around 2′ tall.

The Little Quick Fire starts blooming a few weeks earlier than the Limelights, which may be a selling point for those who don’t want to wait until mid-August for some flowers.  But I have to admit that so far I’m not super impressed with this one.  The flowers on mine are rather small and dull compared to the Little Lime.  But maybe I just need to give them some time.  They also are mostly white so far with just a little tinge of pink.  I’m guessing that they don’t turn that ‘fire’ color until fall.

My Little Lime is at least 10 years old (or more) and although they are only supposed to get 4′ tall and wide, mine is easily as tall as I am (that’s 5’10”).

If you love the look of a Limelight, but don’t have space for a shrub that can get to be 8′ tall or more (my Limelights are about 9.5′ tall), a Little Lime is a great option.

We have a Vanilla Strawberry hydrangea out back next to the carriage house.  The flowers on this one start out white, and gradually turn pink.

I do like this one, and it is just as prolific a bloomer as the Limelight, but I haven’t kept up with the pruning and it’s looking a bit leggy.

Just a quick note on that, you should prune your paniculatas in late winter/early spring (it tends to be the very first garden task I tackle each year) by about 1/3 to promote strong new growth and larger flowers.  This is basically the only maintenance required for these plants.

But back to the Vanilla Strawberry, I was hoping for a gorgeous show of pink color on this hydrangea but it doesn’t start out with a bang, but rather slowly turn pink.  There is a new variety out this year called Berry White that I want to get my hands on.  It supposedly has stronger stems and deeper, richer color.

That being said, by early October the Vanilla Strawberry does look pretty spectacular …

I may have to do another Sunday morning post about how the colors of the paniculatas change into fall.  Because truly, if you think they look good now, just wait until October!

Finally we get to the star of the show, and my personal favorite, the Limelight.

There is definitely a reason this plant has become so popular.  It’s easy to grow, requires very little maintenance, is covered with blooms (if you’re giving it enough sun), and is basically a show-stopper.

We planted a pair of them in this spot next to our deck to provide additional privacy around our outdoor dining space and they’ve worked perfectly for that.

I love being able to enjoy my morning coffee with a backdrop of gorgeous flowers this time of year.

Another thing that I love about growing hydrangeas is that I can dry them for use in my winter window boxes.  I’m doing a little experimenting this year to figure out the best way to dry them and I’ll be sharing that soon so be sure to stay tuned!

planter successes, and failures.

Good morning from the garden!

This morning I thought I would share my successes, and my failures, in this year’s planters.

In my garden I pretty much plant annuals in pots, and perennials in the ground.  There are a few exceptions to this rule here and there, but for the most part this is how I roll.  I’m working on changing that up a bit and maybe I’ll do more of that in the future, we’ll see.  But really, here in my zone 4b garden, asking perennials to survive the winter in a pot can be dicey.  The rule of thumb is that a plant must be hardy to 2 zones lower than your actual zone to survive the winter in a pot.  So as much as I loved all of those window boxes in Charleston with heuchera growing in them …

as a zone 4 – 9 plant, heuchera won’t survive the winter in a planter here.

And for those of you non-gardeners out there, I don’t mean that zone 2 plants will stay green and growing in a pot throughout the winter here.  They will still die back to the ‘ground’, but they have a better chance of coming back in the spring.

As for annuals in the ground, of course they will grow just as well in the ground here as in a pot.  Annuals only live for one growing season either way.  I just don’t have a lot of space in my garden beds to add in annuals, although this year I did make a couple of exceptions.

But back to the planters, let’s start out with the failures beginning with the planters on either side of the steps to our deck with the Eugenia topiary balls in the center.

It’s time for me to wake up and smell the coffee on this one.  We just don’t have enough sun in this spot for full sun annuals.  I had decided to give them one more try, this time making sure to feed them with a bloom boosting water soluble fertilizer (I used Miracle Grow Bloom Booster) on a regular basis.  However, I still got very few blooms on both the Snowstorm Giant Snowflake bacopa and the Superbena Violet Ice (both from Proven Winners).  They were lush and green and grew like weeds, but got very few flowers.  I did shear them both back a couple of weeks ago, but they still haven’t flushed back with flowers.

The Supertunia Mini Vista Indigo on the other hand gave me lots of blooms in these pots, but didn’t actually fill in at all.  I wasn’t expecting that.  Now granted, this petunia is meant to stay on the smaller side (hence the ‘mini’ part of its name).

I also planted the Mini Vista Indigo in my chicken feeder planter (on left in photo below), and it was the perfect plant for that planter because of its compact size.

There is only room for about 3″ of soil in that thing, so it’s impressive that these did as well as they did.

Now that I understand how the Mini Vista grows, I will plant it more strategically next year in spots where it won’t get crowded out by more vigorous growers.

Another failure for me this year was the lobelia that I planted at the end of May.  I purchased four of the Laguna Sky Blue lobelia (also Proven Winners) because it’s just so pretty.  I had given up on planting lobelia in the past because it has always died on me around mid-summer.  But theoretically this newer variety of lobelia is supposed to be “much more heat tolerant than past plants” (taken straight from the Proven Winners website).  But mine was all dead or nearly dead by the end of June.  Definitely no more lobelia for me.

As it died off I replaced it with other things, one of which I ended up really loving, and that was the gomphrena (the bright pink balls).

I’ve never grown this one before because I always thought it was kind of small and boring.  But now I’m realizing that it looks great mixed with other things.

I also think it could look kind of fab mixed in a garden bed around perennials to provide summer long color.

Another plant that replaced some of the lobelia was the Supertunia Vista Jazzberry.

It’s a gorgeous, bright, cool pink.  You’ll notice that it doesn’t have the name ‘mini’ in it, this plant grew much faster and larger than the mini vista.

I also used the Jazzberry to replace some failures in our mailbox planter.  We share a mailbox post with our neighbor, nnK, and she added planters to either side of the mailboxes a while back.  I replaced the one on my side with … what else? … a rusty old toolbox, although you can barely see it right now.

We started out the season with the lemon coral sedum (left), a bright pink new guinea impatien, a small dahlia, and the purple scaevola on the end.  As you can see, the impatien and the dahlia didn’t make it.  Well, actually, I pulled out the dahlia to put in the Jazzberry.  The impatien is still in there but it has been totally overtaken by the Jazzberry.

Aside from the mailbox, in general all of my pots with flowering annuals in them look kind of scraggly at this point.  I probably should have been shearing them all back on a more regular basis.

I’m not going to feel at all bad about pulling all of these out and replacing them with some fall flowers in September.

But this brings me to the real successes of 2022, the non-flowering annuals that I grow for their colorful foliage like coleus, caladium, oxalis, and sweet potato vine.

I shared my guest bed planter with you guys recently, and that was only planted up back at the end of July so maybe it’s not a great example of how these plants look great all season.

And in fact, I did have a bit of a fail with the caladium at first.  It doesn’t like the cold, and we had some cold nights in late spring.  They weren’t below freezing, but they were in the 40’s and the caladium I had already put out in pots died back to the ground.  It came back eventually, but it took a 4 to 6 weeks before it looked good.

But it looks fantastic now …

That’s one of my favorite combinations; it’s Molten Lava oxalis with a red caladium (sorry, didn’t retain a name on that one).

I also had planted this pretty pink and white caladium surrounded by pale pink impatiens.

Although that caladium initially died back, it came back strong and now this is one of my favorite combos.

I have one more caladium planter that I planted later in the season after the pansies that were in this urn started looking really pathetic.

Hopefully I have learned my lesson about waiting until warmer weather to plant caladium.  By the way, for those of you who suffer from deer problems, caladium is deer resistant.

Coleus can also be susceptible to cold weather, but not quite as bad as the caladium, and it’s also deer resistant.  I filled my front window box with several varieties of coleus this year including Colorblaze Velveteen, Colorblaze Strawberry Drop and Wasabi.

The Wasabi totally tried to take over.  I’ve pinched it back hard several times this summer.

I’ve combined the coleus with some black sweet potato vine, some more of that lemon coral sedum, some Shadow Dancers ‘Marcia’ fuchsia, and some Charmed Wine oxalis.

That oxalis is really fighting for some space (the dark one on the right end).

You know, when you can get constant, consistent color like this out of a plant that requires almost no work (except for pinching it back a few times), it’s hard to argue with it.

I also had superb results with sweet potato vines this year.

When the Japanese beetles became abundant in our area about a decade ago, they were devouring these.  I had quit planting them for a few years.  But I’ve gradually added them back and now the beetles seem to leave them alone.  I’m not sure if that’s the result of improvements made in the plant varieties, or because I seem to have fewer of the beetles lately (although they did a number on my ferns again this year).

One other planter success worth mentioning is my herb garden.

It was definitely as success as far as growing the herbs, but a little bit of a fail in that I rarely remember to actually cook with them!

I’m planning to take a stab at attempting to save some of my annuals over the winter this year including the caladium, the oxalis and the Eugenia topiary balls … and maybe even some of those herb plants.  Now that I’m retired, I should be able to find the time to care for them.  I’ll try to remember to share some ‘Sunday mornings in the garden’ posts about that process.

So, how about you?  Did you have any failures or success stories from your planters this year?  Or do you have any tips on overwintering some of these annuals?  If so, be sure to share them in a comment!

so. many. hostas.

Welcome back to Sunday morning in the garden, grab some coffee and let’s talk about hostas.

I know some gardeners turn their noses up at hostas because they are just too easy.  And while I agree that just planting a row of them spaced 5′ apart in a foundation garden with rocks around them can be pretty unimaginative, there are also plenty of amazing ways to use them in a garden.

Not only that, but there are also countless varieties to choose from.  There are very small hostas … like the baby blue eyes that I just purchased for my fairy garden …

and very big hostas, like Sum & Substance or Empress Wu which can grow 4′ tall and 6′ wide.

There are also lots of different leaf textures.  Shiny, matte, puckered, smooth, or curly like this Stiletto.

I love the ones with really puckered leaves, they remind me of the seersucker fabric that my mom used to make summer clothes for me.

The shape of hosta leaves can be more rounded, like the one above, or more pointy like the leaves on this Lakeside Dragonfly

Some hostas may have an upright growth habit with more vertical stems …

while others grow in a lower mound with their stems more horizontal to the ground.

Let’s talk about color for a minute too.  My sister always corrects me when I call a hosta ‘blue’ by telling me they are green.  Sure, all hostas are technically green but in the gardening world some shades of green have more blue in them …

and some have more yellow like this Sun Power hosta.

and some have what is considered ‘white’ in them also.

The colors of some varieties of hosta can vary depending on how much sunlight they get.  I find that this May hosta is much more yellow if it gets more sunshine (and isn’t it gorgeous next to the dark purple of that Purple Palace Heuchera?).

However, in a full shade situation the color is much more subtle.

If you’re planning to plant a vibrant, bright yellow hosta, make sure it gets a little morning sunshine to bring out that bright color.  I just planted three of these Sunset Grooves hostas and I hope they get enough sun where I put them to maintain this gorgeous color.

And on the other hand, if you plant a beautiful blue hosta make sure it is mostly in shade to avoid scorching the leaves.

There’s nothing more disappointing than buying a gorgeously colored hosta from the nursery, and then planting it in your garden only to find that the color has totally faded.  So pay attention to the light requirements when deciding what hosta is right for you.

Hostas can have solid colored leaves or beautifully variegated leaves like those on this variety called June.

That’s one of my all time favorites, FYI.

Here in my shady, zone 4b garden I find hostas are exceptionally easy to grow.  They don’t require much maintenance during the growing season other than cutting off the flower stalks.  I cut off the spindly, less attractive flowers right away, but I leave the bigger, prettier flowers until they are spent.  I have noticed that the bees really love the hosta flowers, so if you like to attract pollinators hostas are a good choice for the shade.

As I was reminded this spring, one downside to hostas is that they can be very susceptible to hail damage.

Yikes!

Coincidentally, two of my favorite garden vloggers, Garden Answer and Linda Vater both recently mentioned that they struggle to grow hostas.  Both live in hot, dry climates and find that their hostas burn out in the heat.  Garden Answer is planning to replace hostas with plants more suitable to her climate, like Brunnera.  Linda Vater mentioned that she’ll only grow hostas in containers now.

All I can say is, finally, something I can grow in zone 4b that gardeners in warmer climates find difficult!  I must say that usually it is the other way around.  There are all kinds of plants that simply won’t survive our harsh winters.

How about you?  Can you grow hostas successfully in your garden?  Leave a comment and let me know.

an onion by any other name.

Since quite a few of you liked the idea of Sunday mornings in the garden, I’m going to give regular Sunday garden posts a go.  So grab a cup of coffee and let’s talk onions.  I bet you didn’t think I’d start out with onions!

True, the Allium genus includes onions, leeks, garlic and chives …

I’m sure most of you are familiar with your basic chives.  I love cutting them fresh to sprinkle on baked potatoes, and recently Mr. Q added them to an omelet he made for our dinner.  But they aren’t a particularly pretty plant, are they?

Instead, I want to share ornamental Alliums with you today, and they are a pretty plant … and more importantly a really cool flower.

I had been gardening for quite some time before I discovered ornamental Alliums.  But now that I have, I absolutely love them.

I grow two types of ornamental Alliums, those that are planted as bulbs in the fall and those that are herbaceous and have a large root ball (and you can plant them any time in the growing season).

The bulb Alliums have foliage that comes up in early spring, produces the flowers, and then dies back to the ground after flowering.  Sort of like a tulip or daffodil.  In my zone 4b garden, these Alliums bloom in late May to early June and by now there is no trace of the plant left in the garden … unless I have left the flower stalks in place to dry.

Just in case that photo is confusing to some, none of the green plants around those dried flower stalks are the Allium, those are other plants.

Once dried, which usually just takes a few weeks, I pull the Allium flowers out and store them until late fall when I use them in my winter floral arrangements (much like the Astilbe that I mentioned last week).

The bulb Alliums are fantastic for intermixing with other perennials that will bush out after the Alliums are done and fill in the space around them.  I have mine planted with peonies, hostas and iris.

I have had great success with my bulb Alliums, the only maintenance they really require is removing the foliage once it dies back which is pretty effortless.  Most of mine are planted in partial sun, which seems to be working fine, but they can handle full sun.  And actually, I have some success with the bulb form in spots under deciduous trees where they get more sun until the trees leaf out.  Mine have been multiplying over the years, but I wouldn’t consider them invasive in any way.  In addition, much like my sister, deer don’t particularly care for onions, so that’s a plus for me as well.

I didn’t keep track of what variety of Allium bulbs I planted years ago, but I suspect they are Purple Sensation, which is fairly common.

In addition to that fabulous purple, bulb Alliums can also be found in white, yellow, pink, burgundy, and blue.  They also come in a variety of heights from 8″ tall all the way up to a whopping 50″ tall, and with bloom times from late spring to early summer.

So if you plan right, you can have bulb Alliums blooming for a month or more.

You can find Allium bulbs for sale in late summer to early autumn along with the tulips and daffodils, but in my experience there isn’t a great variety to choose from at most DIY stores (like Home Depot or Menards).  There are usually a few more options at nurseries, but even they don’t seem to have a great selection.

For that reason, I went online and ordered some more unique varieties to plant this fall.  I’ll try to keep you posted on that process, whether or not I like the place I ordered from (Longfield Gardens, and FYI I borrowed that graphic above from them as well), how well they grow over the next year, etc.

That brings me to the herbaceous Alliums, and these are blooming this week in my garden.

I have three varieties of the herbaceous form.  The one above is one that I purchased at a garage sale, and therefore I have no idea what it is.  I suspect it may be Millennium.  It has a lovely pale purple flower, and a nice compact form.

I recently planted two more varieties, Windy City

and Serendipity from Proven Winners …

This type of Allium plant grows more like chives, in a clump with foliage that stays green all season.  They tend to be shorter and with much smaller flowers than the more showy bulb Alliums.  Serendipity will get 15 – 20″ tall, Windy City will get 15 – 17″ tall.

I just planted the Serendipity Allium this week (I found it at Home Depot), and it doesn’t look too spectacular just yet.

Eventually it should look like this …

Of course, time will tell if these two newer Alliums will do well in my garden, but I’m optimistic about them.

How about you?  Do you grow Alliums?  And if so, do you have any specific recommendations for the rest of us?  Or maybe a favorite variety?  And if you don’t grow Alliums, have I convinced you to throw a few bulbs in the ground this fall and give them a try?  Leave a comment and let us know.

sunday mornings in the garden.

Welcome to my new series to be posted here on Sunday mornings; a short (or maybe not so short) post about what’s happening in my garden each week.  This likely won’t continue year round, for obvious reasons.  I live in Minnesota and although snow can be pretty too, there isn’t a lot going on in the garden in January.  So we’ll just see how that goes.  Many of you seemed to enjoy my garden tour post last week, so why not make it a regular thing?

And on the plus side, for those of you with absolutely no interest in gardening, you’ll know to just skip the Sunday posts 😉

I do wish I’d thought of this in the spring instead of halfway through the growing season … but, here we are.  Better late than never.

The bee balm was blooming profusely in my garden last week.

This plant goes by a lot of names, the most popular being bee balm or bergamot, but its official name is Monarda.

I always think the flower looks like exploding fireworks.

Bee balm is in the mint family (the flowers and leaves are edible), and if you’ve ever grown it, you’d know that by the scent of its leaves.  And also by the way it spreads in the garden, much like mint, it can take over.

I have pretty much let mine run rampant in my back garden.  I have to confess that this is the garden in my yard that gets the least amount of love.  I think because it’s also the one that gets the most sun.  In my garden tour post last week I mentioned that I really don’t like gardening in the sun and it shows in this particular bed.  But at this point in summer, the bee balm is practically the only thing blooming in this spot so I’m OK with having lots of it.

I also have a rogue trumpet vine in this garden that so far I have been unable to eradicate.  It came with the house, so I’ve been battling it for over 30 years.  Oh, and P.S., this garden is on the border of our property, the white and black pots and the red gazing ball you see in the background are in my neighbor’s garden.  Obviously if those were my pots, I’d have turned them all rusty by now using Dixie Belle’s patina paint.

Bee balm comes in a variety of shades of red, pink, and purple-ish.  It also comes in a variety of heights.  My neighbor has one that is only about a foot tall, but the variety I have is 3′ tall.

Monarda is definitely a pollinator.  It attracts bees (hence the common name of bee balm), butterflies and other beneficial insects, and it also attracts hummingbirds.  I can attest to that because we often get hummingbirds visiting ours.  I’d love to be able to add a fabulous photo of a hummingbird in my garden here, but I’m never quick enough to get one.

Another pollinator plant that looked fantastic this week was my Astilbe.

I have three different colors of Astilbe in my garden; white, purple and one that started out as a peach color when I purchased it but has since reverted to a sort of sickly lavender.  The white has already gone over, and the lavender is just getting started, but the purple was at the peak of perfection this week.

I originally planted this Astilbe in a much shadier spot in my garden and it performed very poorly there.  The plant tag said it was a good choice for shade gardens, but I can tell you from experience that it does need some sun if you want it to get full and bloom profusely.

I moved it to our front northwest facing garden quite a few years ago and it does so much better now that it gets a lot of evening sunshine.  I’ve since divided it a couple of times, and I think I need to divide it again.  I was watching Gardener’s World recently and they said that Astilbe needs to be divided regularly to keep blooming.

Hmmmm.  Mine seems to still be blooming pretty good.

I have some ideas brewing in my head for expanding my gardens next year, so I may hold off and start dividing things next year to supply a new garden.

I mentioned that Astilbe is a good pollinator plant, and although I do see butterflies and bees on mine, the blooms are always loaded with tons of these little flies.

See them there?  I can see five of them in that photo.  I’m not super fond of those flies, whenever I water that spot they all fly up and swarm around which is kind of gross.  But they aren’t hurting anything so I try to leave them alone.

The Astilbe is planted right under my front window box, and I’ve discovered that the blooms combine beautifully with the purple and pink fuchsia and the dark purple sweet potato vine in the box.

One last note about the Astilbe, I often leave the flower heads on the plants to dry out.  Then I use them in my planters for winter.

So this plant does double duty for me.

Do you grow bee balm or Astilbe in your garden?  Or do you have another favorite flower that blooms in mid-July?  Leave a comment and let me know.  Also, be sure to let me know how you like the idea of my new gardening series!