

I thought it would be fun to start the new year with a toolbox makeover!
If you’ve been following me for a while, then you know that I sometimes struggle with the decision to paint (or not paint) something.
Such was the case with today’s project, this toolbox that I picked up at a garage sale in September.
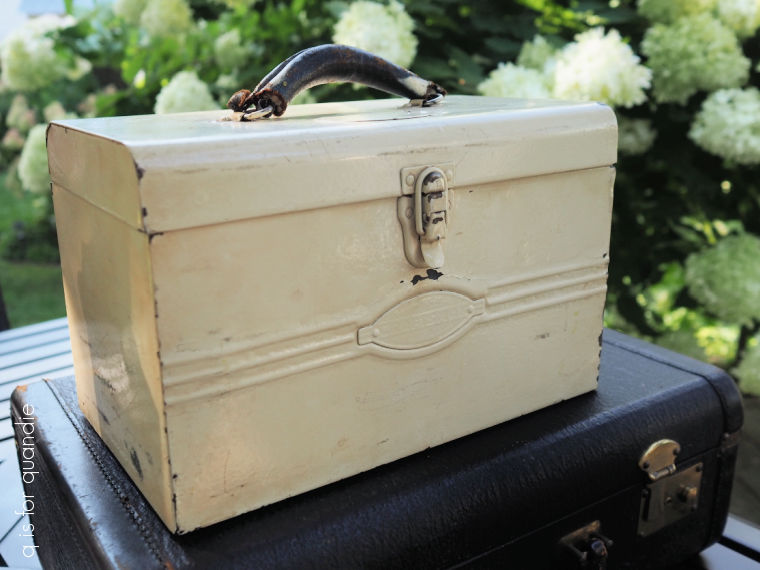
After all, it’s pretty much already the color of my favorite neutral white, Dixie Belle’s Drop Cloth. It also has some good authentic distressing.
However, it was quite grungy, and there was some sort of sticky stuff on the top. In addition, whoever painted it last time got a little overspray on the leather handle.

The handle also had come apart a bit at the ends, I’m going to call those ends a ‘hanging chad’ 😉
I ended up deciding that it wouldn’t hurt to try cleaning it up to see where that got me.
So, I gave it a good scrub with some TSP substitute and a Magic Eraser, then I gave it an all over sanding with some 220 grit sandpaper to knock off any loose bits. I then rinsed it with clean water.
Next up I simply snipped off the hanging chads on the handle, and then gave the leather one coat of Dixie Belle’s Coffee Bean. I sealed the Coffee Bean with some of DB’s clear wax. That gave the handle a much tidier look, without making it look too ‘new’.
Then I took a step back and re-evaluated.
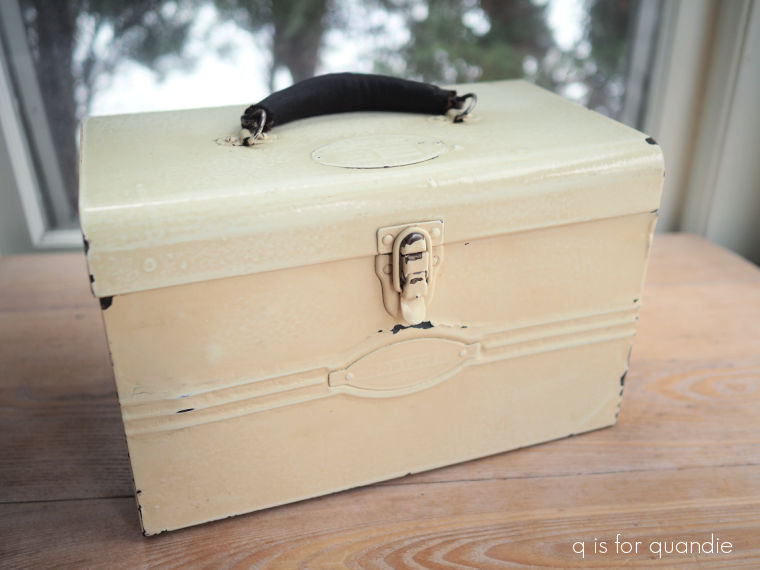
Not bad. And since I knew I was going to be adding a lot of floral transfers to it, I felt like it didn’t need a new paint job.
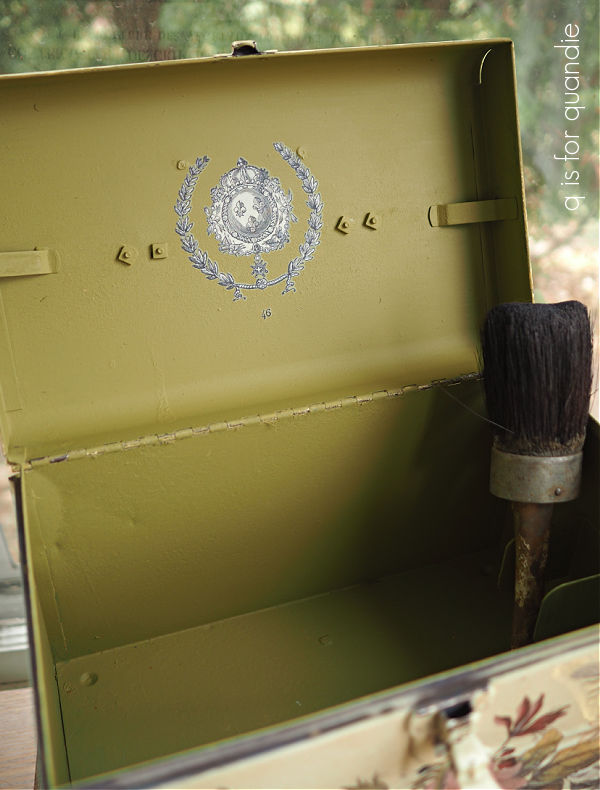
Well … on the outside that is. The inside definitely needed a new paint job!

So after a good cleaning on the inside, I gave it two coats of Dixie Belle’s Holy Guacamole, followed by their flat clear coat.
In this case, I didn’t bother with using Bonding Boss before the paint for two reasons. First, there was no rust to worry about. Second, it already had a coat of paint that had some sort of texture to it and I knew my Dixie Belle chalk mineral style paint would adhere quite well to it without needing that extra step of Bonding Boss.
Next I added a quick transfer to the inside lid.
![]()
This one is from the I.O.D. Brocante transfer set. Once applied, I went over it with another coat of clear flat sealer.
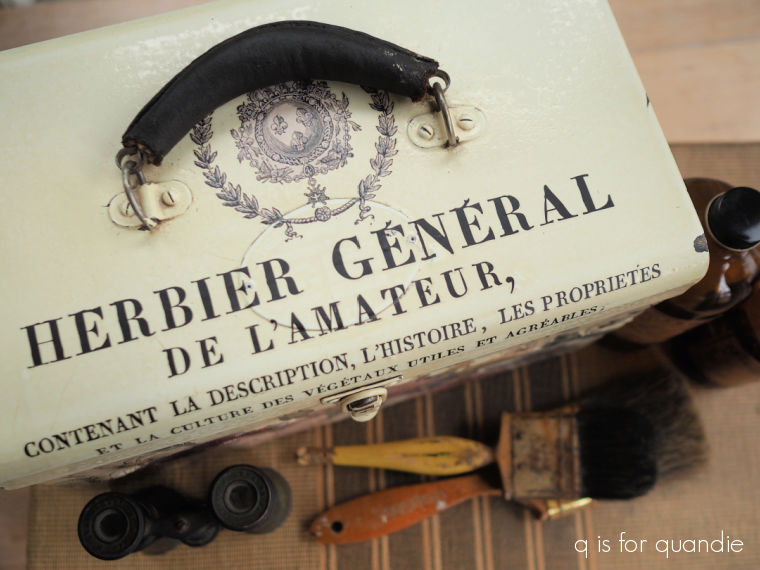
Back to the outside, I first applied florals from the I.O.D. Floral Anthology transfer.

The bee is also from the I.O.D. Brocante transfer.
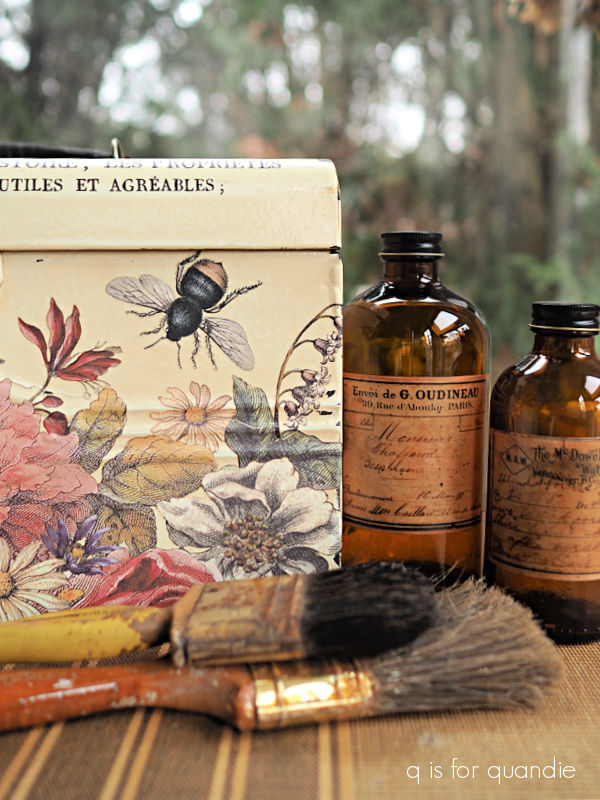
Next I added some wording from their Label Ephemera transfer to the top of the toolbox.

You may remember that I’ve been complaining that this particular transfer, which has always been a favorite of mine, is retired, and has been getting more and more difficult to find. I even found one on Etsy selling for $80! As if.
But then one of my readers reached out to tell me that she found someone on eBay who had two of them left, and would likely accept an offer of $35 each (thanks again for that Melissa). I made the offer, and it was accepted. But as she was getting ready to ship them to me, the seller realized that she only had one after all. One is better than none though, so I still bought it.
Then I ended up stopping by a brick and mortar shop near me (Liza Jane Designs in Afton, MN), and she mentioned that she had a secret stash of Label Ephemera that she’d been saving for herself, but she’d be willing to part with a couple of them.
So when it rains, it pours!
And now I have a stash of three brand new Label Ephemera transfer sets. Yee haw!
I also added that same segment of the Brocante transfer that I used inside the lid to the top of the lid. Unfortunately, as I was attempting to place it in exactly the right spot, I got too close to the surface and wham! it was stuck. So, it’s not perfectly centered where I wanted it. But it will do.
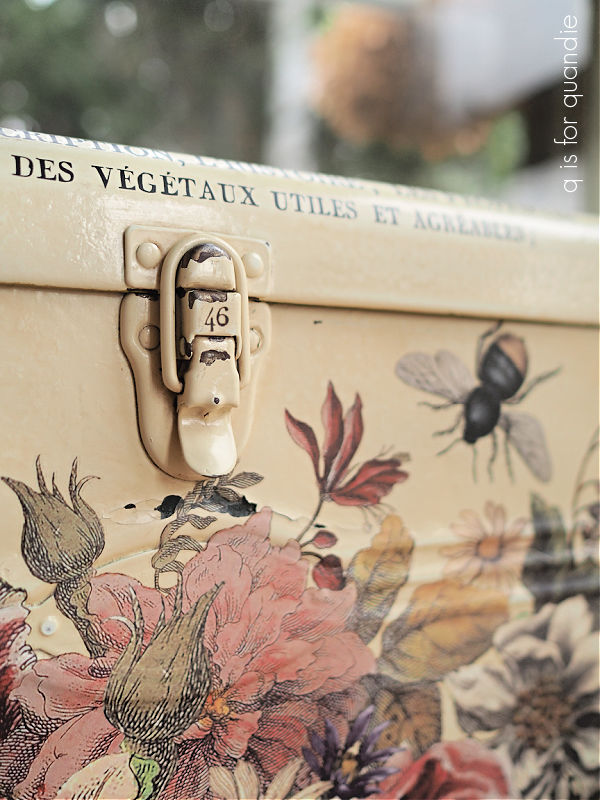
You probably didn’t even notice the tiny little detail of a number ’46’ at the bottom of that transfer (you can see it on the version inside the lid), but it didn’t fit in the position it ended up in on the top of the lid so I cut it off and added it to the latch.
Once I had all of the transfers in place, I went over the exterior of the toolbox with some of Dixie Belle’s clear wax to seal them.
With that, it was done.
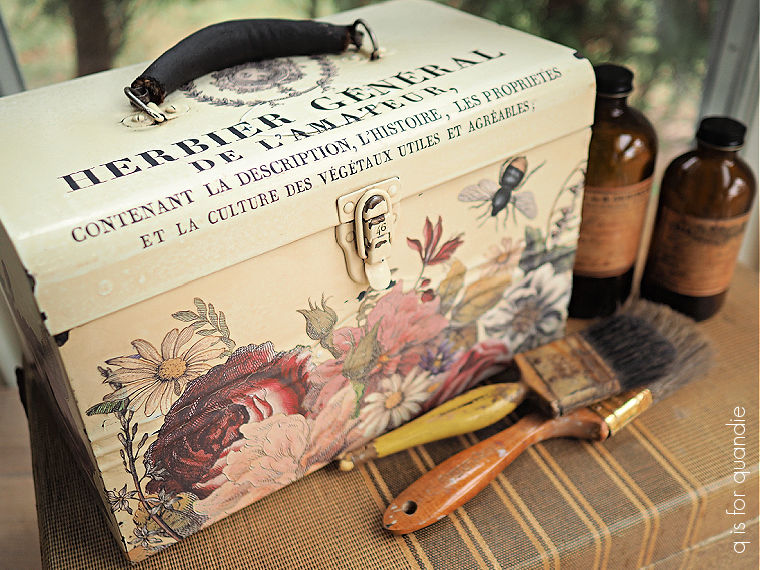
Personally I’m glad that I went with a clean up job on the exterior rather than painting over that original patina. Well, semi-original patina. Obviously this toolbox had been spray painted sometime in the past so this wasn’t its original look. But, I think there is an authentically aged feel to my final look.
What do you think? Leave a comment and let me know.
This toolbox is for sale locally. Check out my ‘available for local sale‘ page for more details.

I think it’s absolutely gorgeous! Wish I lived closer.
LikeLike
Thanks Cheryl 🙂
LikeLike
I am SO JEALOUS that you found a label ephemera transfer! I wish IOD wouldn’t retire their transfers. ANYWAYS…. Love the toolbox…as always! Happy New Year!
LikeLike
I certainly wish they would come out with a new and improved version of Label Ephemera. Preferably one where the different elements don’t overlap each other. Wouldn’t that be awesome?!
LikeLike
Agreed! No overlapping would be great!
LikeLiked by 1 person
I love all of your tool boxes! I love the little bee on the front. I also love the green on the inside. Wish I lived closer, I would snatch this one up!! ❤️
LikeLike
Thanks Monica!
LikeLike
I love all of your tool box makeovers However this one is my favorite! If I were near you I’d buy it as I never find old tool boxes around me!
BTW, what do you/people do with them anyway?
kc
LikeLike
Well, I don’t know about other people, but I have several of them myself. One holds all of my furniture waxes, one holds my hot glue gun and glue sticks, and one holds my tree toppers at Christmas. Now that I’ve started this ‘new to me-ish’ hobby of working on my dollhouse I may have to get another toolbox to use to hold my dollhouse tools and supplies too!
LikeLike
Awe, Linda the tool box looks fabulous. Another inspiring project that should get me going to do finish one in my stash. Like you I was on the hunt for the Ephemera label and found one on EBay for $29. it came in the original brown mailing tube. I have not used it yet. I am so glad you were able to build up a stash for yourself. It will definitely come in handy. Thanks for getting 2025 off to a good start with your lovely project.
LikeLike
I guess the trick is to keep an eye on eBay right?!
LikeLike
Linda,
I’m glad you just cleaned the tool box. I love the authentic look. I hope this get me inspired to go for it! I love how you stage all your end projects! smiles to a great new 2025!
🙂 Alice
LikeLike
Thanks so much Alice!
LikeLike
That toolbox looks fantastic!! Glad you didn’t paint the outside. As always, great work, wonderful inspiration for the toolboxes I have here in my home/work area.
LikeLike
Thanks Lydia! Hope you have fun making over your own toolboxes 🙂
LikeLike
Don’t have any cute toolboxes but every time I see one at an estate sale I think of you….
LikeLike
Go for it the next time you see one!
LikeLike
Beautifully done. 😍
LikeLike
Thank you!
LikeLike
Love the “46” on the latch and you put together a beautiful vignette! Great pics, as usual.
LikeLike
Thanks so much Kathy!
LikeLike
This is just gorgeous!
I have a question about painting my own tool box, I was hoping you had suggestions for me.
My tool box is hinged all the way along the back and I am finding that the lid isn’t opening very smoothly because of the paint. The paint is also chipping of around the hinged area.
Any ideas would be great.
Thanks!
LikeLike
That will happen with a hinged toolbox. My advice is to first work your lid open and closed quite a few times to loosen any paint that isn’t adhered well, then sand along the hinge knocking off any loose bits of paint, follow that up with a coat of clear wax on the inside and outside of the hinge. And finally, just be aware that you will have chipped off paint around the hinge and that’s OK. Check out this toolbox with a hinge, if you look closely at the first picture you can see that I’ve sanded back the hinge quite a bit. Same with this one. I hope this helps!
LikeLike
Thank you for this advice! I think in the future I will sand the hinges prior to painting if I don’t want the original colour to show through as well. Waxing the hinges is a great idea.
LikeLike