Recently my friend Terri has been sending me messages about furniture for sale on Facebook Marketplace. I’d never purchased something via Facebook before, but one of the pieces she forwarded really appealed to me and it was a good price so I followed up on it.
I found it a little clunky going through Facebook to make arrangements for the purchase. I ended up wasting about 2 hours because initially the seller said he was available at 4:00, but then when 4:00 rolled around I was still waiting to get his address and not getting a response to my IM on Facebook. So there sat Mr. Q and I with our boots on, ready to head out. Finally around 6 p.m. the seller messaged me with his address and we headed out. From there on out it was smooth sailing. The seller’s home was easy to find and only about 20 minutes away. He had the dresser out in the garage ready to go. I looked it over, handed him the cash and then he and Mr. Q loaded it into our van. Easy peasy. And of course, this kind of thing can also happen with Craigslist. I just seem to have better luck communicating via text rather than via Facebook messaging.
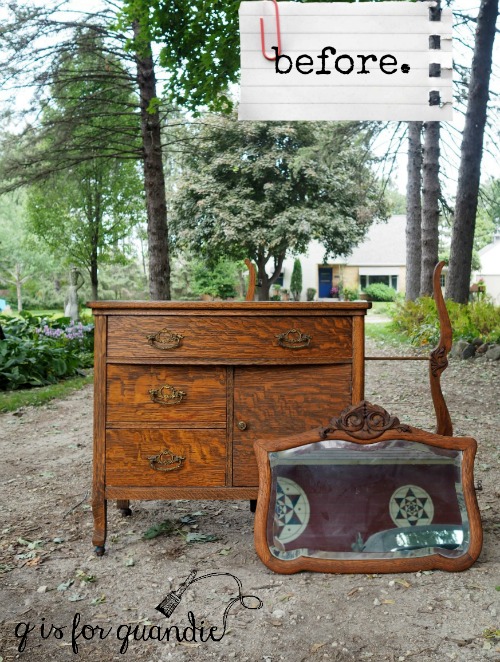
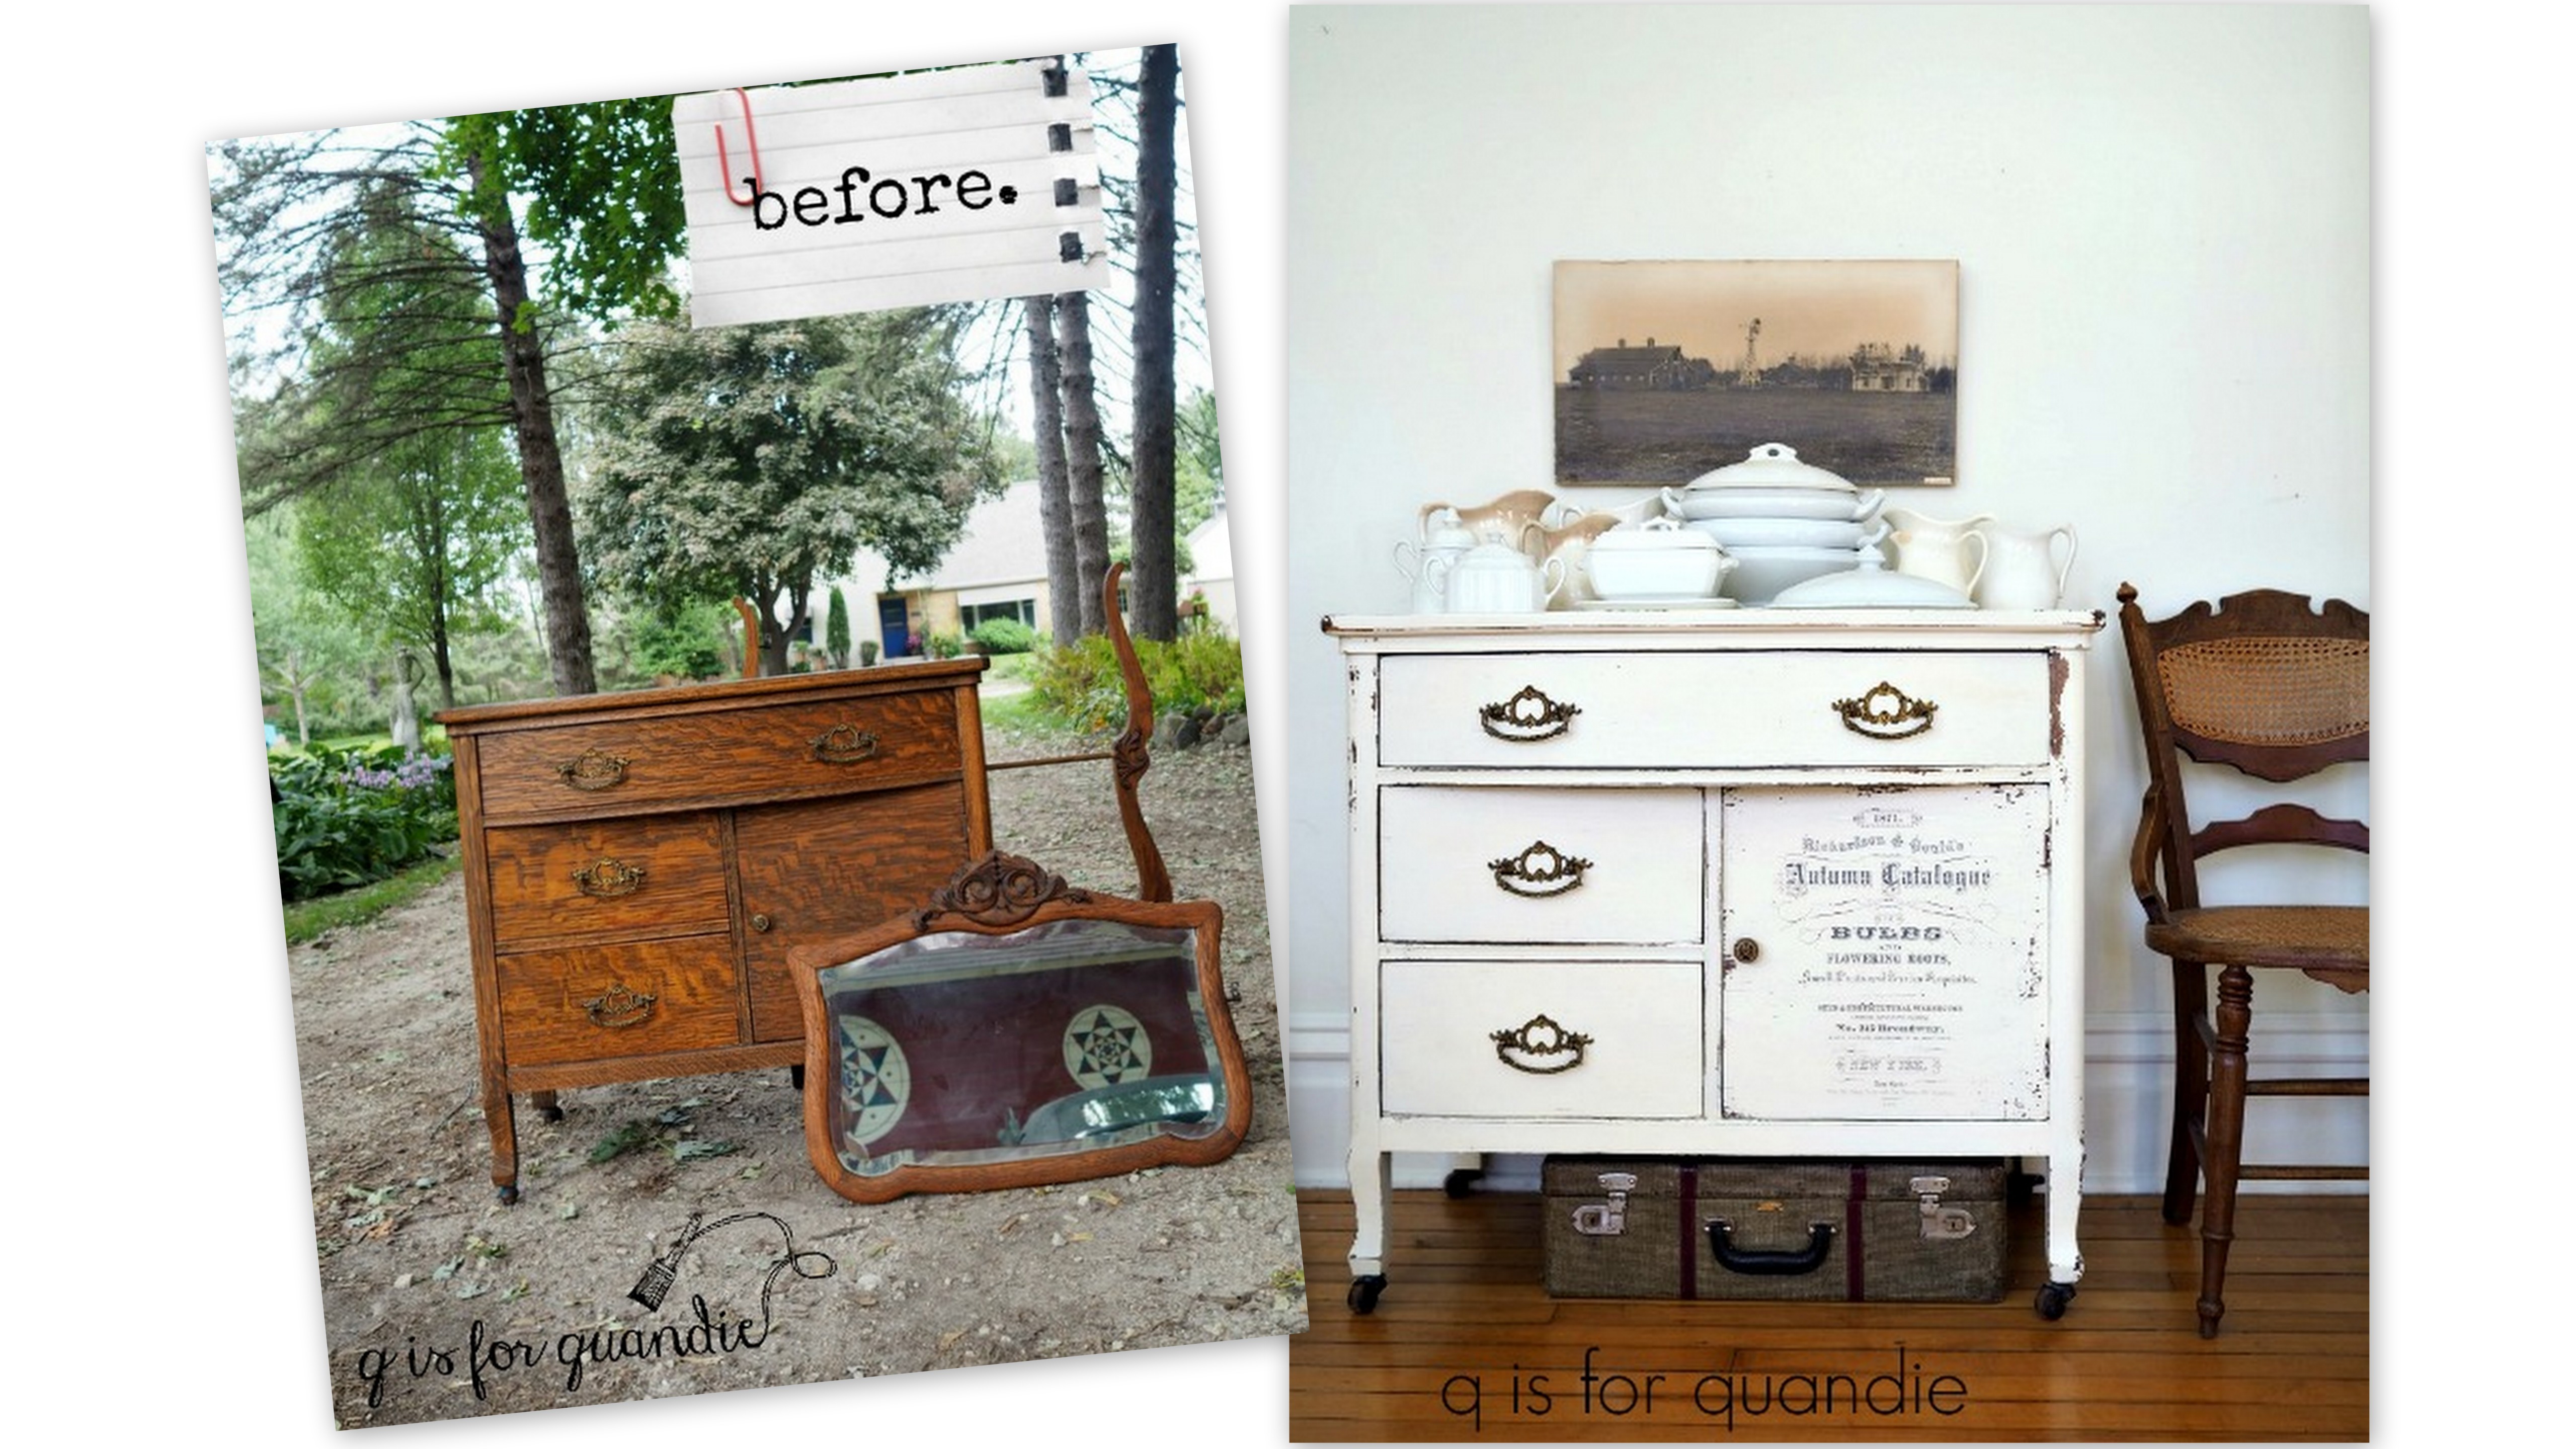
Anyway, here it is.
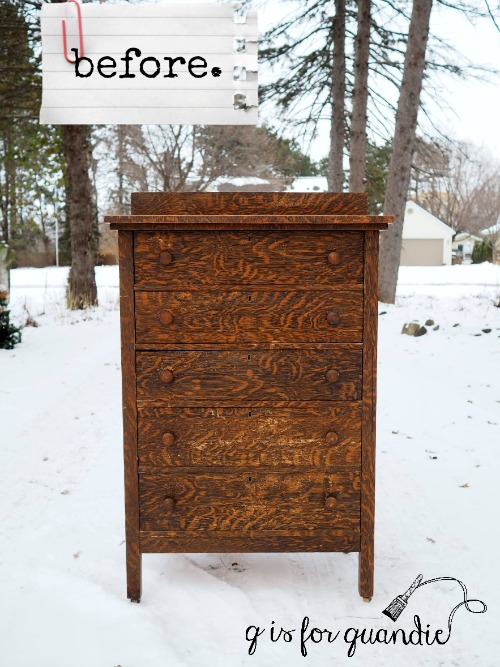
Perhaps you are wondering at this point what gotten into me. This is not at all my typical style. But I was in a mood and I knew that with some paint and some new hardware I could bring out some amazing mid-century mod style with this piece.
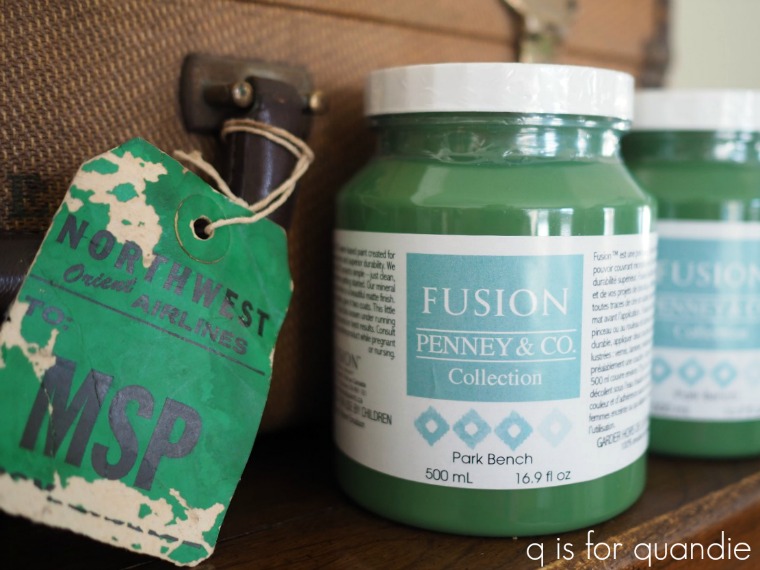
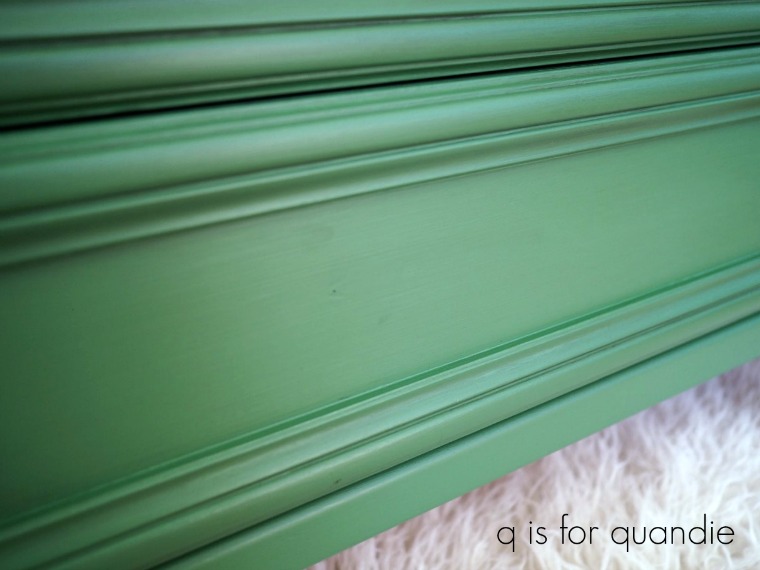
As soon as I saw it I was picturing it in a crisp fresh green. Specifically Fusion’s Park Bench. Perhaps it had something to do with the shortage of green things to look at this time of year in Minnesota!
But then I hesitated.
That’s a lot of COLOR. It’s a larger piece of furniture, could it really handle it? I definitely won’t be keeping it, so I had to wonder if I would be able to find a buyer for a large-ish, very green, mid-century dresser.
But the universe kept shouting ‘green’ at me. Starting with that Northwest Orient luggage tag. How many of you remember the days of Northwest Orient?
Then I was watching a colorized version of an old episode of the Dick Van Dyke show. I have to say, I only made it about halfway through the show before I had to give up on it but that’s a whole different story. I just had to change the channel when Dick told Laura he wouldn’t allow her to dye her hair. Um, excuse me? Allow? As if. Some mid-century things should definitely not come back in style. But what I couldn’t help but notice was the fab green chair in the background of Dick & Laura’s living room.

Clearly this shade of green was a popular mid-century color.
Next I was thinking that this piece would work beautifully in a nursery so I checked on pinterest to see if people were doing this color in nurseries these days. And why yes, they certainly are.
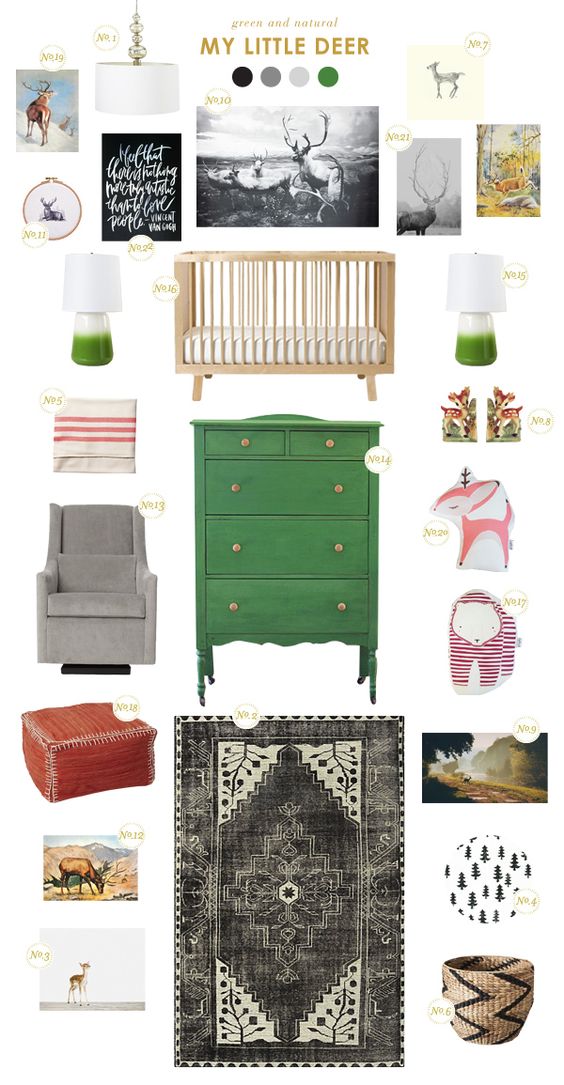
And doesn’t it work beautifully?

I’ll definitely be marketing this piece for a nursery, but it could also work well as a liquor cabinet/bar.
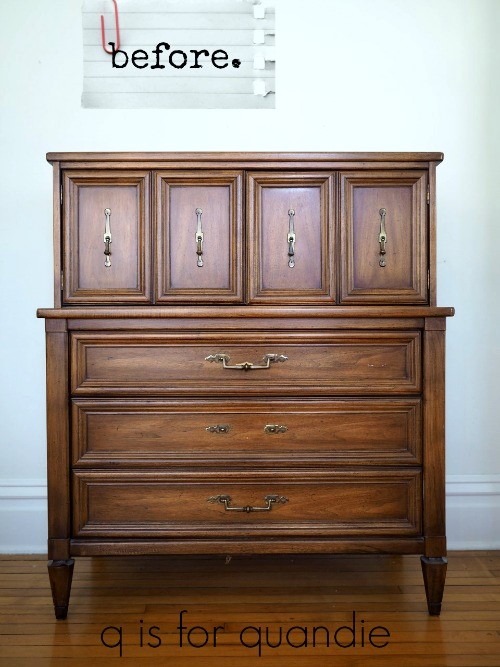
But I’m getting ahead of myself. Let’s go back to the beginning. Since I went so far off track, here’s the ‘before’ photo as a refresher.
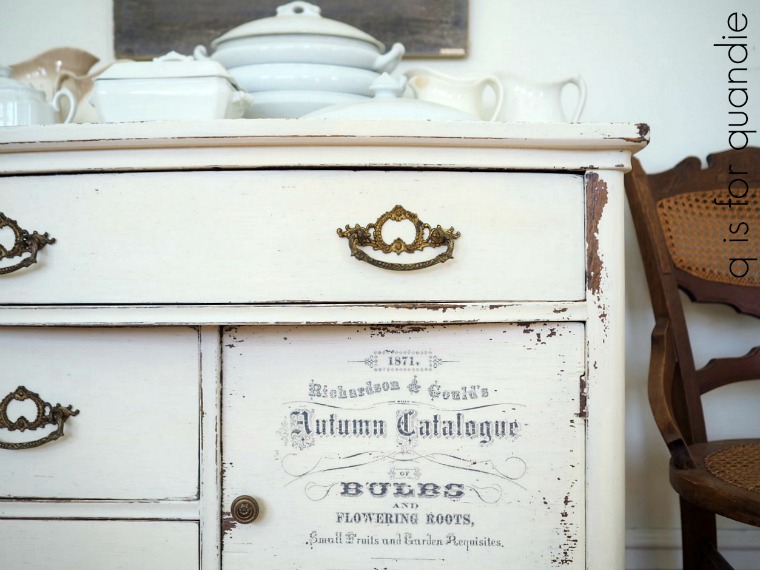
This piece was in almost perfect condition. The drawers glide beautifully, the piece is solid and well made. The only problem was a missing drawer pull (see the middle drawer). As I’m fond of saying, if you’re missing one you might as well be missing them all. It would be very tricky to find a replacement part for that one pull. I could have tried to find three new pulls for the drawers that worked well with the hardware on the top doors. But I didn’t much care for the look of those anyway, so I opted to go with new hardware overall. That meant filling the holes left by the old pulls on the drawers.
It’s not difficult at all to fill and disguise previous hardware holes if you’re planning to paint your piece. I don’t think you’d know that there used to be holes here, would you?
Here is how I do it. Start by placing a piece of tape over the back of the hole on the inside of the drawer. Next, fill the hole with Elmer’s ProBond Wood Filler (or whatever brand of wood filler you like, as long as it is paintable). Make sure the entire hole is full of filler, then smooth off the excess and let it dry. Most fillers claim that they don’t shrink, but I have yet to work with a brand that doesn’t dry a little bit concave (maybe technically they don’t shrink, but they do settle into the hole).
 So here’s today’s q-tip: Once dry, sand your wood filler and then go back with some lightweight spackle and fill again. I find that the spackle is smoother and does a better job of filling in that last little bit of concave space that was left after the wood filler dried.
Once dry, I sand smooth again and then I’m ready to paint.
After my usual prep (light sanding following by cleaning with TSP Substitute) I painted the piece with two coats of Fusion’s Park Bench. I purchased two pints of the Park Bench just in case one wasn’t quite enough. There is nothing more frustrating than running out of paint near the end of your project. But I didn’t even use one full pint. I probably used about 3/4 of it. So on the plus side, I have lots of Park Bench left for another project down the road!
Since this is a mid-century piece I opted not to distress it by sanding the edges. However, I felt like the result looked somewhat one-dimensional so I decided to add some dimension in another way. By adding black wax.
You do not have to top coat Fusion acrylic paint for durability or water protection. However, you definitely can wax over it for aesthetic reasons like this one.
I find that wax behaves a little bit differently over acrylic paint than it does over a more porous paint like chalk paint or milk paint. It doesn’t soak in quite as much, which can be an especially good thing when you are working with black wax over a lighter color. You are better able to wipe away the excess without leaving a ‘stain’ of sorts behind. With this piece I really just wanted to add more definition to the trim around the edges of the drawers and door fronts. I used a wax brush to apply the wax just to those areas working it into the creases. Then I used a clean rag to wipe away the excess from the raised areas, leaving some wax behind just in the creases.
It was just enough to give the dresser a bit more dimension by accentuating that trim.

I replaced all of the original hardware with these gold knobs from Hobby Lobby.
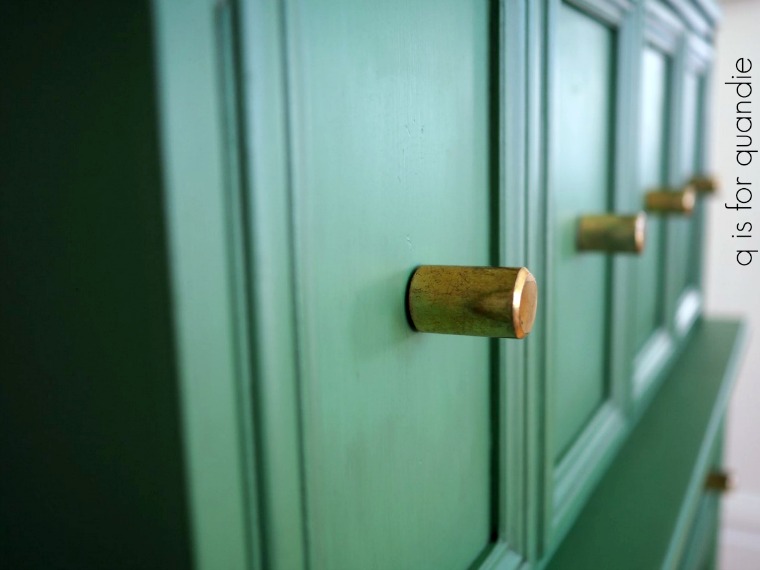
I wish Hobby Lobby had more mid-mod style knobs. They do have some, but not a huge selection. This particular style also comes in silver, but I thought the gold paired with the green had more of a mid-century feel.
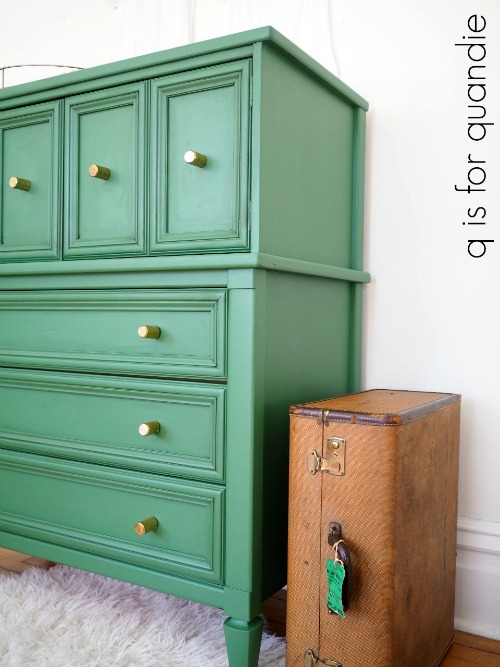
Are you wondering what the whole piece looks like? I’ve been teasing you a bit with all of these glimpses. Enough already, here it is …
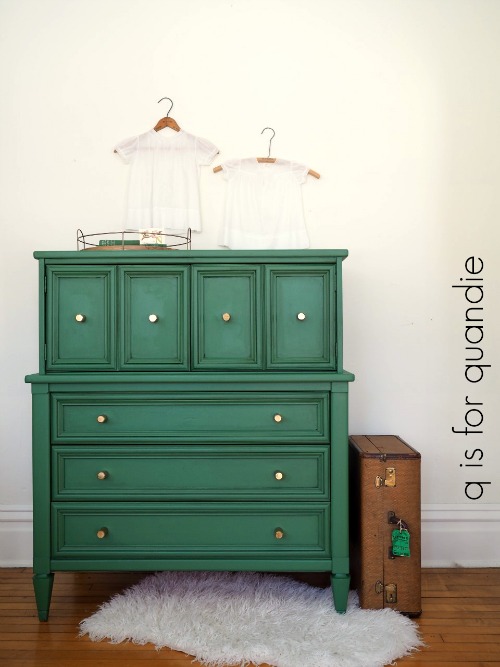
This is my attempt at staging it for a nursery without having any real nursery type props other than some pretty vintage baby dresses and a fabulous vintage green kid’s book.

I also felt like most of my vintage, cottage-y, farmhouse-y style props weren’t quite right for the more mid-mod look of this piece.
I did much better staging it as a bar.
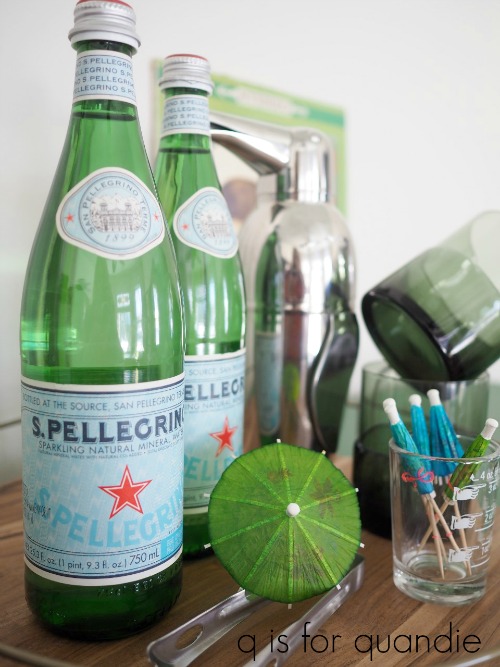
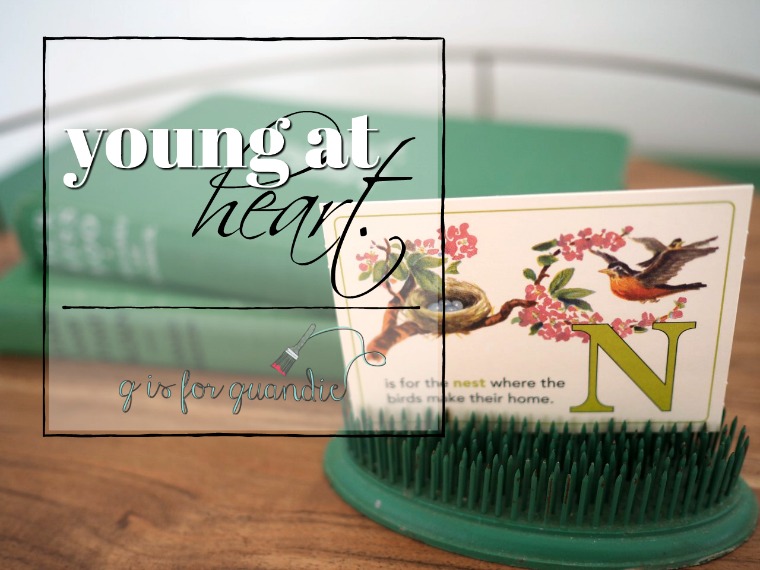
I found this old record album at the thrift store for $1.49. Perfect for providing some mid-century art to the wall. I’ll probably just re-donate it after using it in my photos. Not only did it have the perfect shade of green, but the title is perfect for staging a piece of furniture meant for the very young at heart!

I found the round tray that I’m using in the photos at Target.
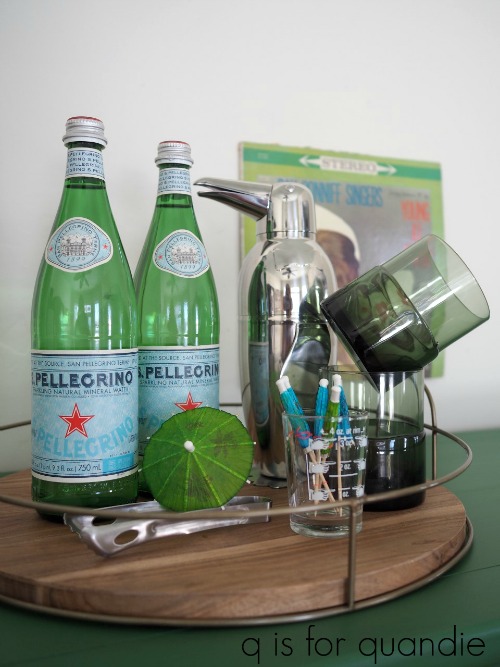
It’s part of the Hearth & Hand with Magnolia line. While I was standing in that aisle of my local Target I ran into my friend Donna (also a loyal reader of my blog, thanks for that Donna!) and we had a whole conversation about how the final season of Fixer Upper has really transitioned toward more of a mid-century modern style rather than their previous farmhouse style. Have you noticed that? It’s definitely noticeable in their Hearth & Hand line.
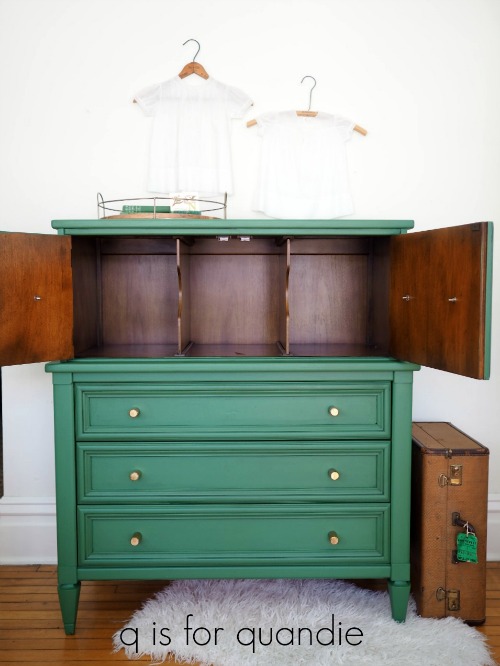
As you can see, I did not paint the inside of the upper cabinet portion of the piece. It’s in perfect shape, so I felt that leaving it alone was the right choice. At first I wasn’t sure why this top section is divided vertically like it is. But looking at it again I realize that each section is the perfect width for folded shirts. Also, those dividers are removable, so if you did want the use the entire space without dividers you could. And coincidentally this section is also the perfect height for most liquor bottles or baby clothes, or maybe diapers?

How convenient.

Now the real trick is going to be seeing if this dresser will sell. Wish me luck on that!