Back in 2008 the hubby and I went on a cruise in the Mediterranean. It was actually our second Med cruise, our first was in 2004 with our good friends Joe & Vonda. But that was before I went digital (if you can believe that!), so I can’t feature it on throwback Thursday.

We loved that first one so much though that Mr. Q and I chose to take a second Med cruise. The itinerary was entirely different, so no repeats (well, there was one, but more on that later). We sailed from Barcelona, Spain with stops in Aix en Provence, Villefranche-sur-Mer, Livorno, Corsica, Gibraltar and Tangier.
Technically our first port was Marseille, France but we traveled inland a little ways to Aix en Provence. One of my former co-workers and his wife were living near Aix at the time, so it was fun to have our own private tour guides that day.
It might sound kinda strange, but I like to visit old cemeteries. The painter Paul Cezanne is buried in the Saint-Pierre Cemetery in Aix, and my friends were game to go check that out with us.

We followed that up with a lovely lunch on a patio with the most delicious wine. Why is it that wine always tastes better on a patio in France? And although our French waiter was a little cool at first, he warmed up to us and in the end was quite charming. Or perhaps it was the wine!
Here are our personal Aix tour guides, Dan & Sue.

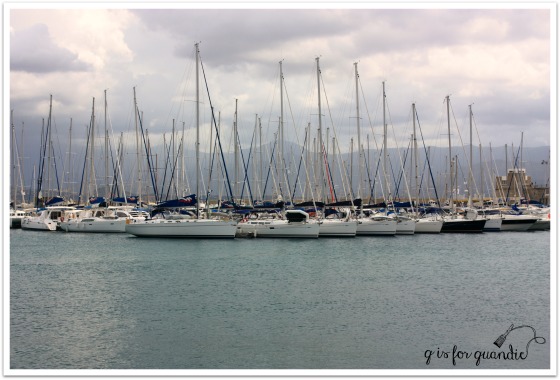
Our next port of call was Villefranche-sur-Mer which is right in between Nice to the south and Monaco to the north.

One of the nice things about taking a cruise in Europe is that you can choose your level of bravery when it comes to exploring. You can take one of the ship’s shore excursions where everything is planned for you and you don’t have to worry about a thing, or you can strike out on your own. Mr. Q is not a huge fan of guided tours, so we had done some research ahead of time and knew that it would be pretty easy to take the local train to Monaco for the day.

Well, it was supposed to be easy. I’m sure for travel savvy people it would have been a breeze, but we aren’t quite as savvy as you might think. We accidentally ended up on an express train for the return trip which flew right on past our stop at Villefranche and took us into Nice. To say I was a little panicked about this might be an understatement. We had a ship to catch! We were about to be stranded, although there are probably worse things in life than to be stranded on the Cot ‘d Azur. Fortunately the trains ran frequently in both directions, so we crossed over to the opposite platform in Nice and after figuring out how to identify express trains we hopped on the correct train and made it back in plenty of time. Phew! We even managed to have time to stroll around Villefranche for a bit.
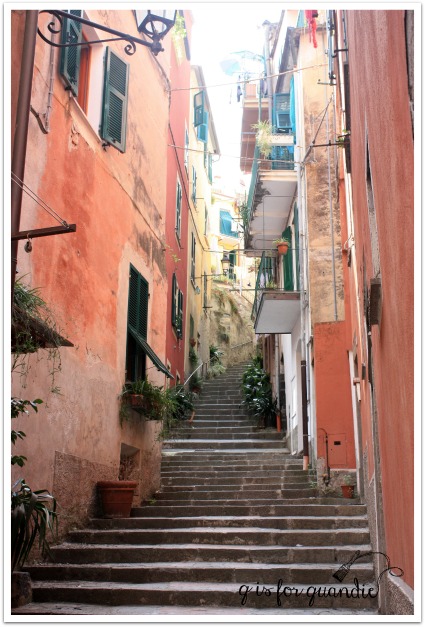
After that harrowing (ok, not really) experience I was fairly happy to be on an official ship excursion in our next port which was Livorno, Italy. Livorno itself isn’t the draw, but you can get to Pisa, Florence or the Cinque Terre from there. We opted for the Cinque Terre.

I always laugh at that photo, doesn’t it look fake? Like Mr. Q is posed in front of a green screen? But no, 100% real.
See that little pink circle sticker on Mr. Q’s shirt? Proof positive that we were on an organized tour!

The Cinque Terre was so lovely that many of my photos look kind of fake.
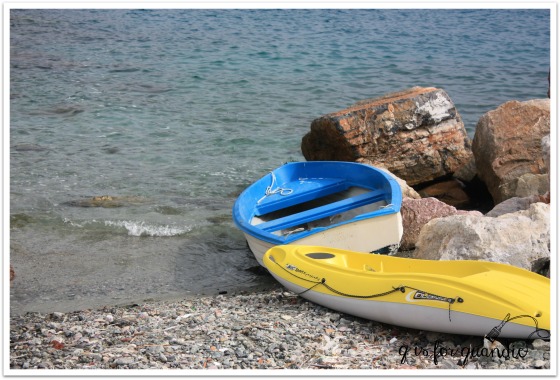
All real though, I promise.
The next port of call on this cruise was Civitavecchia. For those of you who don’t know how this works, when you look at the itinerary of a cruise such as this one it will list your port of call like this: Rome (Civitavecchia), Italy. Rome is not on the coast. In fact, it’s about 70 – 80 minutes away by train. Having been to Rome a couple of times already, Mr. Q and I made a serious tactical error at this point in our trip. We decided not to take the train to Rome. Dumb, dumb, dumb. I still regret this choice. We thought it would be a good chance to rest up (you’ll see why this wasn’t necessary in a few minutes). But seriously, how often am I going to get to Rome? And there are so many things I haven’t seen there yet. We could easily have taken the train and then visited the Villa Medici for example. Well, it was 8 years ago, I need to get over it already. But if you ever find yourself in this position, please just go to Rome. For me.
After our day of rest, our ship moved on to Corsica. Corisca was … well … meh … OK. It had a charming European feel. There were lots of shops. But we were there on a Saturday and clearly it was the day that everyone came to town to shop. It was a zoo. Crowds everywhere. We enjoyed walking around for a few hours, and of course there was some lovely scenery. But there wasn’t a lot to do there.
So imagine our dismay when that evening it was announced over loudspeaker that our ship was in need of a repair. The part was being flown in from somewhere. We had to stay in Corsica for an extra day.
Corsica on a Sunday was the polar opposite of Corsica on a Saturday. Nothing was open. Absolutely nothing. It was a ghost town. Plus we’d already walked the full length of the city the day before. Plus it was overcast with off and on showers (the only rain on the entire trip I might add). Clearly this was meant to be our day of rest. See? We should have gone into Rome! If only we’d known that this unplanned rest stop was headed our way.
Eventually our part arrived, the ship was repaired and we headed off to Gibraltar, home of the famous rock. Also home of the famous Barbary Ape (or macaque).
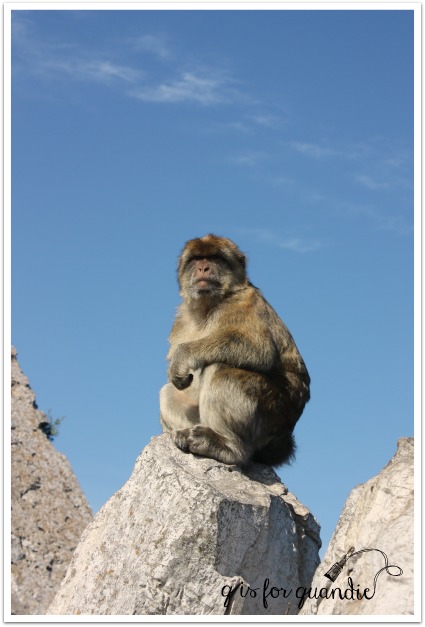
These guys are all over the place on the rock. And this isn’t a zoo, there are no barriers between you and the wildlife. Add to that the fact that they are kind of mean, and they really like to steal stuff. Especially food, but other stuff too, like cameras, hats, sunglasses, etc. We were warned to keep everything tucked away, and once they take something not to try and get it back. Yikes! I watched one of these apes snatch the ice cream bar right out of the hand of a child. Not pretty.
The next stop on our trip was supposed to Casablanca. However, since we were a day behind due to our engine repairs, something had to give and sadly it was Casablanca. Mr. Q and I were pretty disappointed since we had booked a side trip to Fez. The old part of the city of Fez is a UNESCO World Heritage site. Fez was founded in 859 A.D. Can you even imagine a city that old? I know we would have loved seeing it. But no use crying over spilled milk. On the bright side, we were refunded the pre-paid fee for the excursion and also given additional ship board credit to make up for a missed port. We ended up not owing a single dime on our shipboard account by the end of this trip, which is normally quite unheard of.
Our last official port of call was Tangier. By the time we got to Tangier, we had become quite friendly with our dinner tablemates, two couples from Scotland that were traveling together and had been friends with each other for over 40 years. We’d been having so much fun with them at dinner, despite really only understanding about half of what they said most of the time. We thought it would be just ‘tickety boo’ to combine forces in Tangier and hire a private guide with a van for the six of us.

We toured a bit of the countryside.

Mr. Q rode a camel.

Then we headed back for a tour of the Medina on foot.

Medina: the ancient quarter of any of various North African cities.

There was plenty of Moroccan tile to be found.
Well, all good things come to an end and thus our cruise ended where it started, in Barcelona. We spent a few extra days at a hotel there so that we could say we’d really seen it. We enjoyed our time in Barcelona. It’s a lovely city with some unique twists, like all of the Gaudi architecture. But to be honest, by this point what made us happiest was the lovely little sidewalk cafe not far from our hotel where we had breakfast every morning.

I can still taste that delicious coffee.
I hope you enjoyed today’s throwback Thursday. I suspect that I enjoy taking these trips down memory lane far more than any of you, but I hope that at least it’s not total torture for you. On the bright side, if you’re bored by these posts you can just skip right over them and come back tomorrow for some more painted furniture. On the other hand, if you’ve considered a Med cruise yourself I hope you found some inspiration here! I highly recommend it!


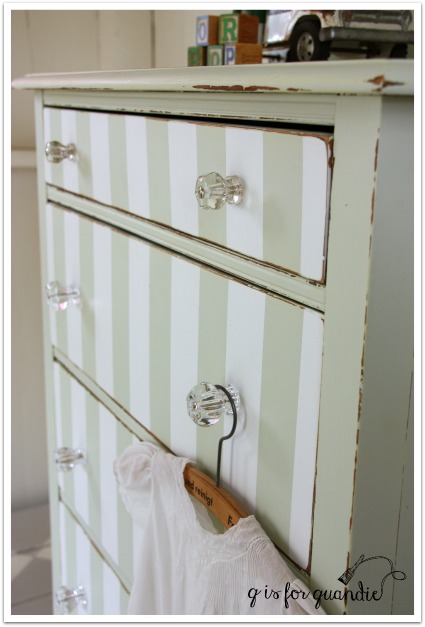
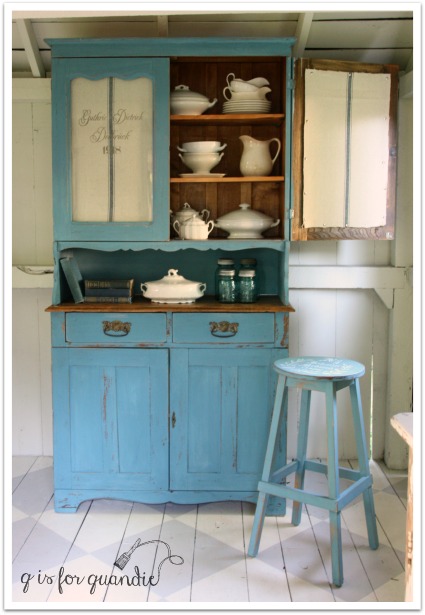
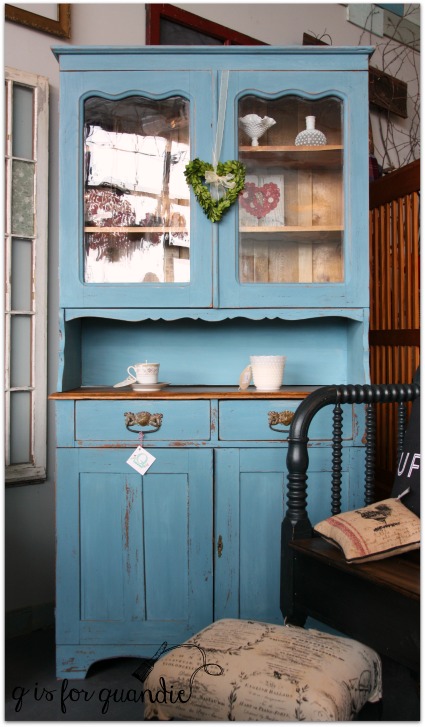 Nothing behind the glass. Which is great if someone wants to display things inside.
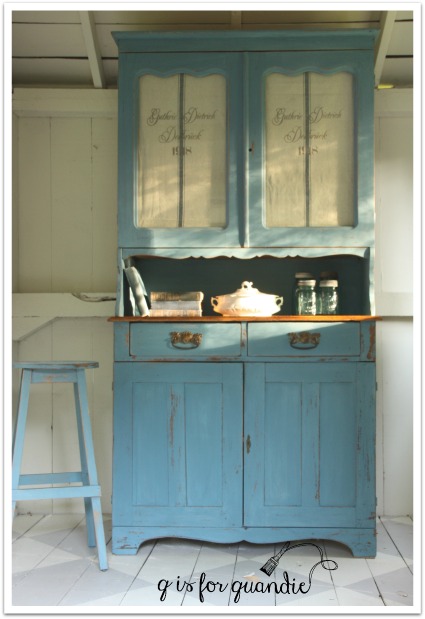


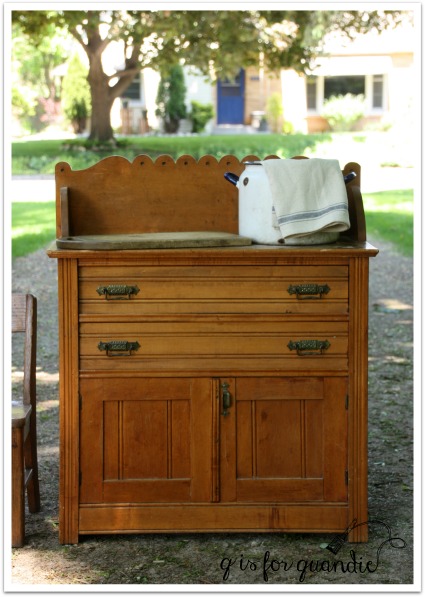
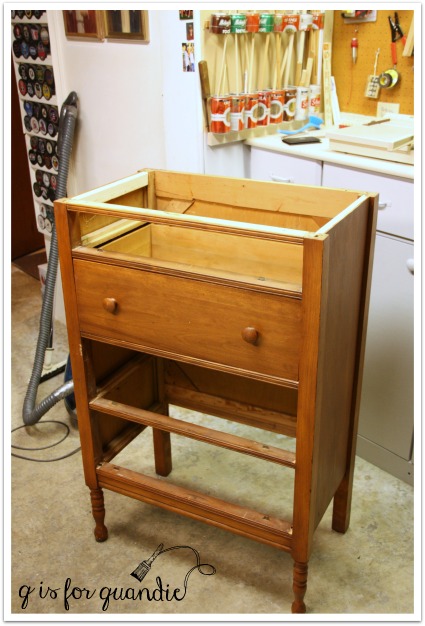
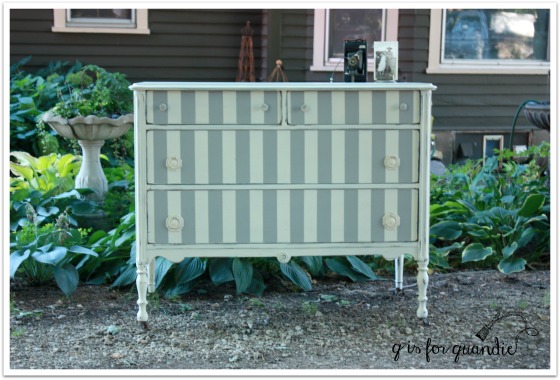
 The problem with this dresser was that it was what I like to call a bit wonky. I judge wonky-ness by putting my hands on the top of the dresser and trying to wiggle it side to side. It shouldn’t wiggle or have any give. But this one did. When a dresser is wonky, I send it over to Ken and he shores it up.
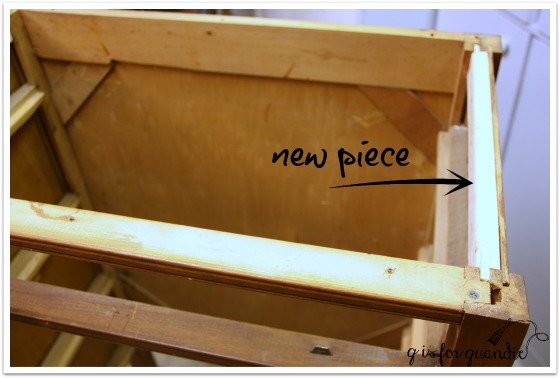


 Each can is labeled with the dowel size.
 Gold Medal soda? Does anyone remember that brand? I believe it was local to Minnesota.
 It’s ingenious, right? Plus it’s environmentally sound because he just used old cans that would have been thrown away, not to mention it’s pretty thrifty. Ken was recycling before it was cool.
 He custom built the wood cabinet with cubby holes of the precisely right size for them.

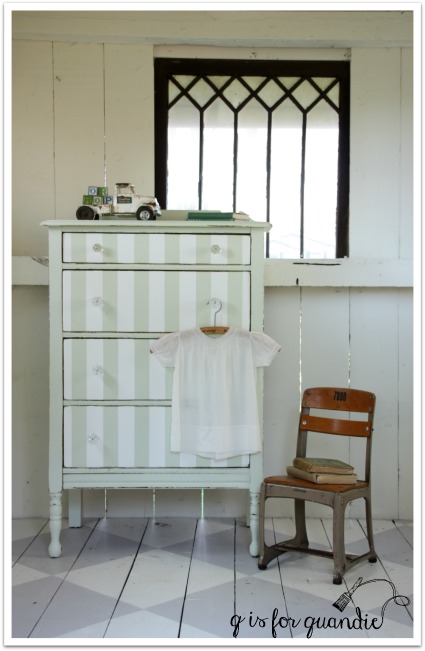


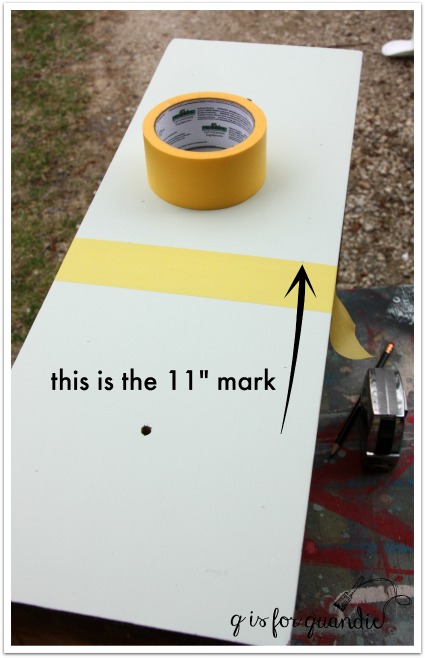
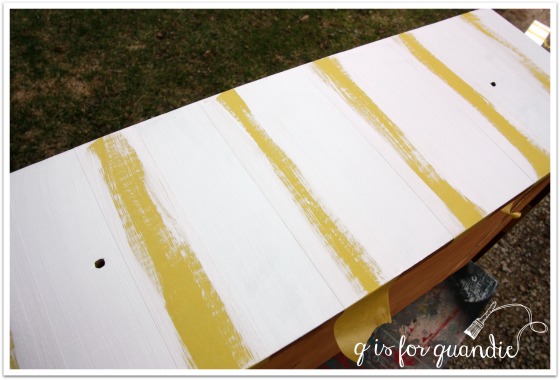
 I like the delicate surface frog tape for taping over fresh paint (see, it even says that on the label!).
 Now, here’s a little secret. The wide frog tape is 1.88″ wide (why, oh why, did they do that?), so I put 2.12″ between each stripe. Why? Because I can’t wrap my head around the math involved in 1.88″ wide and what that equals on the measuring tape (what would that even be? can any of you tell me?). Instead I make my marks every 4″. And I have found that visually the stripes do not look like they are different widths.