


Mr. Q and I drove to Apple Valley to pick up this sweet antique serpentine dresser a few weeks ago. Unfortunately I have once again neglected to take a ‘before’ photo, drat! But I can tell you that someone had ‘refinished’ this dresser by applying a thick, drippy and very shiny coat of polyurethane to the entire thing.
The ad clearly stated that the dresser had some additional issues (you’ve got to admire honest people!). Both of the two lower drawers had holes in the bottoms. They were caused over time by the drawer bottoms rubbing on the metal drawer stops. I assumed that the drawers were rubbing because the stops weren’t pounded in far enough to clear the drawer bottoms, easy enough to fix. In hindsight, I should have realized the problem was more significant. But luckily I have a secret weapon in my back pocket, or should I say next door? Ken the handyman to the rescue!
Whenever I bring home a dresser that needs repairs I call Ken to come over for a confab. We start with trying to figure out what is causing the problem. In this case, the drawer runners were worn down from years of use as were the bottoms of the sides of each drawer.
Those worn down parts meant that each drawer would sort of fall down about ¼” in the back. So when the drawer was pushed in all the way, the back of the drawer was sitting about ¼” lower than the front. That’s why it rubbed on the drawer stops. It also meant that the drawer fronts would be a little angled and not sit in the openings properly. I hope this description is making some sense to you.
So, not only did the drawer bottoms themselves need to be replaced, but we needed to build up the bottoms of each side of the drawer where they were worn down. And by “we”, I really mean Ken. Here is what he came up with.

He trimmed the sides down so that they were even and level with the back. He replaced the drawer bottom, and then he build up new “sides” for the drawer to rest on.

Next, he added extensions onto the runners inside the body of the dresser.

Now the drawers remain level, they slide in and out easily and they don’t rub on the stops. And they have fresh new bottoms!
Ken really did all of the hard work on this one! Once he was done with the repairs, I stripped the top of the dresser and waxed it with Cece Caldwell’s aging cream. Let’s talk about that for a minute. I am sure there are going to be a few of you who think I should have done something about the stains, gouges and unevenness of this dresser top. Since the top is solid wood and not a veneer, I could have sanded the life out of it to create a smooth and blemish free top. But I happen to love those battle scars, and when I say “sanded the life out of it” I mean it literally. I like seeing some history on my pieces. As long as these flaws don’t compromise the functionality of the piece (like the drawer issues did), I like to keep them. I know this philosophy isn’t shared by all. Wouldn’t the world be a boring place if we all liked the same thing?

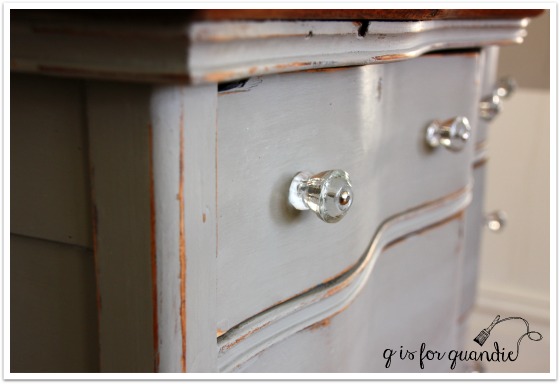
Once I’d made the decision to strip and wax the top, I decided to go with chalk paint on the body instead of milk paint. Remember that very shiny coat of poly that I didn’t get a photo of? Had I gone with milk paint I probably would have gotten some significant chipping. Yes, I love a good chippy piece. But I felt like a smoother chalk paint finish would be a nice juxtaposition with the rustic top on this one. I also could have gone with a more feminine paint color to play up the curvy-ness, but instead I went with a masculine medium grey (this is Annie Sloans’ French Linen).
Before I move on, I should also mention that this dresser did not come with its original hardware. I’m sure that was long gone. Instead there were some of these Early American style drawer pulls on it …

I am not a fan of these. So I removed them and filled the extra holes with wood putty. I gave this dresser some lovely glass knobs instead.
I staged this piece with the radio I snagged at a garage sale last summer and of course I had to include Annie Sloan’s Room Recipes for Style and Color. This is an awesome book, if you haven’t already seen it.

I also used my grandfather’s water color. I haven’t used this in a photo shoot in quite a while, so there are probably some of you who have never seen it.

I have two watercolors that my grandfather painted. They both have a fab mid-century feel, but this one is my favorite.

I love the yin and yang of this dresser. Feminine curves with a masculine color, battle scarred top with a smoother paint finish and pretty glass knobs. These choices all create a nice balance, don’t you think?
This dresser is currently available for sale. If you are local and interested, leave me a comment and I will get back to you with the details.
In other news, since it appears that Ken now needs his own fan club, I decided to get going on a virtual t-shirt design.

What do you think so far?
Linking up with Friday’s Furniture Fix!






 q is for quandie