planting outside of my comfort zone.

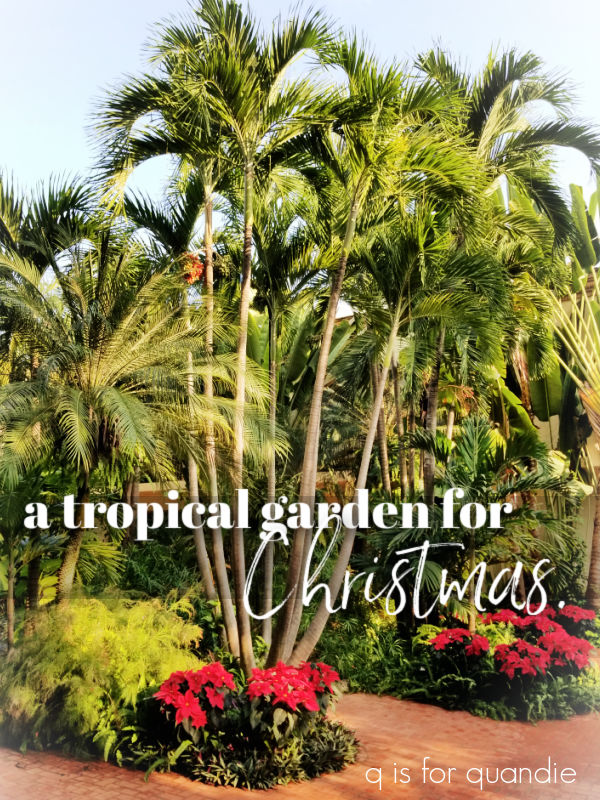
I had planned to get out to the botanical garden at Ethel M’s while I was out at my mom’s house last week.  I thought it would make a great ‘Sunday mornings in the garden’ post.

If you aren’t familiar with Ethel M chocolates, first of all they are named after Ethel Mars.  She was Forrest Mars Sr.’s mother, and he is the founder of Mars, Inc.  So many brands are under the Mars umbrella, including Snickers and M & M’s, but Ethel M is their fresh-crafted gourmet chocolate line and they make them in Henderson, NV.

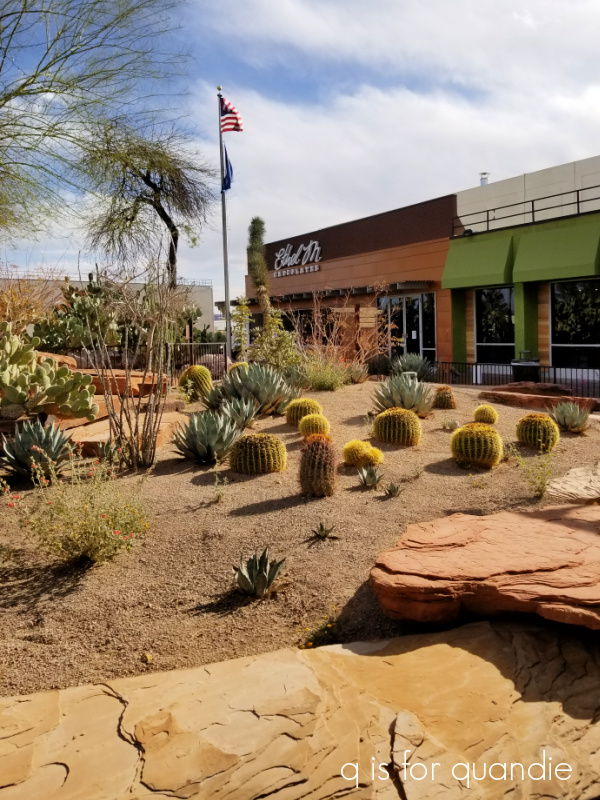
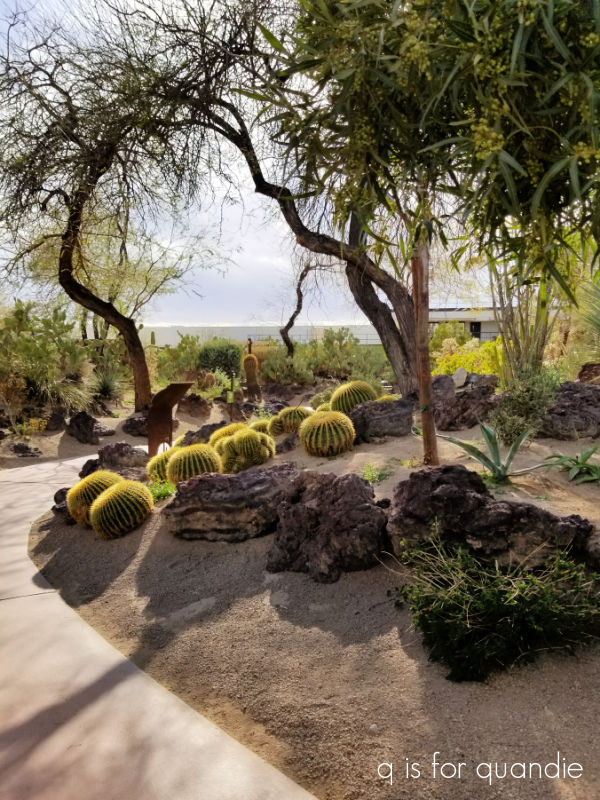
You can tour the factory to see where they are made, and to try a free sample.  But I go for the botanical garden outside.

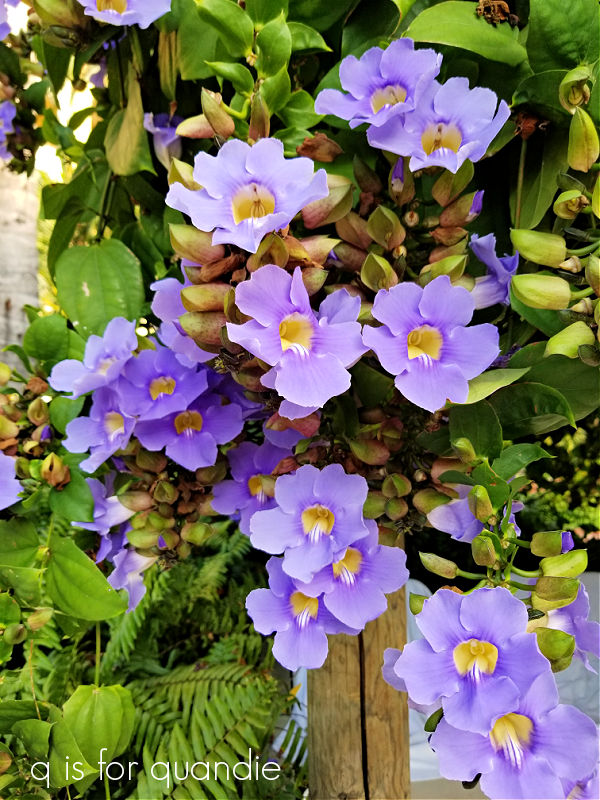
I have to admit, I’m not really a big fan of desert scenery.  I tend to prefer a much more lush look.  But the Ethel M garden shows how beautiful cacti and other desert plants can be.

All of that being said, I didn’t actually get out there this time.  All of those pics are from my visit last year.  My mom came down with bronchitis just before I arrived last week, and she wasn’t feeling up for much.  So I basically spent the week laying low with her.  Honestly, I was quite lazy and didn’t accomplish much.

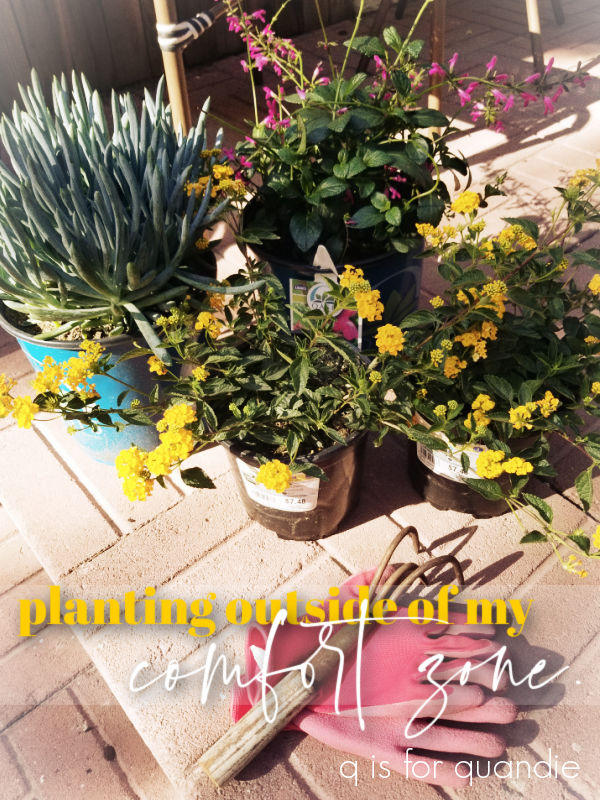
However, I did do some planting for her.

She has a few pots on her patio, and I tend to plant those up with annuals each time I visit.  When I was out in February I put in some pansies.

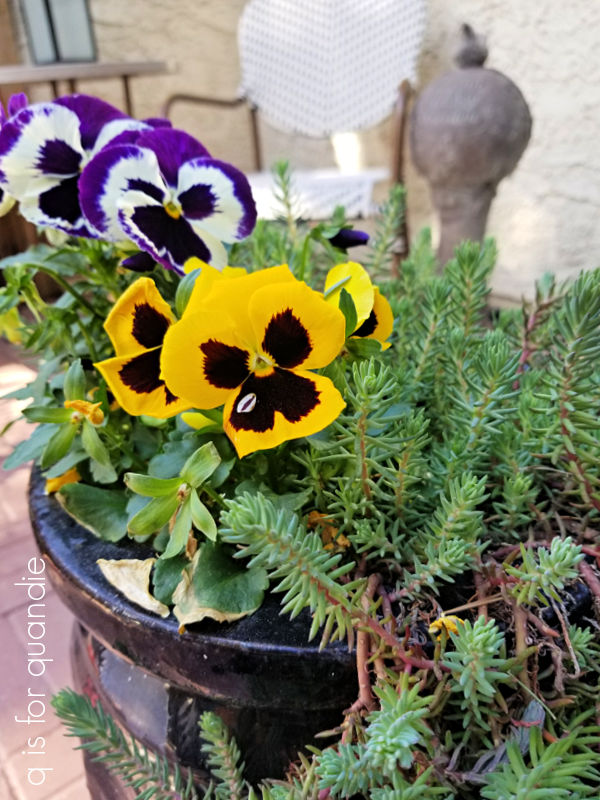
They were still looking OK, but with hot weather just around the corner for her, I knew they weren’t going to last much longer.  I wanted to replace them with some moss roses, which did extremely well for her last summer, but they weren’t available at her local Lowe’s yet.

So I left most of the pansies in place and decided to plant a few things right in the ground for her this time around.

Here’s the thing, my mom lives in a townhome.  They have a rock landscape with irrigation spots here and there for specimen plants.  As plants have died over time, it seems that her HOA is not replacing them.  So there are lots of spots that have a functioning irrigation drip, but no plant.

I’m not usually a rule breaker, technically my mom is supposed to get approval to do any planting in the ground.  But … well … I didn’t have time to wait around for approval.  I planted anyway.

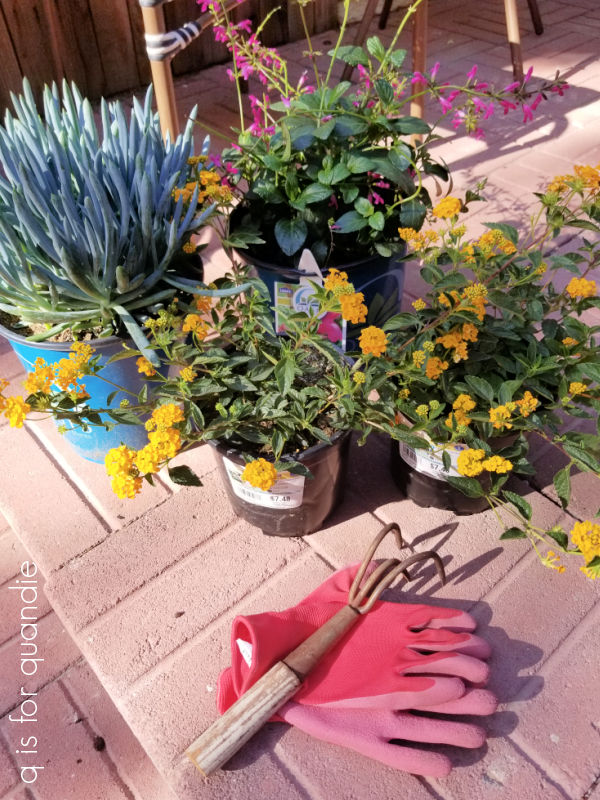
The first challenge for me was figuring out what to plant in her zone 9a, which is a long ways from my own zone 4b garden.  I started out with the yellow lantana.  There are already several of these in the ground in her complex, so I figured they were a safe bet.  I also thought maybe the HOA wouldn’t notice them since they would just blend in with existing plantings.

I grabbed that plant in the back of the photo above with the bright pink flowers because I thought it might attract hummingbirds.  My mom has a hummingbird feeder just outside her sliding glass doors and she loves to watch the birds.

It’s a Chiapas Sage which grows best in full sun and is drought tolerant so I’m hoping it will do well, and draw in lots more hummingbirds.

I also grabbed a gardenia while shopping.  When my family lived in Florida we had a gardenia and my mom loved it, so I thought I’d give it a go.

I wasn’t sure it would do well in the ground with their once a week drip irrigation, so I decided to put it in one of her pots where it would be easy for her to water.

The tag said it would do best with 3 to 4 hours of morning sun, but with protection from the intense afternoon sun.  I was able to place the pot in the perfect location on her patio for that.

I had to laugh when digging through the boxes of stuff in my mom’s garage looking for plant food because I found some vintage garden tools.

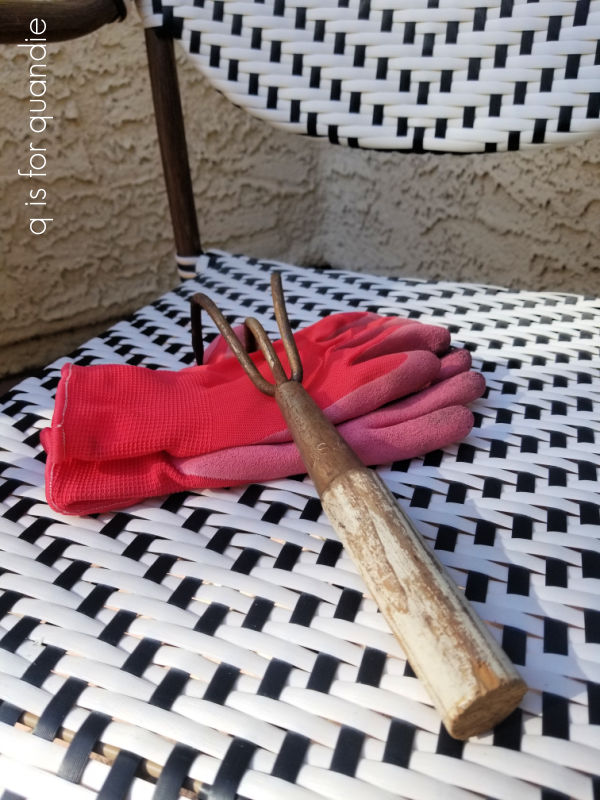
She was never much of a gardener, so I was surprised to find this.  If I came across it at a garage sale I’d probably pick it up to use as a photo prop!  Who knows when the last time was that this tool was actually used.  I may have to sneak it into my suitcase the next time I visit.

For now, I’m keeping my fingers crossed that everything I planted survives.

How about you, do you ever garden outside of your zone?  Leave a comment and let me know.


the first gardening task of the year.

I can now positively say that spring has finally sprung, and so have my alliums.

Just before I left to visit my mom in Vegas we had several days with temps in the 70’s and it really started to feel like summer is on the way.

Between you and me, I’m taking full credit for the weather warm up.  Every time I plan a trip somewhere warm in the winter, Minnesota gets unseasonably warm temps while I’m away.  As soon as I booked my ticket to Vegas, the forecast went from 1′ of snow to sunny and 75.  You’re welcome Minnesota!

Now that gardening season is upon us, I’m going to resume my ‘Sunday mornings in the garden’ series.  So for those of you who are gardeners, be sure to keep an eye out for Sunday morning blog posts.

The very first gardening task I take on each year is pruning my hydrangeas.  This is a job that can be tackled pretty early on in the season (even late winter if you’re so inclined), but I usually save it for our first warm sunny day when it’s still too soon (and too muddy) to do much else in the garden.

After a long, snowy winter the blooms that I left on for winter interest are looking pretty tired (and yes, that is still a big patch of snow and ice in front of the potting shed, will it ever melt?).

There are a few general rules I keep in mind while pruning my panicle hydrangeas (Limelight, Little Quick Fire, Strawberry Vanilla, etc, etc).

  • reduce the overall height of the shrub by about 1/3.
  • remove any dead, broken or weak branches.
  • remove any branches that are rubbing on other branches.
  • prune just above a leaf node.

All of that being said, in my experience you don’t really have to worry too much about rules when pruning panicle hydrangeas.  A couple of years ago I totally hacked at the Limelight hydrangea in my front garden.  I took it down to about 2′ (from probably about 7′ or so).  I left only the thickest stems, and I didn’t even look for leaf nodes.  Yet it still came back gangbusters, and was right back to 7′ tall two years later.

Since panicle hydrangeas bloom on new wood, pruning them will maximize the number of blooms you get.

  I like leaving a little more height on the hydrangea next to our deck because once it leafs out it creates a nice little privacy screen.  It doesn’t look like much now, but here’s how it will look from this spot in August.

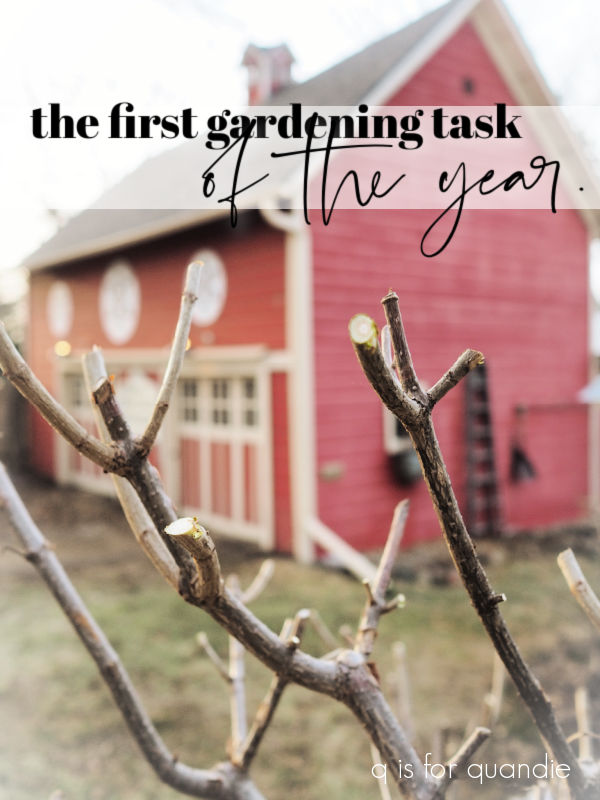
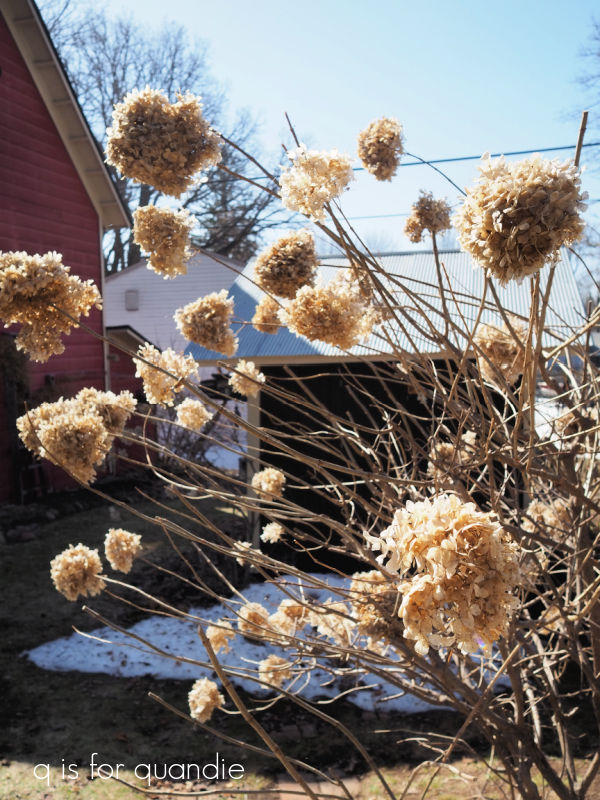
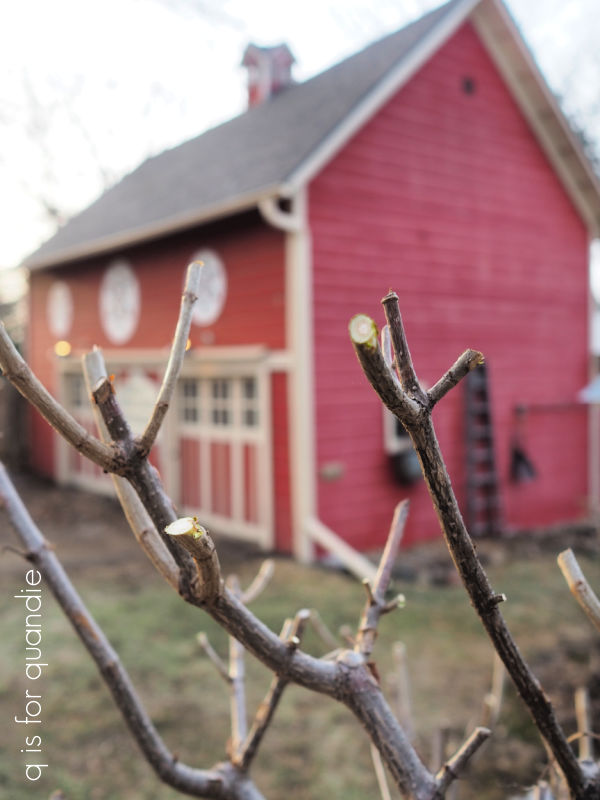
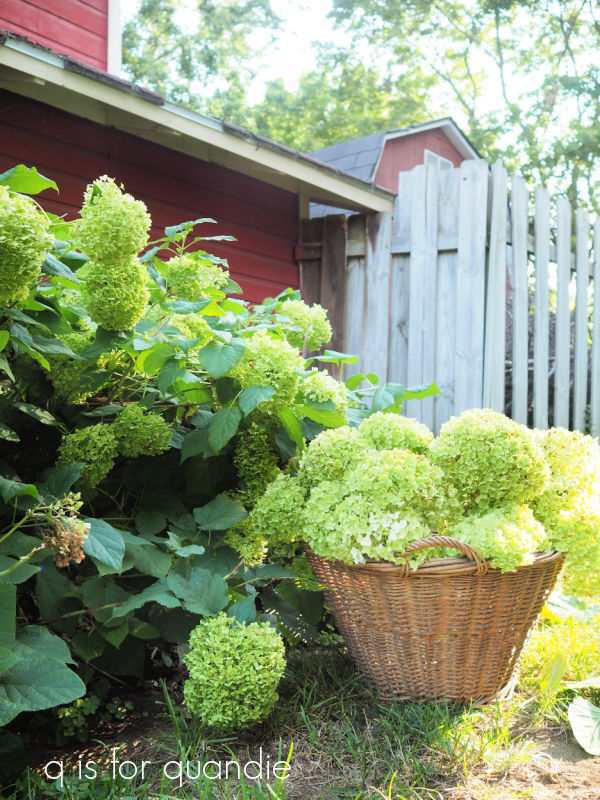
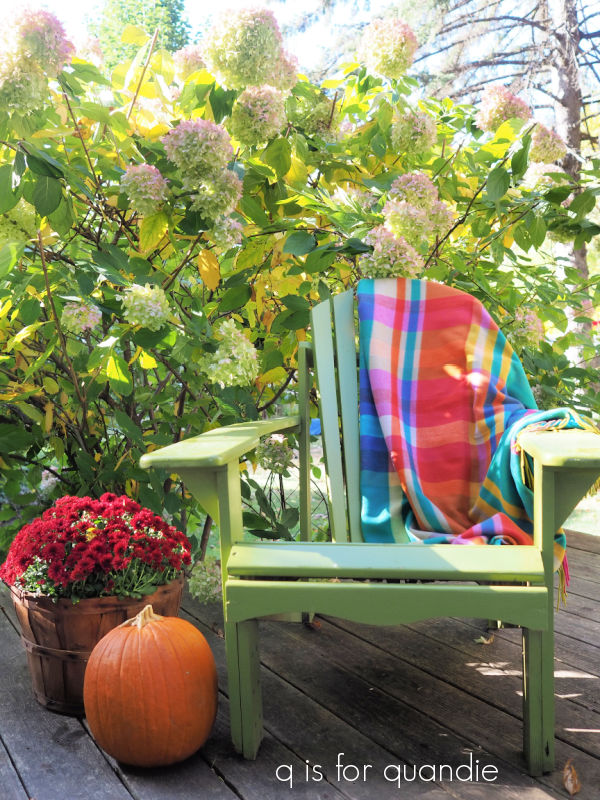
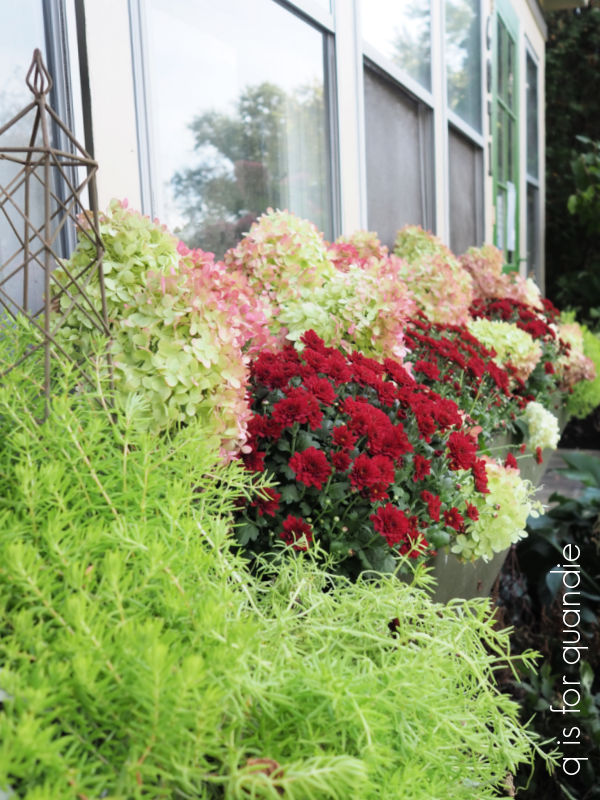
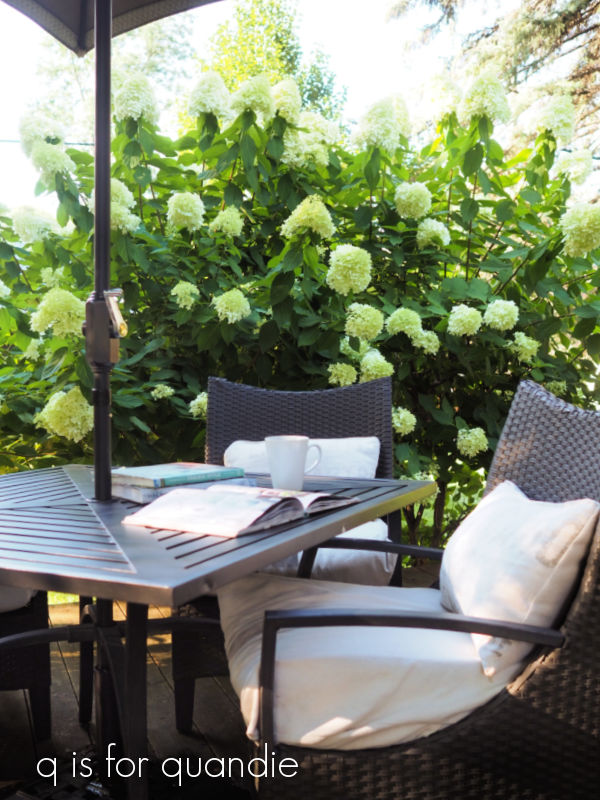
I also prune my arborescens variety hydrangeas (I have Annabelles) in the spring.  They also bloom on new growth, so pruning will encourage blooms.  However, one major downside to this variety of hydrangea is that the stems are often not strong enough to support the flower heads.  The first big rain after they bloom will turn your bush into a floppy mess.

A few years back I read an article that recommended pruning your Annabelles by no more than a couple of inches below the flower heads, leaving the strong old wood stems in place to help support the flowers.  You can also remove weak, broken or dead stems all the way down.

I’ve also given the Annabelle under my kitchen window a little extra support with an old brass headboard.

It was looking quite straggly after the long winter, but I cleaned it up a bit.

Personally, I wouldn’t recommend adding an arborescens hydrangea these days.  Even though some of the newer versions claim to have solved the flopping problem, they haven’t eliminated it entirely.

I actually inherited this Annabelle with the house, and since we moved in I’ve divided and moved it.  There is a big chunk of it out behind the carriage house in my cutting garden, which can be another good idea for this variety.  Place it in a spot where you will just be cutting the blooms off, but it doesn’t have to look good in situ.

So now I’ve checked the first gardening task of the year off of my to-do list.

I’m hoping that I don’t miss the blooming of my scilla while I’m out at my mom’s.  The flower buds were just appearing before I left, but they weren’t open yet.  They do usually bloom in mid to late April, and have even been known to be blooming in the snow as they were in 2020.

I think they’ll hold off this year until I get back.  Fingers crossed.

I also have lots of daffodils, tulips and allium coming up.  Luckily they are willing to pop right up through the snow.

You may remember that I put in a lot of bulbs last fall, so I can’t wait to see how they do.

It feels so good to be back out in the garden!  I’m really looking forward to spending lots more time out there again this year, and sharing lots of tips with you guys along the way.

So tell me, are you back out in the garden yet this year?


that four letter word.

I’m just sharing a quick Sunday morning post from the garden today.

I thought it might be fun to give you guys an update on the ‘winter interest’ in my garden.

For the most part, it’s buried under several feet of snow.

And so much for my Christmas decorations, they also got kind of buried.

Well, except for the ones that are hanging higher up on a wall.

They still look good.  Which is lucky because there is a huge snow bank in front of that scene, so I won’t be getting in there any time soon to take them down.

Cossetta (my statue) has snow nearly up to her waist.

Fortunately, she is impervious to the cold so she’s perfectly fine.

In other words, like much of the northern half of the country, we’ve gotten a lot of snow already this year.  I found one source that says we’ve gotten over four feet so far, and another that says 45″.  I’m not sure which one is correct, but they are close enough.  It’s a lot.

Since I like to look on the bright side, how about I list the benefits of that four letter word, snow.

  • It’s picture postcard pretty.
  • It covers up a multitude of sins.  Suddenly every yard looks beautiful and you can no longer see the debris that your neighbor piles up next to your fence.
  • It adds a layer of insulation to the garden, so subsequent sub-zero weather is not as damaging to dormant perennials.
  • It provides lots of moisture to the ground when it eventually melts.
  • People who enjoy winter sports like snowmobiling, skiing and snowshoeing are in heaven.
  •  It lights up the sky at night.  Have you ever noticed that?  It’s never too dark to see outside at night when there is snow cover.
  • It provides a reason to get outside and get some fresh air and exercise (because you have to shovel off the walkway).
  • You might get a snow day from school or work (although since Covid those have mostly become ‘e-learning’ or ‘remote work’ days).

Can you think of any I’ve missed?  Are you enjoying the snow where you are?  Or are you blessed with warm, sunny weather?  Leave a comment and let me know!


a beautiful white Christmas.

Merry Christmas dear readers!

Since Christmas just happens to fall on a Sunday this year, I thought I would take advantage and bring you a holiday greeting from the garden.  Once again, not technically my garden, but a garden.

The Sunken Garden in the Marjorie McNeely Conservatory at Como Park does a different holiday display every year.  This year they went all white.

Well, white and green anyway.

Of course there were lots of white poinsettias, plus other flowers that I think of as typical Christmas plants like paperwhites …

and amaryllis.

They also used plants that I think of as typical summer annuals in our area like euphorbia and dusty miller.

Plus, there were plants that I think of as potted plants like the little lemon cypress trees, and white kalanchoe.

I find an all white color scheme very serene and peaceful.

I’ve often thought about adding a white garden to my yard.  White flowers really pop in a shady area, or in the moonlight at night.  Some options for white flowers in a shade garden include impatiens (of course), white bleeding heart, lily of the valley, astilbe, snow drops, bloodroot, sweet woodruff, foam flower and anemones.  There are so many to choose from!

But if you’re not a lover of the all white look, you might enjoy last year’s red, orange and yellow theme at the conservatory a bit more …

What do you think?  Are you a fan of the serene all-white look, or do you prefer a lot more color?

Leave a comment and let me know.  But in the meantime, happy holidays to you and yours.  I hope you are enjoying a serene and peaceful holiday season, or possibly a vibrant, colorful one … whichever one works best for you!

winter interest in the garden.

I’m sure many of you are familiar with the movie A Christmas Story.  You know that scene where Ralphie wakes up on Christmas Day and looks out the window to find it has snowed over night to create a magical winter wonderland?  I always feel that same sense of magic when I wake up to find that it snowed overnight, as I did last Wednesday night (and Thursday night, and Friday night).

This was the view from our bedroom window when I got up on Thursday.

I’m not sure my photo does it justice, it really was magical.  It got even better on Friday.

So I thought this might be a great time to bring you a Sunday morning in the garden post, winter version.

Most of the garden vloggers that I watch on YouTube have been talking about adding winter interest to the garden lately.  I have to admit that I’ve never really given ‘winter interest’ much thought in the summer when I’m planting.

So most of my winter interest plants are totally coincidental.  The many hydrangeas that I’ve planted for their fabulous flowers, also look quite pretty after a snowfall.

Even my dismal failure of a lilac hedge adds some decent winter interest.

Otherwise, most of the ‘interest’ in my winter garden comes from the trees.

Or the garden ornaments.

Things like statues, trellises, and obelisks are a quick and easy way to add interest to the winter garden, although not necessarily the cheapest way.

Another recommendation for adding winter interest is to leave attractive seed heads on plants like echinacea (coneflower), astilbe and bee balm.  I have those perennials, but in our climate they pretty much first get battered by a heavy snow, and then buried in it.  They work better for autumn interest rather than winter interest here.

We need to rely on sturdier options in Minnesota like evergreens, or shrubs with winter color like winterberries or red twig dogwood.  They can stand up to a couple feet of snow.  And the red of the winterberries and dogwood look especially amazing in the snow.

But until I get some red things planted, I will have to just admire how the red paint job on the carriage house really pops in a snowy landscape.

How about you?  Do you have any recommendations for adding winter interest to a garden?  Or perhaps you enjoy living in a perpetually green climate.  Leave a comment and let us know!

a tropical garden for Christmas.

Welcome back to Sunday mornings in the garden.  Once again, this post is not coming from my own garden which is currently buried under a couple of inches of snow.  Instead, this one is coming to you from Puerto Vallarta!

As I’ve mentioned, my neighbor’s family invited me along on their family vacation to Mexico.  Yep, I’m very lucky when it comes to neighbors.  I think I won the good neighbor lottery.

So I spent a week at Velas Vallarta with my neighbor Karen and her parents.  The resort was gorgeous, and so was the weather.

  We had 7 days in a row of mid-80’s and sunshine, not a drop of rain or a cloud in the sky.  Perfection.

We basically spent the bulk of our time looking at this view while a very nice waiter named Edwin delivered pina coladas and nachos.

Most of the time it felt like we practically had the place to ourselves because the resort was only about 50% occupied.  The week immediately following Thanksgiving week is not very popular apparently.

We did venture out to the beach a couple of times.

And we also ventured out to the marina to do some shopping.

But I said this was going to be a garden post, and that’s because the grounds at Velas Vallarta were just beautiful.

Not only that, but many of the plants had markers so it was a lot like being in a botanical garden.

I enjoyed finding out what the various plants were called, like the Washingtonia Robusta or Mexico Fan Palm.

And the Musa X Paradisiaca or the Banana!

There were two flowering plants that stood out as my favorites.  First up, the bougainvillea.  This is one of my mom’s favorite flowers, and she would have loved how they were spilling out of a multitude of planters on the balconies at this place.

But I think I liked the Blue Sky Vine even more.

They had long pergolas around the several swimming pools that were covered in this vine and provided perfect spots for shady lounging.  There was one small problem in that they really attracted the bees, and Karen got stung twice in the pool.  Ouch!

I have to admit, I find it difficult to feel properly Christmas-y in the tropics.  But the resort was doing their best to add some holiday vibes.  One morning I woke up to find that they had planted poinsettias in the garden the previous day.

They’d also put up a huge tree in the lobby.

It was decorated with these beautiful silver lanterns.

Still, it took coming home for me to get back into a holiday mood.

As much as I enjoyed that gorgeous warm, sunny weather in Mexico, I need a little snow on the ground to feel like Christmas.  How about you?  Do you enjoy a tropical Christmas?  Leave a comment and let me know!

gardens around the world.

Good morning from the garden.  Unfortunately, I came home from Florida last weekend to a garden that was pretty much completely done.  All but the most hardy of perennials have died down to the ground, and most of the leaves are off the trees.  So I’m not sharing my own gardens today, instead I thought those of you who are gardeners would enjoy seeing the gardens of Epcot’s World Showcase.

For anyone not familiar with Disney World, Epcot is one of the four theme parks there.  The back half of Epcot is devoted to the World Showcase which features 11 areas themed to specific countries situated around a large lagoon.

Back in the day, Disney offered a guided tour of the gardens in the World Showcase and Mr. Q and I did that tour.  I loved it.  You got to go into the World Showcase in the morning before it was open to the public.  This was back when the World Showcase didn’t open until 11 a.m.  (this was also before the Norway ride became the Frozen ride, ahhh, the good ol’ days).

Anyway, unfortunately they no longer offer this tour.  But I did get a lot of insight back then into how they use landscaping to enhance the feeling of each country’s pavilion.  The attention to detail at a Disney park is always impressive, and no more so than in the World Showcase.

The garden in Canada is modeled after the famous Butchart Gardens in British Columbia.

It’s filled with big swaths of flowering annuals, as well as colorful coleus.  If you want constant color in your garden, annuals are the way to go.  But you’d better have a Disney sized budget for that since you have to replace them every year.

It inspired me to consider putting a few patches of coleus into the ground in my gardens next year though.  The only problem with that approach here in Minnesota is that it takes most of our short growing season for the coleus to fill in, and by the time it starts looking spectacular our first frost is only weeks away.  So maybe not.

But Florida can definitely pull it off.

By the way, here’s a quick q tip for you.  If you want to explore the World Showcase without hoards of people, these days you’ll want to head there immediately when the park opens.  Everyone else will be getting in line for rides.  You’ll have about an hour to make your way around the lagoon (roughly 1.2 miles) before the crowds catch up with you.

The shops and dining locations may not quite be open yet, but you can explore the details of each ‘country’ while having it practically to yourself.

Next up is the U.K. pavilion, and it’s definitely one of my favorites.

It’s so dang charming.

A formal sort of hedged garden is right up my alley, and they have them in spades in the U.K. pavilion.

Hedges and topiary, I need to add both in my own garden.  I’m putting them on the wish list.

There was a liberal use of annuals for color again, and also big masses of caladium.

The light green on the left and the pink on the right are both caladium.

We cross over the Channel into France next.  The landscaping here feels even more formal than the U.K. with more hedging and topiary.

But aside from the hedge garden above, the France pavilion doesn’t have much else in the way of gardens (it does have a lovely water feature, but I neglected to take a photo of that).

The next country you’ll encounter on the way around the showcase is Morocco.

Once again, there aren’t any large garden beds in this pavilion.  But really, the tilework is so impressive that you wouldn’t want to detract from it with gardens.  Plus, Morocco has a dry Mediterranean climate which isn’t really conducive to lush, green gardens.

Here’s a quick bit of trivia about the Morocco pavilion.  It was sponsored by King Hassan II and is the only Epcot pavilion sponsored directly by a country’s government rather than a corporate sponsor.  The King sent Moroccan artisans over to design and create the tile mosaics.

Next we head into Japan.

You just know that this pavilion is going to have some gorgeous gardens.

And specifically a lovely koi pond.

I love the simplicity and serenity of a Japanese garden.

Just a sidebar, if you’re interested in Japanese gardens be sure to watch Monty Don’s Japanese Gardens series (available on Prime).

The next country on your way around the world is Italy.  Once again, it’s a gorgeous pavilion with architecture borrowed from Venice, Rome and Tuscany.

They don’t have any formal garden beds in this pavilion, instead they seem to rely heavily on terracotta pots.

There certainly are some gorgeous pots though.  That one in the back of that trio above has an annual in it that I used myself this past summer.

I believe it’s Evolvulus Blue Daze and it performed really well for me.  I need to make a note to plant it again next year.

I was a little surprised to find that they had hostas growing in containers as well.

To me they look a bit sad though, don’t you think?

Germany has a very unique garden, it’s a model railroad garden.

There are several trains running around the tracks at all times.  The plants seem to mainly consist of small, pruned evergreens.  But I did notice that they have quite a few of the Berberis thunbergii ‘Concorde’ that I have in my fairy garden.

That’s it in the lower right corner of the photo above.

Next up we have China.

The garden in China is mainly dominated by a beautiful pond filled with water lilies.

Again, very peaceful and lovely like Japan.

Norway doesn’t have a very structured garden area, but they do have a building with a sod roof which is quintessentially Norwegian I think.

As is the lefse that my sister purchased at the Kringla Bakeri Og Kafe in the Norway pavilion.  I’m not much of a lefse fan myself, so I went with the Verden’s Beste Kake, which was delicious.  We enjoyed our treats in the seating area under that sod roof.

The royal sommerhus also has a sod roof.

The last country on our journey around the world is Mexico.  I was hoping to find an orchid garden in this pavilion, but apparently they only do that during the Flower & Garden event.  So really the pavilion just features lots of tropical foliage.

It’s certainly pretty, but definitely not my favorite.  I have to say I’m not really all that into tropical foliage.  I have no desire to plant things like hibiscus, or orchids.

Any of you familiar with Epcot have probably noticed something missing in my post.  I completely skipped over the American Adventure pavilion.  Ooops!  Well, aside from flowers in red, white and blue, there wasn’t much to write home about in that one.

Looking back at all of these pavilions, the U.K. gardens are definitely my favorite with Canada as a close second place.  How about you?  Which would be your favorite?  Have you ever toured the gardens of the World Showcase?  Leave a comment and let me know.

feels like 12.

We woke up to a bright and chilly morning last Tuesday.  The actual temp was 21, but the ‘feels like’ temp was 12!  Twelve!  In October!  Yikes!

I don’t really remember when they switched out ‘wind chill’ for ‘feels like’, but I did a bit of googling and apparently the ‘feels like’ number takes humidity levels into consideration whereas the ‘wind chill’ did not.

Either way, ‘feels like 12’ is too cold for October.  And as I’ve discovered, it’s also too cold for mums.

Dang!  I probably should have covered them.  But then, the soil is frozen rock hard.  I’m not sure that covering would have helped.

It’s funny, when I planted all of my bulbs a couple of weeks ago I thought I was planting them way too early.  But here we are in October with a hard freeze already.  I guess my timing was pretty good after all.  Likewise, I also pulled out all of my caladiums last weekend in preparation for saving them over the winter.  Just in time I think.

I used quite a few caladiums in my planters this summer.

That tall white one above was one of my favorites, as was the pink and green one I planted along with some double impatiens …

Caladiums are another fantastic way to add colorful foliage to your garden.  They will grow in full to partial shade and perform best with some dappled morning sunlight.

They are not fond of cold weather though.  Caladiums are only hardy in zones 9 – 11.  Here in my Minnesota zone 4 garden I have always treated them as an annual and just tossed them at the end of the season.  But, you know what?  Caladiums are kind of pricey.  They are around twice the price of other annuals that I plant.

So this year I’ve decided to try saving the bulbs for next year.

The first step was to dig them all up, and gently shake off any loose soil.  Do not rinse or wash off the dirt with water as this will make the bulbs more susceptible to rot.

Leave the foliage in place and allow the bulbs to ‘cure’ for a week or so (sound familiar, feels like we’re painting).  I just left mine in the potting shed on vintage plates to dry.

Once they are ‘cured’, or dried out, the leaves should drop off or at least be easy to pull away from the bulb.  Go ahead and remove all of the leaves.

At this point you should inspect your bulbs for any signs of damage or rot.  Be sure to toss any that are damaged, moldy or soft.  As they say, one bad apple (or in this case, caladium bulb) will spoil the bunch.

It seems like with the many caladiums I had, I should have a big pile of bulbs.  But after weeding out the bad ones (maybe about 25% of them were bad), I ended up with just this one plate full.

Then again, if each one of these becomes one plant, I have plenty!

Next up comes packing these away for winter.  The bulbs need to be kept dry, therefore the packing materials should allow them to breathe.  A cardboard box or paper grocery bag should work.  I’m choosing to nestle mine in a cardboard box filled with shredded paper.

I’ll put the box in the basement where they will stay cool, dry and out of sunlight.

The big trick for me will be remembering to pull them out again next spring.  I plan to pot them up indoors 4 to 6 weeks before our average last frost date.  With our short growing season here in Minnesota, it makes sense to give them a good head start before transplanting them out into my pots.

I’ve put a reminder on my calendar for the end of March.

Hopefully next summer I’ll have lots of beautiful caladiums and will have saved myself a few bucks by not having to buy them.  Wish me luck on that!

just for judy.

Thank you to those of you who took the time to leave an encouraging comment about my ‘sunday mornings in the garden’ posts. I was reminded that even though many of you never leave comments, you’re still out there reading and enjoying (hopefully) my posts.

I think the most surprising feedback I had was from my neighbor’s mom, Judy.  I popped across the street for lunch one day and Judy was visiting and she mentioned how much she enjoyed my gardening posts and wished I wouldn’t discontinue them!  I didn’t even realize she followed my blog.

So just for Judy, and the rest of you who said you didn’t want me to quit posting about the garden, I am going to continue with ‘sunday mornings in the garden’, just maybe a bit more sporadically.

Which brings me to today’s garden subject, fall color in the garden.  I have to say, I really do think fall is the most beautiful season of the year.  It’s an unfortunately short season, but I sure do enjoy it while it lasts.

Now I have to admit, I have not done all that well with adding fall color to my garden.  I don’t have a single tree that turns a beautiful color in fall.  Well … that’s not entirely true, I do have a huge maple next to the driveway that eventually turns a pretty yellow, but it’s not a show stopping orange or red.

But that photo is from a few years ago, this tree turns really late in the season and it’s only just starting to show a tiny bit of color now.

We’ve attempted to add pretty fall color trees to the front yard, but we’ve had bad luck with trees in that spot.

Since we’ve lived here we’ve had two trees in front that have come down in wind storms.  I feel like there’s something about this spot that funnels the wind through in some way.  The last one came down in September 2019 and we still haven’t talked ourselves into replacing it.

But gosh, that tree sure was pretty in the fall.

I think I’m talking myself into replacing it again as I’m writing this post!

Anyway, I also have to say that luckily I don’t have to just rely on trees in our yard to provide fall color, just down the street there are some trees that put on an amazing show every fall.

I get to admire those regularly from my piano room window.

In addition, you don’t have to rely solely on trees for fall foliage.  There are shrubs that provide some fabulous color too.  One of my favorites is Tiger Eye Sumac.

My Tiger Eye is planted right next to a Vanilla Strawberry hydrangea, and the flowers on that also turn a deep red as the season progresses.

And of course, all of my various hydrangeas add nice color to the garden in the fall.  The Limelight turns a pretty combo of pink and green.

I also get a surprising amount of pretty fall color from some of my perennials.  Have you seen how many gorgeous options there are out there for heuchera these days?

This one is called Fire Alarm, and it’s the perfect color for fall.

Believe it or not, there are also some varieties of hosta that change color nicely in the fall.

Not all hostas turn color like this, but if you google it you can find lots of recommendations for those that do.

I also rely a bit on annuals to add some fall color to my garden.

I feel like a few of my favorite garden vloggers have been dissin’ the mums lately, but I like to pop a few into my containers after pulling out the more brightly colored summer annuals.

I try to stick to a moderate budget of $100 for that though because the fall season just tends to be so short for us here in Minnesota.  I filled the front window box with some inexpensive mums from Home Depot, and then filled in with some of my dried hydrangeas.

I left the Lemon Coral sedum in place because it’s pretty hardy.  It won’t make it through the entire winter here in zone 4, but it can handle some freezing nights in fall.

But speaking of fall being a short season, we went from 80 degrees last Tuesday to snow on Friday.

So, I guess you could say our fall season lasted about three days this year.

The snow didn’t stick around long, it was gone by lunchtime.  But it was certainly a reminder that summer is definitely over and winter is coming.  We should all enjoy fall while it lasts!

fall bulb planting.

It seems as though my Sunday morning garden posts aren’t terribly popular so far, so I’ve decided to re-evaluate.  I’m guessing that many of you spend time with family and friends on Sunday’s, rather than reading blogs.  In addition, I’m finding it a little challenging to pull together four blog posts every week.  It’s really cutting into my actual gardening and/or painting time!

I’m not ready to give up garden posts entirely though, even though gardening season is going to be wrapping up here soon.  So I may throw in a few here and there on a weekday rather than waiting until Sunday.

If any of you want to provide feedback on that, feel free to leave me a comment.

That bring me to today’s post, where I want to share a huge q tip on fall bulb planting!

Over the past five years or so, we’ve developed a bit of a deer problem in our garden.  They like to come and munch on my tulips as they come up in the spring.  Add to that how stressed and busy I was during my last several years of working a day job, and you might understand why I’d pretty much given up on bulb planting.

But this past spring a bunch of tulips came up in my garden that I hadn’t seen in years.

I’d forgotten how fabulous it is to see these early flowers in the garden after a long winter.

Now that I have a little more time on my hands, I decided to do some more significant fall bulb planting.  Back in July I placed an online order with Longfield Gardens for tulips, daffodils and three varieties of allium, and my order arrived this week!

It was perfect timing because we had some gloriously sunny days, and some much cooler temps at night.

You’ll know it’s a good time to plant tulips when you’ve already had your first light frost (ours was on Tuesday) and your nighttime temperatures are between 40 to 50 degrees. In my zone 4 garden, that’s usually late September to early November.  I have to admit, I may have jumped the gun slightly here.  I probably should have waited another couple of weeks to plant my bulbs.  But it’s so much more pleasant to plant bulbs when it’s 60 degrees and sunny rather than 40 degrees and blustery, right?

I had a lot to plant, so I thought it best to strike while the iron was hot.

At this point you might be wondering, what is the huge q tip?

Today’s q tip; fall bulb planting is SO much easier with a garden auger!

OK, so I don’t actually own a garden auger, but my neighbor nnK got one for Christmas and was generous enough to share it with me.

This post isn’t sponsored, and I am far from being any kind of an expert on power tools.  So I can’t really help you figure out what brand to buy or any of that stuff.

However, I will say that you might be tempted to think you want a smaller auger for planting bulbs.  And sure, if you are someone who puts each bulb in its own hole, each spaced precisely 4″ apart like the directions say, then you might be happy with the smaller auger.

But I used that big honkin’ 6″ one shown above.  I like to plant tulips and daffodils in clumps.  They look so much more natural that way.

Depending on the bulb size (those above are daffodil bulbs that were quite large), I can get 4 to 6 bulbs in each 6″ wide hole made with the bigger auger.

The process is super simple.  Dig the hole to the appropriate depth with the auger (one thing to note, the one I used is quite heavy, so bear that in mind).  Add some bulb tone to the hole …

Plop in your bulbs, pointy side up, then cover them back up.  Water them in well, and you’re done.  Easy peasy.

And hopefully next spring I’ll have lots of lovely tulips and daffodils.

And I won’t have to buy so many to stage my photos!

How about you?  Are you going to be planting any bulbs this fall?  Or have you ever used a garden auger?  Leave a comment and let us know!