
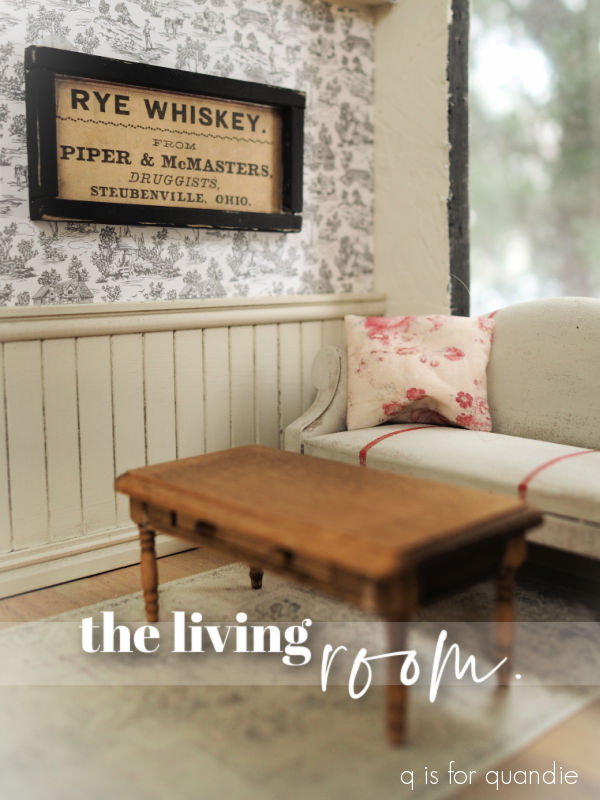
The last room in the free-at-the-curb dollhouse is the living room.
Well, there’s also a downstairs hallway, but I didn’t do much there so I’ll include it in this post with the living room. Especially since they share a floor.
So let’s start with that.
This is the Light Oak Gloss Finish Wide Plank flooring from Miniature Crush.
I really should have read the fine print (or even just the title) before I ordered it because you know me, I don’t love a glossy finish. Also, I should point out that this sheet of flooring was $16.99. The unfinished pine flooring from Hobby Lobby that I used on the 2nd level is $7.49 per sheet, so less than half the price. Now, don’t get me wrong, the Miniature Crush flooring is definitely much nicer quality than the Hobby Lobby version, and if you like a glossy light oak wood floor, it’s perfect right out of the package. It’s also peel and stick, so you don’t have to mess with glue.
However, for me the Hobby Lobby version saves me the next step, which was to lightly sand down that glossy finish and add a color wash using a very watered down Dried Sage from Dixie Belle.
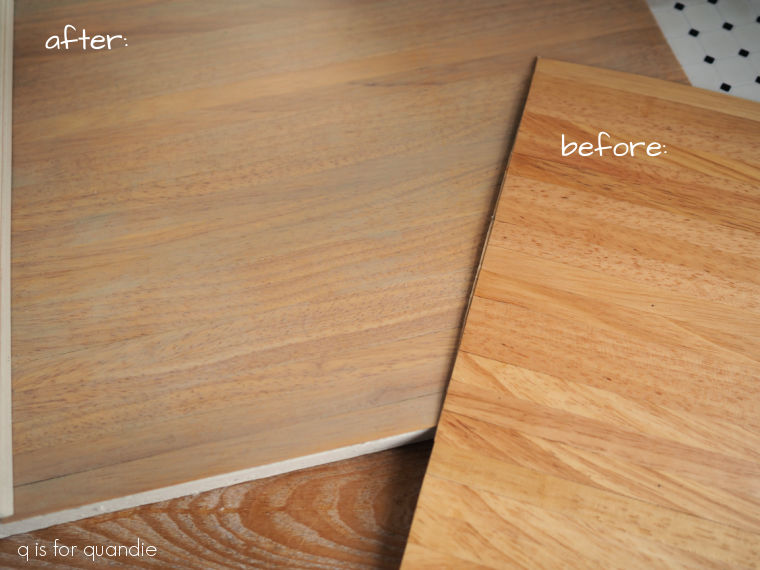
Brush on, then wipe off the excess until you’re happy with the look. The flat finish of the Dixie Belle paint really toned down both the shine and the yellowish color.
Once dry I added a coat of Dixie Belle’s clear wax for protection.
It was much easier to fit this floor because as you’ll remember, the ‘guts’ of the dollhouse can be removed.
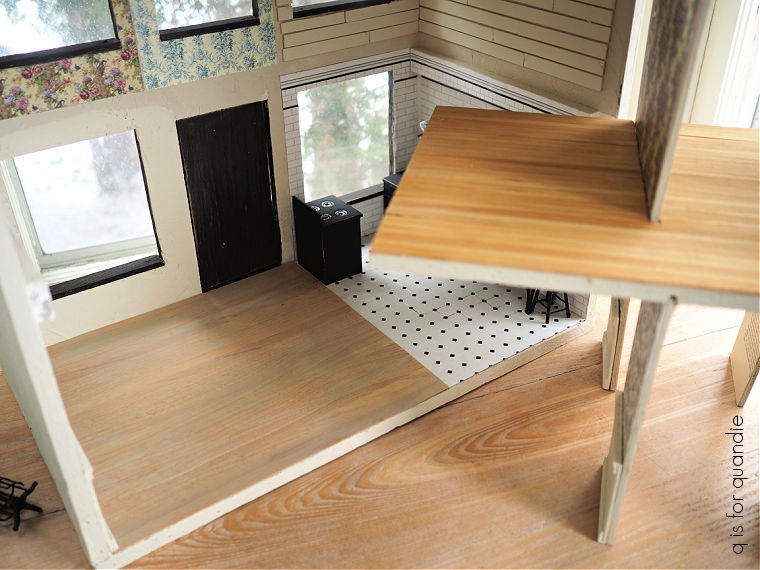
So I was able to pull that out, peel off the backing and stick the floor down, and then put the ‘walls’ back in place. Easy peasy.
Actually, while I had the ‘guts’ removed, it was also super simple to ‘wallpaper’ the hallway using some more of my Gulliver’s Travels book pages (I did this in my dollhouse project last year too).
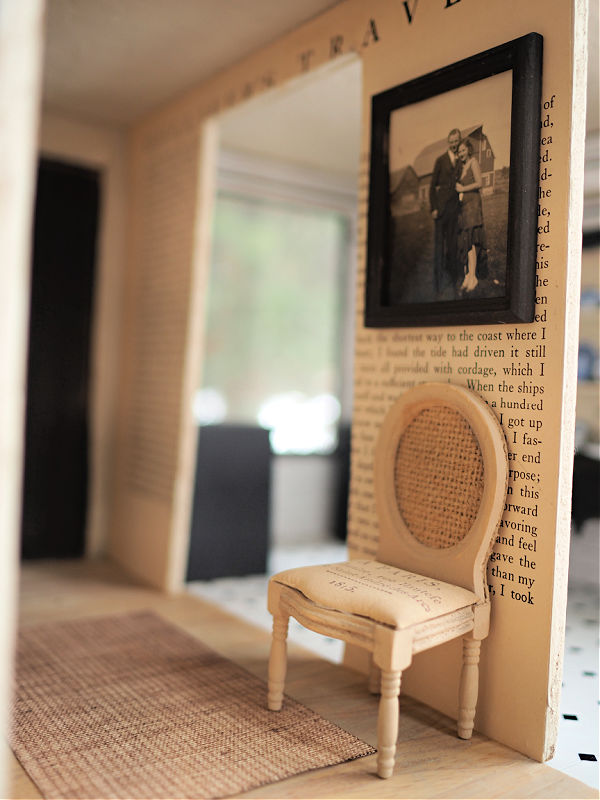
I just cut the book page to size and adhered it with Mod Podge.
I added a framed vintage photo to the wall. The photo is from my stash of old family photos, but it’s one where no one was able to identify the people in it.
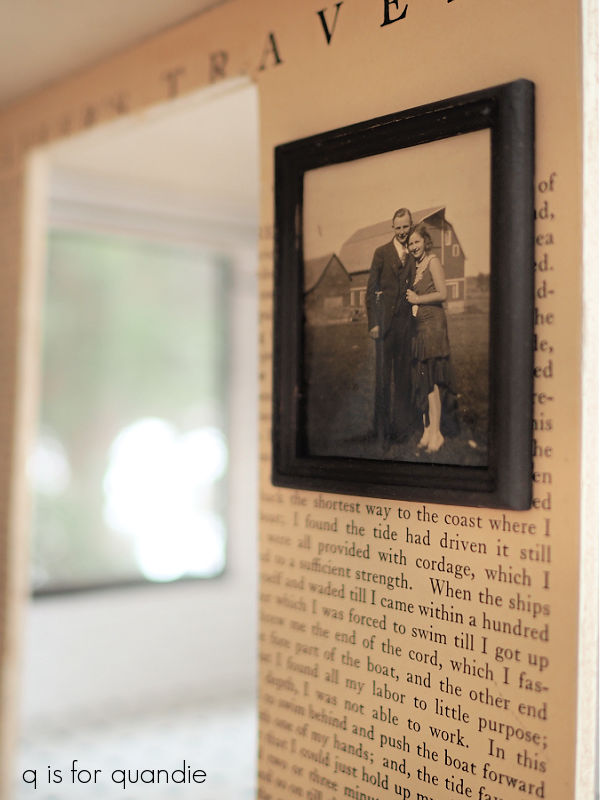
The wood frame is from Michael’s and came unfinished. I painted it in Dixie Belle’s Coffee Bean.
The chair is one I painted up last year as part of a dining set.
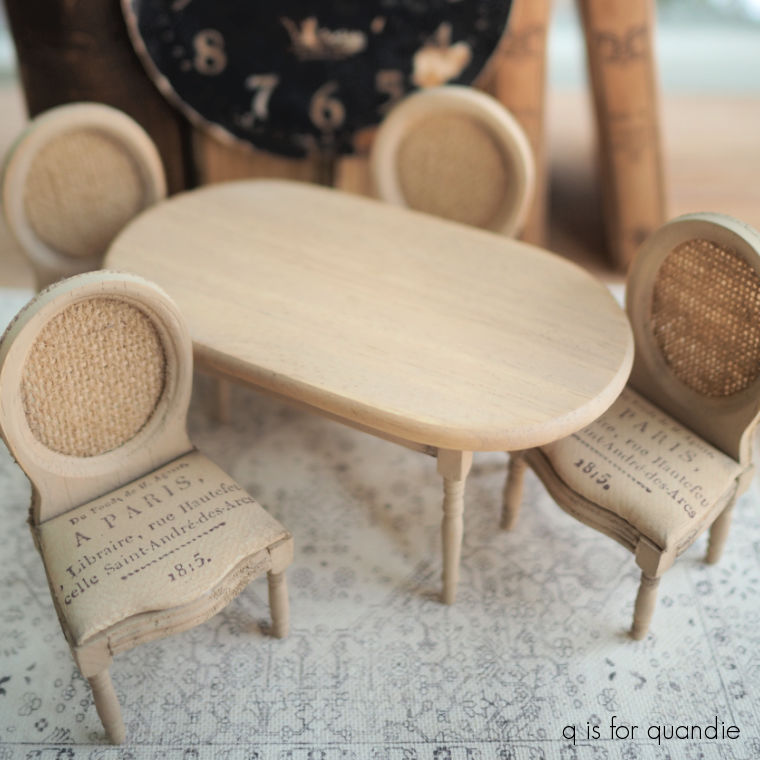
I have the set listed for sale on my ‘miniatures for sale‘ page, but so far there are no takers.
Also, FYI, purchased four of these sets from Hobby Lobby last year for $10 each but now they don’t seem to carry them anymore. I did find the set on Etsy for $26.95 plus $6 shipping, but somehow paying more than 3x as much for it seems wrong to me.
Anyway, I’ve temporarily placed one of the chairs in the hallway, but I may have to come up with something else for this spot so as not to break up that dining set.
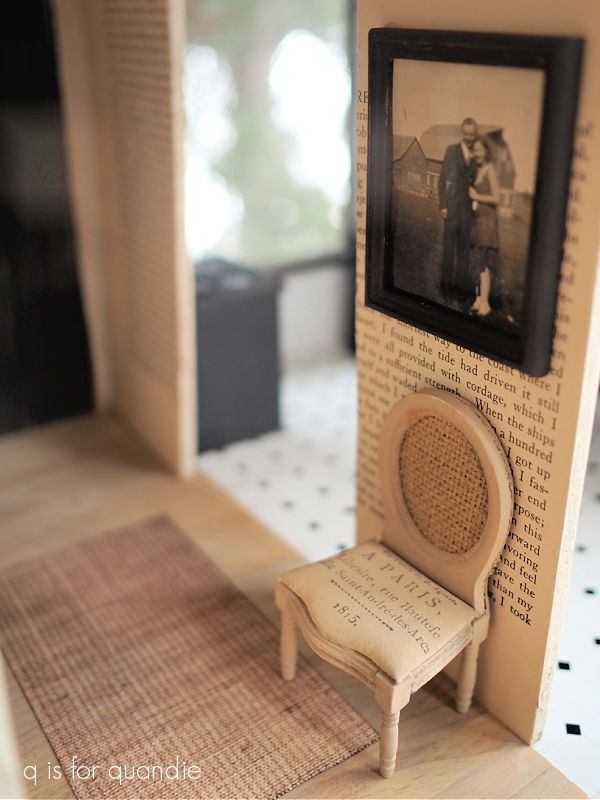
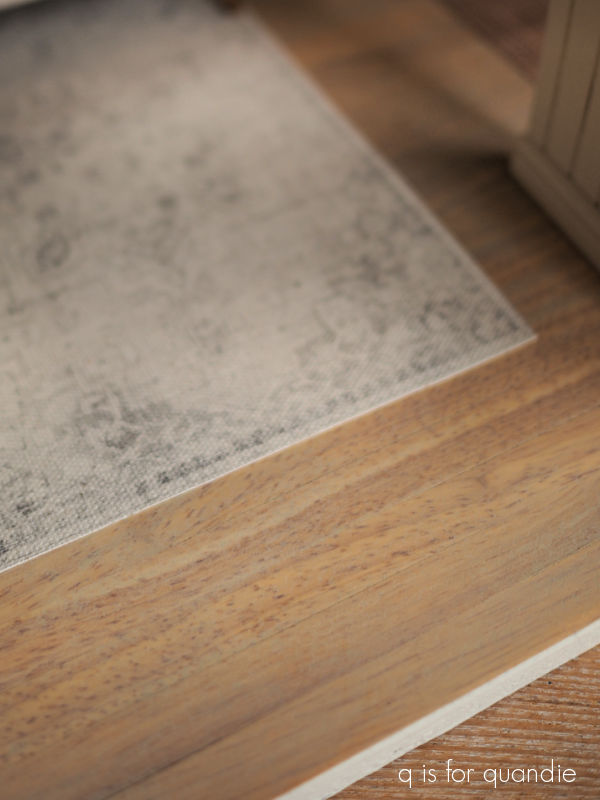
The ‘sisal rug’ in the hallway is another rug that I printed myself on canvas.
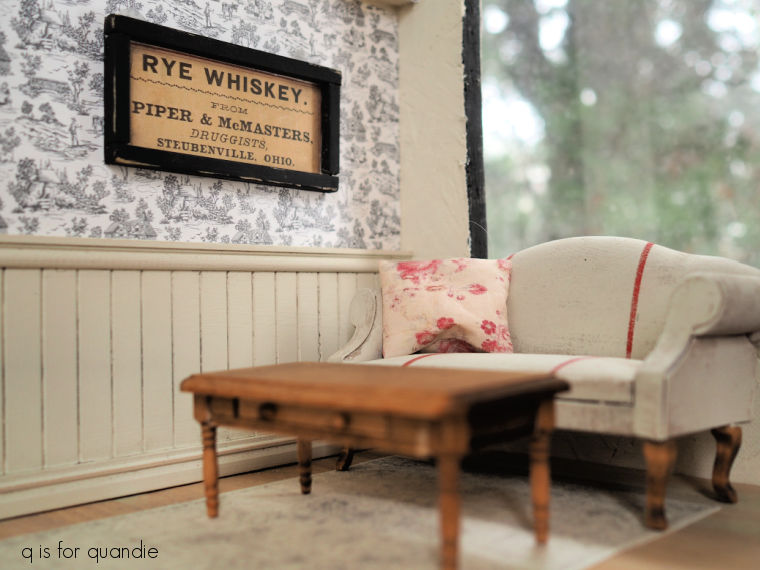
Back to the living room. I used some leftover pieces of black and white toile wallpaper on the upper half of the living room walls. This was leftover from wallpapering the bathroom in last year’s dollhouse project.
Then I painted some wainscoting in Dixie Belle’s Drop Cloth for the lower half of the walls.
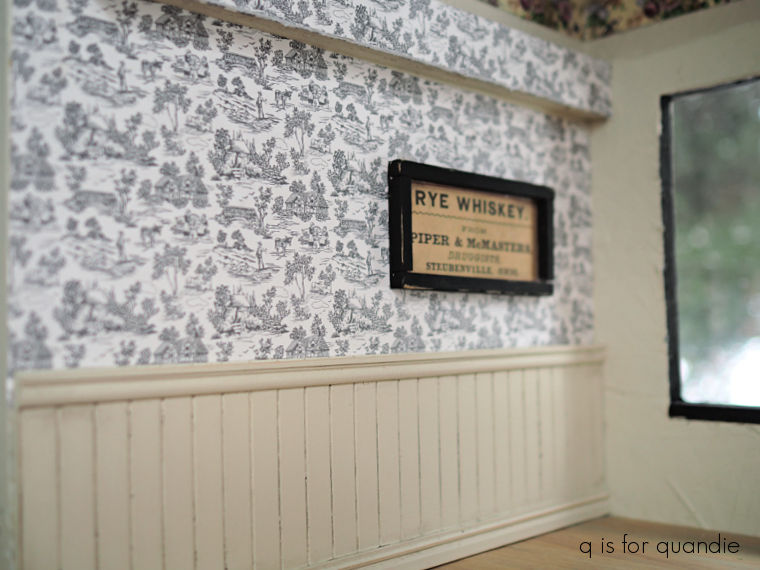
The wainscoting was also from Miniature Crush, and I have to confess that I didn’t quite have enough to finish the back wall and since the sofa mostly sits in front of it, I didn’t bother. I just left that back wall painted.
I’m sure most of you are familiar with my printed rugs by now. I used one in the blue bedroom of this house, and last year I used one in the purple bedroom of my first dollhouse.

I wanted something similar for the living room, but in shades of grey, so it occurred to me that I could simply print the rug using the black and white setting on the printer, rather than in color.

And it worked out perfectly!
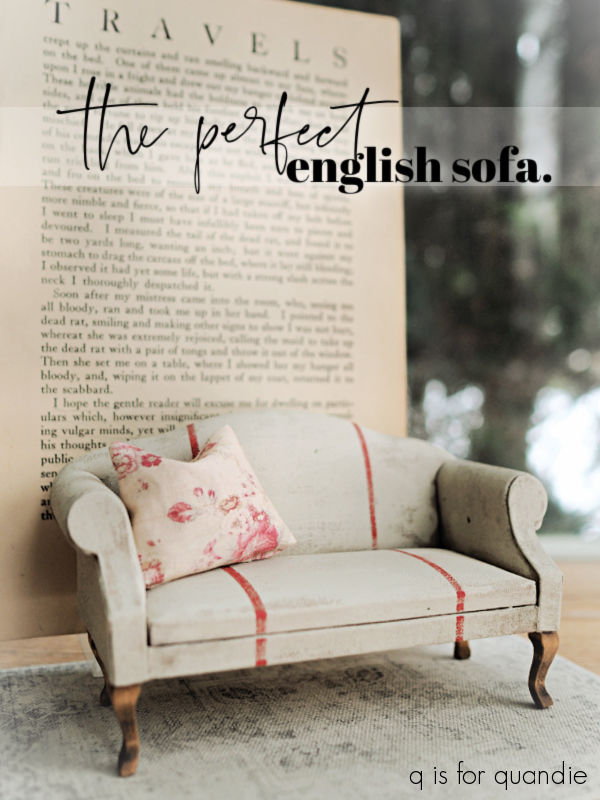
As for furnishings, I shared my perfect English sofa in my last post.
Now … full disclosure … I made an attempt at creating a tufted ottoman to go in front of the sofa and it was a dismal failure. Maybe I’ll try again one day, but for now I’m just placing the coffee table from Temu in front of the sofa.
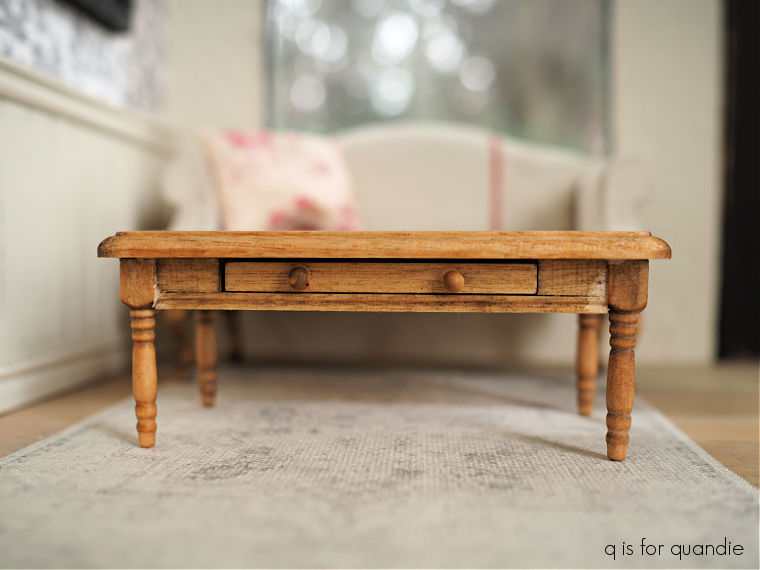
I purchased the coffee table unfinished. To finish it, I applied some of the Sweet Pickins Dark Oil Wax using a small brush and wiping away any excess. It worked quite well except in spots where there must have been excess glue.
I also created something to hang on the wall.
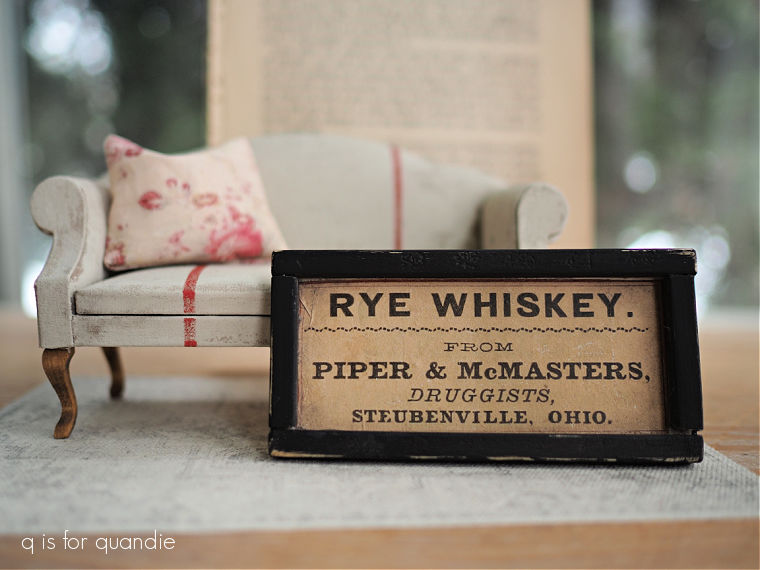
I used a small bit from the Roycycled Label Masterboard decoupage paper . I decoupaged it onto a thin sheet of balsa wood. Then I cut the square ends off some chopsticks, painted them in Dixie Belle’s Coffee Bean and glued them on to the balsa wood to create a frame. Super simple.
I adhered it to the wall using Tacky Wax, so it’s fully removable or adjustable.
With that I’m calling this project ‘done for now’.
I’ll wrap up this post with a breakdown of the money I spent on the living room/hallway combo. Well … as for the hallway, that would be a whopping $2. I already had the book pages I used on the walls, the sisal rug and the little chair. The only thing I spent money on was the picture frame at $2.
The living room was a bit pricier, I spent $12.99 on the wainscoting. The wallpaper was left over from my last project. I printed the rug myself on canvas that I already had on hand too. The sofa was $26 and the coffee table was $6. So around $45 total.
I’ll be back next week to recap the entire project, and to share what’s coming up next, so be sure to stay tuned!

Fab as usual! I purchased some of the canvas to print rugs after seeing yours and it works great. I too am mourning the loss of the miniatures at Hobby Lobby. I went in one day to see orange clearance stickers plastered all over the miniature section and saw the writing on the wall. There were three of the French dining sets so I grabbed two of them and some other things. I still have hope though – I was in yesterday and they are selling dollhouses again after they too were on clearance.
LikeLike
I read an article online speculating on why Hobby Lobby wasn’t going to carry the actual dollhouses anymore, because they are a one-time major purchase for most people and take up a lot of shelf space. It’s more profitable to sell smaller items that people will buy lots of. But here’s hoping they are bringing them back, and that they’ll also bring back those dining sets!
LikeLike
I Love your dollhouse and decor ♡
Amazing!! ♡
LikeLike
Thanks Diane!
LikeLike
All your miniatures are beautiful. Your doll houses are so charming. ❤️
LikeLike
Thanks so much Monica!
LikeLike
Not to take away anything from all that you are doing with this adorable dollhouse, but as a collector of vintage photos, I have to say that was awestruck by the photo of the couple with the barn in the background. I have photos of both my grandmother’s wedding and her sister’s wedding taken years apart on the lawn of the family farmhouse–also with their barn in the background. This was a well composed and executed photograph and a sweet moment in time. I hope this couple had a long and happy life together!
LikeLike
That is an awesome photos, isn’t it. I was lucky enough to bring home a big pile of old family photos back in 2016, and if you love vintage photos, you should check out this post where I show a few of them.
LikeLike
So incredible! I have taken the first step at my own project! I had the frame of a little horse stable “in the rough”. I am reimagining it as a little potting shed and have started the work. It won’t happen as fast as your projects but I am thrilled to just have a start! I also dug out a dollhouse I had bought at a garage sale years ago and started making plans for a reno! Then my granddaughter decided she would like to get back to her dollhouse instead of getting rid of it. We have started making plans and started a Pinterest board for our ideas. Her younger sister was feeling left out so I have decided to deed her the dollhouse! We plan on working together on them as time permits. Time will be limited with their busy schedules though.
I have two other dollhouses that my girls played with when they were younger and I feel it is time to give new life to those once the potting shed is done.
All of this is to say “THANK YOU” for sharing and inspiring me to tackle this and bring my granddaughters along for the ride. Such great memories will be made.
Maybe at some point I can share some photos with you!
Thanks again and I can’t wait to see what you have coming up!
P.S. I tried to send this as a reply to your email and it was undeliverable. Sorry to leave this long comment here but I always have a tough time leaving you comments.
Gloria
LikeLiked by 1 person
First up, you aren’t alone. I know quite a few people have trouble leaving comments on the blog. I wish WordPress could somehow make the process easier, or at least less buggy. That being said, never worry about leaving a long comment, I love when people take the time to share their thoughts with me! And it makes this blogging thing really feel worthwhile when I hear that I have inspired someone to tackle a project themselves! Fair warning, you might also find yourself getting addicted to miniatures! Creating a mini potting shed is going to be really fun. One last thing, you can always email me at qisforquandie@gmail.com 🙂
LikeLike