
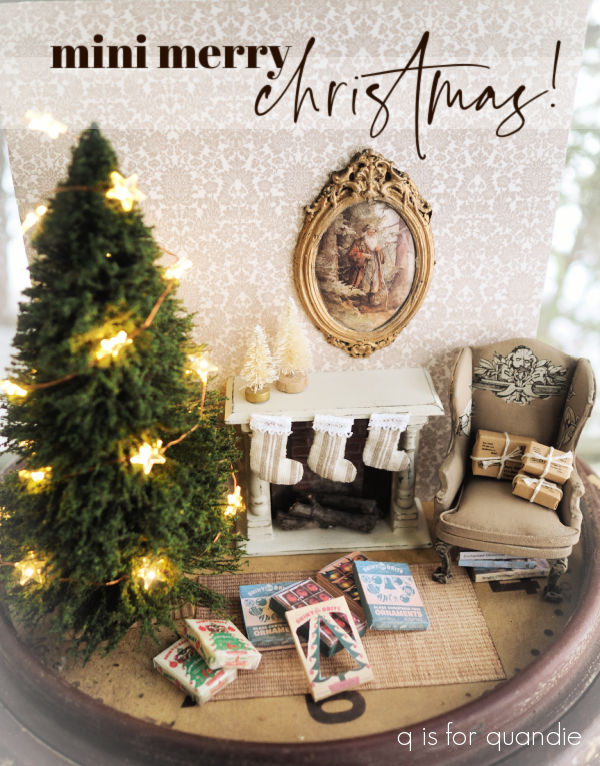
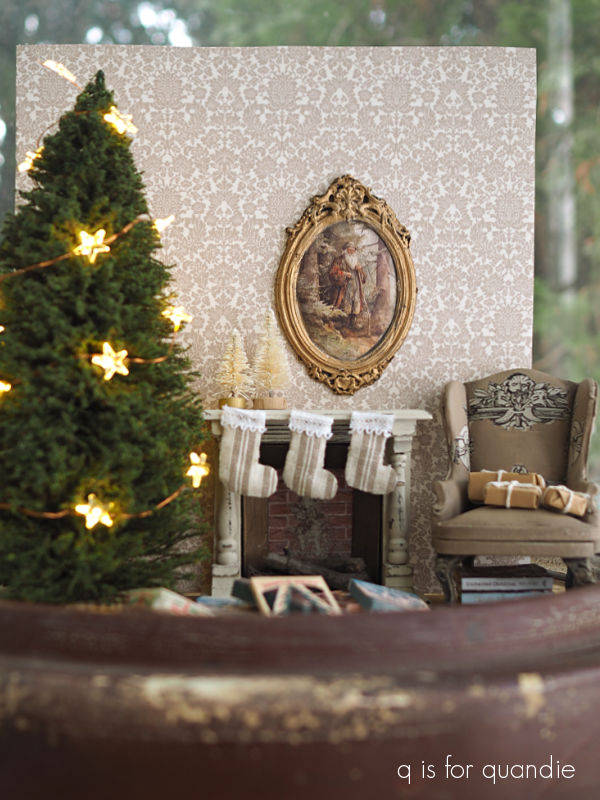
For my final Christmas project of the year, I thought it would be fun to create a mini Christmas vignette.
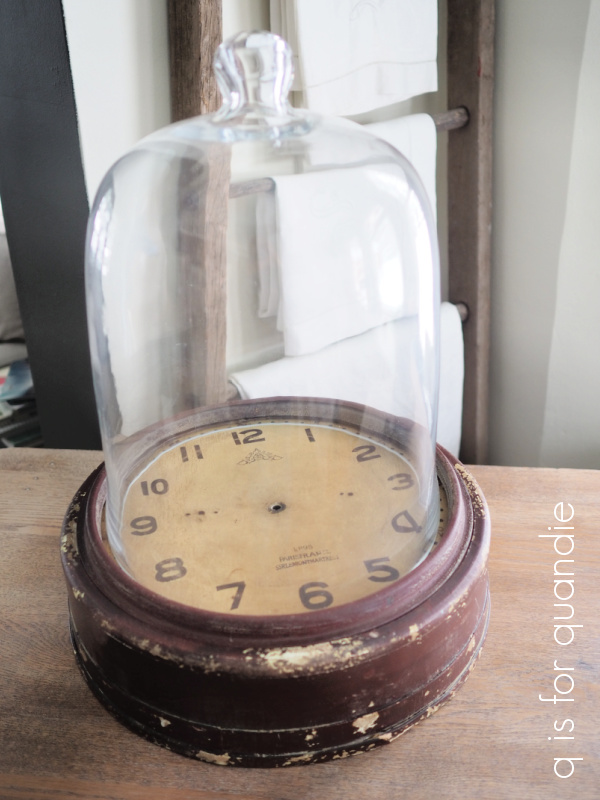
And I thought of the perfect spot for it, inside my clock cloche!
I started by ordering a few items from Miniature Crush. They are a miniatures mail order company located here in the Twin Cities. They don’t have a brick and mortar, but they do ship super quickly which I always appreciate.
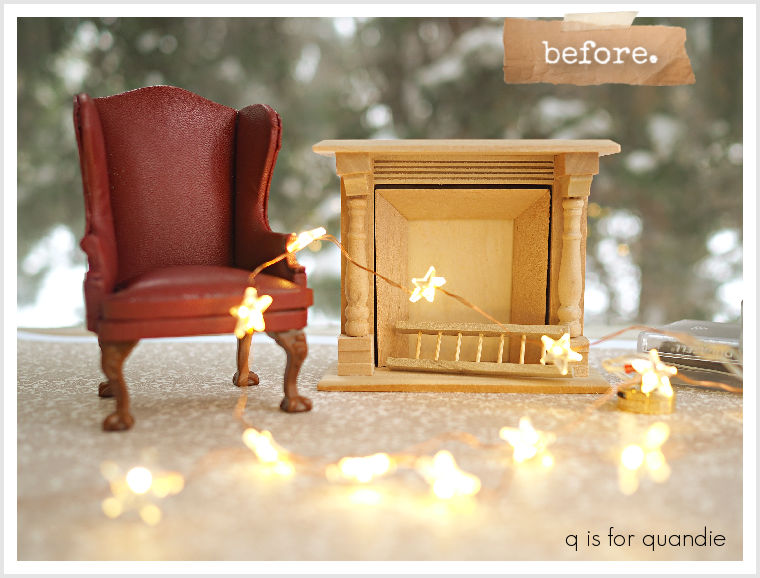
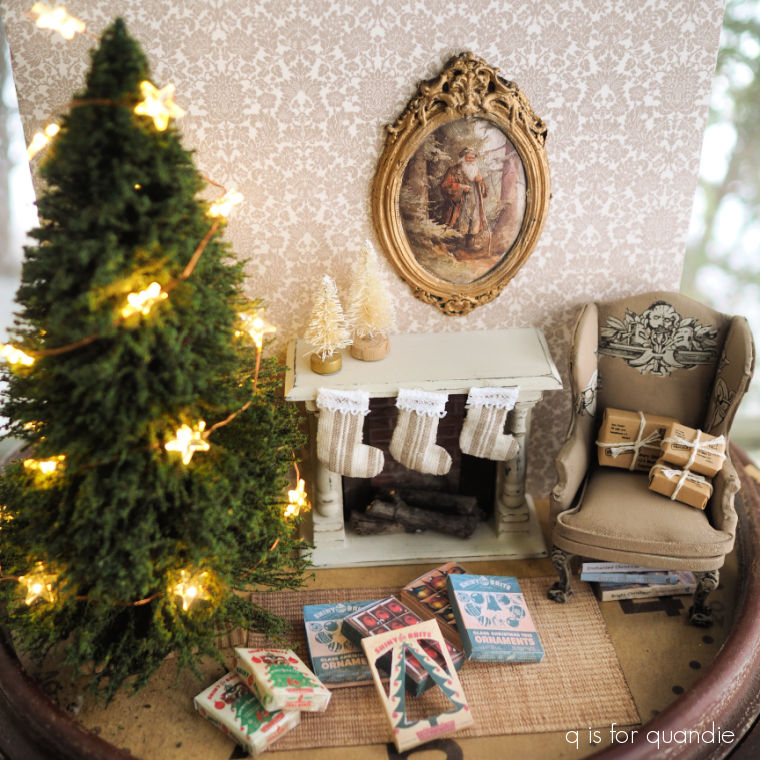
I ordered a wing back chair, a fireplace and some wallpaper (the star lights are from a local gift shop).
Next I got out my Dixie Belle paints and got to work. I started with the chair.
 I gave the chair a base coat of Dixie Belle’s Coffee Bean, which is a dark brown/black color. I wanted to cover up the original red completely and have a dark color to distress back to.
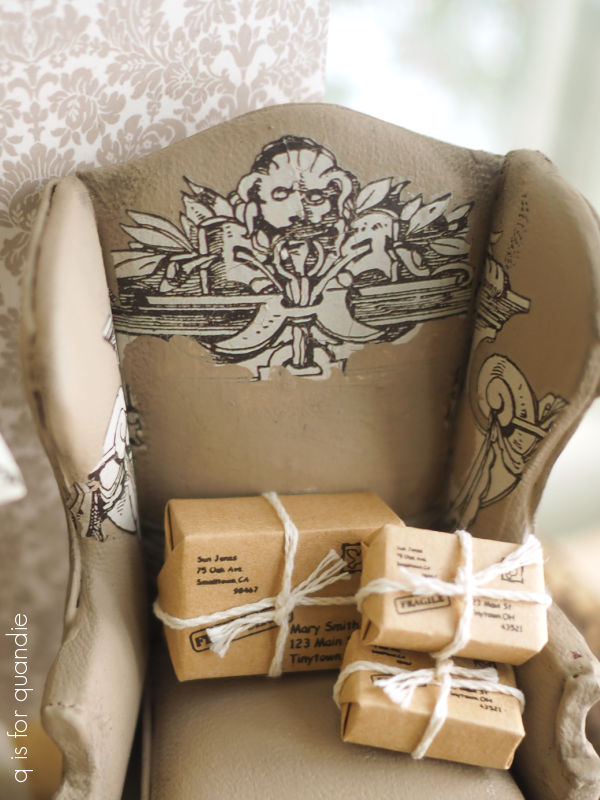
Then I added two coats of Dixie Belle’s Putty. Once dry, I added a small transfer from the I.O.D. Santa’s Hollow set to the seat back. I modified that transfer a bit to make it work for the chair by painting over some portions with more of the Putty.
Once the transfer was in place, I gave the chair a topcoat of Dixie Belle’s clear wax. Then rather than distressing back to the Coffee Bean underlayer, I used some of DB’s Dixie Dirt in the Earth color to add some age.

I used a small brush to apply it to some of the corners and creases.
Oh, and FYI, I dry brushed some of the Putty paint over the Coffee Bean on the legs of the chair to bring out the detail.
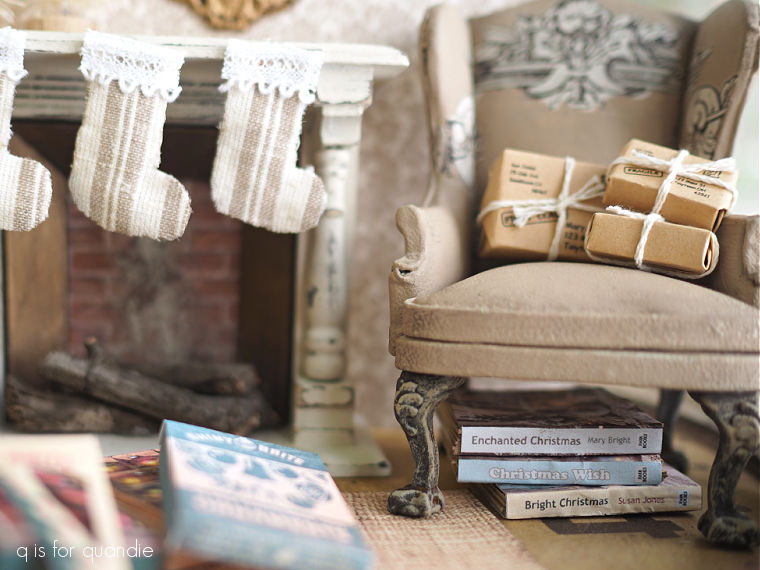
Those adorable packages on the chair were a gift from my friend and fellow Reclaiming Beautiful vendor, Amy (they were the perfect addition to my Christmas scene Amy!).
Next up, the fireplace.
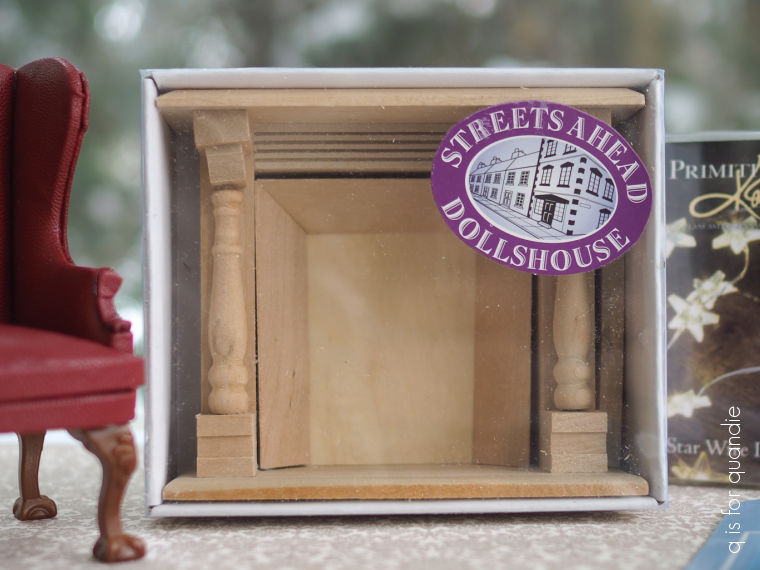
Unfortunately, it seems that I may have ordered one of the last of this style available from Miniature Crush because it’s now sold out.
I like purchasing these unfinished pieces and then putting my own stamp on them. Once again, I gave this piece a base coat of the Coffee Bean, then I added a couple of coats of DB’s Ecru over it.
In this case, I did distress the paint back to the dark undercoat.
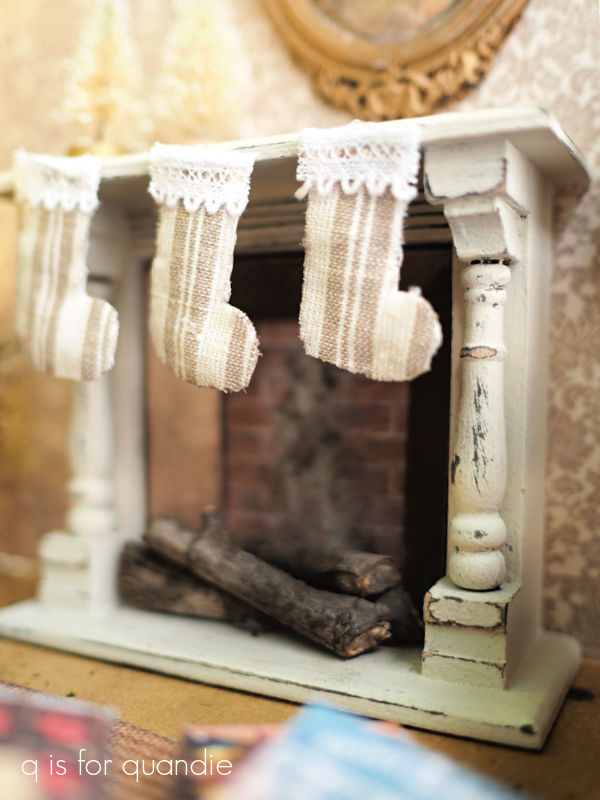
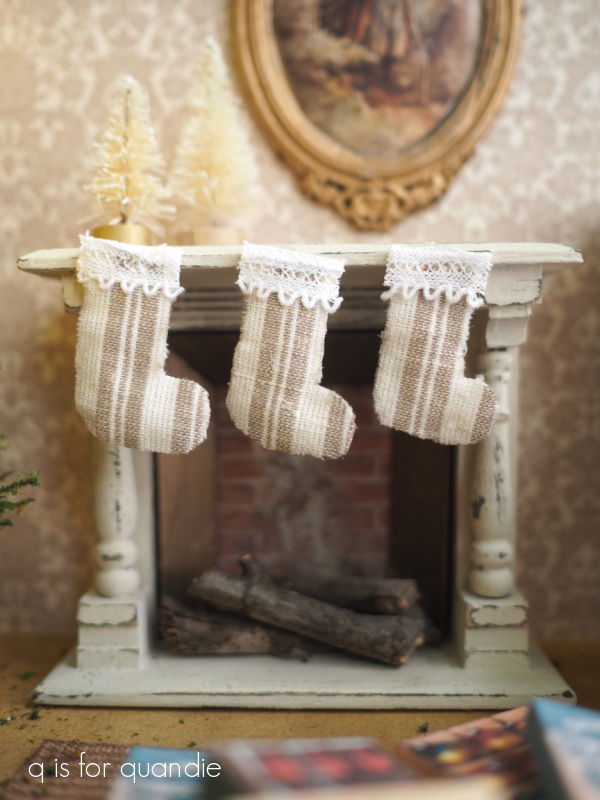
I lined the back of the fireplace in some brown brick textured paper from Miniature Crush. Then I used some of re.design with prima’s Bronze Age metallique wax on the surround. I applied a little Mod Podge over the brick and then sprinkled on some more of the Dixie Dirt to make the brick look sooty.
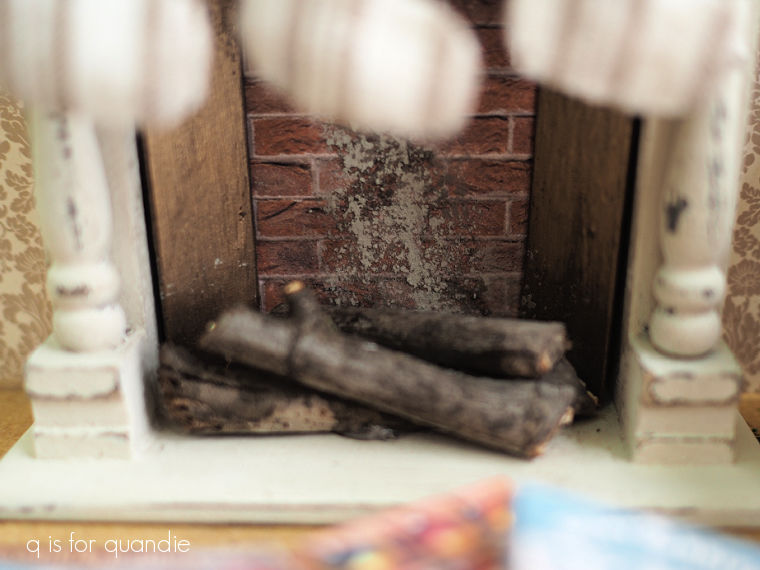
I gathered some twigs from the garden to cut into logs for the fireplace.
I realize now that it would have worked better to get some photos of these details before hot-gluing the Christmas stockings into place, but … well … I didn’t do that.
Speaking of the stockings, I made those myself.

I layered ticking stripe fabric on either side of some thin batting, gluing all three layers together. Then I cut out the stocking shapes. Once I had them cut out, I had to add a little more glue to the ‘seams’ using a toothpick. Finally I added the trim from an old hanky to the top of each stocking with some more glue. Easy peasy.
One of my favorite pieces in the vignette is the ‘painting’ of Santa that hangs over the fireplace.
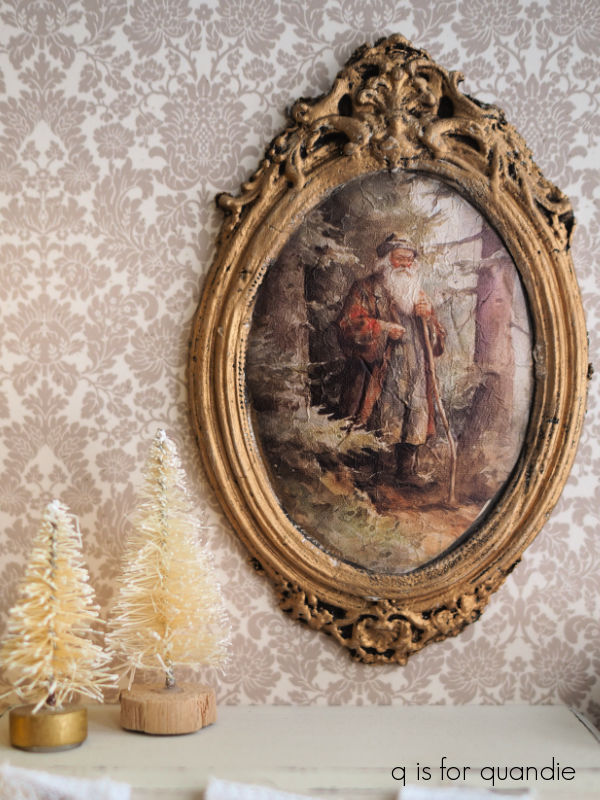
That came together so perfectly! I used I.O.D.’s Air Dry Clay and their Frames mold to create the frame. Once the clay was dry, I once again began with a base coat of Dixie Belle’s Coffee Bean. Then I applied their Antique Gold gilding wax over it. The dark background really makes those frame details pop.
I then painted the center oval with DB’s Ecru. Then, as though it was meant to be, that Santa transfer, also from the Santa’s Hollow set, was the perfect fit for the oval. Did they plan that? I don’t know, but I love it.
There are two more similar Santa transfers in that set and now I’m thinking I might frame those up and add them to the wall as well.
By the way, the wallpaper is also from Miniature Crush. It’s the Berkshire Damask Clay on Cream Bradbury & Bradbury paper.
The ‘wall’ is just a piece of foam core board that I cut to size. I used spray adhesive to apply the wallpaper, then I used double sided tape to stick the ‘wall’ to the back of the fireplace so it would stand upright. I also used double sided tape to ‘hang’ the painting on the wall. We’ll have to see how well that holds up over time. I may have to use something stronger down the road.
Before I move on to my final favorite detail, let’s address the elephant in the room … the Christmas tree.
You know how it is when you go to the tree farm and you pick out what you think will be the perfect tree, then you get it home and it seems to have grown 2 sizes on the drive home?
Something similar happened here. I ordered this tree from KADkrafts on Etsy. It’s available in two sizes; 7″ and 9″. Naturally I ordered the larger size, somehow thinking that the 7″ would be too small. Of course, when it arrived I realized that the 9″ tree was going to be a bit overpowering in my vignette.
However, aside from the size, this tree is perfect. I think it really looks like a real tree. So I decided to go ahead and order the 7″ one too (I can use the 9″ tree in the dollhouse garden, when I get to that). Unfortunately, even though I paid extra for priority shipping, and it was supposed to arrive on Monday, it’s not here yet. Lucky it wasn’t meant to be a Christmas present, right? So for now I’m just using the larger tree, but not decorating it with anything more than the lights.
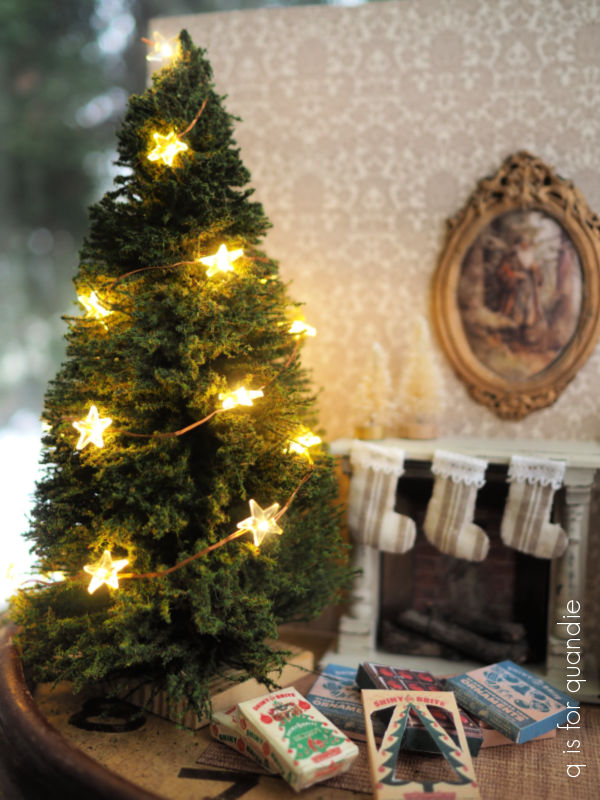
That brings me to my final bit of miniature Christmas fun!
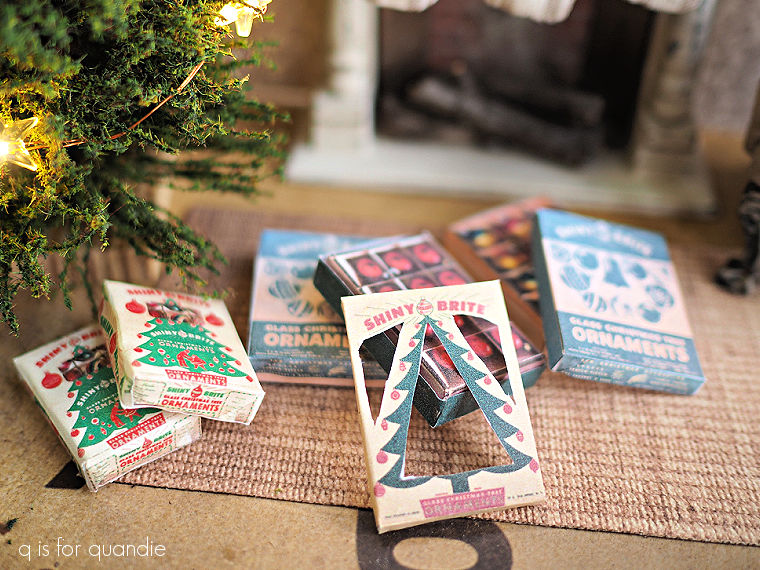
The tree is just waiting to be decorated with a non-collection of Shiny Brite ornaments. These were a digital download from Etsy. In other words, you download a digital file, print it out, then cut out the paper and glue it into box shapes. It’s a little bit putzy, but I love the results.
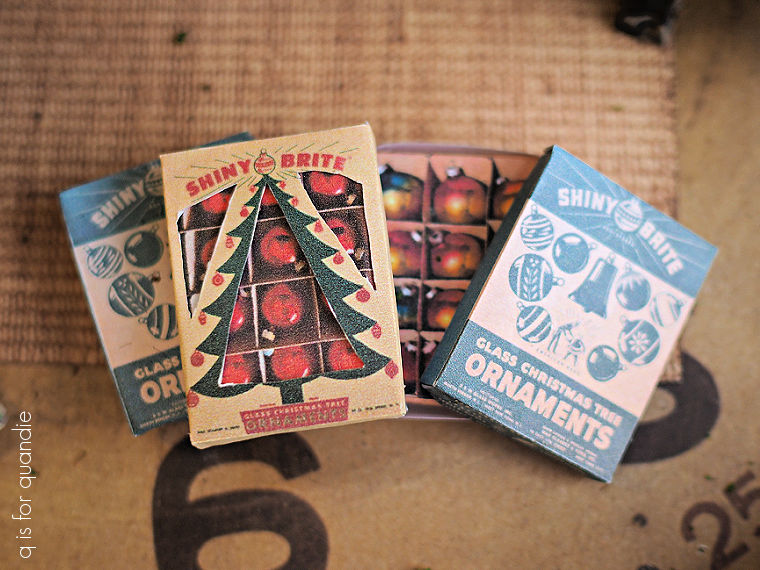
So there aren’t any presents under the tree yet, Santa will bring them tonight. But, who needs presents when you have all of these Shiny Brite ornaments?
I struggled to get a good photo with the glass cloche in place.
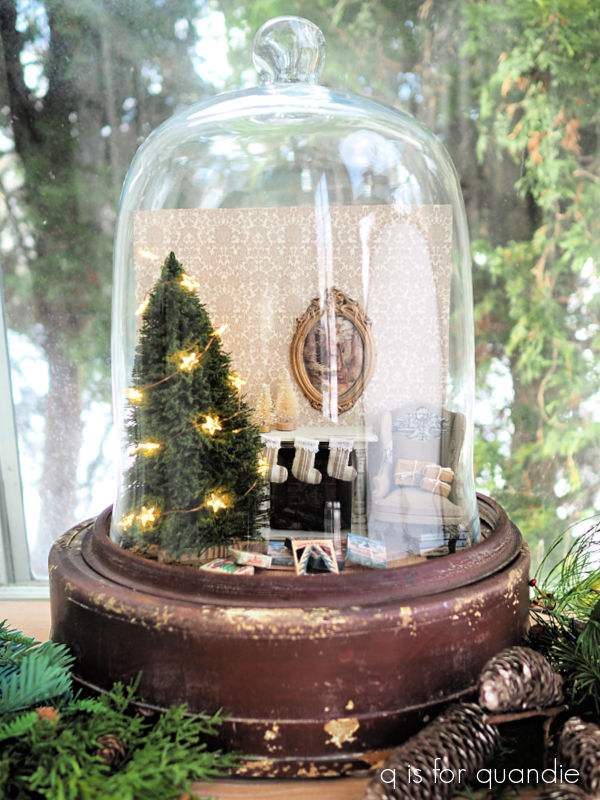
But there was a little too much light bouncing off the glass. However, I have to say that this little scene looks best at night when it just lit by the glow from those little star lights on the tree.
With that I’d like to wish a mini Merry Christmas to all of you who celebrate it! And to those who don’t, not to worry, we’ll be back to our regularly scheduled programing after the New Year.

Love It ♡☆♡
LikeLike
Thanks Diane!
LikeLiked by 1 person
Now that’s pretty cool! Very fun!!
Merry Christmas 🎄
LikeLike
Thank you! Merry Christmas to you too Susan!
LikeLike
Oh wow! this is just perfection! Love how all the details came together!
Sent from my iPhone
LikeLike
Thanks so much Sheri 🙂
LikeLike
Wow! Your creativity and attention to detail is awe inspiring! Love it!
LikeLike
Thanks so much Sue!
LikeLike
This is fabulous! Love the details.
Merry Christmas to you and Mr. Q. And a Happy New Year.
LikeLike
Same to you Marguerite!
LikeLike
All those details – just lovely!
LikeLike
Thanks Laura!
LikeLike
Absolutely adorable!! Every detail, every touch…perfection.
Merry Christmas to you and Mr Q!
LikeLike
Merry Christmas to you too!
LikeLike
Okay, now it’s official…you are the Queen of crafting!! How adorable! Merry Christmas and thank you for another year of fun and beauty.
LikeLike
You are very welcome! Thanks for following along 🙂
LikeLike
I love this!! This is very precious! Merry Christmas to you and Mr Q. May you be blessed beyond measure through 2026🎄❤️🙏
LikeLike
Happy New Year Monica!!
LikeLike
Love it Linda! Such a cozy display! Happy Holidays! 🎄🎄🎄
LikeLike
Thanks Olga! Happy Holidays to you too 🙂
LikeLike
Love, love, love it!!!
LikeLike
Thanks Valerie!
LikeLike
Definitely going to steal the stockings idea and the tiny packages for my miniature cat cafe! Your dollhouse renovation set me on a miniatures journey that I am thoroughly enjoying. Have a wonderful break and see you next year.
LikeLike
How fun! It’s addicting, isn’t it?
LikeLike