
Sometimes it takes a couple of tries before I feel like I’ve gotten something right.
Such is the case with today’s project, this metal box.

My friend Kathy gifted me with this box last summer. I really wanted to try and save that original very distressed paint job. So after cleaning the box, I decided to paint just the lid and then apply an I.O.D. paint inlay to it.
I shared the full details of that back in June of last year, and it ended up looking like this.

I have to admit, I didn’t love it. I did put a price tag on it for my occasional sale last summer, but it didn’t sell. So I tucked it away for a bit.
But I pulled it out last week to give it another go.
First up I sanded the lid vigorously to prevent the lines of the paint inlay from showing through a couple of fresh coats of Dixie Belle’s Midnight Sky.
Then I decided to give another I.O.D. paint inlay a try. But this time I wanted to put it around the sides of the box rather than on the lid. Once again, I didn’t want to paint over that chippy paint though.
I’ve seen quite a few people applying the paint inlays into a clear top coat rather than paint, so I decided to give that a go.
I used Dixie Belle’s flat clear coat, and it worked out perfectly.

Or … well … somewhat imperfectly, but just like it’s supposed to.
Basically just follow the same steps that you would with paint, only use a clear, water-based top coat instead (find full step by step post for applying a paint inlay here). In addition, be sure to remove the paint inlay paper backing fairly quickly once dry. If you wait too long the top coat will harden and make it difficult to get the paper off.
When I did the original paint inlay on the top of the box last summer, I noted that I got some inconsistent results.

Since I was applying it over a solid, fresh coat of black paint, I think that looked a little out of place.
But I think the same sort of result looks much more fitting over the chippy sides of the box.

Once I had the paint inlay applied, I gave the sides of the box a quick spray with a matte sealer to protect it from smearing.
Next I gave the top of the box a good sanding to rough it up a bit because I felt it looked too freshly painted in comparison to the sides.
Then I decided to give one of the I.O.D. gilded transfers another shot.
![]()
You may remember that I purchased these when they first came out and I wasn’t super enthused about them.
But I did give them another try later, using them on some ice skates in the fall with much better results.
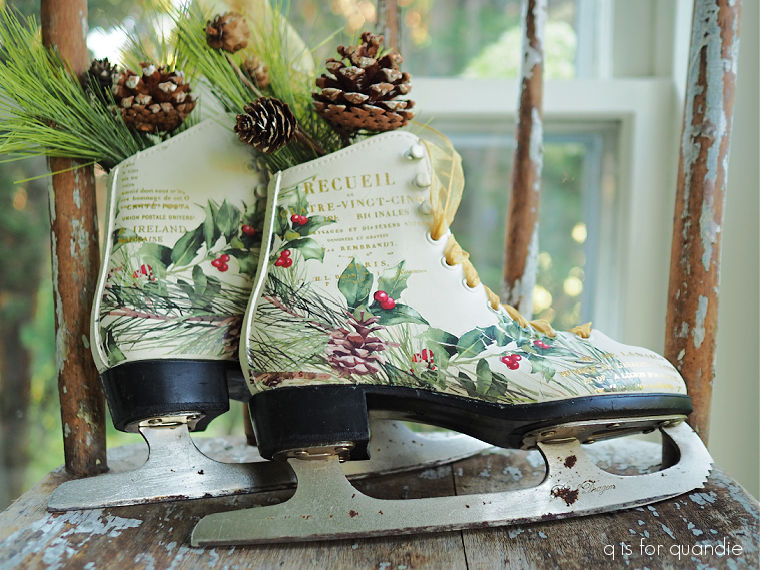
I definitely felt like using them in this way, layered over something botanical, was the way to go.
But for the top of this box I decided to try applying one over black paint once more. I’ve seen examples of this online that look really good, so I was willing to try again.
![]()
I think you have to be OK with imperfections when using these gilded transfers. Much like the paint inlays, they aren’t meant to produce perfection.
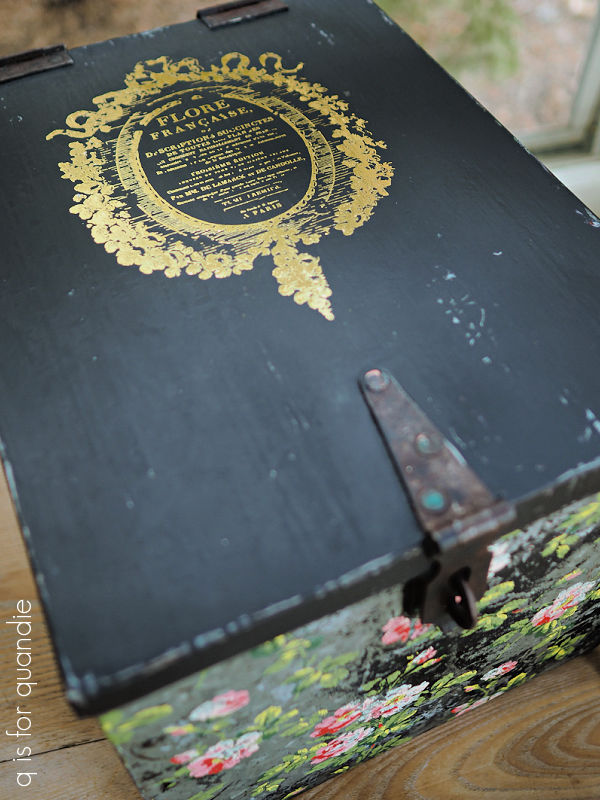
Once you accept that and decide to work with it, they can be really lovely.
You also have to get a feel for how to apply the gilded transfers. They work a little differently than your typical transfer. It takes more patience, and just gentle pressure rather than hard rubbing to get these adhered.
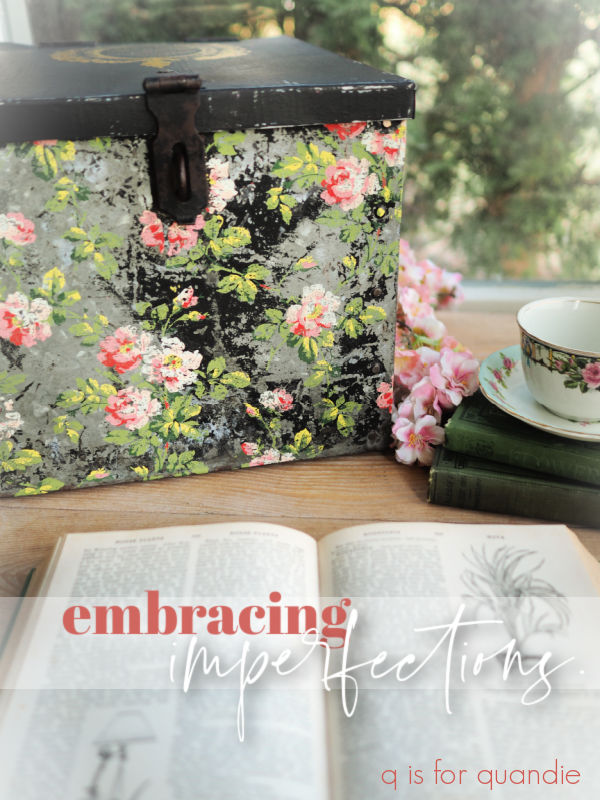
Ultimately, I think this box turned out pretty cool.
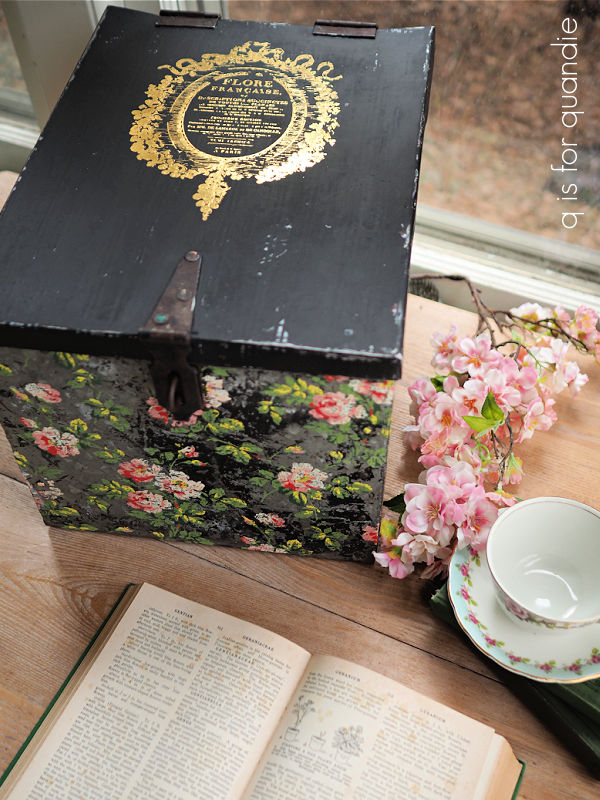
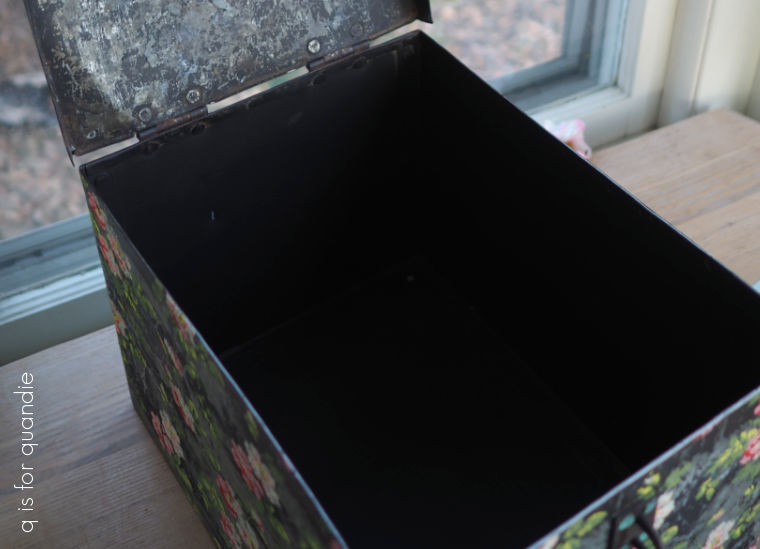
I did paint the inside in Dixie Belle’s Anchor to freshen it up, so it would work well for storing stuff like your garden journals, hats and mittens, your old DVD collection, your stash of greeting cards, craft supplies … and with that hasp, you could even lock up your secret diaries in this box.
I staged my photos with this pretty little tea cup.
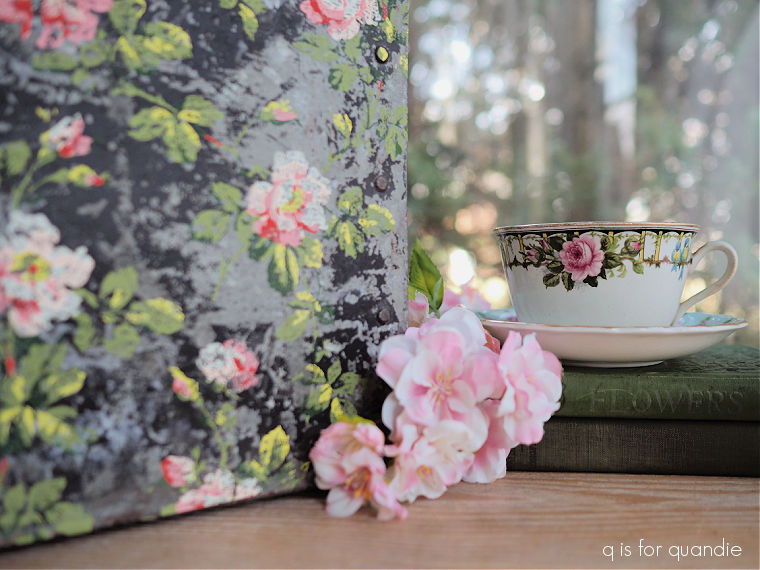
I still have a major weakness for pretty floral china, although aside from using it in photos I rarely do anything with it.
I’ve gotten rid of most of the floral china I once had with the exception of anything with birds on it.
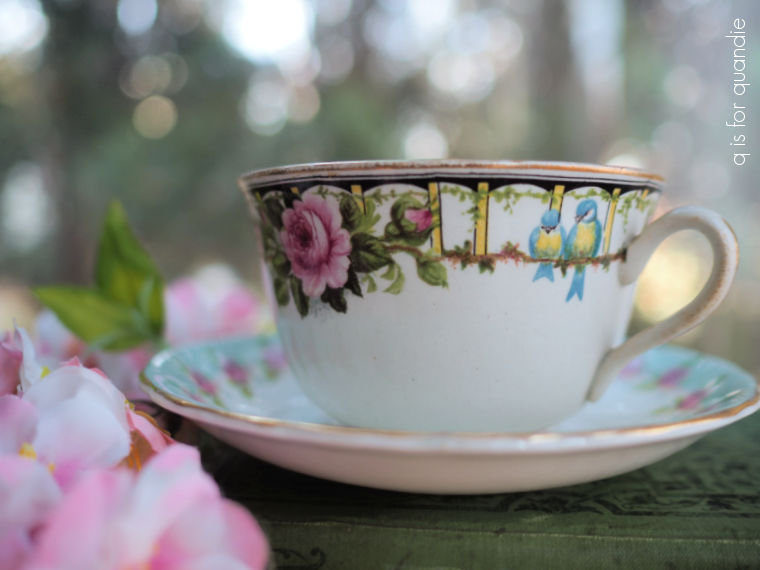
How sweet are those little birds?
Anyway, back to the box.
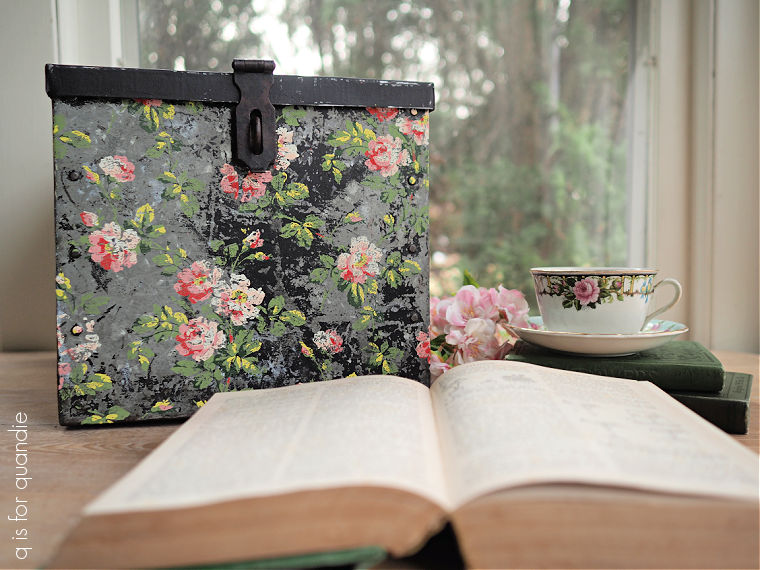
Now that I have decided to embrace the imperfections and work with them instead of against them, I’m much happier with how this box turned out.
How about you? Are you OK with imperfections? Leave a comment and let me know.
By the way, this box is for sale. I’ve added it to my ‘available for local sale‘ page, so you can check out the details there. Also, FYI, I’ve created a new page for the mini’s that I have for sale and am willing to ship. For clarity, I decided two separate pages might work better. Be sure to check those out!

The box looks great and I love the China tea cup too ♡
LikeLike
Thanks Diane!
LikeLike
The box is perfectly unperfect! I have one of those paint inlays with plans to use it on a small buffet….my courage is building because of your examples and results.
PS. The china cups are lovely! Great to have kept them in my eyes 😁
LikeLike
Even though I don’t always get perfect results with them, I do love working with the paint inlays. It’s so satisfying to pull that paper off and see the design left behind. Have fun with your project!
LikeLike
This is so pretty. I love the chippy look of the box.
Sent from my iPhone
LikeLike
Thanks Sheri!
LikeLike
I love it SO MUCH! Sent from my iPhone
LikeLike
Thanks Lynne!
LikeLike
This turned out fabulous!!! Could not love it more! I am guessing this is Rose Chintz inlay?
LikeLike
Oh my gosh, did I neglect to mention that? Yes, it is. Thank you!
LikeLike