
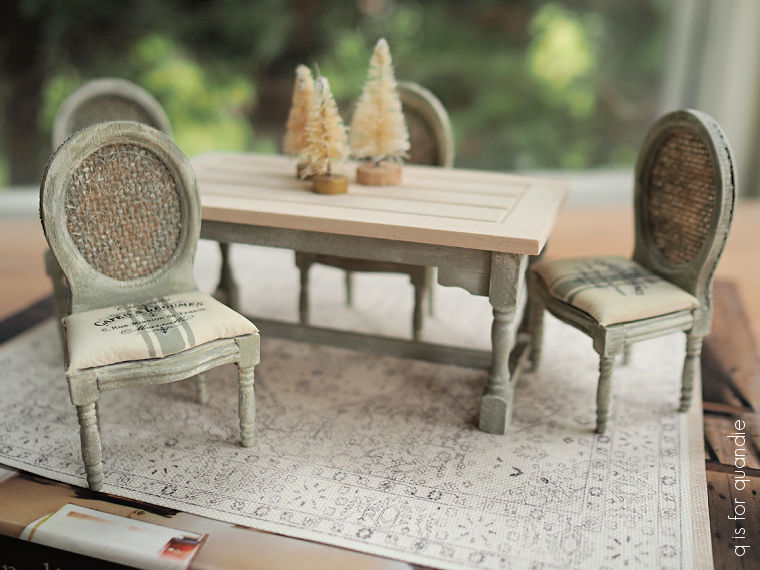
So far you’ve seen my dollhouse dining room table and chairs, and the rug I purchased for the room.
And you’ve also seen the sideboard that I painted up more recently.

As well as the extra two chairs for either side of the sideboard.

And that brings me to the room itself.
Here is how it looked before I gave the house to my in-laws.
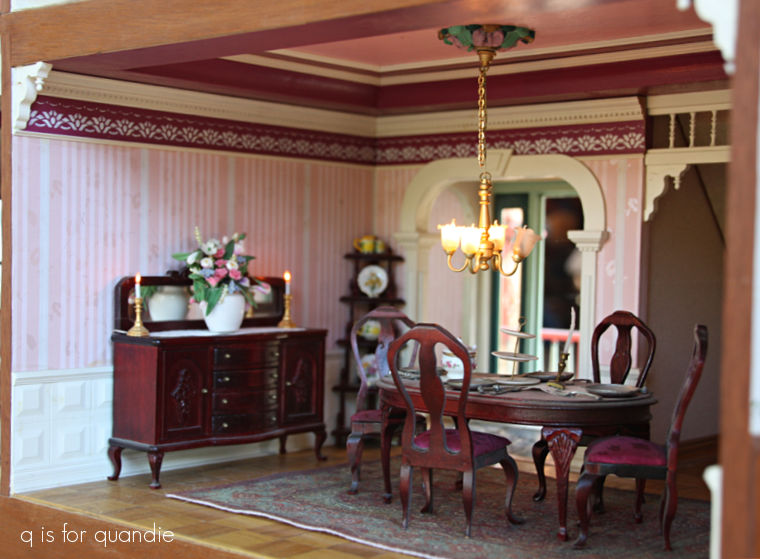
My tastes have definitely changed. I would count burgundy as one of my least favorite colors these days, but I sure used a lot of it in this room. And that reddish stained furniture, ugh.
Here’s how the room looked when I got the dollhouse back from my in-laws, complete with some spooky cobwebs on the chandelier (and for those of you who don’t know this story, check out my post that explains it here).
![]()
As I mentioned, they had misplaced the box with all of the house’s contents. There are a few items I wish I had, but for the most part I’m OK with starting over with furnishings.
I had originally planned to provide a little drama in the dining room with dark grey walls, and in fact I’d even painted the first coat on one wall back in September.
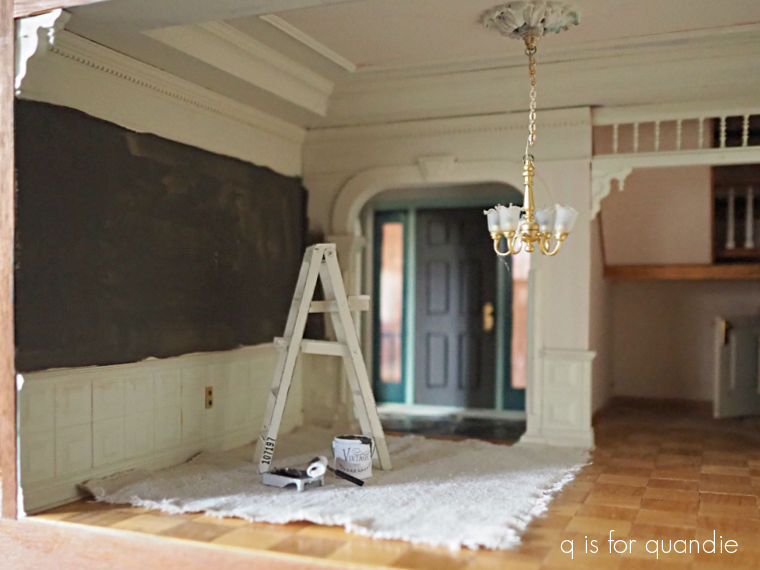
That would have been a striking look. It would have set off the white paneling and trim work beautifully.
But then I ordered the I.O.D. Gloria paint inlay. And now you’re probably wondering what in the world a Christmas themed paint inlay would have to do with a dollhouse and that’s a fair question.
Although some of the designs in the Gloria inlay are overtly Christmas-y, many of them are not. And they are absolutely gorgeous.

As soon as I saw that flute playing cherub I thought it would make the perfect mural for the wall in the dollhouse dining room.
Unfortunately it was too big.
But then I saw this page …

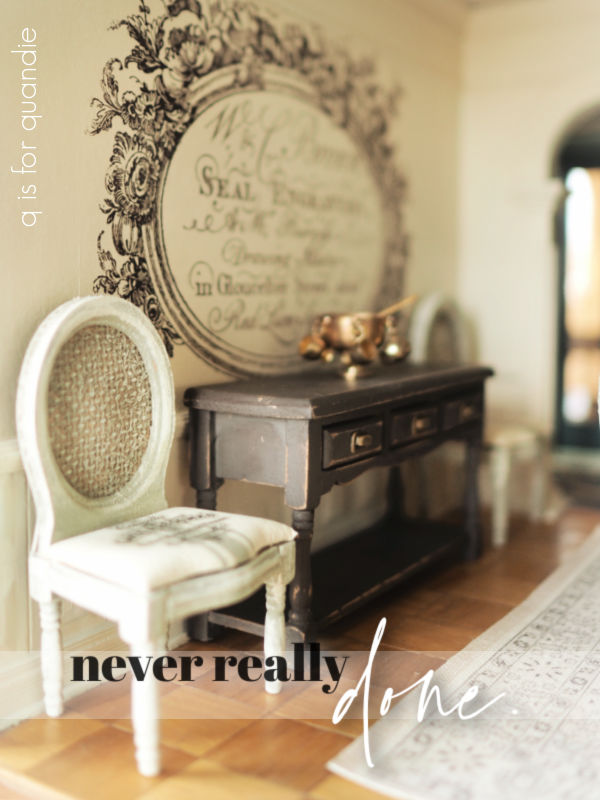
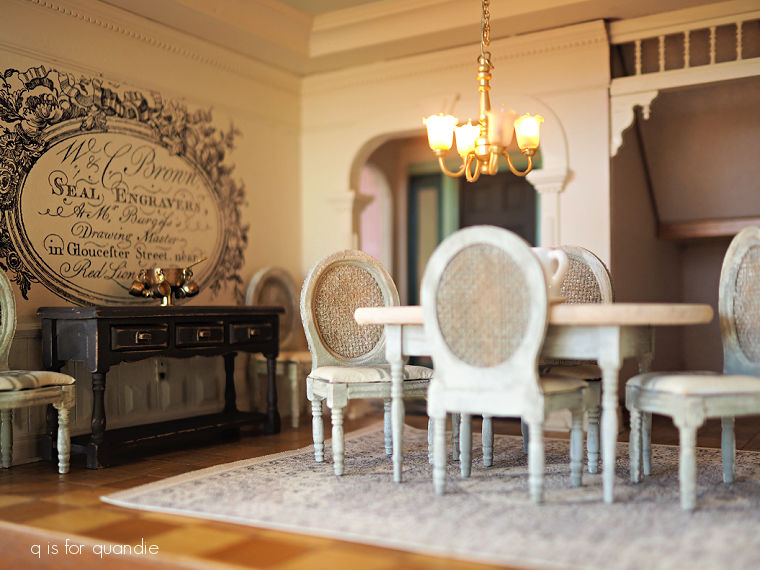
And that Seal Engravers transfer on the bottom right was the perfect size for my wall.
I was a little nervous about the application process, but it worked out beautifully. I just used my normal technique to apply it (for more detail on how to apply a paint inlay check out this how-to post).
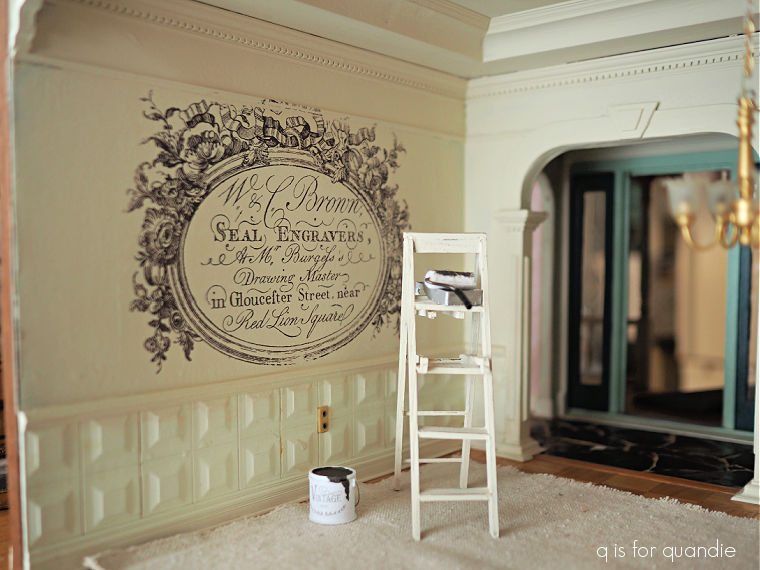
Talk about drama!
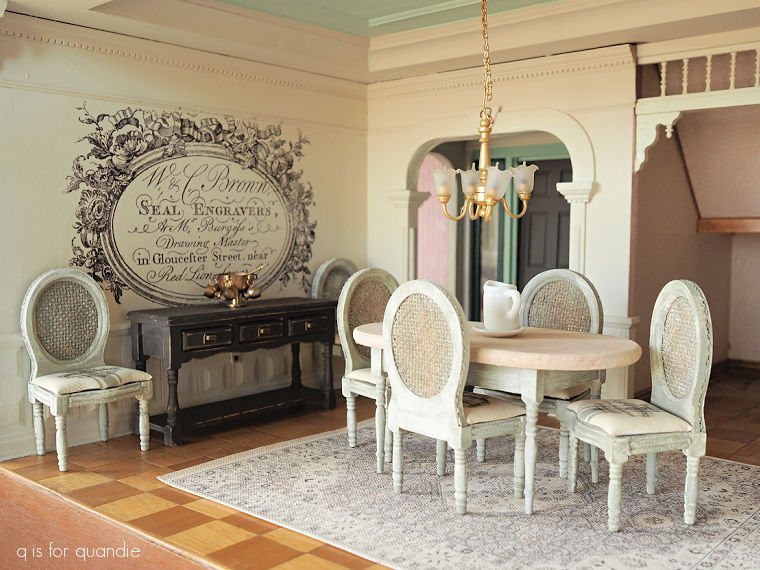
Next up I painted all of the ‘woodwork’ and the ceiling in Dixie Belle’s Drop Cloth to give me a blank canvas. Ultimately I then decided to paint just part of the ceiling in a pale blue green (much like my own ceilings).
Let me tell you, that was a tricky process. First of all, I have the vision of a 61 year old. Secondly, it has been incredibly dreary here over the past several weeks, so lighting wasn’t ideal. Lastly, I was painting the ceiling in place, so craning my head around to try and get in there to both see it and paint it was challenging.
I ended up having to use a hand mirror to see what I was doing.
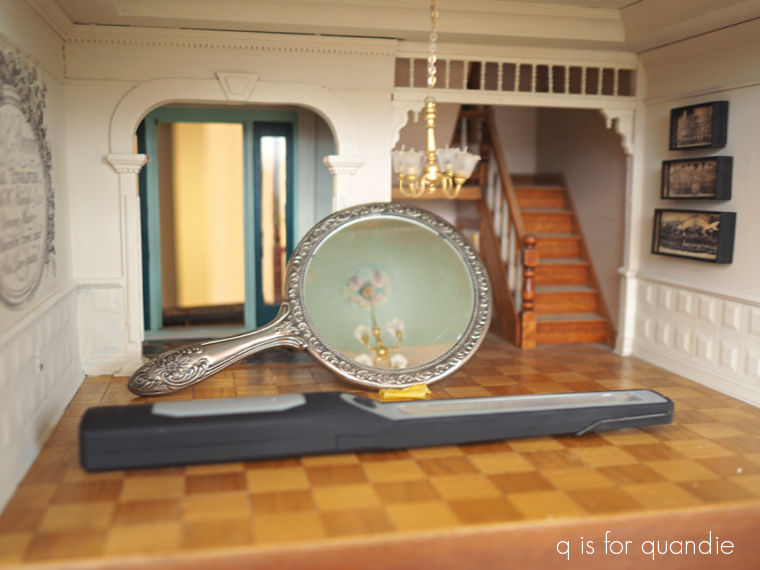
That other item in the photo is a light, which I turned off to take the photo. But it did help to blast a spot light onto the ceiling while I was painting. As for painting while looking in a mirror … well … I’m going to have to get a lot more practice before that works well. I was constantly moving my brush in the wrong direction.
But ultimately I got the ceiling painted.

That color is a mix of about 25% Dixie Belle’s Tide Pool and 75% Endless Shore.
I am finding that colors look a lot darker in these small dollhouse rooms than they do on larger objects. So even with 75% warm white added to it, this Tide Pool looks darker than I expected it to. Full disclosure, I did paint it first with a 50/50 mix, and then went back over it with the 25/75 and decided to call it good.
My ceiling paint job is definitely less detailed than the original, but my dad had the advantage of painting it as he was putting it together. He didn’t have to use a mirror 😉
For one last touch, I applied Dixie Belle’s Gold gilding wax to the plaster medallion around the chandelier.
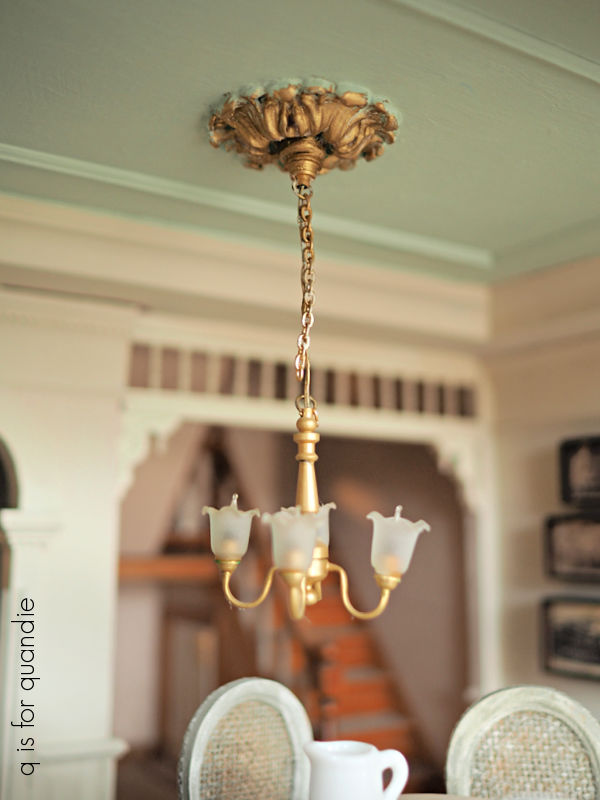
That brings me to the electrical. I have to admit, I have no idea how I’m going to tackle that. I know nothing about wiring, and thus I have no idea how to replace any of the hard-wired light fixtures throughout the house like this chandelier. Not to mention that of course the wiring was done as the house was being built, so I can’t really get to most of it.
None of the lights on the first floor are currently working, including this dining room chandelier, but most of the lights on the upper two floors are still working. So do I replace the dining room chandelier with a more attractive, but non-functioning version? Do I attempt to fix the wiring somehow, and re-wire a new light? That’s a problem for another day.
**Update: since I originally took the photos for this post, handyman/neighbor Ken came over and he suggested I play around with the fuse box.
Yes, the dollhouse has a fuse box!
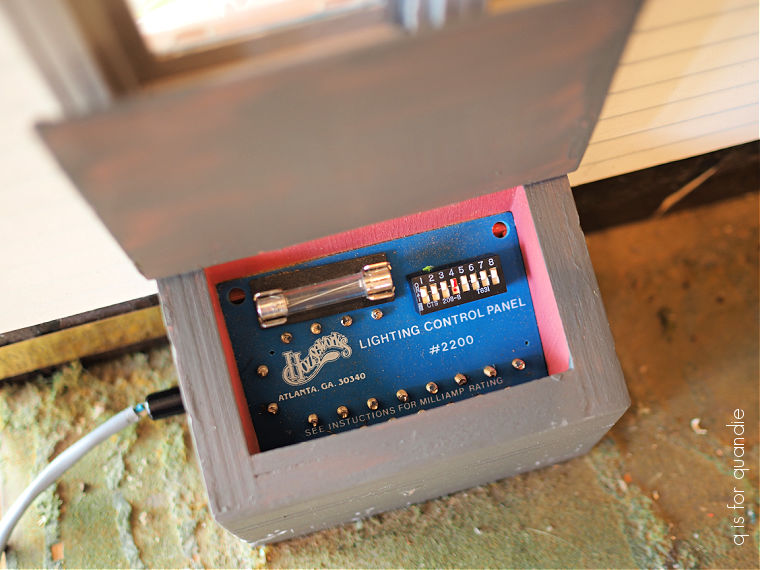
And as it turned out, one of those tiny 8 switches on the upper right side was flipped down. So we flipped it back up and voila!
The lights on the first floor are on. For the most part anyway, there are a couple of burnt out bulbs.
So, to recap, one wall in the dining room has the paint inlay, sideboard and two chairs.
On the opposite wall I’ve hung a trio of military panoramic photos that I purchased from The Curated Farmhouse on Etsy.
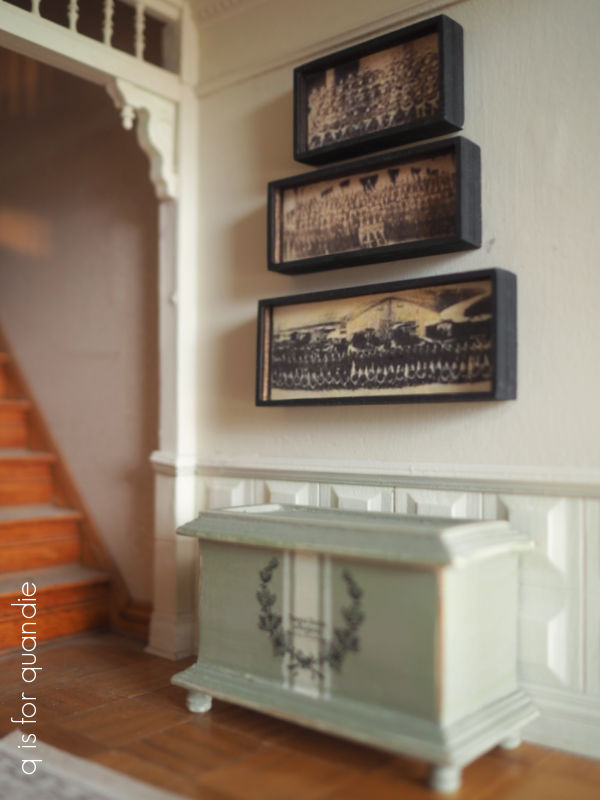
I’ve placed the trunk below them, but I’ll be on the lookout for something else for that spot that feels more ‘dining room’ to me. This trunk is most likely going to end up in the principle bedroom.
The rug, dining table and chairs are in place.

So for now I’m calling the dining room ‘done’.

Down the road I’d like to find small details to add to the room, like a nice floral centerpiece for the table, and maybe some dishes, etc. At some point I need to deal with both the front foyer and the stairwell that are visible behind this room.
But for the most part, one room down, eight to go. Plus that stairwell and foyer, plus the exterior.
I don’t want to rush things though. I’m having way too much fun with this project! Also, I’m sure that over time I’ll be adding things, and taking things away. Much like with any sort of decorating, things can continually be evolving and you’re never really ‘done’, right?
Be sure to leave a comment and let me know what you think of the new and improved dining room.

That color looking darker as the surface area gets smaller is called “increasing diffuse reflectance.”
It is something people who build model cars have to take in account when trying to model manufacturer colors exactly, as do model railroaders when trying to match the exact color used on train cars.
I can confirm for all your readers that the colors you chose look wonderful.
LikeLike
I knew there had to be some sort of science-y reason behind that ;-), thanks hon!
LikeLike
This is just gorgeous. It’s amazing seeing these details that are in miniature. Am enjoying watching you go through this process!
Sent from my iPhone
LikeLike
Thanks Sheri!
LikeLike
The miniature furniture makeovers have been so fun to watch and I love the dining room. I am tempted to do my own dollhouse after seeing yours!
LikeLike
Definitely do it!
LikeLike
It looks fabulous! The colors are perfect…well done. I cannot wait to see the transformation of each room as you move through the house…so fun!🤩
LikeLike
Stay tuned Eileen 🙂
LikeLike
You did an amazing job!! The dining room is beautiful. I love the wall mural. Perfectly done my friend❤️
LikeLike
Thanks so much Monica!
LikeLike
Linda, perfectly done! I love how the mural fits ! The pictures are my ( I think) my favorite. The trunk is perfect as well. Another fine job! smiles, Alice
LikeLike
Those military panorama photos were one of the first things I purchased for the dollhouse. I do love them too!
LikeLike
I just LOVE it Linda!!! And so amazing that all the lights work!!🙌🏻
LikeLike
Uh … well … after writing this post, all of the lights have quit working. Mr. Q thinks there is probably a short somewhere and it will be nigh on impossible to figure out where, or to fix it. Drat! I haven’t given up hope quite yet, but I have accepted the distinct possibility that I may no longer have functioning lights.
LikeLike
I’m loving the re-do and the styles you have chosen to update the house. I’m wondering if you are planning to replace the chandelier? It seems dated and a more modern style would really make the dining room pop. I don’t know anything about doll houses (I never had one as a child and I have all boys) but this has been fun to follow along with you. Your creativity is unmatched!
LikeLike
Replacing the chandelier will be totally dependent upon whether or not I can now fix the wiring overall. It is hard-wired in and I don’t have the skills to replace it with another functioning chandelier. That’s a decision for another day at the point.
LikeLike
absolutely GORGEOUS! How you were able to paint that ceiling with a hand mirror amazes me! It’s fabulous….i adore this room and everything you did to it!! What a fun project and I still can’t get over the fact that your dad made the house. So very cool that you are renovating it now. 💕
LikeLike
I am definitely having to work on my patience while painting the dollhouse. Slow and steady is the name of the game. That, and the right brush!
LikeLike
I love your dollhouse ♡ All your furniture, painting and decor is amazing ♡
You are Amazing!! I will be waiting for more to come!!
LikeLike
Well, I don’t know about that. In a week or two I’ll be sharing some of the miniature artists I’ve found on line who truly are amazing. I’m pretty sure I can’t compete. But thank you Diane, you are too kind 🙂
LikeLiked by 1 person
Okay – this dollhouse is mind-blowing. The detail on the inside, the staircase, the moldings, and it has a fuse box 😂. I absolutely could not love this more. And the dining room furnishings and accessories you chose are perfect. This was worth the wait!
LikeLike
Thank you so much!
LikeLike
Please unsubscribe.
LikeLike
I can’t unsubscribe for you, but it’s easy to do. Simply click on ‘unsubscribe’ written in blue at the top of the email you received.
LikeLike
I love the dining room. And thank you so much for all the information on products you’ve used and where you’ve purchased items. I’m doing my first dollhouse and I’m using a lot of your ideas. I’ve painted furniture in the past so I’m familiar with the paint and transfers. You should get a commission from some of those retailers of dollhouse furniture. I’ve gotten a lot of what you used from places you’ve mentioned!
LikeLike
Hey, maybe I should get a commission! I like your thinking Julie 🙂
LikeLike
The doll house is amazing! I admire your patience and creativity!
LikeLike
Thanks Sandy!
LikeLike
I just love this and what you’ve done to change up the room! It’s delightful to be part of the dolls house update ❤️
LikeLike
Thanks so much Lindsay!
LikeLike