

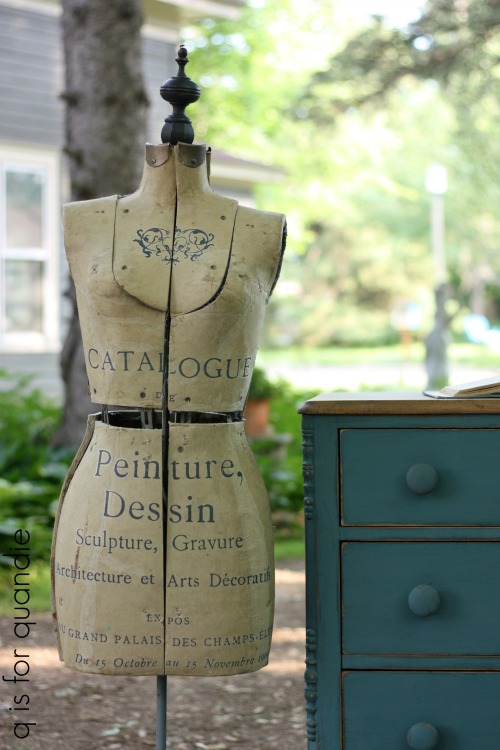
An empty corner in the guest room of my dollhouse sent me scrolling through Etsy looking for something to put in that spot. I started with chairs, and there were a few chairs out there with potential. But ultimately the idea of adding a dress form to that corner popped into my head.
I started searching on Etsy and came across a miniature dress form that had been given a copper verdigris patina all over and thought “I can do that”. In fact, I bet I can go one step further and create a miniature version of my full size dress form, Collette.
So I kept searching and ended up finding a pair of miniature dress forms for $10.

They are made of plastic, and require just a little bit of assembly with some superglue.
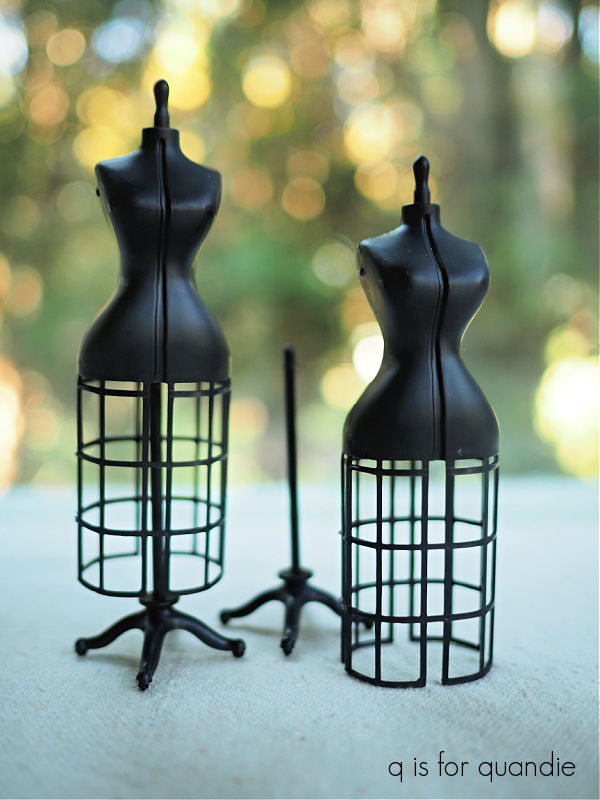
Once assembled I gave mine a quick coat of Dixie Belle’s Bonding Boss. Since they are made out of a rather slick plastic, I wanted to hedge my bets on adhesion.
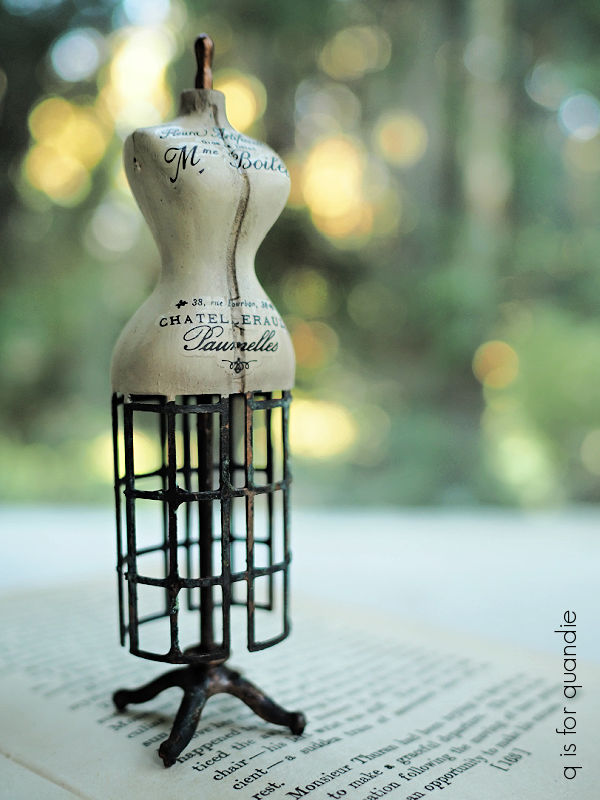
Once that dried I started on the base and the ‘cage’ at the bottom of the dress form. Unfortunately my full-sized dress form doesn’t have a cage, I wish it did. I think they are really cool. The mini dress form has one, so I decided to give it a patina so that it would look like metal.
I started with a coat of the Dixie Belle Iron patina paint. Then I added some dabs of the Bronze. While the paint was still wet, I dabbed on some of the Green Spray. I just kept playing around with those three products until I got the look that I wanted.
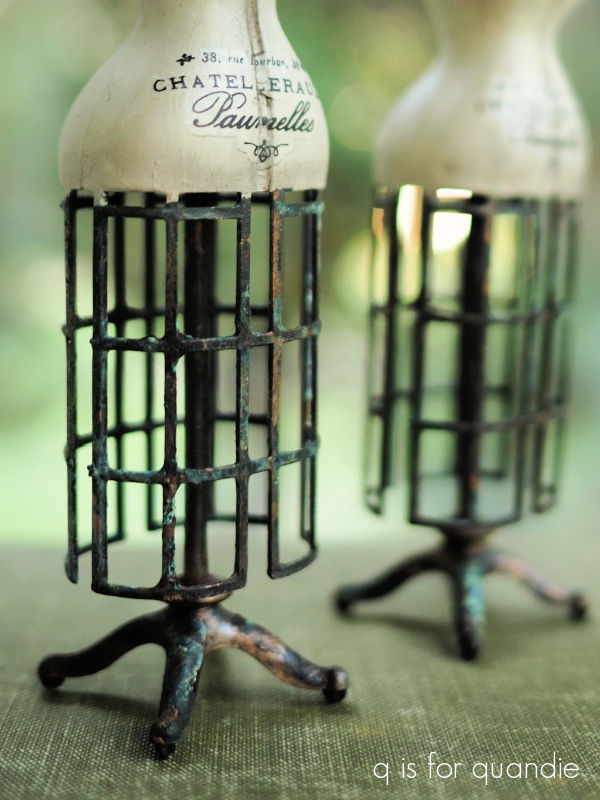
You can find a full tutorial on using the Patina Paint here.
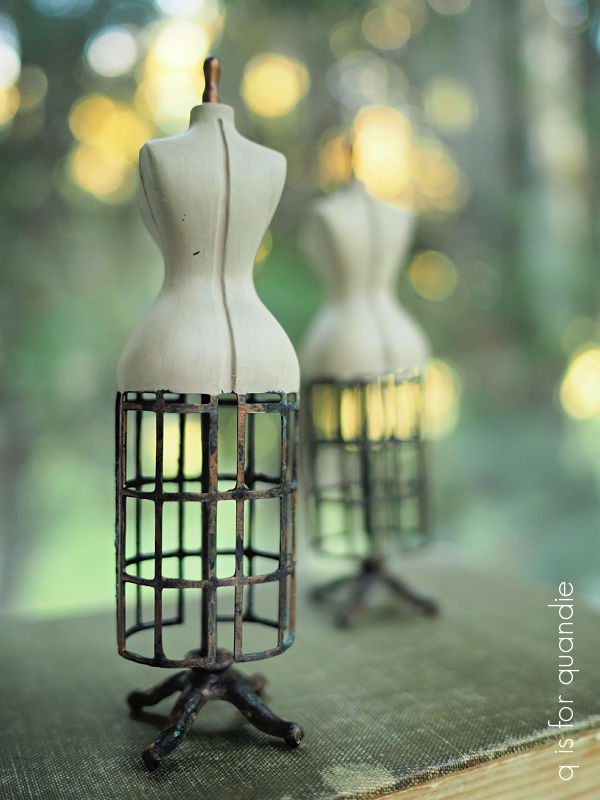
Next I pulled out Dixie Belle paint in a color called Putty. I’ve had this particular jar in my cupboard for a while, and it had been opened and used before (most recently on this dresser). This chalk style paint will thicken up a little over time, but it’s easy to just add a little water to thin it back out again. In this case I really didn’t want any big ol’ brush strokes, so I watered my paint down a little and applied it to the body of the dress form.
Once I had the Putty on I felt like it was a little bit one dimensional, so I went through my cupboard and found Dixie Belle’s Burlap. Once again I watered it down a little, and then blended it with the Putty to create the perfect color.
Once that dried, I pulled out my re.design with prima knob transfers again (these are coming in so handy for miniature work!). I found the perfect one to use on the dress form from the French Maison set.
![]()
Once the transfer was in place, I used clear wax over the body of the dress form.
I was going to call it good at that point, but I felt like it needed just a bit more dimension. So I used a small brush to apply some of the Dixie Dirt in a brown color called Earth.
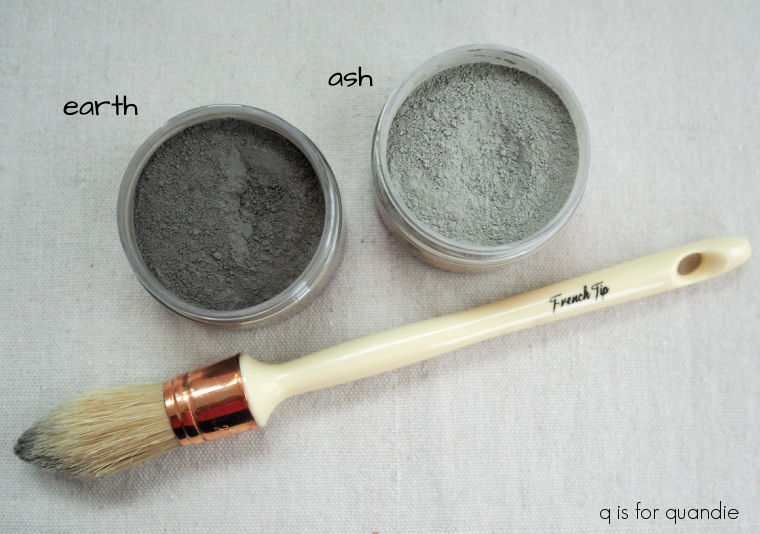
That’s an older photo, and clearly that brush was too big for this project. I used a very small brush, and I applied the dirt to the crease down the center of the dress form body, and also around some of the edges. It added the perfect touch of age.
I had so much fun creating these dress forms!
Since I’ve named both of my full-size dress forms, Collette and Lula, I decided I should go ahead and name the mini’s as well. In honor of my recent trip to Disneyland, and one of my favorite attractions, the Enchanted Tiki Room, I’ve named them Suzette and Mimi (let’s all sing like the birdies sing, if you know, you know).
In case it wasn’t already apparent, I did paint both of the forms exactly the same.
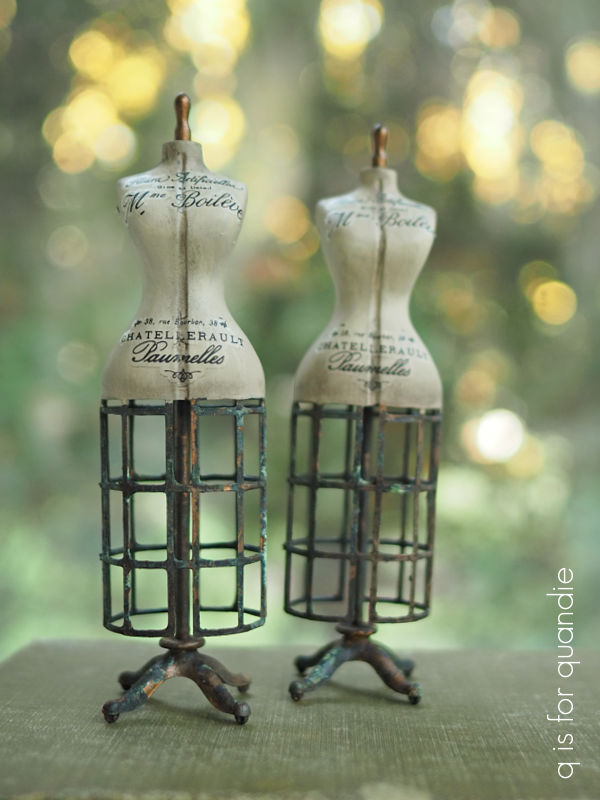
Obviously I don’t need two identical dress forms for myself. So I’m going to keep Suzette, but stash Mimi away and include her in my blogiversary giveaway next month. Be sure to stay tuned for that!
But in the meantime, how do you like the dress forms? And have you tried any of the Dixie Belle patina paints yet? They continue to be one of my favorite mediums to play around with, on both miniature and full-sized items. Leave a comment and let me know what you think.
Thank you to Dixie Belle Paint Co for providing their products used on the dress forms.

I think you have found your calling with dollhouse remodels and decorating! I love all of your projects but this one is over the top! My dad made me a replica of the house I grew up in in 1:12 scale many years ago, and my plan is to remodel that one day also.
LikeLike
Thank you so much Traci! And also, OMG, how lucky you are to have a replica of the very house you grew up in. That will be a fun project for sure!
LikeLike
I love watching the redecorating of your dollhouse. Many many years ago I had a favorite aunt that had a wonderful dollhouse. Like you, she was very creative/resourceful. Watching you design this mini dress form has brought back many fond memories of my time spent with this wonderful aunt. BTW, I am in the process of painting Christmas themed boxes with inspiration from your recent posts.
LikeLike
Have fun with your boxes!!
LikeLike
the dollhouse remodel posts are such fun. Thanks for sharing it with us.
LikeLike
Thanks so much Marguerite, I’ll be keeping them coming 🙂
LikeLike
The dress forms are so cute! I’ve enjoyed every post on your dollhouse makeover project. You’ve inspired me to tackle a makeover on my own dollhouse…I just need to retire first 😉
LikeLike
Yep, being retired definitely helps 😉
LikeLike
Wow! Your patience and talent amaze me. The dollhouse makeover is so fun!
LikeLike
Actually, I don’t think I’m terribly patient. So far none of my mini makeovers have required too much patience thankfully. We’ll see how well I hold up when they do.
LikeLike
Just when I think this dollhouse project can’t get any more fabulous – a mini dress form?!? This is so so cute.
LikeLike
Thanks so much 🙂
LikeLike
oh my gosh! Those are most adorable !
you created a masterpiece ☺️
smiles, Alice
LikeLike
Thanks so much Alice!
LikeLike
I love them!! I also have a couple dress forms and always wanted one with a cage. You have as usual worked magic with these. 🫡
LikeLike
I did find one with a cage for sale at Acme Junk Co in Amery, Wisc last year (I shared it here), but unfortunately at $475 it was way out of my price range. Maybe one of these days I’ll find one at a price I can live with 🙂
LikeLike
Soooooo Awesome!!!!!!! 👏 Sent from my iPhone
LikeLike
Thanks Susan!
LikeLike
Those are incredible. I love your attention to detail. I will be watching for your giveaway!!!!
LikeLike
Stay tuned Gloria!
LikeLike
Fabulous! Love them!!
LikeLike
Thanks Melissa!
LikeLike
Love these. ❤️
LikeLike