

I know it probably seems like I haven’t done much lately in the way of furniture makeovers, and that’s true. It’s mainly because I’ve been busy with other things, like gardening, garage saling and a deck refresh.
Our deck was starting to look a bit shabby, and when I put my foot through one of the boards this spring I realized it was more than time to freshen things up a bit.

Just for fun, here’s what our deck looked like prior to 2009.

OMG you guys! Does it look like a jumbled up mess or what? I know I loved that pergola at the time, but looking back it was just too much. In the end that grapevine that was trained up the pergola attracted both racoons and Japanese beetles. It had to go.
Anyway, we replaced that with our current deck back in 2009. Here’s how the replacement looked when it was brand new.

Phew! Much cleaner. We did make it just a tiny bit larger, but it looks so much more opened up without that pergola.
Fast forward 14 years and that brings us to me putting my foot through a board. It was high time for a refresh.
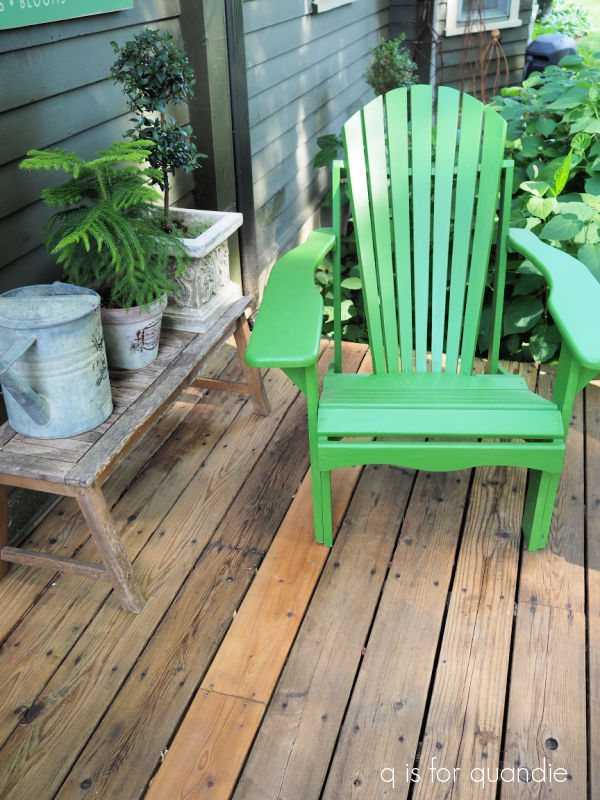
I had already started with the English racing green paint job on the Adirondack chairs that Ken made for us. The next step was to replace that rotted board, and some rotted boards on the steps. Ken helped out with that task too. The hardest part was getting the screws out of the old boards, they did not want to come out.
But we eventually got them up and pieced in the new board.
It’s going to stand out like a sore thumb for a while, but eventually it should blend in.
We have taken a couple of steps to prevent further boards from rotting. The first was to have gutters installed all around the roofline over the deck when we did our roof last summer. The spot that was rotted just happened to be right under the spot where an old gutter stopped short before the the end of the deck. So when it rained, water poured down right on that area.
The next step was to add a protective coating to the wood this year. You can sort of see how the decking was looking underneath the chair in this photo.

It was very grey, and very dirty. I assume that black stuff is mildew. In case you’re wondering, the last time we cleaned the deck was in 2019, so this is 4 years of dirt.
So we borrowed our neighbor, nnK’s, pressure washer and gave the deck a good cleaning. Then after waiting a couple of days for it to dry out thoroughly, we applied a product called TWP, or Total Wood Protectant, in clear.

Sure, we could have chosen a tinted version of this product to help that new board blend in, but in the past we have found that those tinted options tend to look kind of awful pretty quickly as they get dinged up. Our deck sees a lot of traffic year round because this is where we come and go from our house. We wanted to protect the wood, but not add a product that would peel or show excessive wear over time (been there, done that). And in addition, we really rather liked the natural color of the wood.
TWP is an oil-based product that penetrates the wood rather than forming a film on top that can peel. At least, that’s what the paint guy at Fleet Farm said. He claims that he put it on his parent’s deck three years ago and it still looks good.
I’ll have to report back on how it wears over time, but I can say that it looks fantastic right now.

We are planning to be more diligent about keeping snow cleared off the deck next winter in an effort to keep it looking good longer too, but we’ll see how that goes. We certainly didn’t accomplish that last winter!

Next came sprucing up the table and chairs. We’ve had this set since we replaced the deck back in 2009, so it’s 14 years old. As you can see above, we don’t leave it out in the winter and I think that has helped prolong its life.
It was definitely starting to show its age though. Step one was giving the tabletop a fresh coat of paint. There were a couple of spots where the paint was starting to chip and bubble, so I sanded those down and then sprayed the table with Rust-Oleum’s Metallic Oil Rubbed Bronze spray paint.

It was almost a perfect match for the original color of the table, and now it looks like new again.
Next came giving the chairs a much needed refresh. Over time quite a few of the vinyl straps that support the cushions had deteriorated. So I ordered some replacement vinyl strapping via Amazon.

Now, I have to tell you, it was quite the production to replace these straps.

If I had read the directions before purchasing the strapping I’m not sure that I would have wanted to tackle it. Basically, you have to heat the vinyl to get it warmed up enough to fully stretch out, then quickly attach it to the frame with those plastic rivets before it cools down. As it cools, it tightens back up enough to provide the needed support. The recommendation on the packaging for the heating process was to boil the strapping in a pot of water! Then handle it using heat proof gloves of some kind so it doesn’t burn you.
Um, yeah, right.
This was another job that Ken helped out with, and instead of boiling water, we heated the strapping with a heat gun. It took both of us to attach the strapping on one end, then heat it with the heat gun while also pulling it as taut as possible using a pliers to hold the other end, and then somehow wrangle it into place and attach it on the other end. Honestly, it was a very frustrating process.
But we got ‘er done. And really, what was the alternative? Send these chairs to the landfill? That seems like it would be a shame.
That left one final issue, the original cushions had gotten rather flat over time. I looked and looked for replacement cushions that would be nice and full and never really found anything I liked. So instead, I purchase some inexpensive cushions from Menards and simply added them to the existing cushions inside of the slipcovers that my friend Sue made for me years ago.

The slip covers were always a bit roomy, so fitting a second cushion in them was easy enough. Now they are super thick and cushy.

The great thing about these slipcovers is that they are washable, so I threw them in the wash quick before putting them back on. Same with the throw pillows.
You can read more about the slipcovers in this post from 2019 when Sue initially made them for me.
The Adirondack chairs were already painted and my new Flower Market sign was in place on the other side of the deck.

That just leaves the fun stuff, filling this year’s planters. I’ve placed three of my faux rusty pots (learn how I created my faux rusty pots here) in the one corner of our deck that still gets a fair amount of sun so I can fill them with some sun loving annuals.

I once again chose to start with Proven Winner’s Mini Vista Indigo petunias. I purchased them for the first time last summer and absolutely fell in love with them.

Isn’t that color gorgeous?
I added in this verbena …

Seriously, how could anyone resist a lilac and white striped flower? That is another Proven Winners plant, the Superbena Stormburst.
I also have added some white bacopa, some purple salvia and a pink gomphrena.
I realized last year that the two pots that flank the stairs are mostly in the shade now, so I went with some more shade tolerant choices in those.

There is a heuchera, a small ivy and the purple flower is a Summer Wave torenia. This is the first time I’ve used this particular annual and so far I have to say it looks great.
Now all that’s left is to mix up a Cosmo and enjoy a lovely summer evening sitting on the deck.

Phew! It’s always good to have a big project like this tackled.
How about you, do you have any big summer projects lined up? Leave a comment and let me know.

Nice refresh on your deck and love the pop of green. The pots of flowers are so pretty and your wheel barrow just charming. I have the same color of petunias and verbena except with lobelia on my deck. I also had a pergola built in 2006 which I truly loved. However so did the carpenter bees. I think it was 2016 we had to dismantle it except for the privacy partition at the end. That partition is being rebuilt in a couple of weeks it’s covered in jasmine so I will be very sad to see it go. This year I also purchased new Adirondack chairs out of a composite material and I chose the new modern shape. To be honest I prefer the traditional shape so much more but the traditional shape was $100 more a chair and we need eight chairs for our large family.
LikeLike
I love lobelia, but unfortunately it doesn’t love me. I can never keep it looking good throughout the summer. As for the chairs, the style of mine is based entirely on comfort. My neighbor nnK had one Adirondack and it was so comfy that Ken made a pattern from it and proceeded to make dozens of them. I’m pretty sure almost everyone I know has one of his chairs somewhere! He’s currently making a new one for me since one of mine is on its last legs. This way I’ll have a replacement waiting in the wings when it finally gives out! As for that jasmine, is there no way to save it?
LikeLike
You are so fortunate to have Ken! My husband a handful of green thumbs and can paint anything but carpentry is not in his bailiwick. As for the jasmine he is going to try propagating it. The root system has been in place for 16 years it’s enormous. He doesn’t think he can move. The new privacy screen is not designed for a vine. It has blessed us for many years not only beautiful but when it blooms the fragrance is wonderful.
LikeLike
I remember how lovely the jasmine smelled when we lived in Florida. I don’t believe we can grow it here in Minnesota, but I may be wrong about that.
LikeLike
Wow it looks fantastic team-you have been busy! This post is so timely,I am staining our huge deck today (and not looking forward to it…) but needs doing. I love your planters and agree who could resist that striped verbena.
LikeLike
Yep, deck staining is one of those tasks that we all dread. One of the hardest things for me used to be the timing. Trying to find a stretch of dry weather so the deck could dry out after power washing, and then dry after staining. Wishing you the best of luck with your staining job!
LikeLike
Holy refresh! That looks so warm and welcoming! I see the one-winged angel with a crown is overseeing the flowers. Beautiful! As usual, you are amazing!
LikeLike
LOL, yep, I didn’t even bother to hide his broken wing!
LikeLike
Your deck is beautiful and it looks so inviting. That was a lot of hard work but your efforts paid off. I love the bright touch of green. 😊
LikeLike
Thanks so much Monica!
LikeLike
What a nice refresh- your deck looks so inviting!
LikeLike
Thanks Cheryl!
LikeLike
Your deck looks fabulous! And I love that penguin shaker.
LikeLike
Isn’t he fun, I want to say that I bought him at Target of all places. But it was a long time ago now 😉
LikeLike
A beautiful Minnesota outdoor space – enjoy!
LikeLike
You know us Minnesotans, we have to get out and enjoy the summer weather as much as possible while we can! Of course, as I’m writing this comment it’s 7 a.m. and only 48 degrees outside, so maybe I’ll have to wait until just a little bit later to enjoy the deck today!
LikeLiked by 1 person