
I have another do-over for you guys today.
Remember the fine print dresser?

I painted this one back in March, and it did not sell. Now granted, as I’ve gone on and on about, sales have slowed way down for me overall. As a quick update on that, the pair of modern end tables I painted in July did sell within a few weeks. In addition, I took the bench with the Gregory’s Catalogue paint inlay on it into the shop where I sell on consignment and it sold pretty quickly there. So things are starting to move a bit.
But back to this one. I have to admit, I didn’t absolutely love the color combination of the Drop Cloth background with the Sawmill Gravy stencil. So I decided to re-work just the front of this piece.
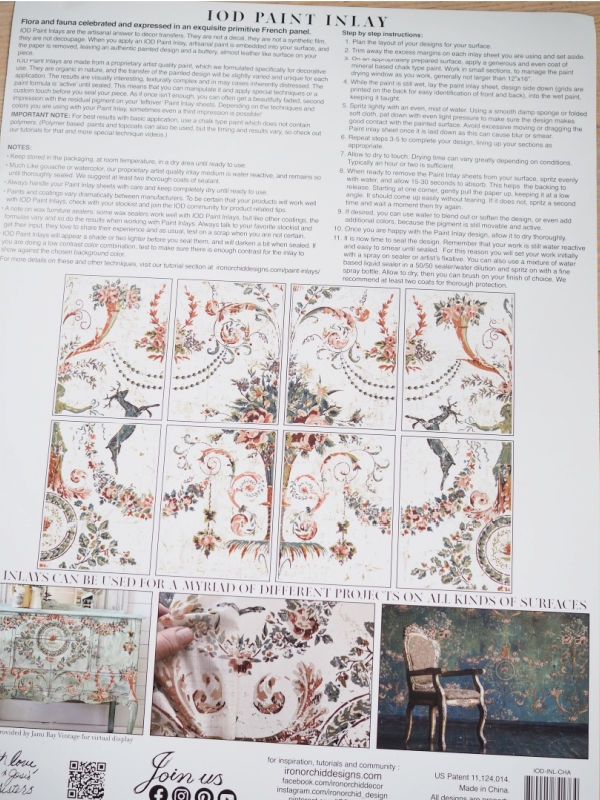
Plus, I really wanted to use the Chateau paint inlay from I.O.D.
I learned a really great tip by watching a YouTube video from Lynne at ellen j goods, and that is, you can cut up those pieces on the packaging that show the layout of the design and then move them around like puzzle pieces to create different looks.
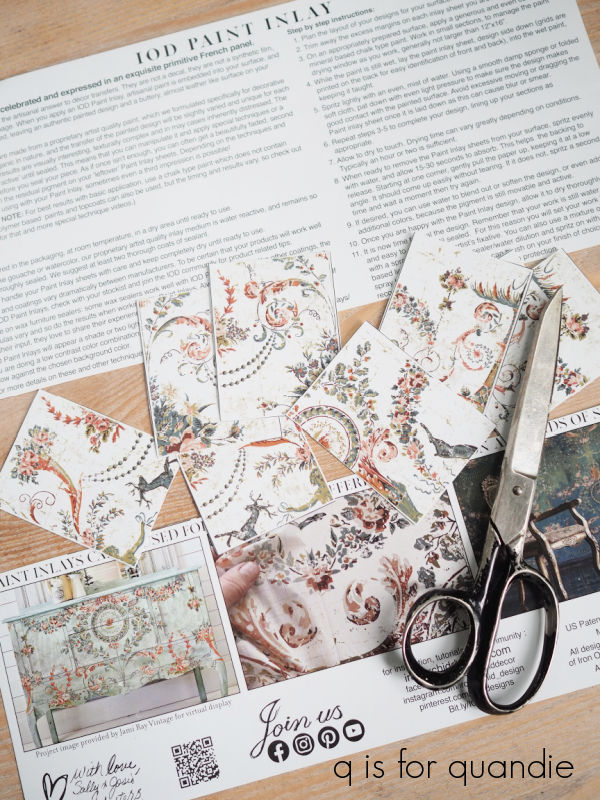
So I cut up my packaging and started playing around. First, here is how the design is shown on the packaging.

You could also turn the one design into two separate designs.

And both of them could be flip flopped, the deer could face outward and the floral urn could be split up on either side.
Here’s another option for using the entire design.

You can continue to create even more options if you’re comfortable with cutting up the individual sheets a bit.

If you have a tall, more narrow piece rather than a wide piece you could use that look above and just remove the side pieces with the deer on them.
Hats off to whoever designed this paint inlay, I’m impressed by the ability to move it around in so many ways and still have the different elements line up with each other.
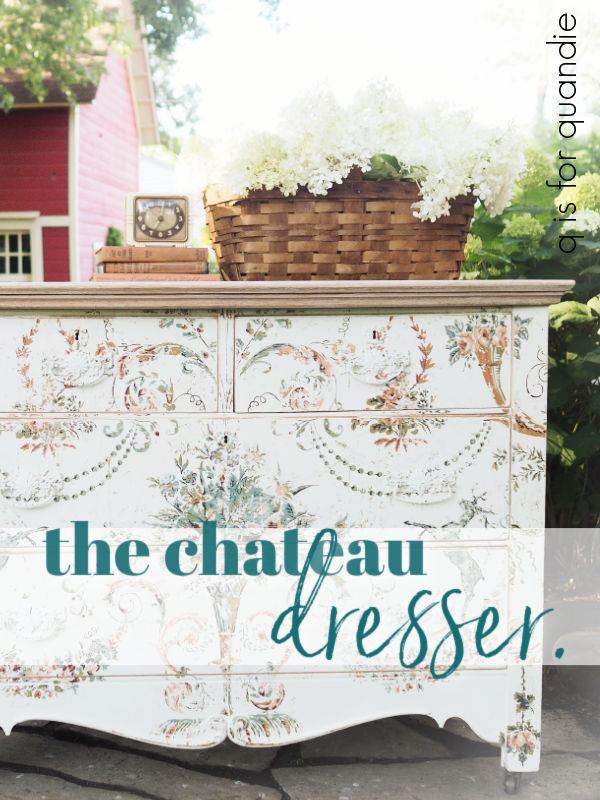
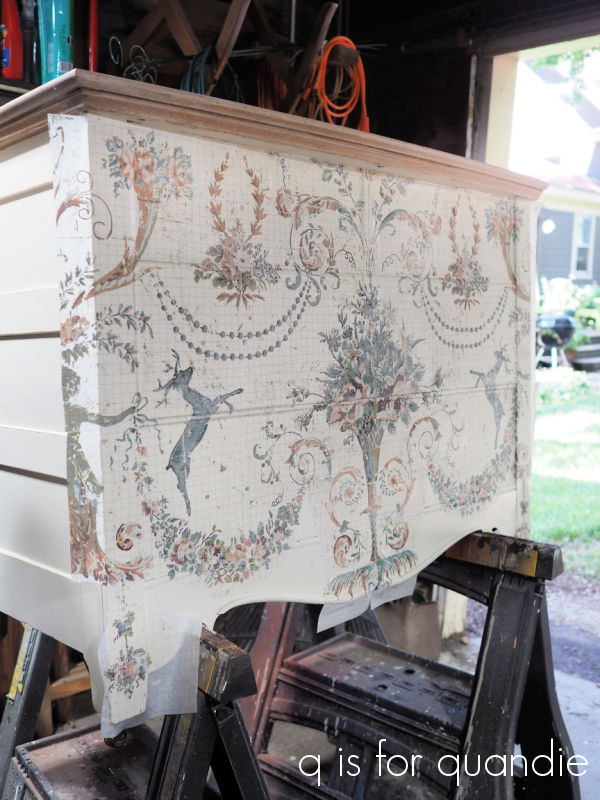
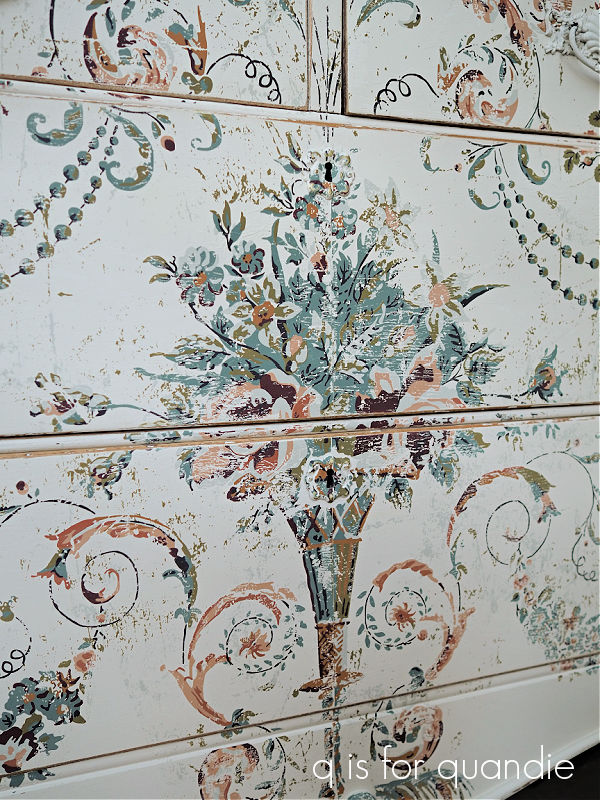
Here is what I came up with for my piece.

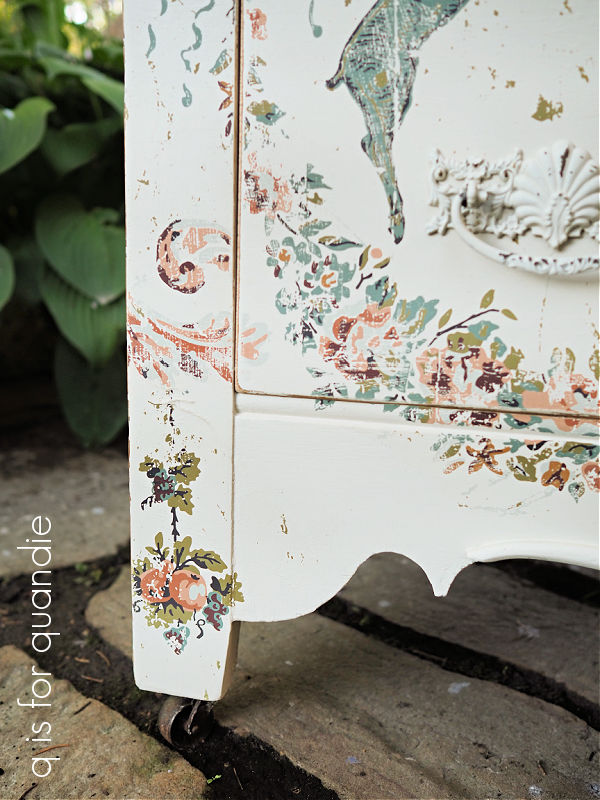
I debated removing the deer (if you look closely you can see they are cut out), but in the end I decided to leave them in.
The full design was just a bit too tall for my piece, so I removed a section that I didn’t use at all and I moved those swags to either side at the bottom where they will actually be on the legs of the dresser. Had I left them where they were in the original design they would have fallen off the bottom of the dresser. Here’s how one looks on a leg.
Once I had my layout figured out, I trimmed the blank edges of the paint inlay (for more on the complete process of using a paint inlay, see my how-to post) and then cut up the sheets to match my final design and laid it out on a table so it was ready to go.
To prepare the dresser I first took the drawer pulls back off (I left the keyhole escutcheons in place) and sanded down the stenciled front of the dresser.

Today’s q-tip: if you’re painting over a stenciled design you will see the ridges of the stenciled paint if you don’t sand them down.
You may also be wondering about painting over a previously waxed finish. This dresser was finished with clear wax back in March, so about 5 months ago. You can paint over cured Dixie Belle wax, and the cure time is about 30 days. In addition, the fact that I sanded the piece pretty thoroughly to knock down that stencil was enough to prep this piece for another coat of paint.
Next I gave the dresser front a coat of Dixie Belle’s Drop Cloth. No need to repaint the sides, of course they still looked good and I wasn’t going to bring the paint inlay around to the sides. I let my first coat dry, and then applied the paint inlay to a 2nd wet coat of paint.
After pulling the backing paper back off and letting the paint dry, I sealed it with some Rust-oleum matte clear spray sealer. Then I sanded to distress, cleaned away any dust, and followed up with a quick coat of clear wax.
Next I decided to add more paint to the drawer pulls. If you’ll remember back to the original treatment of this dresser, the pulls and escutcheons looked like this …

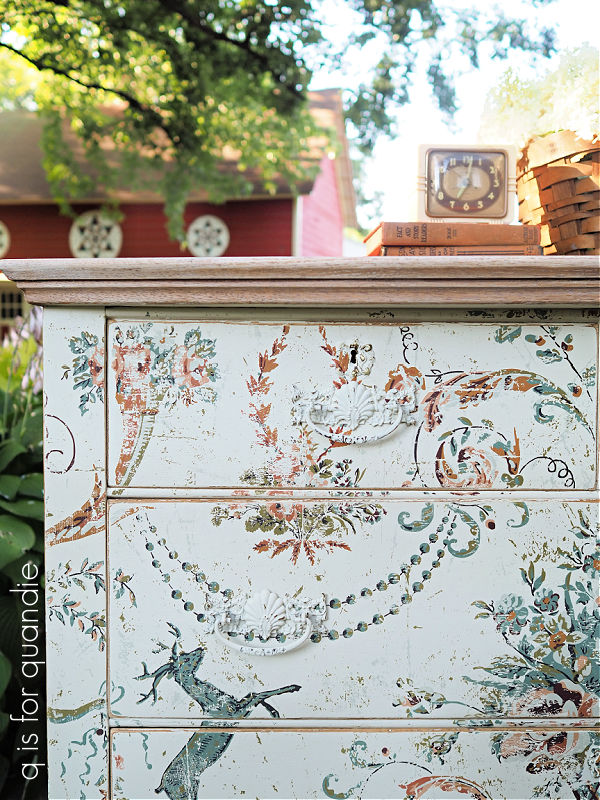
When I put one back on the dresser with its new inlay, I thought they looked way too busy. So I toned them down by adding two coats of Drop Cloth and then wet distressing them only slightly this time.

Now they blend in quite a bit more.

And as for the keyhole escutcheons, as I mentioned earlier, I left them in place while applying the paint inlay and it worked well to just go right over them.

In hindsight, another option would have been to remove them completely and save them for another piece of furniture. But as they say, hindsight is always 20/20. I didn’t think of that originally.
I left the top of the dresser as it was, stripped and finished with white wax.
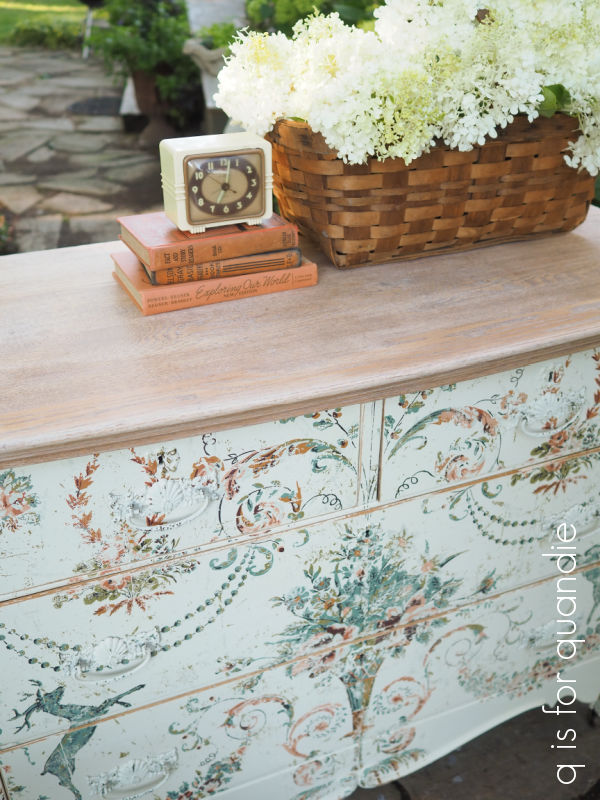
I staged my photos in the garden with the carriage house in the background. Lately this has become my favorite spot for photo taking.

I included an old Bakelite clock, some vintage books in a color found in the inlay and a basket full of hydrangeas.
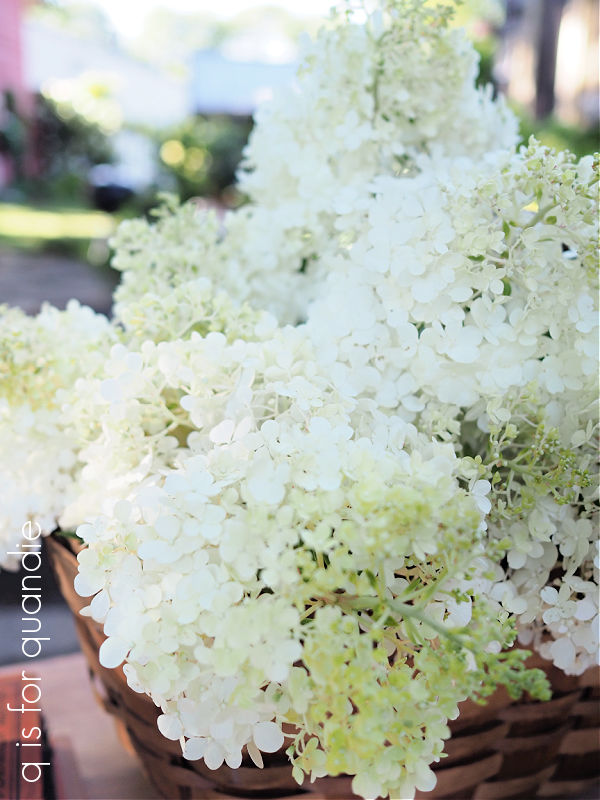
These blossoms are from my Vanilla Strawberry paniculata hydrangea. As you may have noticed, there is a lot of vanilla and not really any strawberry. The pink does develop over time, and these blooms have only just started to open. I’m sure I’ll be doing a Sunday mornings in the garden post about my hydrangea in the next few weeks as the paniculata’s come into their full glory. So stay tuned for that.
I’m a fan of the muted colors in the paint inlay, they have a bit of a fall feel to me.
There is a fabulous olive green, some terra cotta colors, and a smoky teal blue.
I really enjoy working with these I.O.D. paint inlays. They certainly give pieces a unique, hand-painted look. Personally, I feel like once you have an understanding of how they work, they are easier to use, and somewhat more forgiving, than transfers. However, I wish they weren’t so expensive! If you can manage to get more than one use out of them (they say you can use them up to three times), the cost per use goes down considerably though. I’ll be experimenting more with that in the future.

In the meantime, what do you think of this do-over? Did you prefer the more subtle look of the fine print dresser? Or maybe you even preferred the original orange oak look of this one.

The chateau dresser is for sale so be sure to check my ‘available for local sale‘ page for more details if interested.
Thank you to Dixie Belle Paint Co for providing the paint used on this project.

Gorgeous!!
LikeLike
Thanks Kathy!
LikeLike
Love it! If I only had time, I’d love to do this on a small dining room server…should probably get that room painted first 🙂
LikeLike
Yep, I hear you. Hopefully you’ll find the time soon 🙂
LikeLike
I LOVE this, the one with the I.O.D. transfer on it. It is so pretty!
LikeLike
Thanks Jaci!
LikeLike
Love it! The transfer is just gorgeous. The colors in this are so pretty. Can see this piece in so many places.
LikeLike
The muted colors are ever lovelier in person!
LikeLike
Wow! I loved the subtleness of the dresser before but you have taken it to a new level. I bet it sells quickly.
LikeLike
Fingers crossed!
LikeLike
I love this – it is gorgeous!!
LikeLike
Thanks BFF 🙂
LikeLike
I absolutely love this piece! It is such a beautiful makeover! A big accolade to you and your insight! 👏🏼👏🏼👏🏼 Smiles, alice
LikeLike
Thanks so much Alice!
LikeLike
Love love love! I’d never heard of a paint inlay until now. I am definitely going to be checking out your link to more detailed info. I can’t wait to see how it works with a 2nd and maybe 3rd use!
LikeLike
Definitely check out the paint inlays!
LikeLike
Hmmm…. I really like the second makeover. But recently I have found myself loving that warm, golden orange wood furniture. Found myself picking up some thrift store pillow covers with that shade in the pattern. One day I am so done with everything painted white, then I remember how easy it is to match up with any other color. Will I never settle down? LOL.
LikeLike
Nope, you’ll never settle down. And neither will I. Tastes change over time for sure. There are pieces I painted in five years ago that I cringe at now. We just keep evolving and that’s the way it should be 🙂
LikeLike
This chest is so so so pretty Miss Quandie! I truly LOVE it! It does look hand painted and the muted colors are wonderful……and I love the kind of antique whimsey that the deer add. As you know, I’m not big on florals but maybe because these florals are not huge and bright? You’ve done a real artist’s job here……
LikeLike
I’m so happy to hear you say you love this one Connie. I know florals aren’t usually your thing, so somehow it means even more that you like it 🙂 I must admit, I don’t know that I deserve credit for the artistry, I feel like that should go to whoever designed this paint inlay!
LikeLike
So, so pretty. But then again, I loved the fine print version also. Alway been a big damask girl! Honestly, if you had one of each sitting in front of me and said I could have one of them, I would probably walk away with nothing because I would not be able to choose. 🤣
LikeLike
LOL, well, I did like the damask as well, but if I had it to do over I’d use a different color for the stencil. Maybe just a crisp white to make it subtle.
LikeLike
This is one of the prettiest pieces you have done since I started following you.
Sheila
LikeLike
Thanks so much Sheila!
LikeLike
Gorgeous and definitely my favorite version of this piece!
LikeLike
That’s awesome to hear, thanks Melissa!
LikeLike
Love the redo! I think this is my favorite so far…but keep on showing me new ones!
LikeLike
LOL, OK, I will 😉
LikeLike