

Earlier this summer my friend/picker Sue texted to ask if I wanted to buy a small table that her brother was getting rid of. Not only was the price right, but her hubby could deliver it right to my door!
And here it is.

Just look at all of that beautiful detail.
But it had been refinished at some point in its life and given a super shiny finish.

As you all know by now, I am not a fan of shiny finishes on furniture.
Although this piece is constructed out of some lovely wood, there was no way I was going to strip the base with all of that detail. That would have taken much more patience than I possess. But stripping the top would be totally do-able. So that’s where I started.
In case you are wondering, I use Citristrip for all of my stripping needs.
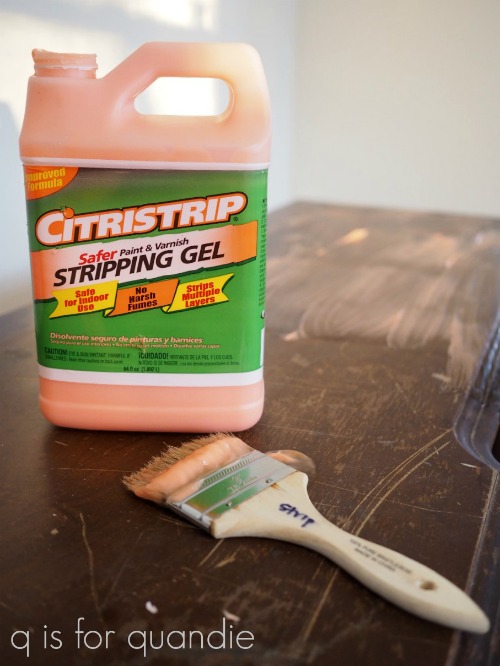
I like it because it’s safe for indoor use (although I did strip this particular table outside) and doesn’t have any harsh fumes.
Once I had the top of the table stripped, I then masked it off with newspaper and painter’s tape because my next step was to paint the base. I took one look at all of that detail and decided spray painting would be my best bet.
I used Rustoleum’s Chalked spray paint in Charcoal.

Here’s something interesting I came across while looking online for a picture of the product to use, I found it at a website selling the paint for $19.90/can. Yikes! I buy it at my local Menards where the ‘everyday low price’ is $6.48/can. I certainly pays to shop around sometimes!

And here’s another tip for you today, I use the Comfort Grip Spray Paint Gun (also from Rustoleum) when I’m doing a lot of spray painting.
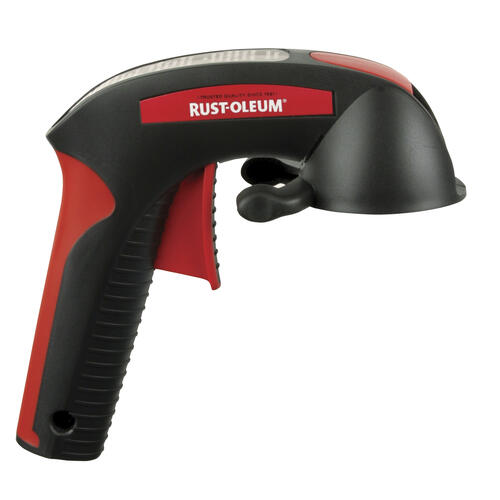
It just clips onto the top of the can. It totally saves your finger from having to press down on that spray button all the time. That helps me get a smoother result with the spray paint too.

The Chalked paint can be distressed just like any other chalk-style paint.

Sticking with my theme of doing things the easy way on this project, I top-coated the paint with Dixie Belle’s Easy Peasy Clear Matte Spray Wax.

Just spray it on and wipe away any excess.

It worked beautifully over the Chalked spray paint.
OK, so after stripping the table top, spray painting, distressing and spray waxing the base, I pulled out a few options for finishing the table top.

Here’s what each one looks like when you open the can …
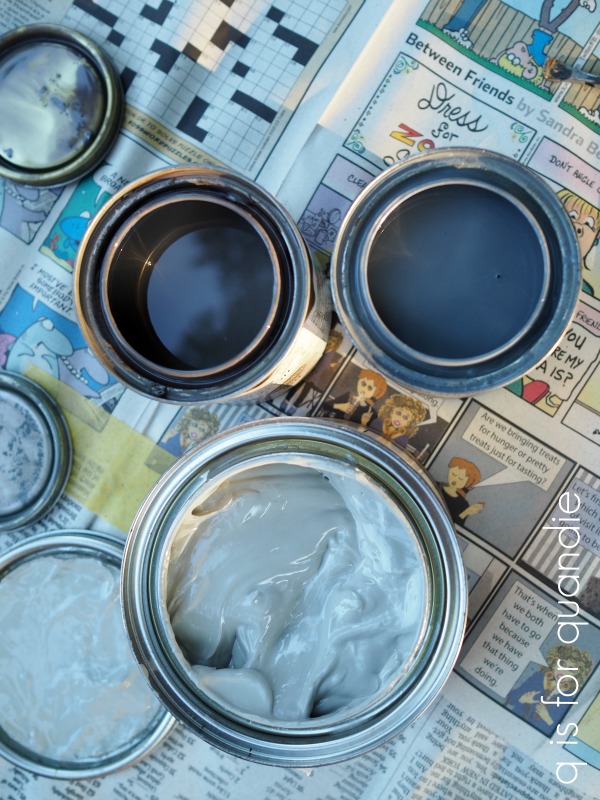
I immediately eliminated the Dixie Belle Weathered Gray Gel Stain (bottom) because I wanted a darker gray. Then I eliminated the Varathane Weathered Gray stain (upper right) because I didn’t love the blue undertone it had. That left me with Homestead House Stain & Finishing Oil (SFO) in Driftwood (now branded under Fusion Mineral Paint). I liked the warmer tone and darker shade of the gray in the Driftwood.
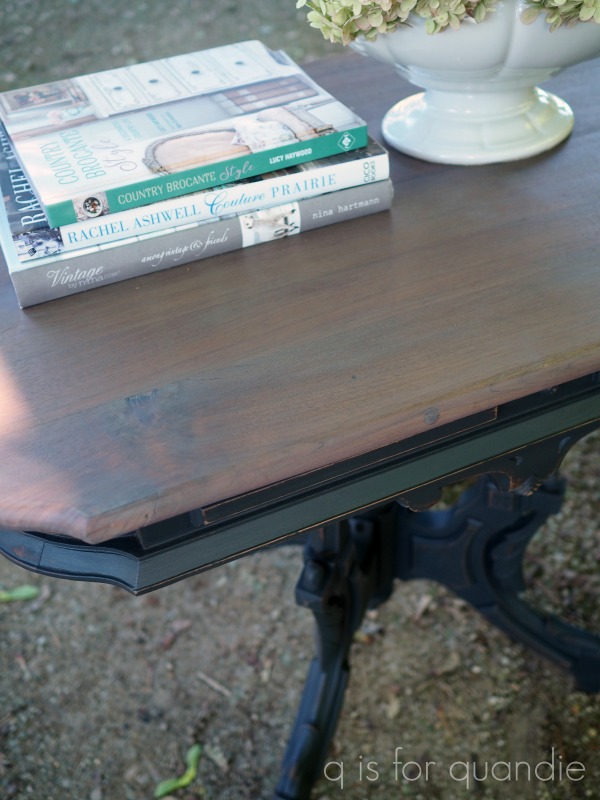
That is just one coat of the SFO. This product is meant to be applied in several light coats. Each coat progressively adds a little more color, durability and sheen. But in the case of this table, I really liked the color after just one coat so I left it at that. I could have added a couple of coats of the Natural color SFO over the Driftwood to add durability without adding color, but I didn’t have any of that on hand.

Keep in mind that this is how the Driftwood SFO looks over the wood on this particular table. It is semi-transparent, so the look will depend a bit on what you’re putting it on.
All in all, I think this gorgeous antique table has been given a totally updated look, don’t you?

As always, thanks to Dixie Belle Paint Co and Homestead House for providing some of the products used on today’s project.
If you are local and could use an updated antique table, be sure to check out my ‘available for local sale‘ page for more details on this one.

Oh wow! Completely updated. I didn’t care for the bottom of it initially but this really made the table look great! Love the color combo and this gal is such a beauty and showing off her legs to their best advantage!
LikeLike
Thanks Sheri!
LikeLike
Very nice. Like the color.
LikeLike
Thanks sis!
LikeLike
Amazing update!! It looks so much better! I love all the detail. I would not have thought to use the spray chalk paint!
LikeLike
The spray chalk paint is a great option when you have a lot of detail that’s hard to brush.
LikeLike
I love leaning about new-to-me products through your posts. What a wonderful transformation!
LikeLike
Never heard of the spray can topper thing! What a great idea! Will be headed to Menards for sure. Loved the table (great score by Sue) and especially the end result – as always!❤
LikeLike
What?! You’ve never heard of that spray paint gun thingie. I’m surprised with all of the crafting you’ve done over the years. Well, now you know and the next time you want to spray paint something you can give one a try 🙂
LikeLike
Thanks Netti!
LikeLike
Gorgeous table! Love being privy to your thinking process and the “why” you use and choose your products.
LikeLike
Thanks Kim!
LikeLike
I will have to try the spray chalked paint – haven’t done that yet. Lots of items online are so much more expensive than stores now with all the Covid crap going on. I try to go out when I can, but mainly try to stay safe. LOVE that pistol grip – they sent me one years ago when I questioned something (I don’t remember what) and I’ve had it for literally 7 years or so. Never knew they made such an animal. I recently bought another for my husband who was working on painting some wheels. Definitely finger saving!!
LikeLike
Yep, totally finger saving 😉
LikeLike
Gorgeous table makeover!
LikeLike
Thanks Mary!
LikeLike
That table made me gasp! It was not what I was expecting when it was described as a little table. Why, oh why, don’t tables like this fall into my lap?!?!?! Your update is beautiful. I have wanted to try SFO for years now and I swear someday I am going to get the chance to give it a try.
LikeLike
I guess by ‘little table’ I meant it’s not dining table sized 😉
LikeLike
Love the table but miss the graphics. You do such a neat job placing them! Table looks like a beautiful lady in her bra and panties but ready for her dress! Course you know whatever you do is great in my book!!
LikeLike
I always wonder if people think I use too many graphics. I seem to be putting them on nearly everything these days (and in fact will even be posting some painted pumpkins with graphics soon). I thought I’d keep it simple this time. But it’s good to know that people miss them when I don’t add one 🙂
LikeLike
I enjoyed this post Miss Quandie (-; The table is all brand new and I’m wondering what your opinion is on the Chalked spray paint? On a one-to-ten scale, how does it compare to the brush-on paint? Inquiring minds need to know! (-; (-; (-;
LikeLike
The table turned out very nicely Linda! And I learned a lot about new products – thanks for sharing!
I’ve noticed there was no extra step between stripping and painting? I’m always confused about what should be done in between. And in 99% cases i end up with sanding instead of stripping due to not having all those mineral oils etc that are recommended to clean up the stripping solution. So do you do use anything in between? Thanks!
LikeLike
I wash off the stripper using plain water and a scrubby pad. It takes quite a bit of elbow grease to make sure that it’s all cleaned off. There are products you can use to do the same thing, but they are usually some version of mineral spirits and I just don’t like working with those chemicals if I don’t have to. So I make a bunch of passes with clean, clear water until I feel like I’ve got all the stripper off. Then I sand the surface smooth. Now, to clarify, I only do all of this if I want to either stain or wax the wood. I don’t ever bother to strip something if I’m just going to paint it.
LikeLike
Linda, thank you so much for clarifying this for me! I feel like I might take that stripping bottle out of the closet and try it.
Thanks again!!!
LikeLike