
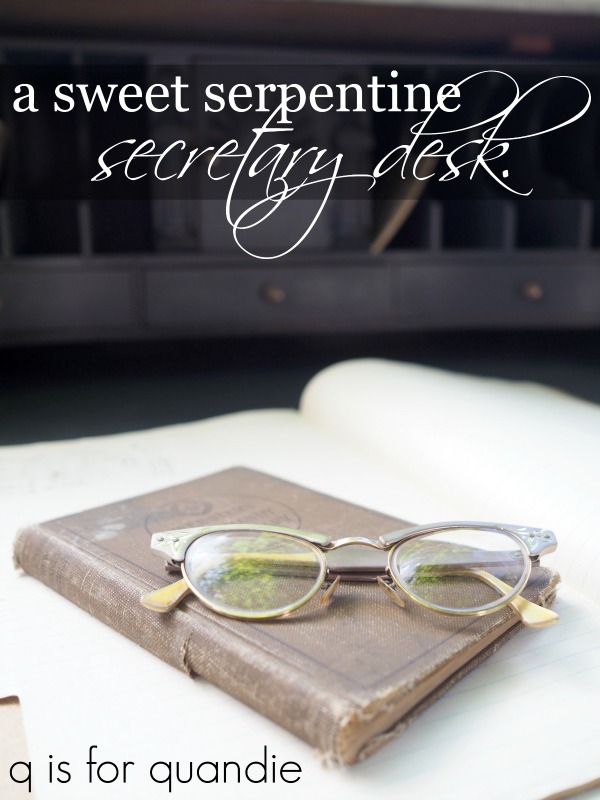
As a reminder, here is the pretty little secretary desk that I shared with you guys on Monday. I picked this up at an ‘epic’ garage sale while out driving around in Wisconsin.

Just check out that curvy serpentine front and those fabulous claw feet. Ignore the not so great hardware and the incredibly beat up finish.
You’ll also have to ignore the Blue Cross/Blue Shield information sticker inside, plus the bent and disconnected hinge. Not to mention all of that dust.

I knew that behind those flaws was a gorgeous piece of furniture.
I started work on this piece by removing the inside piece.

Did you know that sometimes these just come right out? Unfortunately that’s not true of all secretary desks. Plus someone had added a couple of screws to this one to hold it in place, but once I removed those it slid right out. It couldn’t be any more convenient for painting.
Once I had it out I removed the sticker, then the little knobs. I cleaned it up and then sprayed it with Rustoleum Chalked spray paint in Charcoal. With all of those slats it would have been a bear to paint with a brush. After sanding some edges to distress, I sealed the spray paint with the Rustoleum spray matte clear sealer as well. Finally I put the original knobs back on again.

Much improved.
Next I sanded and cleaned the outside of the desk. As I was cleaning it, the water was turning decidedly orange-ish in color. That was a good indication that this piece was going to be a bleeder and since I was going to paint the outside in Dixie Belle’s Drop Cloth (a creamy white), I needed to find out for sure.
So I painted just one of the drawers as a test. Yep, definitely a bleeder. In other words, the orange-y colored stain on this piece was bleeding through my creamy white paint. I’m sure many of you are familiar with this phenomenon, but in case you aren’t, when this happens you have to seal your piece with a stain blocking sealer before you can proceed with painting. It doesn’t matter how many coats of paint you put over bleeding stain, that stuff will just continue to bleed thru.
So I brought out the Dixie Bell BOSS.

This product comes in both a clear version and a white version. I think the clear version is more versatile since I don’t always want to see white under my paint color when I distress the edges, although the white version would have worked fine for this particular piece.
I painted the outside of the desk with just one coat of the BOSS and then I let it dry for 24 hours. I’ve learned in the past that extra drying time can make a big difference with this product, so I now always let it dry for at least 24 hours.
And here is the difference using the BOSS made.

Ha! Yep, I wasn’t kidding when I said this one was a bleeder! The top drawer is my test drawer without the BOSS. The bottom one is another drawer with one coat of BOSS followed by two coats of Drop Cloth. That’s some pretty good blocking power.
Now, you do have some other options for sealing a bleeder. You can use shellac. But that stuff is smelly and it’s a pain to clean your brush afterwards. You can use spray shellac and sometimes I do pull that out for spot treatments, but you can only use that outside (unless you want to gas your family). You also can use a stain blocking primer from your local DIY store, but I have yet to see those available in a clear version.
So, BOSS gets my vote. It has very little odor and you can clean up with soapy water.
Once I had the rest of the piece painted with two coats of Drop Cloth I had to wait for the next step. I knew I had the perfect transfer coming from Prima Marketing, but it wasn’t here yet. I’m not very good at waiting … tick tock, tick tock … but this one was definitely worth the wait!

Now, I have to say, I don’t know why Prima chose to call this one Parisian Letter because there is only one small line of French on it, and it’s a the very bottom and didn’t fit on my desk. Obviously there’s also a little Latin on that crest, but otherwise all of the writing on this one is in English.

But that doesn’t make it any less gorgeous.
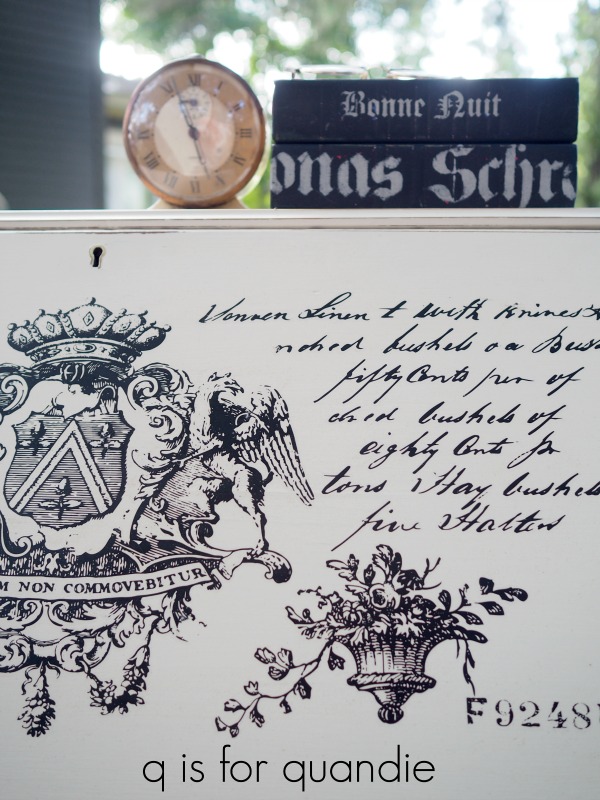
Most of the writing seems to have something to do with the quantities and prices of things, and a lot of it isn’t terribly legible. But that isn’t the point, the point is to look pretty not to impart a message of any kind.
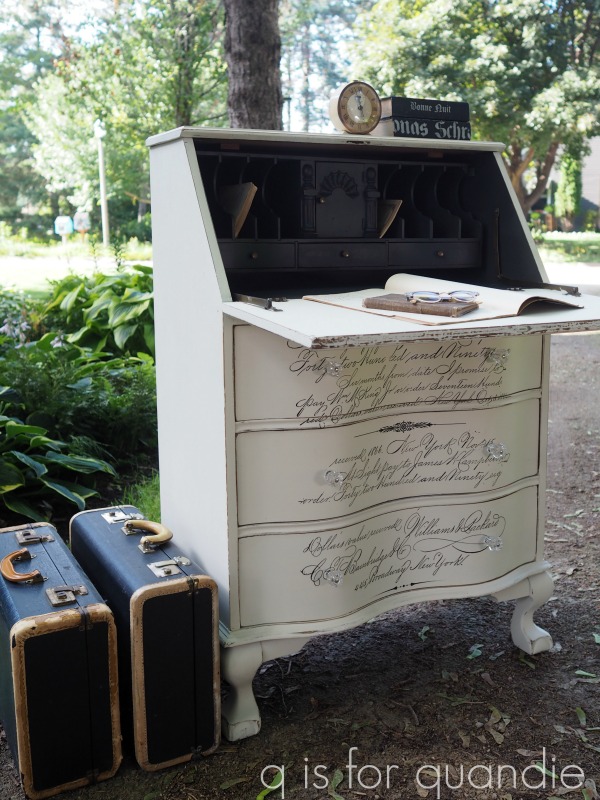
I’m not sure if you noticed, but I changed out the drawer pulls. I really wasn’t loving the original hardware, plus it’s always my preference to let the transfer be the star of the show. Clear glass knobs from D Lawless sort of fade away, but yet also look appropriate to the piece.

This sweet serpentine secretary desk would be perfect to use bedside instead of a nightstand. You could keep all of your reading material inside. It would even be quite simple to set up some sort of charging station inside by cutting a hole in the back to allow cords to go through.
Of course, you could just use it as a desk. My handyman Ken repaired and reinforced the hinges that support the desk top so it is perfectly functional. Of course I wouldn’t put something super heavy on it, but it would easily hold a lap top.

But it would also be a great spot for dropping your keys and mail in the foyer. You could fill the drawers with hats, scarves and gloves.
So many possibilities!

As always, many thanks to Dixie Belle for providing the BOSS sealer, the paint and the clear wax, and to Prima Marketing for providing the transfer for this project.
If you’re wondering where to purchase the Prima Marketing transfers check out their ‘where to buy’ page.
If you’re wondering where to buy the Dixie Belle Drop Cloth, you can shop with them directly online or find a retailer near you.
And finally, if you happen to be local (Twin Cities, MN) and in need of a sweet serpentine secretary desk, check out my ‘available for local sale’ page for more details.

This is another one where I was scrambling looking for a spot…alas (love that word), my house hasn’t gotten any bigger since the last time I looked. Great job rehabbing this piece. Love it!
LikeLike
Yep, my house isn’t getting any bigger either. Otherwise I would have loved to keep this one too 😉
LikeLike
It’s so beautiful, you did a fabulous job creating a beautiful, useful piece of art. Excellent use of color and transfer. I also love Dixie Bells sealer Boss. It’s user friendly and works great. Thanks for sharing.
LikeLike
The BOSS really is user friendly. I love the ease of clean up and that it doesn’t stink up the place when I use it 😉
LikeLike
Absolutely LOVE how this turned out.
LikeLike
Thanks Jill!
LikeLike
Oh my! This one is a keeper! How can you part with it? Good tip on the Boss drying time. I always rush it.
LikeLike
There is simply no room at the inn for this one!
LikeLike
The desk turned out great. It will probably go fast.
LikeLike
Fingers crossed!
LikeLike
Dang this is a sweet piece! I love this! I wondered how you were going to paint the inside! Great job; I like the black interior. You continue to amaze!
LikeLike
That spray paint was a life saver for the inside of this piece. I have another secretary desk to work on and I’m going to approach it the same way.
LikeLike
Really exquisite piece now! Your work is amazing!
LikeLike
Thanks so much Susan!
LikeLike
Just found your site. Love this piece. Looked at the old pictures of your house. Want to move into one just likeit this afternoon: After your have worked your magic on it.
LikeLike
Thanks Candy! Our house is always a work in progress 🙂
LikeLike
Maybe the Parisian letter was coming from/or going to, an agent in Paris.
LikeLike
Maybe. Written in code.
LikeLike
This is another piece that lines were definitely too good to pass up. But it had seen better times for sure.
So do you see a transfer and in your mind think I know exactly what that would look good on? Or is it these are the pieces I have on have and you select from your stash? Inquiring minds… This is a real beauty now. Love it.
LikeLike
It depends. In this case, I purchased the desk and then realized this transfer would be perfect for it, but I didn’t actually have this transfer yet. So I put in my request for it and kept my fingers crossed that Prima would be able to send it to me. Otherwise, I had a couple of back up ideas in mind too. I’m glad I was able to get this one though because it really is perfect for the desk.
LikeLike
That is SO pretty Miss Quandie! I have a couple of “prractical” questions for you! How long did it take you to “quickly” sand this piece? And how long did it take you to apply the transfer? Thanks!
LikeLike
Sanding the outside before painting, probably took about 5 minutes tops. I just scuff sand lightly all over the whole piece. Sanding to distress after painting takes a little more effort, probably 15 to 20 minutes. I pay more attention to getting just the amount of distressing that I want on the edges and I also lightly sand the entire surface just to smooth it out. As for the transfer, hmmmm … gosh. I really wasn’t paying too much attention to the time. At least 30 minutes, maybe an hour? I had to focus a bit more, make sure each section was straight, be sure I had all of the design adhered. Plus on that particular day my handyman/neighbor Ken helped me lift the desk up onto some horses so that I could work on it standing up and not bending over, and then he wanted to see how the transfers worked so I was giving him a bit of a demo on that 😉 So yeah, probably closer to an hour.
LikeLike
Well,again. be still my beating heart!! Another winner. Do you seal before or after applying transfer?
LikeLike
I sealed after with clear wax. Never put the wax on before the transfer, you can end up with a sticky mess as the friction of applying the transfer warms up the wax. When using chalk style paint especially (like the Dixie Belle) be sure that your surface is clean of any sanding dust before adding the transfer because that may adversely affect adhesion as well. Or, another good piece of advice is to use a water based sealer first, then add the transfer, then add wax. But I did not do that here.
LikeLike
I was planning on doing a dinning table to look like a rustic sign on the top using transfer. I want to score the wood to look like boards and go from there. However in reading your reply, you f wax is used for sealer on the top, will hot dishes being placed on the table make a mess of the transfer?
LikeLike
Possibly. In fact I’d say that putting hot dishes on a waxed surface of any kind (with or without a transfer) probably wouldn’t be the best plan either. If you’re going to be faithful in your use of trivets or hot pads under those dishes, plus coasters under drink glasses, etc you would probably be OK. But if not, I don’t think I’d choose to do a transfer with a wax top coat on a dining table. That being said, my own dining table is waxed, but I’m not terribly picky about durability. I do have a few spots on it now where sweating glasses have left rings. I can fix that by sanding lightly and re-waxing, but you wouldn’t be able to do that as easily with a transfer. So I guess what I’m trying to say here is that wax over a transfer is not the most durable option for a dining table. If durability is important to you, you may want to rethink that and use a more durable sealer over your piece like Miss Mustard Seed’s Tough Coat Sealer, or Dixie Belle’s clear coat.
LikeLike
What a transformation. Beautiful.
LikeLike
Thanks Maureen! Isn’t that transfer gorgeous?
LikeLike
This turned out gorgeous!! It had great bones and I was eager to see what you’d do with the inside. The transfer was made for this secretary. I have to vouch for your idea of using it as a bedside table. I repaired, refinished and painted a vintage, military, one drawer secretary desk and use it as my bedside table. I painted it to sort of match an end-table I turned into my husband’s bedside table. He thought I was crazy to use the fall-front secretary there until he found how handy it is. Now he wants to find one for his side of the bed because you can just close the front to hide the mess and the large drawers hold everything! Sadly, the owner of our only local thrift store shut down her business when she turned 98 and her health began to fail. I’d purchased mine for $15. I had also purchased the prettiest, small, tall legged roll top desk there that was in immaculate condition for $20 – we initially thought it was marked at an appropriate $200 but out of our price range. I so miss that store! The nearest thrift store is now 75 miles away and garage sales here rarely sell furniture of any sort.Anyway, you still continue to inspire me! Thank you for another great tutorial!
LikeLike
That’s exactly what I’m thinking too, that this piece would be perfect bedside since you can just close it up and hide all of the ‘stuff’ that’s usually just sitting there. Bummer about your thrift store, I bet you do miss it, sounds like it was amazing!
LikeLiked by 1 person
What a gorgeous transformation!! I love the transfer. What a beautiful piece. 😊
LikeLike
Thanks Monica!
LikeLike
I have a secretary desk I have been waiting to redo and was searching for inspiration and I saw your beautiful desk! I have had mine for months and was procrastinating painting it due to that insert until I saw you used the Rustoleum Chalk Spray Paint snd I decided to give it a try.
I love the ease of it snd how quickly it dries however I wasn’t happy with the way it felt so I sanded it lightly (120 block) and it just looked scuffed? So I put another coat and then after it was dried used the matte sealer spray. It looks a bit blotchy. Wondering if you have any tips or suggestions for getting a smoother finish when using the spray chalk paint? Yours looks satiny smooth!
Love all of your work!! Very inspiring!!
Lynn
LikeLike
First off, I’d definitely use a finer grade of sandpaper. At least 220 or even higher. That will smooth it out better without scuffing the paint so much. My only other tip is to use multiple light coats of spray for both the paint and the sealer. It’s possible that your finish looks blotchy because it’s not even coverage (but I’m just guessing). Also, I just went and gave my desk a ‘feel’. The chalk paint on the outside definitely feels more smooth than the spray paint. But I did sand my outside a bit more than the inside (it’s pretty difficult to get sand paper into those little cubbies). Maybe that’s just one of the downsides of using the spray.
LikeLike
I love your piece👍🏻I just purchased this exact piece for $25! I am really excited about all the original flathead screws, original key and ornate claw work. I am having a hard time determining the year of origin. Any ideas?
LikeLike
Sorry, no, I really don’t know how old this piece was. Have fun giving yours a makeover 🙂 Well, assuming you’re going to give it a makeover.
LikeLike