
Welcome to day 1 of milk paint madness week, milk paint basics.

For those of you who might be entirely unfamiliar with milk paint, this post is for you. But everybody, be sure to read to the end for details on today’s giveaway.
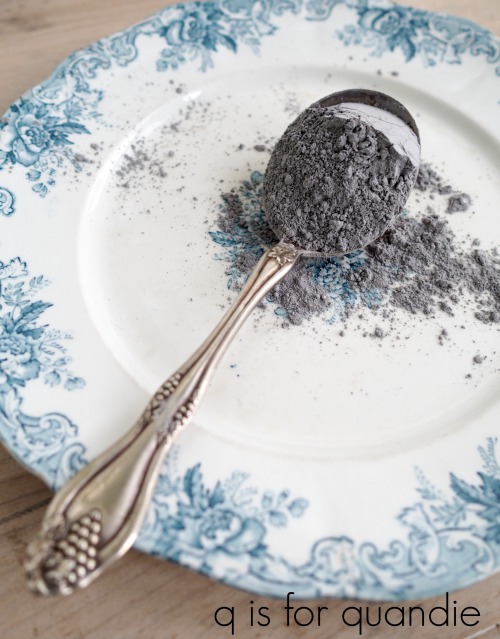
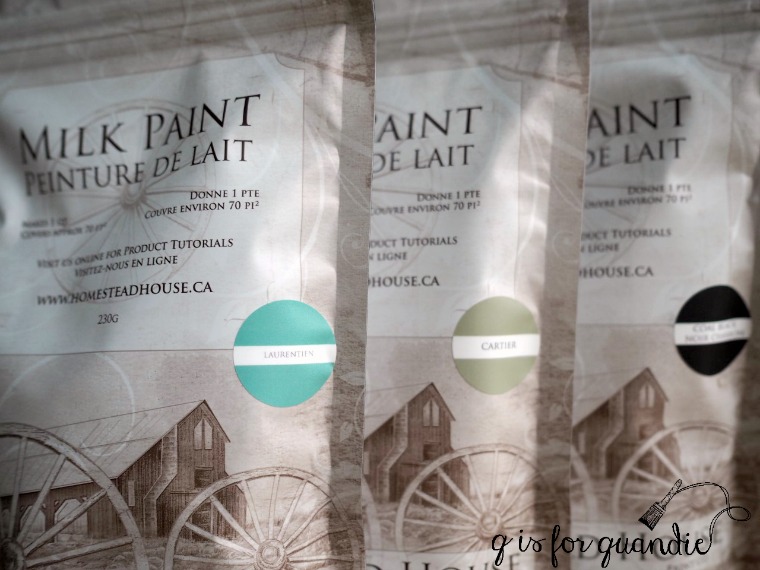
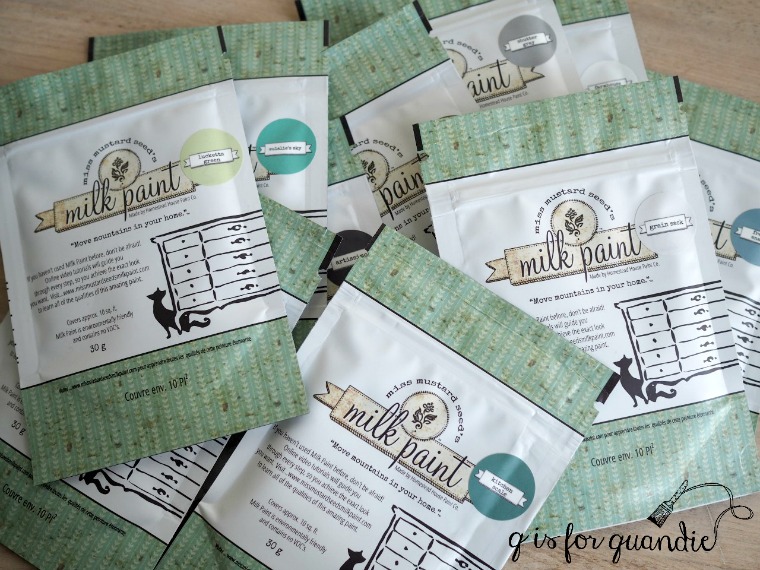
First of all let’s just establish that when I’m talking about milk paint, I’m talking about paint that comes in powder form and you mix it yourself with water when you’re ready to use it. Some of my favorite brands of milk paint include Miss Mustard Seed, Homestead House, The Real Milk Paint Co and Sweet Pickins.
Don’t be confused by General Finishes Milk Paint which is really an acrylic paint and not a milk paint at all.
Also, don’t be confused by The Real Milk Paint Co’s packaging. It looks more like a traditional paint can, but there is a bag of powder inside. There is also a marble inside which is a very clever tool for mixing your paint, but I’ll get to mixing in a minute.

Milk paint is made with only a handful of basic ingredients including milk protein, lime and pigment. It is non-toxic and has zero VOC’s. In other words, it is a very green product that is not harmful to the environment or to you while you’re using it (go here to read more about the green quality of milk paint). Since I paint a lot, I’m exposing myself to the products I use on a regular basis and I bet you are too. Don’t forget to take this important quality into consideration when choosing which products you’re going to use.
Milk paint in powdered form can be stored pretty much indefinitely as long as it is in a sealed container and stays dry. It doesn’t take up very much space on your shelf this way, which is an added bonus.
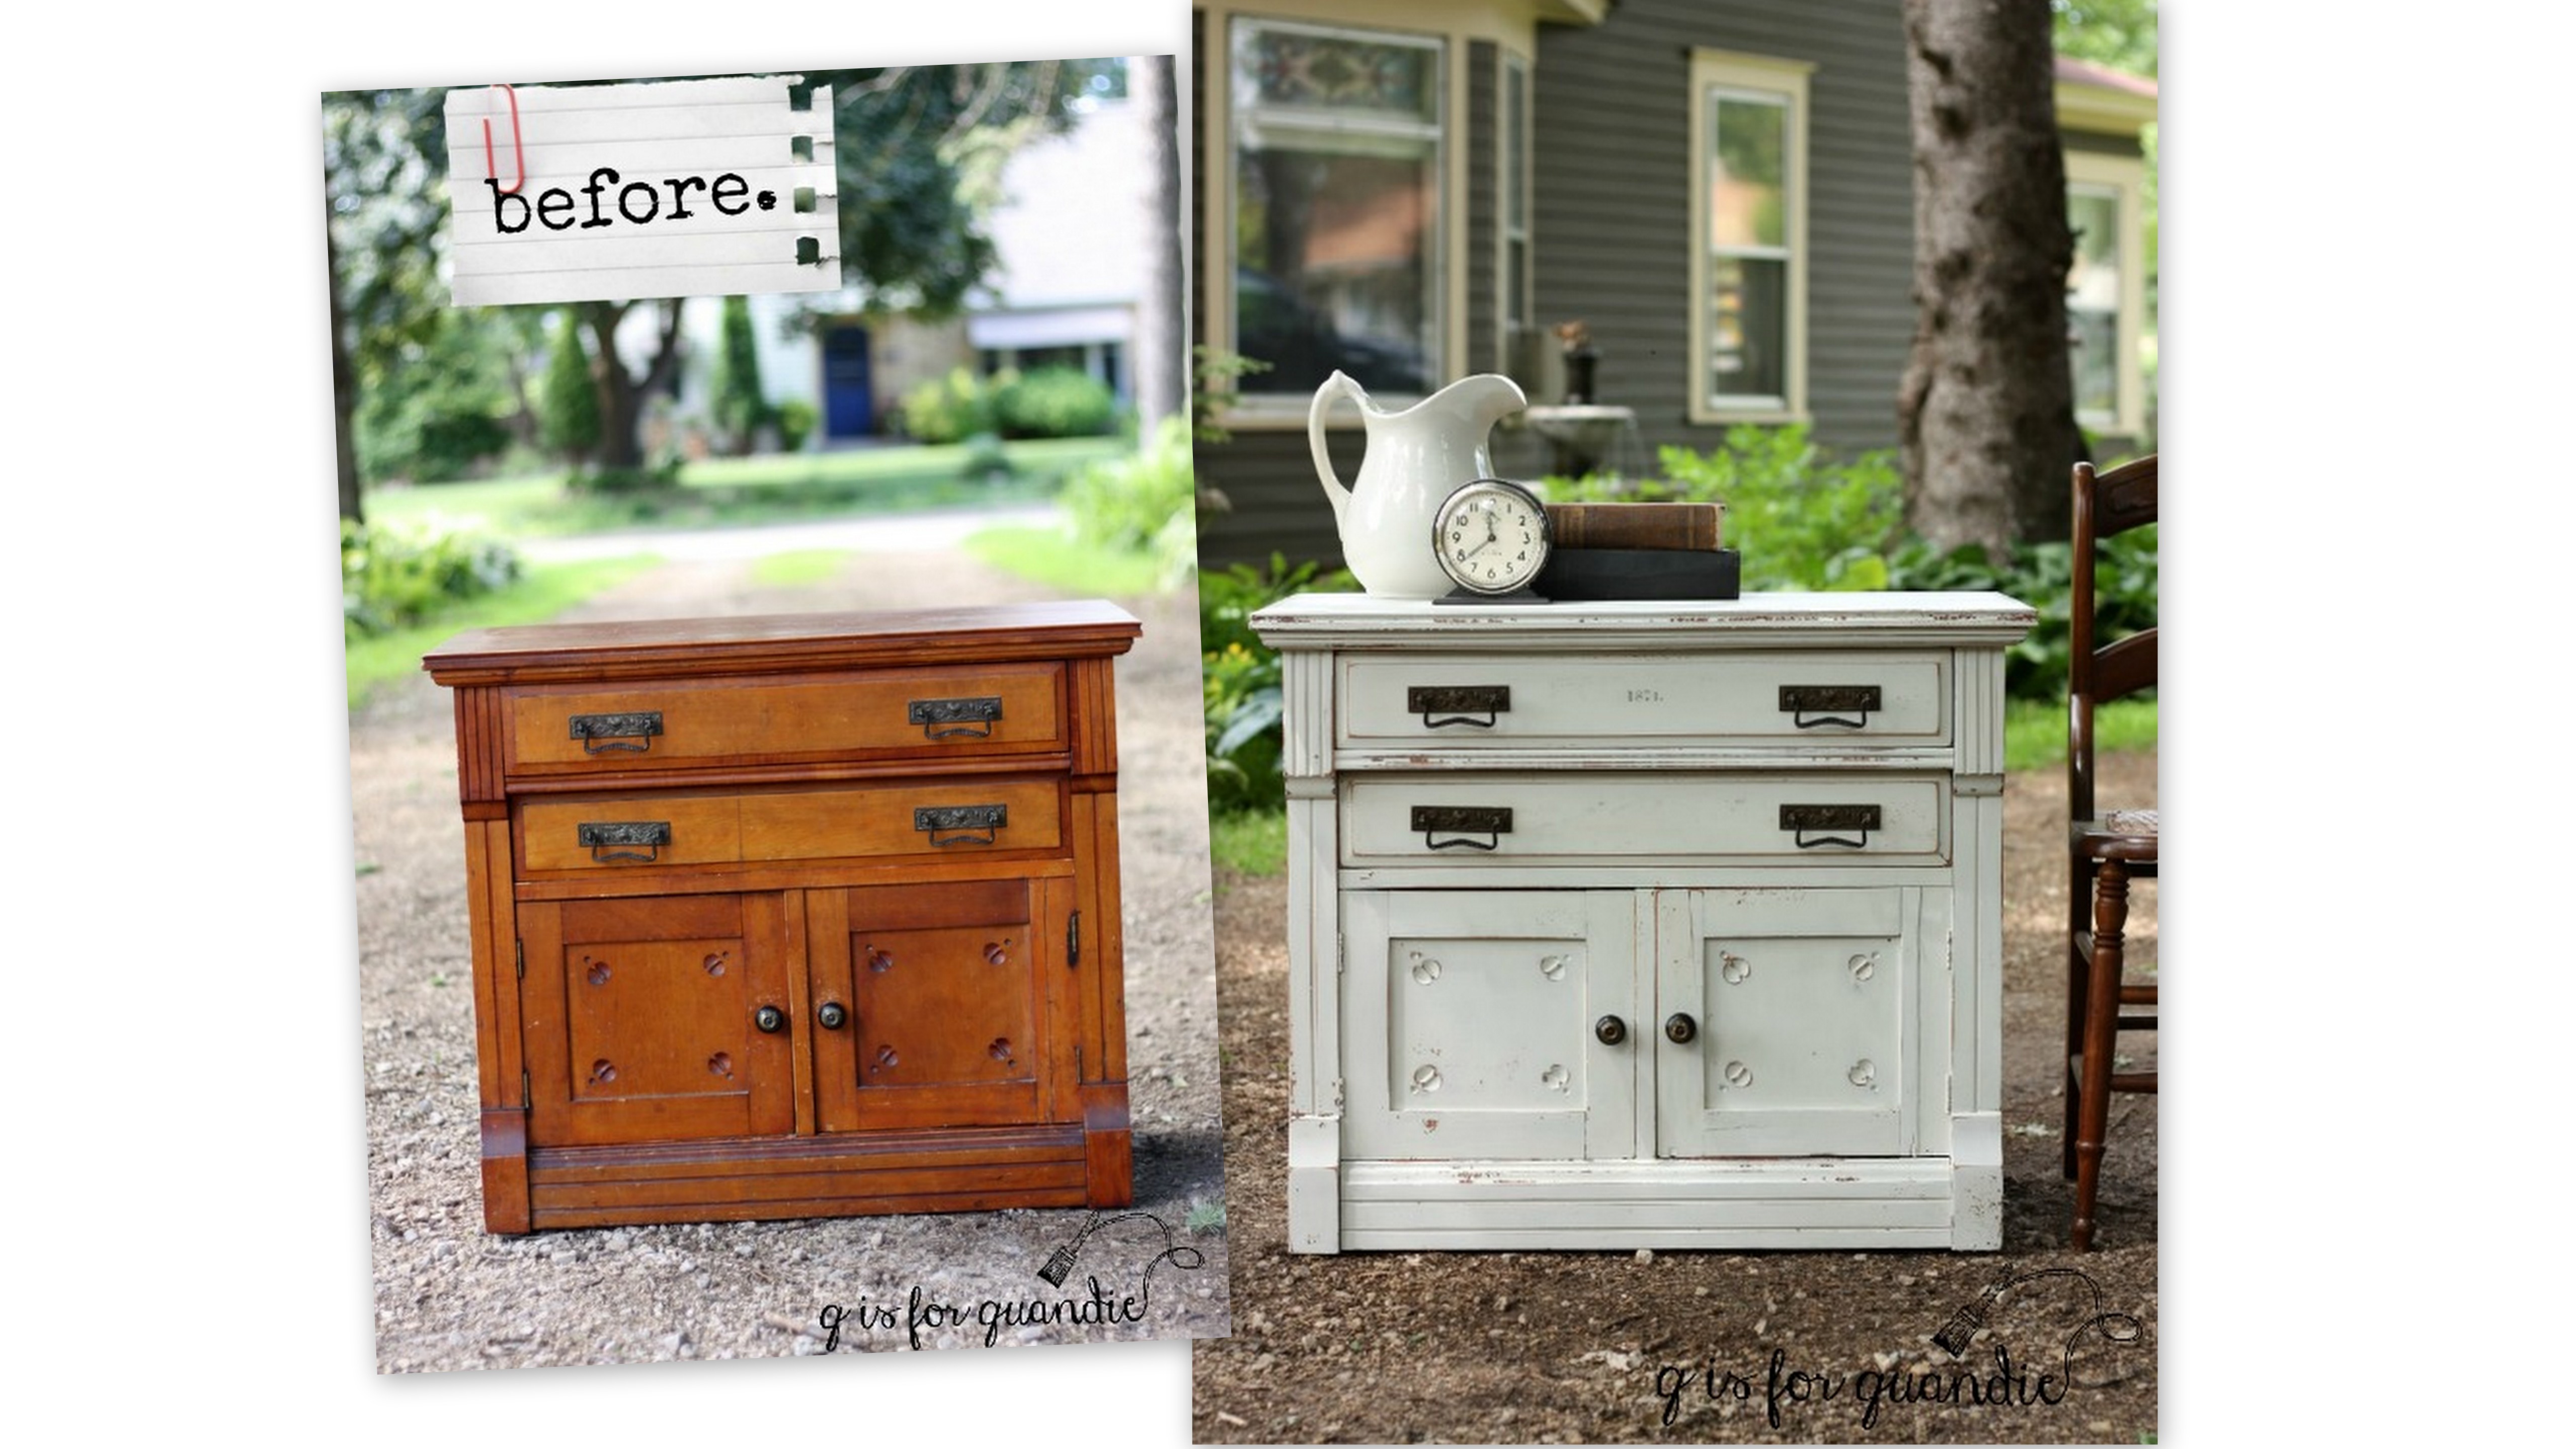
Although these days most of us use milk paint over a pre-existing finish and are delighted when it chips and crackles because of that resistance, historically milk paint was intended for use on raw wood. When used on raw wood, milk paint soaks into the wood much like a stain rather than sitting on the surface like other paints. That makes it incredibly long lasting and durable. When used on raw wood milk paint won’t chip or peel away.
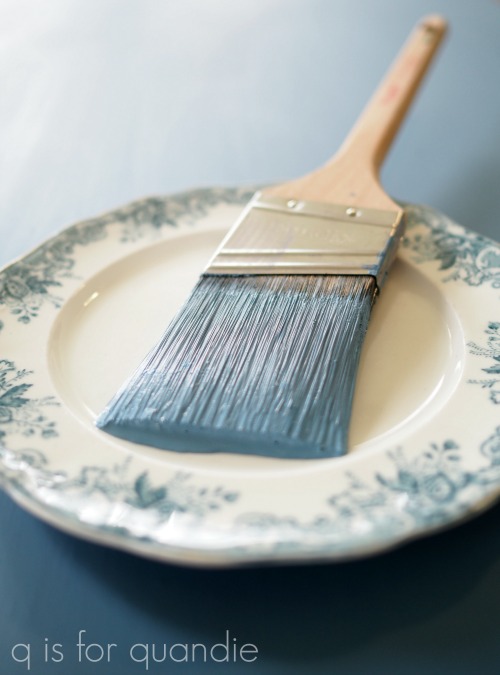
So let’s talk about mixing your milk paint. The basic rule of thumb is to mix equal parts water to powder. However I like to mix darker colors a little thinner (more water, less powder) and lighter colors a little thicker (less water, more powder). But half and half is a good starting point.
You can also mix your paint really thin and use it as a wash. Or leave it thicker if you want to add some texture to your piece.

There are all kinds of methods for mixing your milk paint. Unlike Mr. Bond’s martini’s, it can be shaken OR stirred. This is where that marble comes in from The Real Milk Paint Co. If you like to shake your paint in a jar, throw the marble in the jar as well and it helps mix the paint beautifully. You can also choose to use one of those battery operated milk frothers to mix your paint (reserving it for paint use only of course). I’ve even heard that some people use a blender, but that seems like overkill to me.
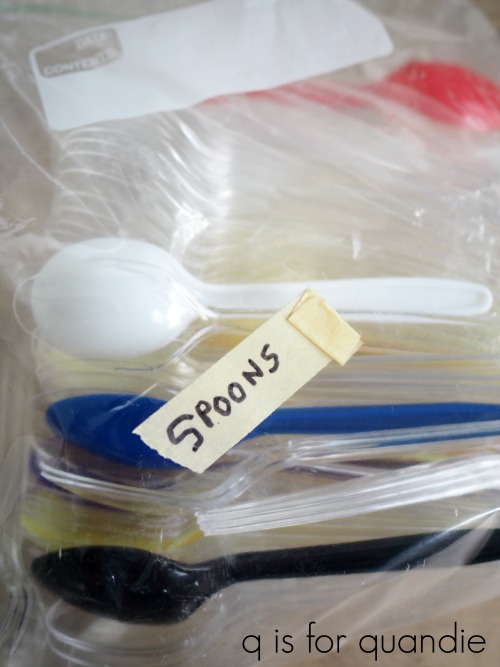
I used to always shake my milk paint in a glass jar and the marble is pure genius for that. It was also a very environmentally sound practice. However, Mr. Q eventually got tired of washing out those jars for me (he does all of the dish washing in our house, we don’t have a dish washer). So I switched over to stirring my milk paint in a disposable solo cup with a plastic spoon. I purchased what may prove to be a lifetime supply of plastic spoons at a garage sale for a dollar and I haven’t run out yet.
Do you put the water in first, or the powder in first? Some say one and some say the other, but I don’t think it makes that much of a difference. However, if you put the powder in first, just be sure to mix all the way to the bottom. It’s sort of like making hot chocolate from a powder, you don’t want to get that overly chocolaty last swallow because a bunch of the mix was stuck at the bottom of your cup.
Should you use cold water or warm water? Again, I’ve heard both. I suggest meeting in the middle and using room temperature water.
I’ve also heard that sometimes well water may cause problems with milk paint. When I was in high school a friend of mine had orange hair from washing it with well water. So if your well water turns things orange, you might want to try using bottled water instead. But city water from the tap should be perfectly fine.

One thing to keep in mind about milk paint is that once it’s mixed with water it has a limited shelf life (no longer than one week). So obviously you don’t want to mix way more than you are going to need. I think this factor stresses people out unnecessarily. Over time you’ll develop a feel for how much paint you need, but in the meantime I have a little trick for you. For a typical piece of furniture like a desk or medium sized dresser, start with about a 1/2 cup paint mixed with a 1/2 cup water. Then start the first coat of paint on your piece and pay attention to how much of the paint you use.
Did you use all of it for the first coat? If so, mix the same amount again for the 2nd coat.
Did you run out? If so, mix a bit more the next time adding enough to finish the first coat and complete the 2nd coat.
Did you have way too much? You get the idea. As long as you have enough paint mixed to paint your final coat all from one batch you are going to be OK.
That being said, you can not mix a new batch of milk paint just to finish that one last drawer and expect it to match. It most likely won’t. So be sure your final coat of paint is all mixed at the same time (see an example of that here) .
Speaking of mixing, be sure to stir your milk paint frequently as you use it (that plastic spoon really comes in handy for this). Because this paint is all natural, the heavier pigments will sometimes fall to the bottom of your cup as you’re painting. This can result in some fairly obvious color differences between the beginning and end of your piece . The best way to prevent that is to give your paint a little stir every 10 minutes or so as you are painting.

Here’s one of the best milk paint tips I ever got; mix your paint first and then let it sit while you are prepping your piece to be painted. That gives the milk paint ingredients time to dissolve and blend while you are removing knobs, lightly sanding and then cleaning your piece.
Speaking of prep work, I recommend not skipping this step when using milk paint (actually, I recommend taking the time to prep your piece no matter what paint you are using). Especially the cleaning step. If there are any oils (or furniture polish) on your piece of furniture it will resist the paint, possibly by a lot. I like some chipping, but maybe not quite this much (check back later this week to learn how to get the perfect amount of chipping).

When buying a piece of furniture always ask the seller if they cleaned it up with anything recently. I often find that Craigslist sellers will put a coat of furniture oil on a piece to make it look good for pictures. If that’s the case, you want to be sure to clean that off before you start painting. I like to use TSP Substitute for that.
Also, don’t panic if your piece looks like the one above after the first coat of paint. If this happens to you, get out your shop vac and vacuum off the flaking paint. Sand the piece thoroughly, you don’t have to remove all of the paint just the lose stuff, but you also want to give the wood underneath some more ‘tooth’ to hold the paint so you don’t repeat the same result. Vacuum again after sanding, wipe the piece down and start over.
OK, so you’ve mixed your paint and you’ve prepped your piece. The next step is painting. This is the simplest part of milk paint. Because it’s thinner than most paints you don’t have to worry about brush strokes (although do keep an eye out for drips). You really can use just about any kind of paint brush and still get good results with milk paint. This may sound odd, but I find it less physically taxing to paint with milk paint versus other kinds of paint because it’s much lighter on your brush and it doesn’t really drag as you’re painting it on. I don’t think I can really explain that properly, but if you’ve ever gone from painting with milk paint to then painting with another paint you’ll know what I mean. It just feels like less work.
Another big bonus to milk paint is how quickly it dries. When painting a dresser I generally remove the drawers and paint them first, then move on the body of the dresser. By the time I’ve finished the body, the drawers are usually dry (unless it’s a super humid day). Because the paint dries so quickly, I often am able to complete a piece from start to finish in one day.
Milk paint coverage can be variable. It will depend on how thick or thin you mixed your paint, what color you are using and what color you’re covering up. I’ve gotten away with as little as one coat when using black or other very dark colors, but I’ve also needed at least three coats when using white over a dark wood.
Here’s a great tip regarding coverage. If you’re painting over a dark finish with a very light color, like white, start with a coat of paint in a mid-tone shade of grey first. Then move on to the white. You’ll get better coverage in fewer coats.
Don’t worry if you feel like your first coat of milk paint looks terrible. The first coat rarely looks good (with the exception of those dark colors). Move on to the 2nd coat and you’ll be amazed at how much better it suddenly looks.
Once your final coat of paint is dry you might notice that milk paint is a little rough to the touch. Get out your sanding block and some 220 grit sand paper and hand sand over the entire piece (I say you can count this as your cardio for that day). The finish will become smooth like butta’ and it will be time to move on to the topcoat, which is the subject of our post for tomorrow.
By the way, if you are a visual or auditory learner you can click here for a link to a great milk paint basics video by Marian Parsons, a.k.a. Miss Mustard Seed.
Now it’s time for the fun part, the prize!
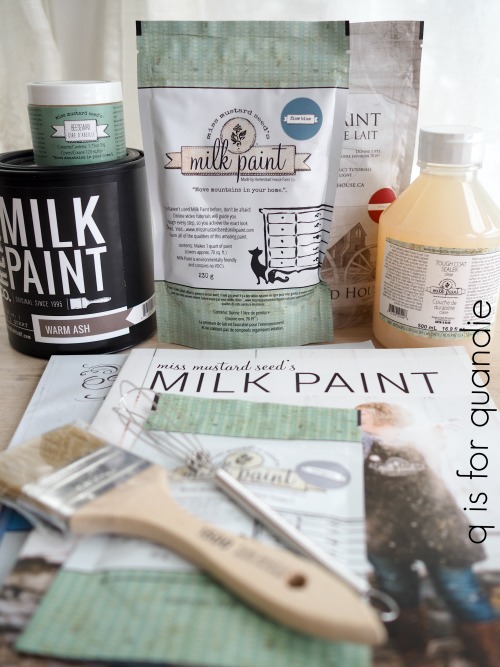
Includes: Miss Mustard Seed Look Books 1 & 2, paint brush, whisk paint mixer, 4 colors of milk paint, Miss Mustard Seed’s Beeswax, Miss Mustard Seed’s Tough Coat Sealer. Thank you to Miss Mustard Seed, Homestead House and The Real Milk Paint Co for providing items for today’s giveaway!
The basic rules: to be eligible to win today’s prize leave a comment on this blog post telling me whether or not you’ve tried milk paint. Your comment must be left on the blog, not on Facebook. You are not required to follow my blog, although it would be awesome if you did!
Normally I make a point of answering every comment left on my blog. If someone takes the time to leave a comment, I like to acknowledge that. But I usually only get 10 to 20 comments so it’s easy to fulfill that promise. But I’m guessing that I’ll get many more comments on these posts so I’m going to warn you up front that I won’t be answering each one. That helps make it easier for me when it’s time to pick a winner too, so I hope you guys will cut me some slack on that this week.
I will randomly draw the name of a winner for today’s prize from all of the comments left on this post by Saturday, April 7, 2018 at the stroke of midnight. You are eligible to win each day, so if you leave a comment on each day’s post, your name is eligible to be drawn for each prize.
The fine print: no purchase necessary, you must be 18 years of age or older to win, void where prohibited by law, the number of eligible entries received determines the odds of winning, approximate retail value of prize is $140, if the prize is not claimed by Friday, April 13, another name will be drawn at random to win, blah, blah, blah.
Be sure to check back tomorrow for the next segment of milk paint madness, and in the meantime remember to pin today’s post for future reference.


Great information!
I paint a lot of furniture and have used
Chalk paint and latex paint. I have never tried milk paint so it would be fun to try. Thanks for the great blog and the giveaway!
LikeLiked by 1 person
I’m pumped for this !! I love milk paint but I tend to always use bonding agent because I’m afraid of too much chippiness… I’m kind of a control freak haha
LikeLike
You know, I am pretty much a control freak too and not being totally in control of the chipping was something I had to work at getting used to. But when it works out well, it is worth the potential for frustration that you had to risk. I say live on the edge, give it a try Corinne!
LikeLike
OK, turns out I really have not used milk paint yet (since you mentioned that GF is not true milk paint)! I am familiar with chalk paint, and latex paint, so I would love to try a new to me type of paint. Thank you for having this giveaway. And I love your blog!!
LikeLike
Ah, yes! That is so confusing right? I’ve read on the General Finishes website that they called their paint ‘milk paint’ because it mimics the look of milk paint. Hmmmm, I’m not sure what I think about that.
LikeLike
I’ve never used milk paint but am very intrigued by the idea of “less work”. Sometimes my shoulders hurt from all the movement of painting and I’m wondering if milk paint might provide some relief! Anyways, love your blog and teaching style.
LikeLiked by 1 person
I have tried milk paint a few times.. I like the chippy factor!
LikeLiked by 1 person
I have tried milk paint before and it is one of my favorite paints to use! Thanks for sharing all about it this week
LikeLiked by 1 person
Great tips!! I started out painting with chalk paint and just kind of “stuck” with it. I keep hearing good things about Milk Paint and would LOVE the opportunity to try some!! I am moving to MY own little place andcant wait to start decorating, painting, playing, and comming up witj REALLY different decor!! Thank you for the opportunity!!
LikeLiked by 1 person
I’ve used Milk paint some but it’s always good to hear great tips and tricks – thanks so much!
LikeLiked by 1 person
I have only used Miss Mustard Seed milk paint and love the look. Lucketts Green is my favorite!
LikeLiked by 1 person
I follow your blog and Miss Mustard Seed”s blog everyday, but haven’t used milk paint yet, this would be a perfect opportunity to try the products!!!
LikeLiked by 1 person
Miss Mustard Seed Milk Paint is a great product. So versatile! I’ve tried almost every color!
LikeLiked by 1 person
Wonderful post! I am definitely going to have to try the marble trick. I’ve never heard of that before. I have used MMS milk paint and her blues (kitchen scale, artissimo, etc. ) are my favorite colors. Big fan of your work!
LikeLiked by 1 person
I haven’t tried milk paint yet, but I would love to! I haven’t found anyone in my area that sells it so I can see the colors in real life…and I do enjoy your blog, especially your photos!
LikeLike
I struggle with that too Caroline. I really prefer to see colors in person and test them out before I commit to using them on a piece of furniture. The sample size packets can be good for that.
LikeLike
Clear and concise, with pictures! Great lesson as I have only used chalk paint in the past.
LikeLiked by 1 person
I have tried many of the paint products available–chalk, fusion, and milk paint. Milk paint–especially MMS is my absolute favorite to work with, especially with hemp oil topcoat. There is no comparison to that buttery soft finish that you can achieve with this combination. In my experience, all your tips on milk paint are spot on with what I have experienced. Thank you for the chance to win the giveaway, and thank you for the inspiration your blog provides!
LikeLiked by 1 person
I’ve read many articles on milk paint but I’ve never tried it. I’ve always been a bit intimidated by milk paint but after reading your post on how to mix and use it, I am eager to try it!
LikeLike
I know milk paint seems a bit more complicated that just cracking open a can of paint and slapping it on, but it’s worth it. I recommend playing around with it on some smaller items first (picture frame, small stool or wooden box).
LikeLike
I do believe I’ve tried milk paint at a retreat however, not to paint a furniture piece with. I believe it was not usable at the time for some reason or another. I would love to give it a go! I love Fusion Mineral Paint! Have no idea why I’ve not tried the milk paint. Age, has to be ….
LikeLiked by 2 people
My first piece of furniture was with milk paint primarily because you used mostly milk paint when I started reading your blog. I then found chalk paint and acrylics and put my milk paint on the shelf. Now I am inspired to take it off the shelf! On the hunt for something to paint!
LikeLike
I’ve been using more acrylic and chalk paint lately too, so I inspired my own self to take the milk paint off the shelf this week. I painted a lovely desk that I’ll be sharing on Friday and was reminded why I love using milk paint! Be sure to check back on Friday to see it 🙂
LikeLike
Thank you for these posts! I’m already learning several new things! I have only tried SP and MMS and love them both but have always felt like I’m doing some things wrong. Like getting it to chip when it doesn’t, so I’m looking forward to that part.
LikeLiked by 1 person
I have tried milk paint and absolutely love MIss Mustard Seed’s. I have had the same thing happen where the last drawer looks different than the first part I painted! This usually doen’t happen if I stir during painting. Love your blog and look forward to reading it.
LikeLike
Yep, gotta keep stirring!
LikeLike
First, let me say that you are so good at breaking things down and making it real. I love that you really provide great instructions and information. And this series will create a lot of milk paint experimentation. So, good on you for promoting a product that is awesome. I love milk paint and if I could I would paint everything with milk paint. I love the authentic shading and chipping. I almost never add bond and I do clean and prep pieces so typically it chips just right! Thanks Linda for the tutorials.
LikeLike
You’ve got it exactly right Laura! Cleaning and prepping pieces is the best way to control unwanted chipping. I’ll talk more about that on Thursday 🙂
LikeLike
I haven’t tried milk paint yet. Anxious to see how it compares to chalk paint. Thanks Quandie!
LikeLiked by 1 person
I have never used milk paint but would love to. Thank you!
LikeLiked by 1 person
Happy *post* Easter Linda. Interesting to know about the General Finishes being an acrylic not a real milk paint. I’ve tried it and it goes on like butta’. Once before I tried a powdered milk paint but the results were left un-indelible in my mind. I have Sausha’s Ocean (Sweet Pickins) waiting in the queue to paint on a desk this week. As always, your tutorials are so complete, it’s as though you have cloned yourself and have become the viewer as well.
LikeLike
Sweet Pickins has some really gorgeous color choices! You’ll have to let me know how your desk turns out 🙂
LikeLike
Hi,
I love reading each and every blog post! A breath of fresh air! I have not tried powdered milk paint. I have used Old Village Buttermilk and always assumed it was milk paint! I plan to try “real” milk paint on two bureaus that are up on deck! Will keep you posted on how they come out and my experience using the powdered paints! ~ Mimi
LikeLike
I’d never heard of Old Village Buttermilk before so I had to google it. It’s hard to tell from their website just exactly what kind of paint it is although it’s definitely not a true milk paint. Sounds like it might be a fun product to work with though.
LikeLike
It is a great product and highly recommend you giving it the old school girl try!
LikeLike
I’ve used Miss Mustard Seed milk paint on several pieces–I love Luckett’s Green and Trophy.
LikeLiked by 1 person
I am really excited about this week’s post! I have not tried “real” milk paint yet. I am a General Finishes milk paint user. I did pick up a vintage tea table this past weekend that I really want that chippy look for. So, I picked up some white milk paint and extra bond from my local store. Thanks for this wonderful post!
LikeLike
Sound like a great first project for milk paint. I’m going to share more about bonding agent on Thursday, but keep in mind that you most likely won’t get any chipping if you add the bonding agent. So if you want chipping, keep that in mind.
LikeLike
I love milk paint and all its qualities. I’ve used it the past and recently started using it again. I am one of those people who sits there and waits for that chippiness to start… oh how I LOVE that part! Watching paint dry is actually exciting.
LikeLiked by 1 person
Milk paint is definitely the way to go on an unfinished piece. After 2 1/2 years the finish on my MMS Trophy milk-painted bookcase is still perfect and beautiful!
LikeLiked by 1 person
Hi Linda,
I’ve not ever had the opportunity to try milk paint. I’ve followed you on your blog for years and have always admired your work, so it would be awesome to finally have a chance to try it out. I’ve often wondered why aren’t these brands more readily available at Michael’s or Hobby Lobby type stores?
LikeLike
You know, I’m not sure what the answer is to that question. Maybe because it’s not a product that you can just use straight off the shelf? Or maybe it has more to do with none of the milk paint manufacturers being big enough to support retail sales on that scale? But those are just guesses on my part.
LikeLike
What fun! Thank you Linda for the review on milk paint. I love painting with it. I do have a question. Can you paint milk paint over a Zinsser primer or should I paint it with a coat of like Fusion paint first. A friend has asked me to paint a headboard she has already primed.Thanks for this weeks info. I am looking forward to each day. Your Awesome!
LikeLike
Hmmm. Good question Monica. I’ve never used milk paint over Zinsser primer, so I can’t really say for sure. If I were you I’d test it first. Paint a board with some of the primer, and then paint over it with your milk paint. See how it sticks, how it looks, what happens when you distress it, etc. Is the primer white? If so, keep in mind that you’re going to see that white in areas that you distress.
LikeLike
Thanks for all of the information that you provide! Much appreciated!
I have never used milk paint, but would love to try it.
LikeLiked by 1 person
Yes! I’m a milk paint lover and also an avid follower. I may not comment as much as I should but I do look forward to reading your posts regularly. I always know I’m going to love it & learn something ! As far as milk paint goes, I’ve only ever tried Miss Mustard Seeds and I just go with the flow whenever I’m using it, it’s always interesting to see how it will turn out but that’s what makes the finished product look so authentic like its been sitting around in a barn for a 100 years. 🤗
LikeLike
That’s a great attitude for milk paint users, just go with the flow!
LikeLike
I’ve used milk paint on a few pieces and loved working with it. I got beautiful results and am looking forward to painting with milk paint again.
LikeLiked by 1 person
I have never painted with milk paint. I thought about it with my kitchen cabinets but is sounded like way too much work. But now that I have read today’s post maybe I’ll think about painting my dresser this summer with milk paint. I just need to decide on a color.
LikeLiked by 1 person
Thanks so much for this post – very helpful! I have used milk paint before and I really do like it! Love your blog and look forward to looking at pix and reading about your beautiful pieces you paint.
LikeLiked by 1 person
I’ve never used milk paint. Truthfully I’ve always been a little intimidated by it, but I have to say that you made it sound a lot easier than I imagined. Looking forward to tomorrow’s post!! 🏡
LikeLiked by 1 person
Yes, I’ve used MMS Milk Paint, and two other companies Milk Paint….loved MMSMP! Thanks for the great info and tips
LikeLiked by 1 person
Thank you for the refresher course this week on Milk Paint. I have tried all variations of Milk Paint, and I also regularly use various Chalk Paints. I prefer Milk Paint for many reasons…and, even if someone says “but you have to mix it”…trust me…it is so worth it! I love you Q…and, I have on my bucket list someday doing a Miss Mustard Seed workshop….and, maybe I will get very lucky and you will be there! Then, two things off the bucket list!
LikeLike
Awwww, thank you so much! You should definitely watch that Miss Mustard video that I linked to in the post. It’s practically like taking a virtual workshop from Marian herself.
LikeLike
I have never used milk paint but it sure sounds intriguing! I have a special piece, our front entryway has an vintage accessory table that is screaming out for a redo. I also tried to cover up a few scratches and it made dark spots. So now I have to cover the top with a placemat. It would be a fun project to start on because of its size. It is the first thing you see when you climb up our stairs into the living area. You expert tutorial was so easy to understand, you break everything down for the “lay person”.
LikeLiked by 1 person
Thank you so much for this refresher on milk paint. Have only used MMS but would gladly try others. I have followed your blog for a while and love your projects.
LikeLiked by 1 person
Hi Linda, I have found that painting the frame and the drawers with the drawers in on the last coat prevents the frame “framing” the drawers. Love the milk paint! Nothing beats that chippiness!
LikeLike
That is a great tip Jeanie! It makes so much sense, I’m definitely going to try that next time. Thanks for sharing that with all of us 🙂
LikeLike
Never tried it, but I’d love to have the chance! Good info.
LikeLiked by 1 person
Living in a 118 year old house, I’ve got to spruce up some of my decor and make it look old. Would love the opportunity to try milk paint!
LikeLike
Oops, email address should have a “0” instead of a “9”…finger slip!
LikeLike
My house was built in 1904, so I’m totally with you on that Nicole. Milk painted pieces are right at home in our older houses!
LikeLike
I’ve never used milk paint, but I think I purchased a piece that has milk paint on it. Thank you for the hint to sand the piece so it doesn’t feel so chalky. I might just do that! Thank you, also, for all of that information! Whew!
LikeLiked by 1 person
Great tips! I have used milk paint in the past and am ready to get started again. I like to use a clear plastic cup and a fork!
LikeLiked by 1 person
I bet the clear plastic helps you see whether or not you have any unmixed powder at the bottom of your cup. Great tip Teri!
LikeLike
Loved your post on milk paint! When i first tried milk paint many years ago i gave up on it immediately, just because i wasn’t sure what i was doing. I turned too chalk paint. I recently tried it again and feel more confident with the finished product. Thank you for sharing your knowledge!!
LikeLike
Milk paint definitely does have a steeper learning curve than other paints on the market. But once you get the hang of it I think you’ll love it!
LikeLike
Great information. Yes, I’ve used Miss Mustards Seed milk paint and I love the look of it. I have three more pieces sitting in my garage waiting for warm weather to get here so I can get them prepped and ready to paint. Thank you for the chance to get some awesome products too.
LikeLiked by 1 person
What a great post! Very informative as usual. I always learn so much from your blog. I have not used milk paint – yet.
Still rehabbing my old farm house in NW IL. My plan is to piece together a kitchen island from unfinished big box store cabinets (unless I come across a good vintage piece that will work) and finish it in MMS milk paint. My kitchen is a good size but very little storage due to 5 doorways and 2 windows causing very little wall space for cabinets. Been studying your blog & MMS website to learn how to do this when the time comes (very nervous about screwing it up!). All of your posts give my confidence because you make it look so do-able with such gorgeous results☺. I’ve acquired several small furniture pieces to start with and practice on.
Today is my bday and I was thinking what a perfect gift this giveaway would be…lol!😉
Thanks for such a great blog. Your time, efforts and talents are very much appreciated.
LikeLike
Happy Birthday Linda! I know what you mean about those darn doorways. I have four in my kitchen. Much like your’s, my kitchen is very good sized, but the doorways make it difficult to have much storage and even adding an island messes with the traffic flow. Luckily I don’t cook, so this isn’t an issue for me 😉
LikeLike
What a helpful post! Thanks for reminding of the personal safety piece and about well water, I have used MMS milk paint with great results.
LikeLike
I often have to remind myself to think about the safety of the products I’m using. I hope I’ve done a good job of stressing the importance of that in this post!
LikeLike