a tropical morning walk.

Good morning from the garden.  Well, sort of.

This morning I thought I would share a few of the tropical flowers I came across while in Puerto Vallarta a week ago, like this one …

Is that a Bird of Paradise?  I believe it is, but I’m used to seeing the variety that has a purple and orange flower, and this one is red and orange instead.

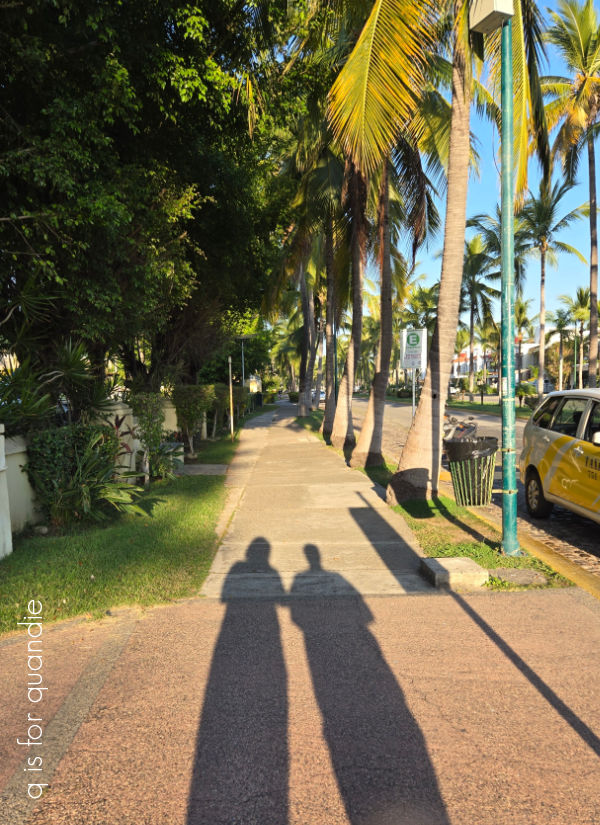
As I mentioned last week, my sister was invited along on the trip to Mexico that we took with my neighbor nnK’s family this year.  It was nice having her along because she is more of a morning person.  We got up early every morning and took a walk around the neighborhood before everyone else got up for breakfast.

We saw lots of lovely flowers during our walks, like this pretty pink one.

I’m pretty sure that’s a bougainvillea, but I’d never seen one in that color before.

I’m used to the white ones, or the typical bright magenta colored ones.

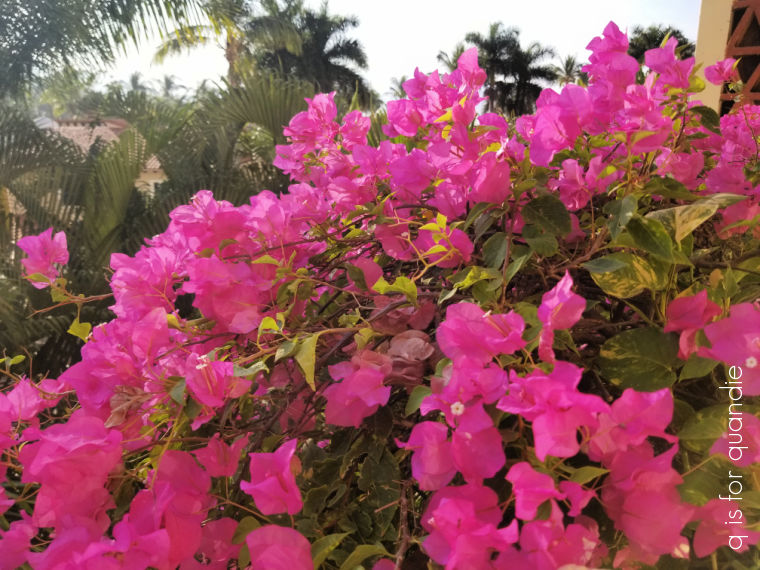
I think if I was planning my own tropical garden I’d go for the more subtle pale pink variety.

I saw a few hibiscus, which I think of a classic tropical flower.

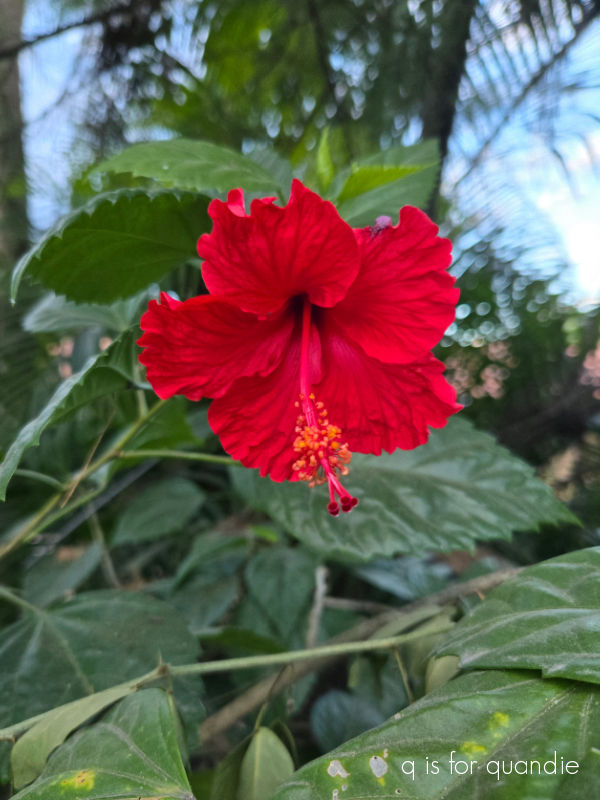
When I first started gardening in Minnesota, it was hard to find hibiscus hardy enough for our climate.  I did a little research online while writing this post and discovered that a hibiscus hardy to zone 5 was developed in the 1950’s, and a grower in Japan started hybridizing other hardy hibiscus in the 70’s and 80’s.  These days you can find lots of options for hibiscus that are hardy to zone 4, including the Summerific line from Proven Winners.

Personally I find them too tropical looking for my cottage style garden, so I’ve never been tempted to grow them.

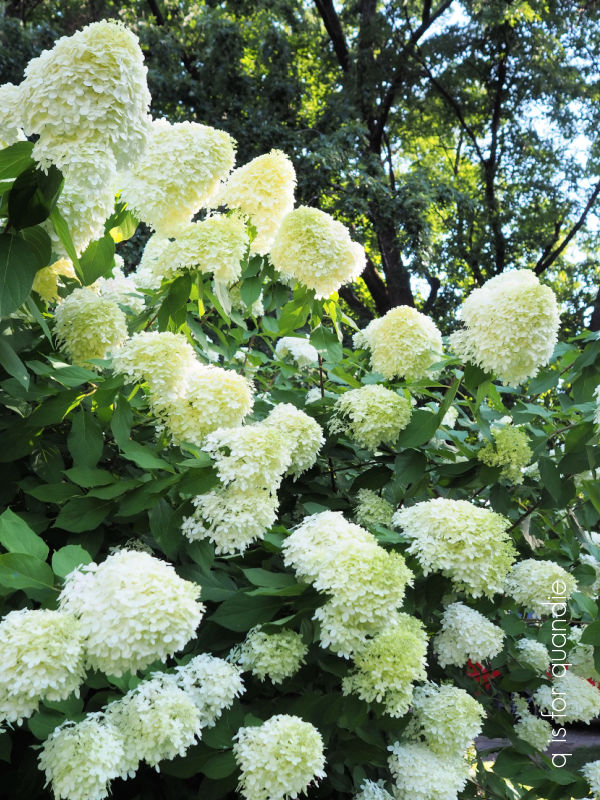
I wouldn’t classify all of the plants I saw in Mexico as tropical, for example there were these gorgeous blue hydrangeas.

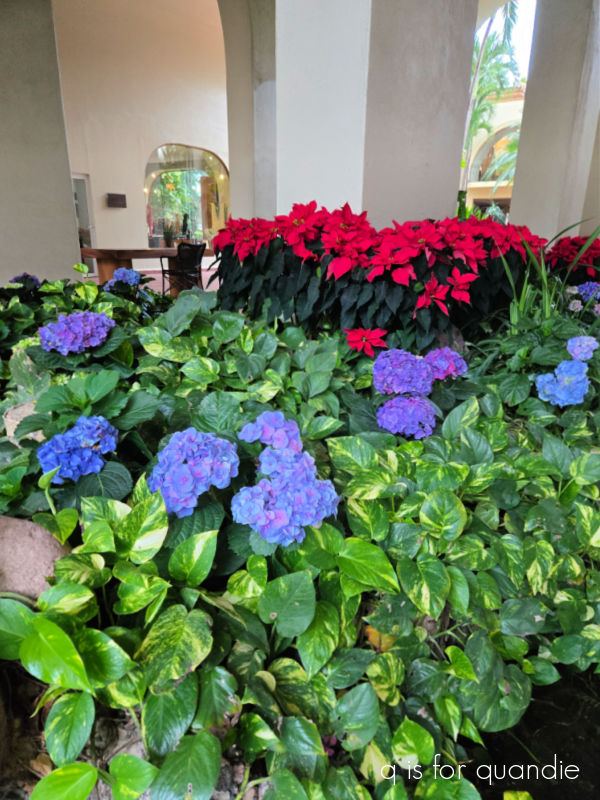
I’m fairly sure that those plants are just temporarily tucked into that flower bed though.  They were probably forced to bloom in a greenhouse, and when the blooms are done, they’ll pull them out and put something else in that spot.

I saw quite a few flowers that I didn’t recognize at all, like this pretty little one.

The flower has an orchid-like appearance, but it’s growing on a vine.  Aside from a variety of orchid that grows on a vine and has yellow flowers, I couldn’t find any info online about any other vining orchids.  Maybe you know what this flower is?  If so, leave me a comment.

I also had no idea what this next flower was, but that combination of red and white petals really caught my eye.

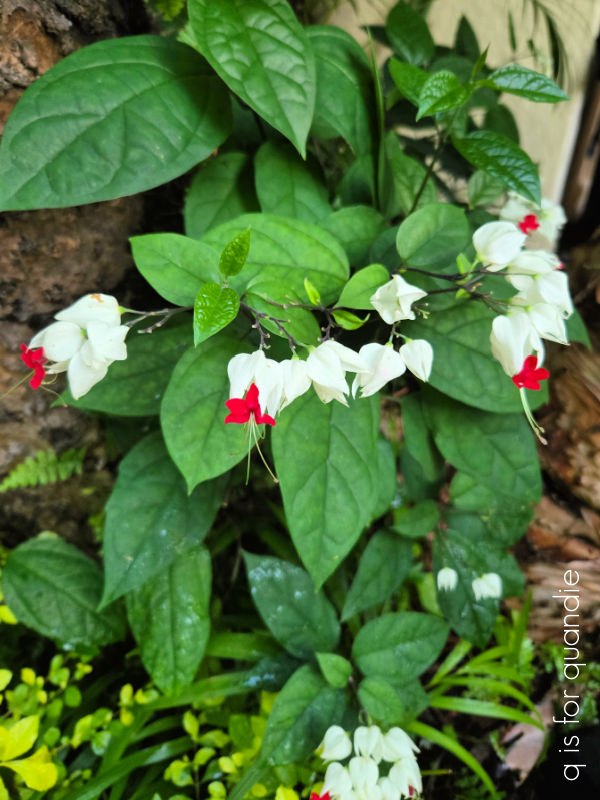
So I did a bit of googling and I think it’s a Bleeding Heart Vine, or Clerodendrum thomsoniae.  It’s only hardy to zone 9, so it won’t be making its way into my garden any time soon.

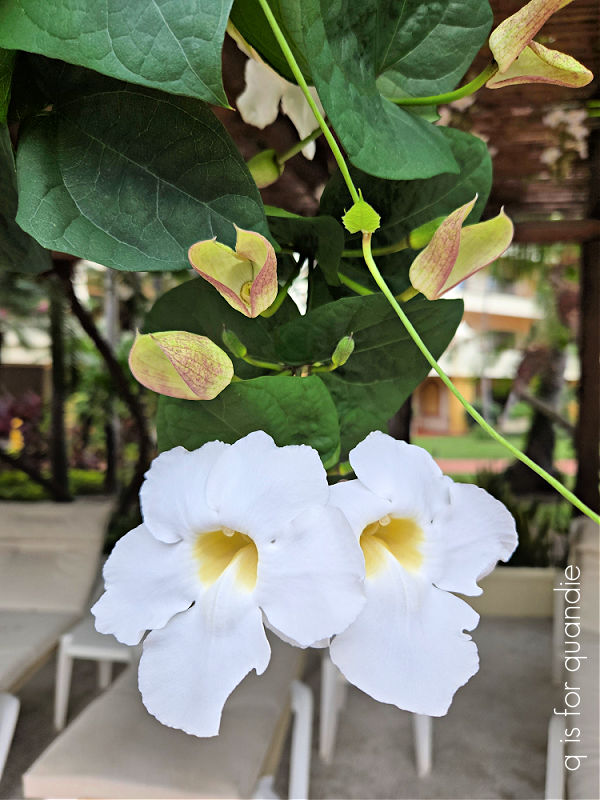
I also saw some old favorites of mine at our resort including the Blue Sky Vine, or Thunbergia grandiflora.

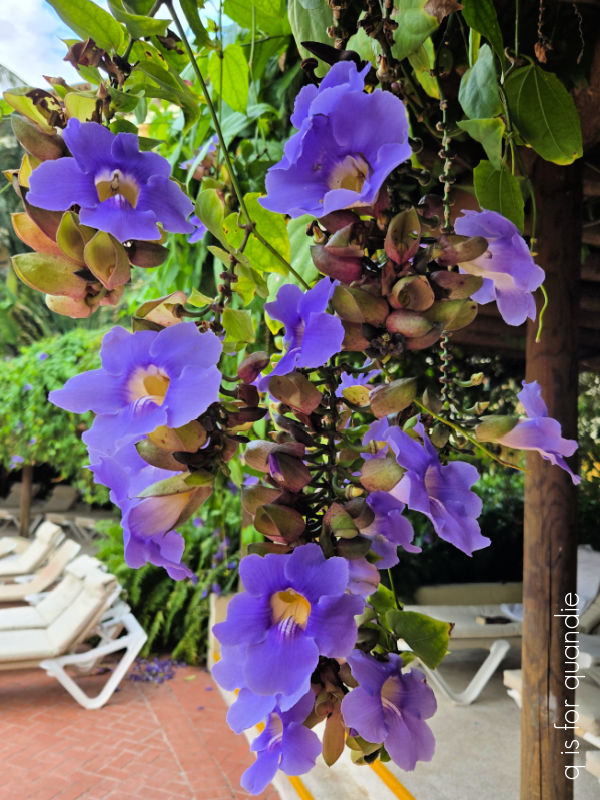
And this year they also had a white version, Thunbergia grandiflora ‘Alba’.

They also had a few water lilies that were lovely.

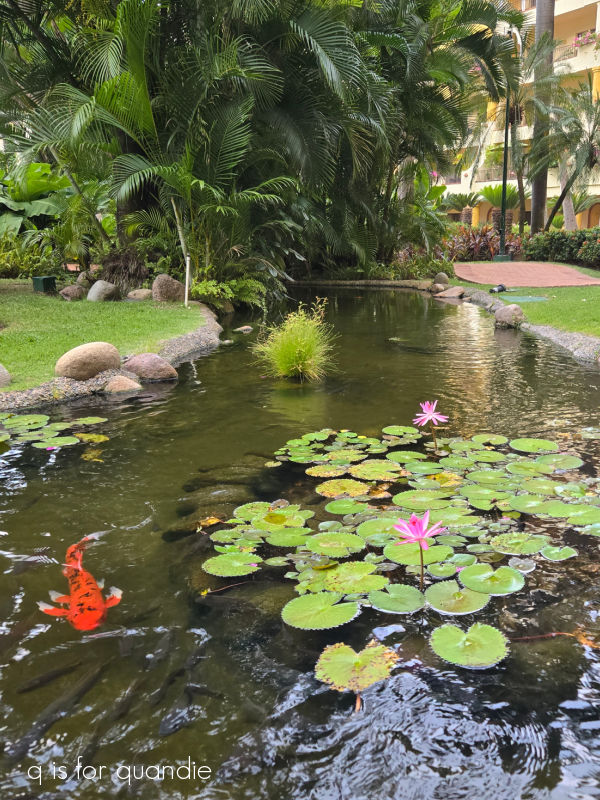
Water lily?  or maybe these are Lotus?  I’m not really sure.

We did spot one other rare sight on our morning walk in Puerto Vallarta that you don’t find here in Minnesota anymore.

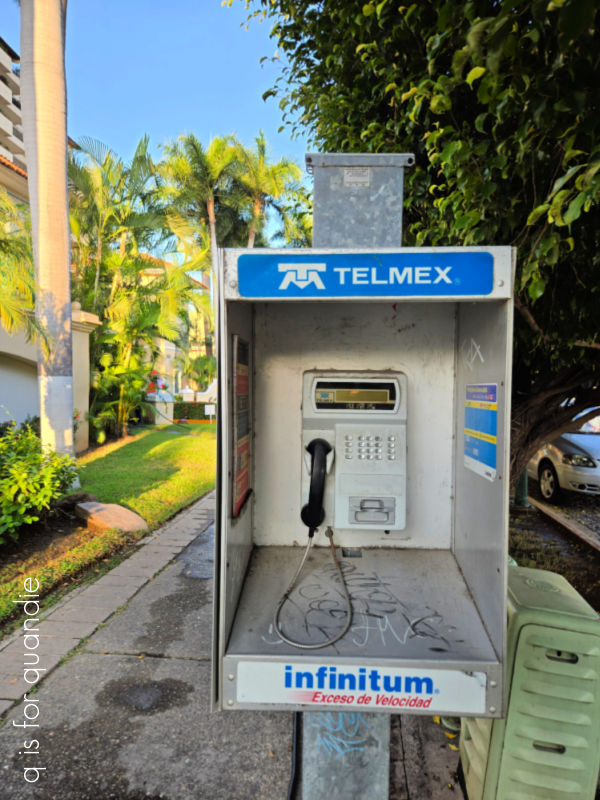
A pay phone!  I haven’t seen one of these in ages.

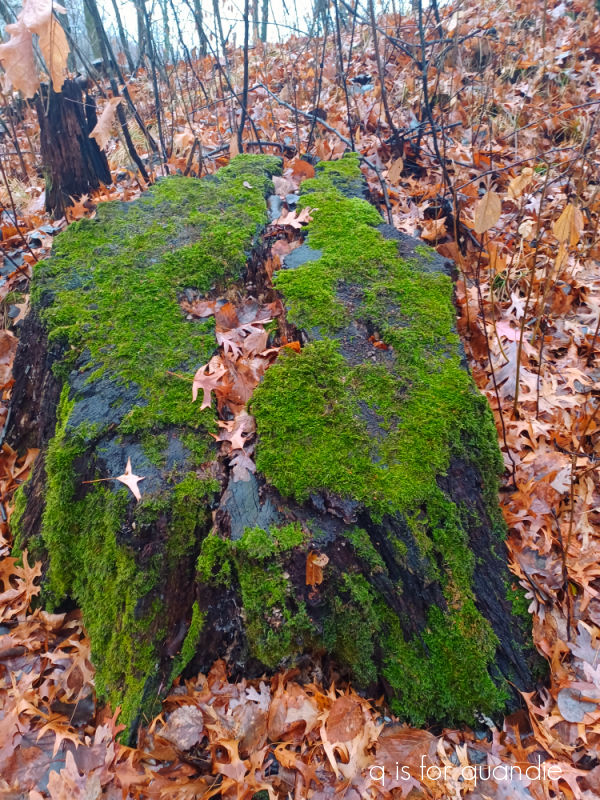
Now that I’m back in Minnesota, I won’t be spotting pay phones or tropical flowers on my morning walks … or much color of any kind really.

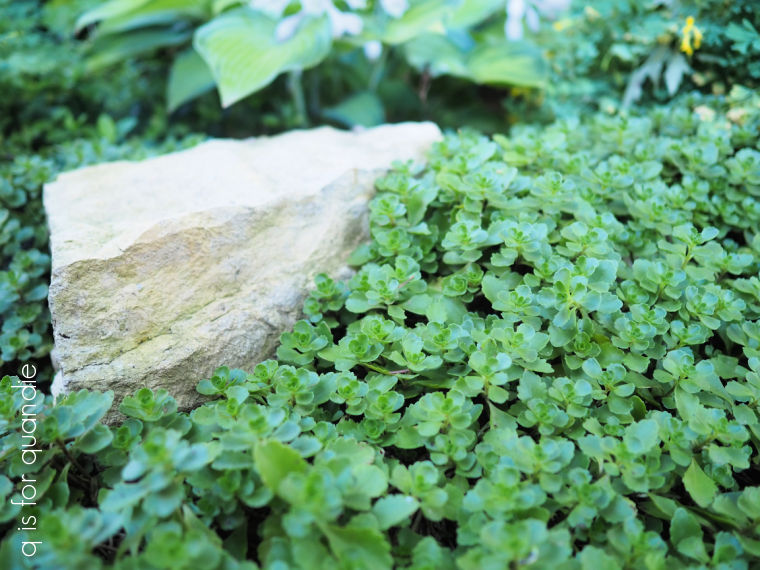
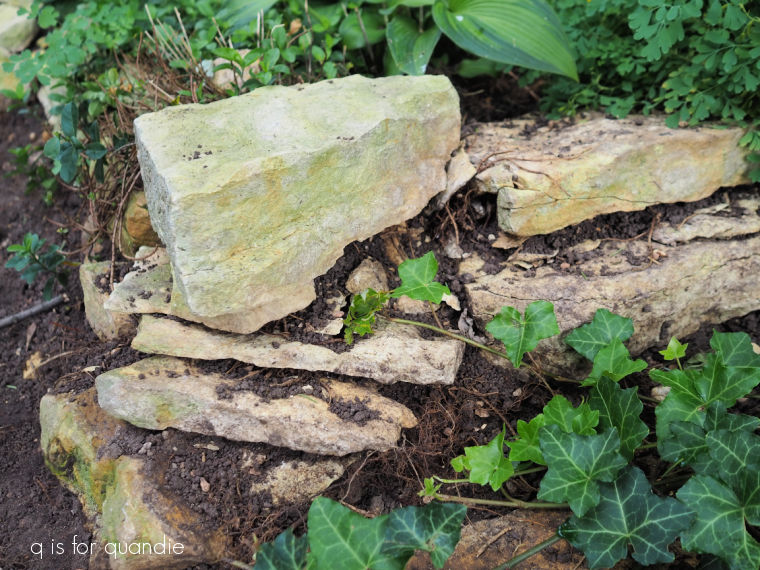
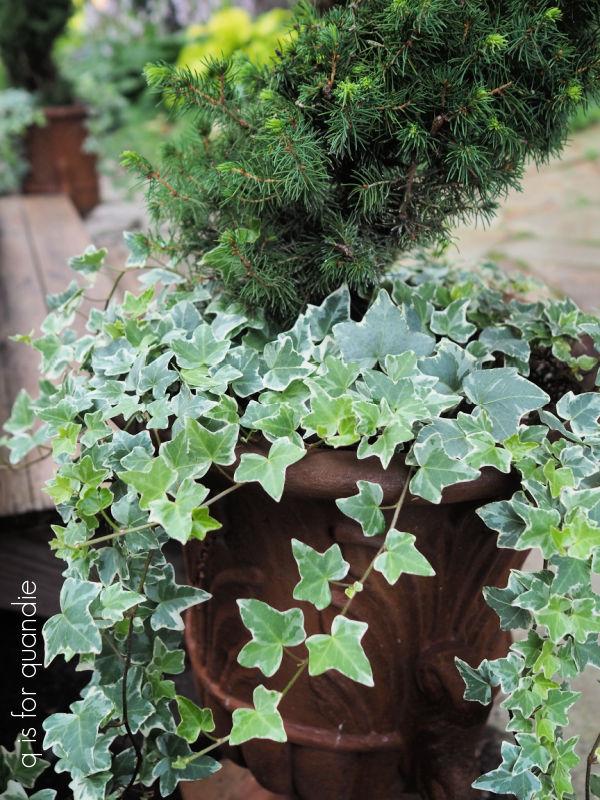
Unless you count the vivid green of the moss on this stump.

Or the occasional bright red berry.

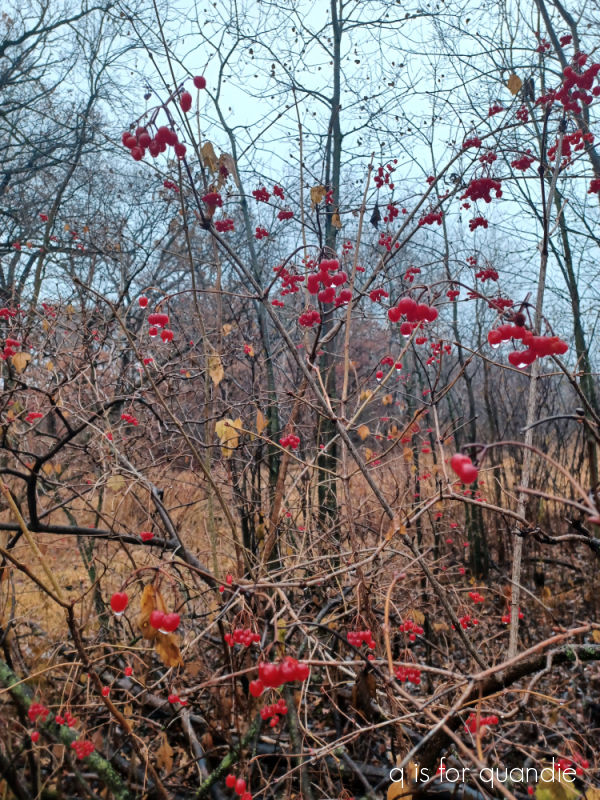
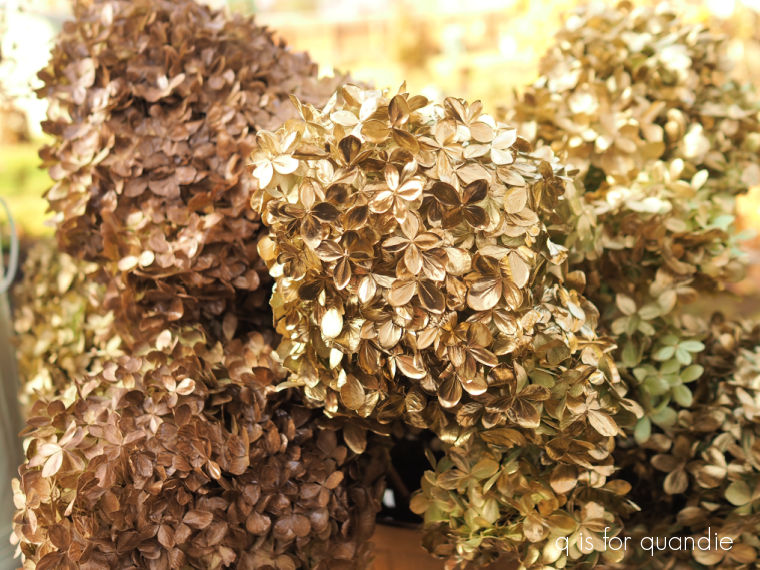
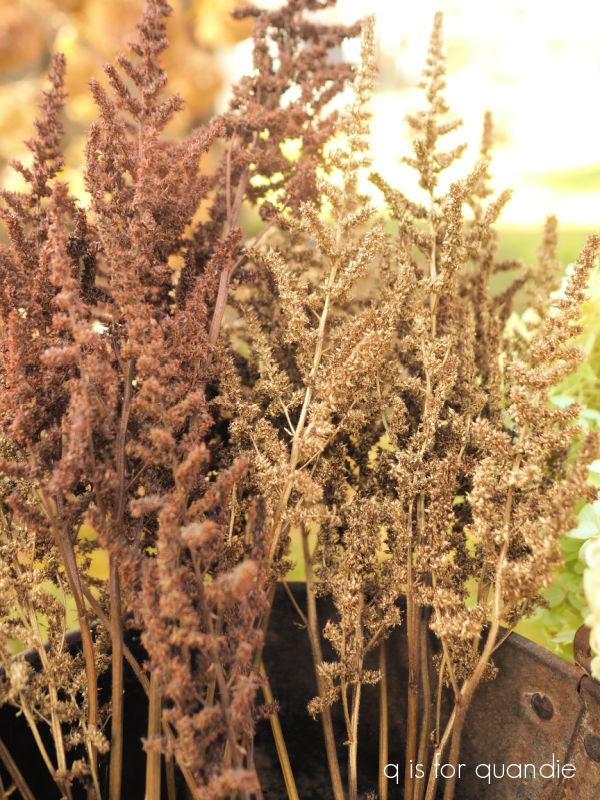
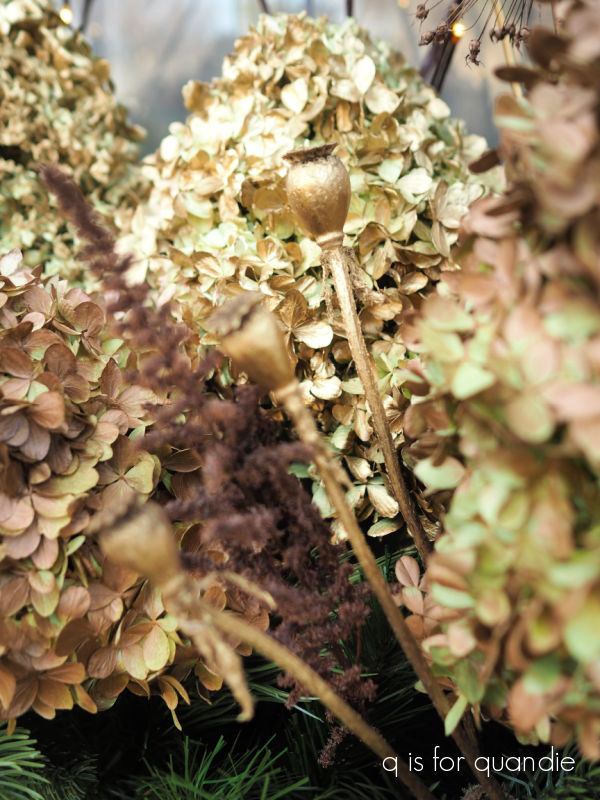
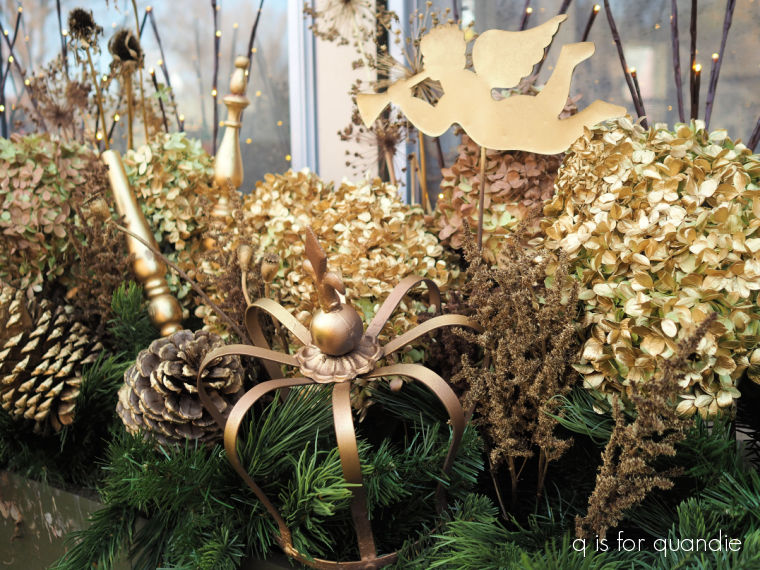
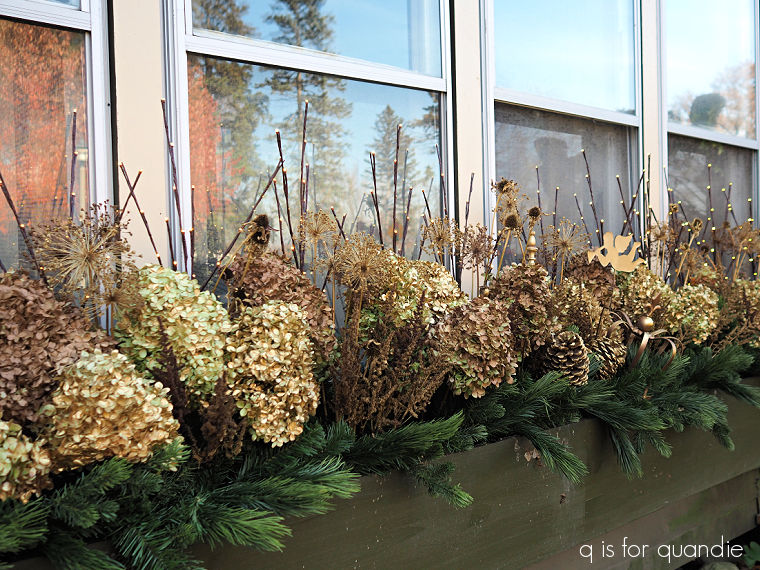
But that’s ok.  We have a different kind of beauty here in the winter, not as flamboyant, but lovely in a more subtle sort of way.

And I’m OK with that.  How about you?

everybody’s doing it.

Good morning from the garden!

OK, if you’ve been paying attention you know that I’m not in my own garden this morning.  I’m in Mexico!

This will be my 3rd visit to this resort with my neighbor nnK and her parents (and this year my sister is joining us as well).  I’m sure that I will be enjoying the gorgeous landscaping around the resort this week.

But before I left I whipped up a quick bulb lasagna to share here today.

Many of you are probably already familiar with a bulb lasagna, its seems like just about every garden YouTuber out there has shared the concept recently.  But just in case you don’t know what it is, it’s basically spring bulbs planted in layers in a pot, sort of like the layers of lasagna.

If you plan it right, the layers come up and bloom in succession.

I wasn’t initially planning on creating my own bulb lasagna, but my sister and I were in Home Depot last week and their remaining stock of spring bulbs were 50% off so I couldn’t resist buying some.

I grabbed some Persian Blue allium because I’d never seen this color before, and it sure looks pretty.

I hope it really does look like that!

I also purchased the new Proven Winners Golden Meadow blend of daffodils.

I quickly got the allium in the ground last Monday before our weather turned really cold, but I didn’t get the daffodils in.  Within a few days, with lows in the teens, our ground was getting pretty frozen so I decided it would be far easier to plant the daffodils in a pot.

And while I was at it, I could go back to Home Depot and get some of the spring blooming iris I saw there to add to it to create a bulb lasagna.

OK, so … simple concept … plant your bulbs in layers choosing bulbs that get planted at different depths and with different bloom times.

Since this is my first attempt at a bulb lasagna, I decided to keep it very basic.  The daffodils get planted at 6″, and they bloom in mid-spring, so they went in first.  I filled the pot with soil until it was about 8″ from the top, and then added my daffodil bulbs.

As you can see, I really packed ’em in there.  Since I’m only doing two layers, that should be OK.  However, if you do three or more layers you need to leave about 2 fingers of space between your bulbs so that they all have room to grow up through the layers.

My Iris reticulata are supposed to be planted at a depth of just 3″, so I added 3 more inches of soil over the daffs and then planted the iris.

I left a bit more space between the bulbs in that layer so the daffodils can come up through them.  The irises should bloom first in early spring, and then the daffodils will come up and bloom in mid-spring.  Theoretically.

I added a final 3″ of soil over the iris bulbs, and then watered my pot thoroughly.

I ended up with one spare packet of 10 iris bulbs and I was going to just pop them into a planter outside, but the soil was frozen solid.  I swear it happens overnight!

So I pulled out another pot and just planted them up by themselves.

But now comes the tricky part, where to put them for the winter?

These bulbs have to go through a cold period of somewhere between 10 to 16 weeks, and my online research tells me that the cold period should be at temps between 35–40°F.  Hmmmm.  I was planning to put these pots outside, but our winters are definitely much colder than that.  We’ve already had overnight temps in the teens, and this coming week they’ll be in the single digits.

Further online research tells me that the bulbs can freeze and rot in a unprotected pot left outdoors in our climate.  So that option is out.

Some suggestions given online include putting them in an unheated garage or shed.  I could do that, but in Minnesota even those spaces get much colder than 35–40°F.  I’ve also seen the suggestion to put them in the basement, but my basement is quite a bit warmer than that.

So I’ve decided to opt for my front ‘three-season’ porch, or as I like to call it in winter, my walk-in fridge.  It is unheated, but since it’s attached to the house it stays a little bit warmer than the shed or carriage house.  It can also be quite sunny though, so I’m going to put the pots under a table and cover them with some old sheets to keep them in the dark.

You also have to keep the container from drying out, but also don’t let it get too wet.  So I’ll be putting a reminder on my calendar to check it about once a month and add water if necessary.

It seems like there are a lot of things that could go wrong with this little project.  Too little cold, too much cold.  To little water, too much water.  Too much light.  I’m beginning to wonder if this was such a great idea after all.  But everybody seems to be doing it, so hopefully it’s as easy as they say it is and next spring I’ll have a lovely pot of daffodils and iris.

Have you had luck with a bulb lasagna?  Leave a comment and let me know, and be sure to share any tips you might have!

copper and gold.

Good morning from the garden!

It’s been a while since I brought you a Sunday morning in the garden post hasn’t it?

So far we’ve had a rather mild fall.  There have been a handful of nights just below freezing, but nothing really cold.  As a result, I still have some plants that look pretty darn good in the garden, like this Alexander’s Great brunnera 

and my Hakonechloa, or Japanese forest grass.

Up until a few nights ago I could also have said that some of my hostas are still looking great as well.

Except they no longer look like that.  Every last hosta that was still green was chomped down to stalks by roaming deer a couple of nights ago.

I really only seem to have trouble with deer in the early spring when they come and eat all of my tulips, and now apparently in late fall when they turn my hostas into a salad bar.

I’ll count my blessings since they don’t bother my garden in summer.  Knock on wood.

But today’s post isn’t about the deer, or what still looks good in the garden.  It’s about my front window box.  I’ve shared it here many times, but for those who may not be familiar it’s quite large at about 12′ long.  One thing I didn’t really think about when we made it so big was how much it would cost to keep it filled with annuals in the summer, and evergreens in the winter.

Unfortunately I don’t really have anywhere that I can go to forage for free evergreen cuttings so I have to buy them, and they aren’t cheap.  So last year when I went to the Bachman’s after Christmas sale I picked up two lengths of faux evergreen garland for 75% off.  They were originally priced at $79.99 (egads!), so I got them for about $20 each.

I think it looks realistic enough from the street, and no one really gets any closer than that except me.  And now I have a nice, full base to start adding further embellishments to.  Plus I’ll be able to use this over and over for several years at least.

I still have all of the faux red berries that I used in the window box last year.

But I wanted to try something different this year.  That being said, I didn’t want to spend a lot of money on all new embellishments.

Plus, I put in a little extra effort in early fall drying quite a few flowers from the garden, like this Astilbe.

And of course, lots of hydrangeas.  So I wanted to use those.

But I didn’t want a ‘brown’ color scheme, so I decided to add a little bling with some metallic spray paint.

I took advantage of some lovely fall weather this past Friday and set up a work area outside to spray paint the flowers.

They hydrangeas look amazing, but I’m not as impressed with the painted astilbe.

I also didn’t love the copper paint as much as the gold.  I chose the matte metallic copper and this is one time when I should have gone shinier.

I had also dried a bunch of allium, and they are awesome painted in gold.

As are the handful of dried poppy seedheads from nnK’s garden.

After tucking all of the painted flowers in with the faux evergreen garland, I decided that I needed to add a few items with a bit more impact.  So I pulled a few different elements out of the workshop and gave them a spray of gold too.

Now, I’m sure that a few of you are wondering how well the painted dried flowers will last.  The answer pretty much depends on our weather.  If we get a heavy snowfall, it will inevitably crush them and they won’t look so good after that.

But hopefully we’ll just get the light and fluffy stuff between now and Christmas.

Fingers crossed!

Are you a fan of the more subtle copper and gold theme this year?  Or did you prefer the pop of red from last year?  Leave a comment and let me know.

saving the rex begonias.

Good morning from the garden.

This year the Farmer’s Almanac is predicting a first frost date of October 10 for us in the Twin Cities.  It seems a bit hard to believe since it has been in the mid-80’s and humid for the last two weeks.  But I’m heading out to California, and then Vegas, next week and I won’t be back until after the 10th.  So, I decided I’d better pot up my rex begonias and bring them in the house just to be on the safe side.

In case you don’t remember, I planted two really gorgeous rex begonias in my front window box this year.

They did amazingly well in there.

In fact, this has been one of my favorite combination of plants (here’s my post about what all I planted out there this year).

Here’s how everything looked when first planted it in May.

Not terribly exciting, I know.

But here’s the look when it filled out.

As expected, the Blackie sweet potato vine grew like mad.

The white caladium took a while to take off, but once we got some hot and humid weather it filled out nicely.

The Charmed Wine oxalis ended up being overtaken a bit, and the white New Guinea impatiens were almost totally crowded out in the end.

But overall I was very happy with the 2024 window box.

That brings me back to saving those begonias.

There are several different options for overwintering a rex begonia.  First, you can let them die back after the first frost, clean the soil off the tuber, and then store it in a warm dry location over the winter.  I have tried this method twice with caladium and failed miserably both times.

Another option would be to propagate new plants from leaf cuttings, and then nurture those over the winter in pots.  They would be a more manageable size if space is limited in your windowsill.

An even simpler method is to cut a stem off the plant, pop it into a jar of water, keep the water topped up and wait for it to grow some healthy roots.  Then pot that up for the windowsill.

My original plan was to just pot them up and try to keep them alive as houseplants over the winter, but as I was re-potting them I did a little pruning and then decided to put some of those stems in water too.

I admit I’m a little nervous about the houseplant thing after reading this advice from Proven Winners:

“Rex Begonias are a bit more of a challenge for indoor growing, but with a high humidity level can be gorgeous with bright filtered light. These plants like constant moderate moisture, high humidity, and regular fertilization. They do not go dormant, so never allow them to dry out. They are very sensitive to dry roots and quickly decline if not cared for.”

My house is definitely not humid in winter, so I’m going to have to work on that.  My plan is to place them in low tray filled with pebbles and water, sometimes called a humidity tray.

But first I had to pull them out of the window box and pot them up.

And let me tell you, I really had a tough time convincing myself to pull them out.  They looked so good, I hated to mess that up.

I was surprised to find that neither of them had established very deep roots, so I googled it and sure enough rex begonias have shallow roots that prefer to spread outward rather than down.  Which means I have provided the wrong kind of pot for them.  I should have put them in large shallow pots, rather than deep pots.

Well, strike one.

But I got them potted up and for now they look pretty good.

The one on the left is a tad droopy so far, but the one on the right is standing up perfectly.

We’ll see how long that lasts.

While I was at it, I also decided to re-pot the succulents that were in my newspaper roller for winter.

I overwintered succulents in this container last year and it was a bit of a hassle because I couldn’t water it without making a mess.  Plus it took up a lot of valuable real estate on my window sill.  I have to fit those rex begonias in that spot this year too.

I have to admit that I don’t usually get great results overwintering plants.  I usually do really well until around January, and then I get tired of taking care of them.  I’ve tried overwintering pelargonium (a.k.a. annual geraniums), scented geraniums, oxalis and those succulents last year, all with very limited (or no) success.

I did do well with the streptocarpus last year …

only to kill off all but two of them this summer when we had so much rain.

To be honest, I’m not really sure it’s worth the effort.  It’s far easier to just buy new plants in the spring.  But I’ll give it a shot with these rex begonias and see what happens.

Now, how about you?  Are you planning to try and overwinter any plants this year?  Or do you have experience with overwintering things in years past?  Leave a comment and let me know.

saving dried flowers for fall and winter.

Good morning from the garden!

You probably don’t remember this, but back in September 2022 I harvested and dried big bunches of my panicle hydrangeas.

After using some of them to make wreaths

 I hung onto the rest to use in winter arrangements.

But I got busy and in the end I never used them in my fall/winter window boxes that year.  I stored them until the following spring, but then as I was cleaning out the carriage house one day I decided that they were just taking up space and I’d never be able to use them all, so I tossed them.

It wasn’t until I was working on my fall/winter window box arrangements last year that I really wished I’d kept them.  What was I thinking?  They were gorgeous and I just threw them away.

Actually, I know what I was thinking.  I was thinking I’d have plenty more come fall again.  And I would have, except I forgot to harvest them at the right time last year.  Instead I left them all on the bushes thinking I could just cut them off when I was ready for them.

That was a mistake.  Over time the hydrangea blossoms that are left on the plant turn brown.

I like to leave some in place for winter interest …

but the brown ones just aren’t as pretty in arrangements as those with some color, so I should have harvested some earlier.

Well, I won’t be making that same mistake this year.

The best time to harvest hydrangeas for drying is when the blooms are just past their prime and starting to dry and/or change color on the bush, and that is about now for the Vanilla Strawberry, Limelight and Little Lime varieties here in my Minnesota garden (FYI, I’ve read that my new Quick Fire Fab hydrangeas will start blooming about a month earlier than the others, so we’ll see about that next year).

After experimenting with a couple of different ways to dry hydrangeas, I’ve found that you don’t need to do anything special.  Just cut them, place them upright in a vase/bucket/basket/crate, and then put that in a dark, dry room.  I put mine upstairs in the carriage house.  There is only one tiny window up there, so it stays relatively dark.

In addition to the hydrangeas, I also decided to cut and dry my astilbe flowers this year.  I had a beautiful crop of them this summer.

I left them on the plant until mid-August when they had turned brown, and then I cut them all and put them in a bucket to fully dry.

I also had a bumper crop of allium this summer.

So I made sure to save those as well.  I also just leave these in the garden until they are dry, and then they just pull right out of the ground with no pruners needed.

I love the way they look like little fireworks.

I plan to use all of these dried flowers in my window boxes for both fall …

and winter …

Let’s hope that I can time those right this year.  I often end up leaving the winter arrangement too late and the dirt freezes solid making it difficult to arrange the dried stems.

And for now I can’t bear to dismantle that gorgeous front window box for fall.

So I may be getting a late start on that one.

How about you?  Do you dry any plants from your garden for winter arranging?

Leave a comment and let me know.

this was a rough one.

Good morning from the garden.

Well … I have to say, this gardening season is coming to a close on a less than stellar note.

It started out great.  Although the deer once again ate most of my tulips, I had some lovely daffodils and grape hyacinths in the spring.

My peonies were gorgeous, although short-lived as usual.

The alliums were lovely this year too.

I had great success with my clematis after fertilizing it in the spring for the first time.

We did end up getting a hail storm at the end of May which damaged a few of my hostas.

Then, things kind of started going downhill from there.  As I’ve mentioned way too many times, we had a really wet summer.  Lots of rain, and lots of wind.  We lost a good sized branch from our pear tree in one storm giving it a lopsided look.

So much scary wind led to my neighbor/handyman Ken having the beautiful maple tree in his backyard removed … leaving a rather sun scorched landscape where once there was a shady oasis.

Everything I have growing in that back perennial bed is looking really stressed now after going from partial shade to full sun.  I’m trying to look at the bright side though, no pun intended.  I was able to put in a row of Quick Fire Fab hydrangeas …

And I plan to re-work that entire “L” shaped perennial bed in the spring, pulling out the shade plants and replacing them with some sun loving things.

Because we’ve had so much wet weather this year, my lilacs have a bad case of leaf spot fungus which causes their leaves to turn brown and fall off.  This is happening all over our area, and many lilacs look far worse than mine.

The wet weather has also given us a massive crop of earwigs and slugs, and they’ve made mincemeat of my hostas.

A week or two ago I mentioned that at this point the panicle hydrangeas were the only thing still looking good in my garden.

I think it was the very next day that we had a torrential rainfall that practically flattened them.

The giant flowers were so heavy after being saturated with rain.  There was one large section that broke off completely, but I was hoping the rest would bounce back as they dried out.  Unfortunately, they weren’t able to stand back up again.

That being said, they are still gorgeous.  Just a little droopy.

And that brings me to my most recent discovery.  It appears that I have jumping worms.

If you remember, I posted about jumping worms back in May.  They are a non-native earthworm that strips the nutrients from top soil.  And according to Ramsey County they are an emerging problem in our area.  They can be introduced to your garden in mulch, compost and potted plants.

Little did I realize at the time that I would end up having a problem with them myself.

It was the beginning of August when I started to notice that I seemed to have far more worms in my garden than usual.  I thought it was just due to the wet weather.  But then I noticed that my soil was looking funny.  Sort of crumbly.

Then I realized that a patch of creeping sedum that I had was dying off.  I could pull it right out of the ground, it didn’t seem to have any roots left at all.  As I was pulling it, I noticed that the worms were in abundance in that area, and the soil that held the sedum just crumbled away.

Now, creeping sedum is shallow rooted by nature, and this particular patch was growing over flagstone.  So, it was extremely shallow rooted.

That being said, I’d had that patch of sedum for a couple of decades or more.  Here it is in happier days.

It grew right over that flagstone.  And now it’s completely dead.

I’ll also point out, as you can see, that the English ivy is still doing just fine.  It can literally grow without any soil at all, so apparently it’s a good choice if you have jumping worms.

So far the creeping sedum is the only obvious victim of the worms in my garden, but I don’t know what the future will hold for the rest of the plants.  Fortunately many of my hostas have been there for a long time and are really well rooted in.  Hopefully that will save them.

Also, I’ve read that the jumping worm population grows exponentially in a wet year v. a dry one.  So it’s possible that this isn’t the first year I’ve had them, but just the first year that they have been this bad.  This summer’s wet weather strikes again.

The problem is, so far there are no definitive solutions for eradicating jumping worms.  I’m not going to go into all of the details here, but if you are looking for more info on jumping worms and possible ways to deal with them you can check out this link.

I’m going to have to do some experimenting to try and mitigate their damage.  Also, I will no longer be sharing plants from my garden with others which is a bit of a bummer.  But better safe than sorry, right?

As as sidebar, if you grabbed one of my sedum cuttings at the Carriage House sale, don’t worry.

The cuttings were taken from the tops of a taller sedum (not a creeping variety), and potted up in new potting soil.  They would not have contained jumping worms or their eggs.

So at this point, I’m ready to throw in the towel on gardening.  I’ve always struggled with garden burnout around now, but this has been a rough one for sure.  I think I’ll be happy to button things up for a long winter’s nap.  I’m sure next spring I’ll be ready to face it all again.

How about you?  Are you ready to call it good for gardening season this year?  Leave a comment and let me know.

hydrangeas and sunflowers.

Good morning from the garden!

I have to admit, not much is looking great in my garden right now.  The hostas are full of holes from earwigs and/or slugs, the bee balm is dried up and sad looking, the ferns are on their last legs, the tips on all of the irises are brown, and I don’t even want to talk about the pseudocercospora leaf spot fungus on my lilacs (if you haven’t heard about this, it’s rampant in Minnesota this year due to the amount of wet weather we’ve had, for more info, check out this video from Kare11).

That being said, my Japanese Spikenard is still looking gorgeous.

And the panicle hydrangeas are looking absolutely stunning this week, they love all of the rain we’ve had!  This one is my Vanilla Strawberry …

And this one is Limelight

Here’s a better photo to put the size of that Limelight in perspective.

It’s easily 11′ to 12′ tall.  I sure do hope my new Quick Fire Fab hydrangeas perform as well for me.  FYI, I did fertilize my hydrangeas in early spring with Espoma Rose-tone.  You don’t really need to fertilize panicle hydrangeas, but I’ve read that they will grow faster if you do.  So you can bet I’ll be out there with the Rose-tone again next spring to fire up those Quick Fire Fabs (pardon the very lame pun).

Since my own garden isn’t looking especially inspiring right now, I’m bringing this Sunday morning in the garden post to you from Green Barn Garden Center’s sunflower field in Isanti, MN.

My niece and I headed up there earlier this week to check it out.

Although it was a bit of a gloomy day (and yes, there was more rain!), the flowers were sunny enough to make up for it.

Being there on a cloudy weekday meant we nearly had the entire place to ourselves.

Sunflowers take about 60 days to bloom, and they bloom for about 7 to 10 days.  So Green Barn plants five crops in succession so that they have at least one section in full bloom throughout the month of August.

They provide a bunch of fun photo spots, like this one with a piano …

or this one with an old fire truck.

There were numerous tractors that one could pose on too.

But my niece and I are of the same mind when it comes to photos of ourselves.  We don’t like them.  I did convince her to pose for just one though.

It started to drizzle about halfway through our wander around the field, so we wrapped things up after checking out a few more of the photo props like these fun bikes.

We paused at the end for one quick selfie, which both of us hated …

but we did it anyway.

If any of you locals are looking for some fun photo ops, Green Barn Garden Center should have sunflowers in bloom through Labor Day weekend.  They charge $7 admission, but you can pose for as many photos as you like (or not, in our case).  Here’s a link so you can check out all of the details.

embracing change.

Good morning from the garden!

Over the past week I’ve been working hard on embracing change.  I fully admit, I’ve never been a fan.  Especially when the change is not by choice.

Ironically, just last week I wrote a blog post from the garden about having patience, and changes in the garden that take years to come to fruition.  But sometimes the opposite happens and a very drastic change takes place in the garden overnight.

Recently my neighbor/handyman Ken decided to have the enormous shade tree in his back yard cut down.

Ken and his wife planted this tree as a small sapling when they moved into their house back in the late 70’s.

After nearly 50 years of growth, it was huge.  Not only did it shade Ken’s entire backyard, it also shaded a good bit of our backyard and also our house.

But lately Ken had been worried about the the age of the tree.  As I’ve mentioned so many times lately, we’ve had a lot of rain this summer and much of it has been accompanied by high winds.  A tree had come down on a house a few blocks away from us and Ken became convinced that the same could happen with his tree.

He had a local ‘landscape & tree’ company come out, and they agreed with him that there was a possibility the tree could come down in a storm (um, isn’t that pretty much true of all trees?).

So he decided to have it taken down (although I practically begged him to reconsider).  Since the pine tree that sits on the property line between our two houses was pretty lopsided after being overwhelmed by the giant tree and would surely look awful with that tree gone, he decided to have that one removed as well.

Last Monday the tree removal crew arrived with a giant crane.  They set it up in Ken’s front yard, and then lifted just one guy and his chain saw up and over the house and into the tree canopy.

He attached ropes to each huge limb before he cut it, and then the crane lifted it up and away.

Little did I realize that they were actually going to swing those giant limbs over our house!

I have to say, it was a bit unnerving to see limbs the size of full trees dangling in the air above our roof.

They then lowered them onto the street.

That’s just one limb!  There were probably about six or seven limbs that size that came off the tree.

There was a crew in the street that then cut them up and loaded them into a huge truck.

It was quite the production.

Once the dust cleared, I was horrified by the destruction.  OK, horrified is a strong word.  How about devasted?  Or maybe heart-broken?  Really, I was just simply sad.

Sad because that beautiful tree was no more.

It really didn’t help that it was a brilliantly sunny afternoon, and suddenly my once gloriously shaded backyard was blisteringly hot.  In addition, all of the more unsightly details, like the utility poles and the far neighbor’s giant pole barn were much more noticeable.

Although that tree was nearly 50 years old, maples can live from 100 to 300 years.  And as it turned out, it was perfectly healthy inside.  I suspect that tree would have easily outlived not only Ken, but Mr. Q and me as well.

On the bright side (pardon the pun), I now have a section of garden that will qualify as ‘full sun’.  I’m trying to see this as an opportunity to grow some of those flowering plants that have eluded me in my mostly shady garden.  I plan to re-work that flower bed next spring by adding some sun-loving plants.

I also decided to put in a hydrangea hedge along the property line where the pine tree was.  It will go from the end of my existing garden to meet up with the lilac hedge along the back.  I purchased six Quick Fire Fab hydrangeas to fill it.

Aren’t they gorgeous?  They have a similar growing habit to the Limelight hydrangeas that I love so much, but they bloom about a month earlier and the flowers start out white then turn a lovely blush pink, followed by a deeper pink by fall.

It will take several years before they get to their full height of 6′ to 8′ tall, but when they do get there I think they will be stunning.  Let’s hope I have better luck with this hedge than I did with those lilacs!

Before planting, I prepared the bed by adding some cow manure and tilling it into the top 6″ or so of soil.  OK, well, by “I” I really mean the super hardworking high school student that I hired to help me with the heavy lifting.  We then added some Espoma Bio-tone Starter to each hole as we planted the hydrangeas (this product is supposed to help the plant develop a strong root system to get established more quickly).  Once the shrubs were all in the ground, we mulched the bed with some black wood mulch.  I don’t like to use wood mulch on perennial beds, but I do like to use it under shrubs.  It reduces weeding, helps retain moisture, and that black color really makes the plants pop.

The sight of that row of gorgeous hydrangeas has cheered me up a little, but I have to admit that the loss of that shade tree has really thrown me.  I know, it was just a tree.  There are so many more important things in life.  I’m trying hard to embrace the change, but I’m really going to miss that tree.

to plant a garden.

Good morning from the garden!

This morning I thought I would update you on a few of the garden projects that I’ve shared in the past.  These are mostly projects that have taken 3 or more (in one case, many more) years to come to fruition.

As Audrey Hepburn supposedly said, to plant a garden is to believe in tomorrow.  Gardening is rarely an instant gratification sort of endeavor, that’s for sure.

If you’ve been following me for a few years you may remember that I attempted to plant a lilac hedge back in 2011.  OMG, that means it was 13 years ago.  So yeah, this one has required A LOT of patience.

I initially planted a row of the fancy hybrid type lilacs and after 5 years it looked like this …

Wow, that’s embarassing, isn’t it?  What a straggly mess.

The flowers were gorgeous.

But the hedge wasn’t providing any sort of privacy along our back property line, and it certainly didn’t look good, even when in full flower.

Over the next several years I pulled out those fancy lilacs one or two at a time and replaced them.  At first I replaced a couple of them with common lilacs.

The common lilacs have performed beautifully and are now at least 12′ tall and doing the job they were meant to do.

We can no longer see our neighbor’s son’s fishing boat from our back dining room window.

But the flowers on the common lilac just aren’t terribly exciting.

So over the past two years I have gone back to putting in the fancy hybrids (because I never learn).  This time around I gave them a little winter protection from the rabbits though, and that seemed to help quite a bit.

And Mr. Q has been really careful not to spray them with weed killer, instead we are hand pulling the creeping charlie that keeps threatening to take over from the neighbor’s yard (I don’t blame her for not tackling them on her side, she is elderly and has a bad hip, she used to have beautiful gardens and lawn but she has had to let them go).

So far so good with the two newest lilacs, although they need to put on quite a bit more height before the hedge looks more uniform.

However, I’m once again having mixed results with the the hybrids at the other end of the hedge.  They started out looking great this year, but currently a couple of them look a bit sickly.

I’m going to try a couple of things, and then wait and see how they look next year.  However, in the end I may have to pull out a couple more and replace them with those boring common lilacs.

In the meantime, I’ve begun another experiment with this hedge.  I planted three clematis at the base of the lilacs.  They should wind their way up the branches and eventually provide some additional interest after the lilacs themselves bloom early in the season.

Once again, we’ll have to wait and see if that works out.

My goal with this hedge was to provide a natural barrier, but not add a lot of extra maintenance.  So I wasn’t going for a neatly trimmed hedge.  The proper way to prune a lilac is to remove approximately 1/3 of the stems all the way to the ground.  In other words, you’re not supposed to just shear the top off to create a uniform height throughout like you would with a more formal hedge.  If you want that sort of look, I wouldn’t choose lilacs.

My next experiment in the garden was planting a Golden Shadows Pagoda Dogwood in the fern bed in 2022.

The Pagoda Dogwood is an understory tree that will grow in partial shade.  Mine, however, is planted in nearly full shade.  For that reason I really wasn’t sure if it would thrive in this spot.

But it is looking really good this year, and I can finally see it peeking out above the ferns.

I suspect it will be another several years at least before it starts to look like I want it to, so I’ll just have to continue to be patient on that one.

Next up is another experiment, this time with planting a shrub in the shade garden.  I planted a Morden Golden Glow Elderberry in 2021.

This is another one that will grow in partial shade, but I planted it in what would probably be considered full shade.  It does get some late evening sun though.

It is growing somewhat slowly, I’m guessing that’s due to the shade.  The full height range for this plant is 4′ to 5′, but I’d rather it stay on the smaller end.

So far, so good.

Last up I thought I’d share a plant that hasn’t required much patience.  You may remember that last summer I went on the St. Anthony Park garden tour and discovered a trendy plant that everyone seemed to be growing.

This plant has a lot of names.  You can call it Aralia cordata, or ‘Sun King’ Golden Japanese Spikenard.  I just call mine Spike.

Spike is loving life in this nearly full shade spot.  In fact, he’s crowding out a couple of neighboring plants that I’m going to have to now move elsewhere.  But that’s OK, I think this plant is gorgeous and worth the space.

Now, how about you?  Do you have any long-term planting projects like my lilac hedge?  Or maybe a favorite trendy new plant that looks great in year one?  Leave a comment and let me know.

this year’s pots, 2024 edition.

Good morning from the garden!

This morning I thought I would share a mid-summer update on my container plantings.

I can’t remember if I mentioned this in an earlier post or not, but this year I chose to focus on plants with interesting foliage, like these absolutely gorgeous rex begonias, rather than plants grown for showy flowers.

The main reason for this is that I just don’t have enough full-sun locations in my garden to get good results with most flowering annuals like petunias, geraniums, lantana, etc.

That’s why I planted up my rusty urns with some dwarf alberta spruce spirals underplanted with some simple variegated ivy.

I’m quite happy with the results so far.  The spirals are starting to get a little shaggy, so I’m going to have to bite the bullet and prune them soon (I’m a little nervous about getting the shape right).  The ivy has filled in beautifully as well.

Other than that eventual pruning, these have required little to no maintenance all summer.  We’ve gotten so much rain that I have barely even needed to water them.

I also chose to rely on colorful foliage in both of my galvanized boiler window boxes (there is one on the carriage house and one on the potting shed).

The one on the carriage house is mainly taken up by two very vigorous annuals, Lemon Coral sedum and Blackie potato vine.  I did originally have a Lime Marmalade heuchera behind that potato vine, but it was totally being smothered.  So I pulled it out and planted it in the ground.

The other boiler window box contains a Charmed Wine oxalis, a ColorBlaze Mini Me Chartreuse coleus, another Lemon Coral sedum and a burgundy colored rex begonia that I don’t know the name of …

and that colorful plant shooting out of the left side is Autumnale fuschia.

Technically this fuschia is supposed to produce blooms, but it is really grown for its foliage rather than its flowers.  I’m fairly sure that mine has not bloomed even once.  Possibly because I’m not really fertilizing these containers like I would for blooming plants.

My bed frame planter is situated in nearly full shade.  It gets a very brief hit of sun in the early morning hours and that’s about it.  I kept it simple this year with a couple of huge ferns that I purchased at Home Depot, a bunch of caladium, and another Blackie potato vine.

If you look at the potato vine, you can see that I have a lot of insect damage.  I’ve had a massive infestation of earwigs this year, I suspect because it has been so wet.  They’ve done a ton of damage, especially to my hostas, coleus, brunnera and potato vines.

Fortunately they don’t seem to enjoy caladium.

Speaking of which, it has only been recently that the caladium has really taken off.  Caladium like hot, humid weather and we’ve just not had enough heat for it to thrive up until now.

I purchased this caladium at Home Depot in mid-June.  As you’ll read in a moment, I have other caladium that I purchased earlier in the spring, and spent a bit more money on, that is not doing nearly as well as this one.

I didn’t strictly stick to non-flowering plants this year.  I have a trio of rusty urns that I filled with Rockapulco Appleblossom impatiens …

and a pretty pale pink and white upright fuschia (sorry, I didn’t make a note of the name of that one).

But they also include a fair amount of non-flowering stuff like the Creeping Jenny, a Plum Pudding heuchera and another caladium.

As you can see, the caladium is looking less than stellar in these pots.  That’s the caladium that I planted much earlier in the season.  I think our cool spring weather really knocks it back a bit.  Caladium is happier spending a little more time in a greenhouse before being planted out in Minnesota.

I’ve definitely saved the best for last today.  I am really happy with the results in my front window box this year.  You may remember that I considered last year’s front window box a bit of a fail.   So this year I went in a different direction.

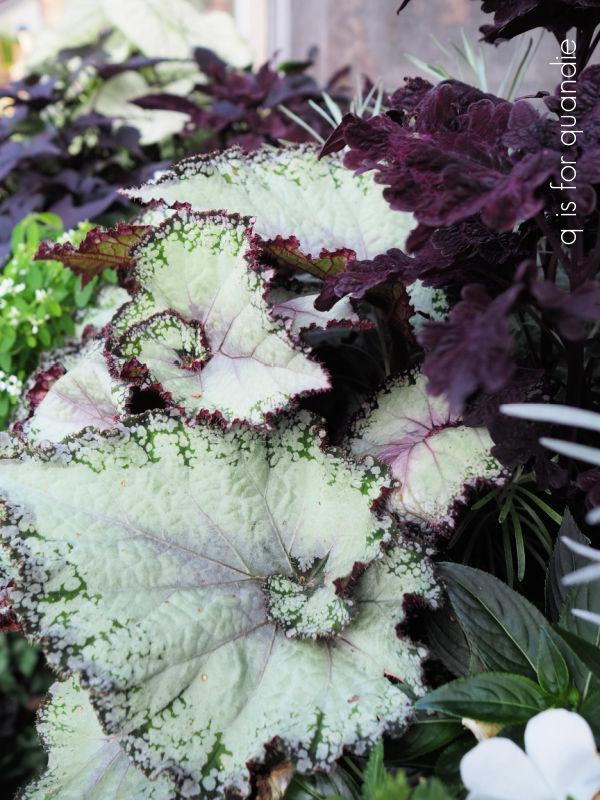
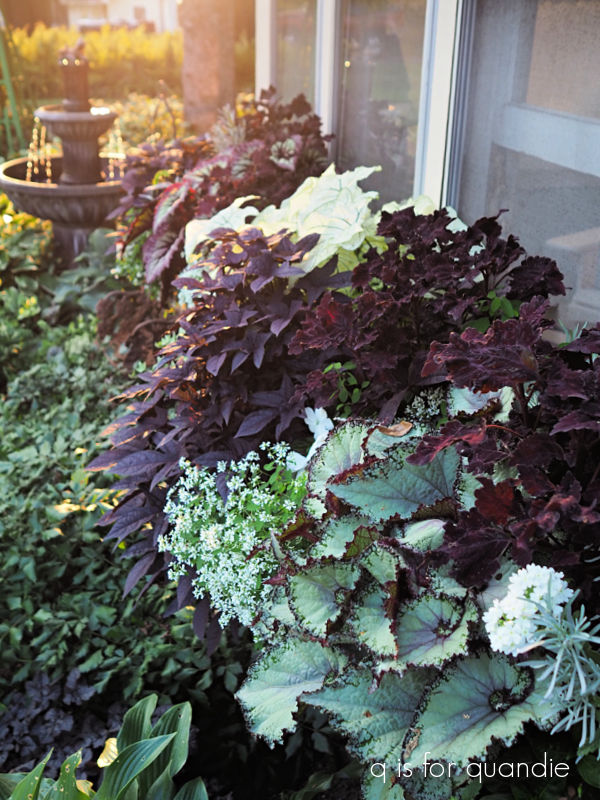
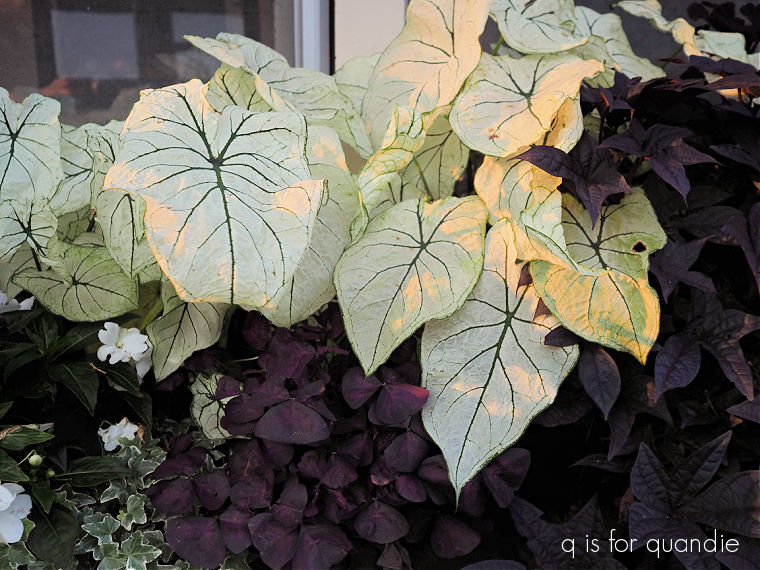
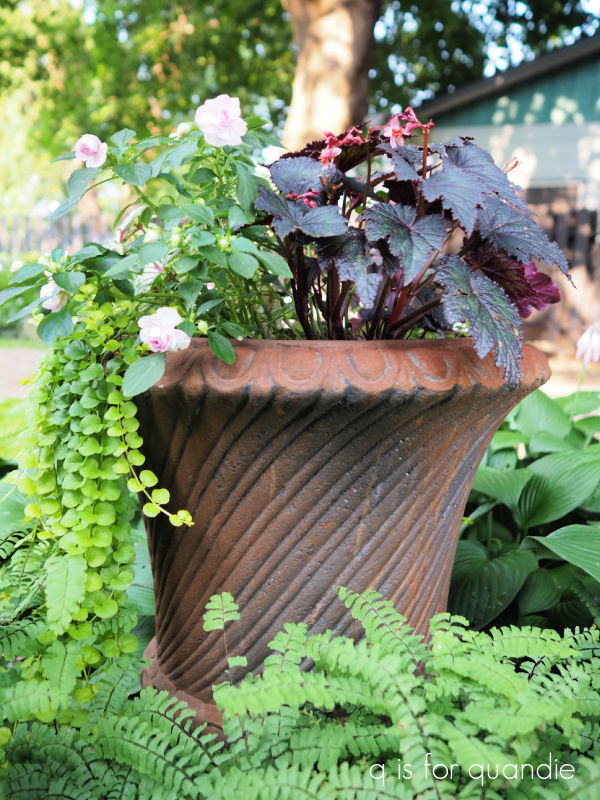
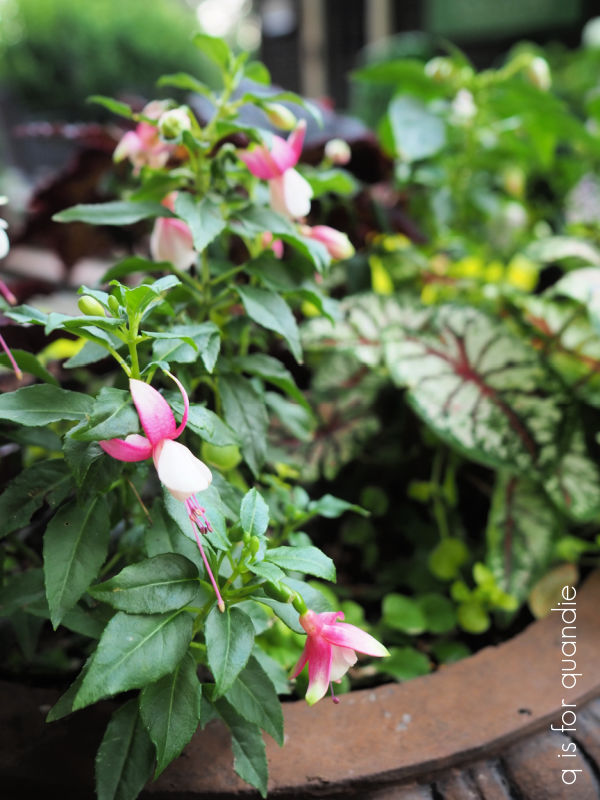
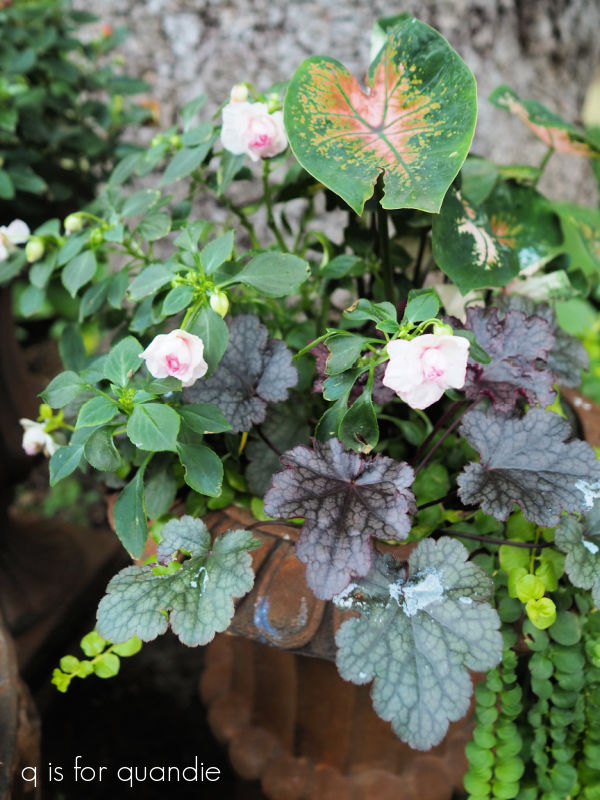
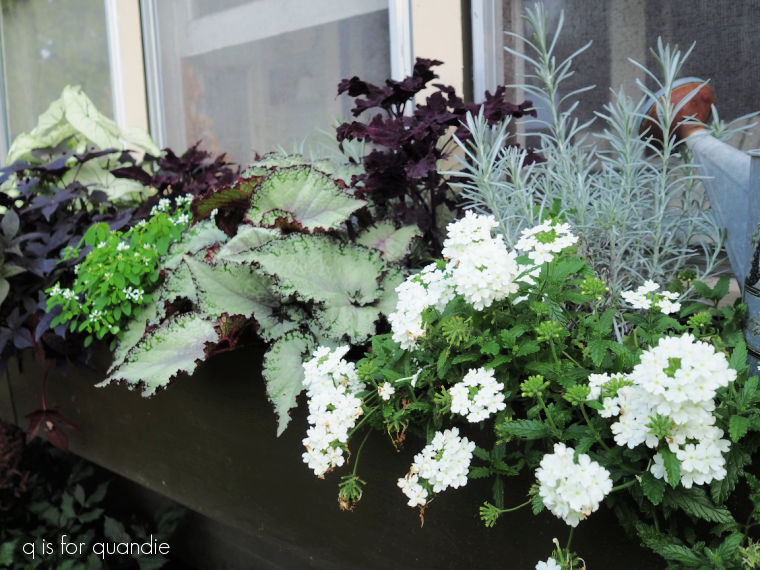
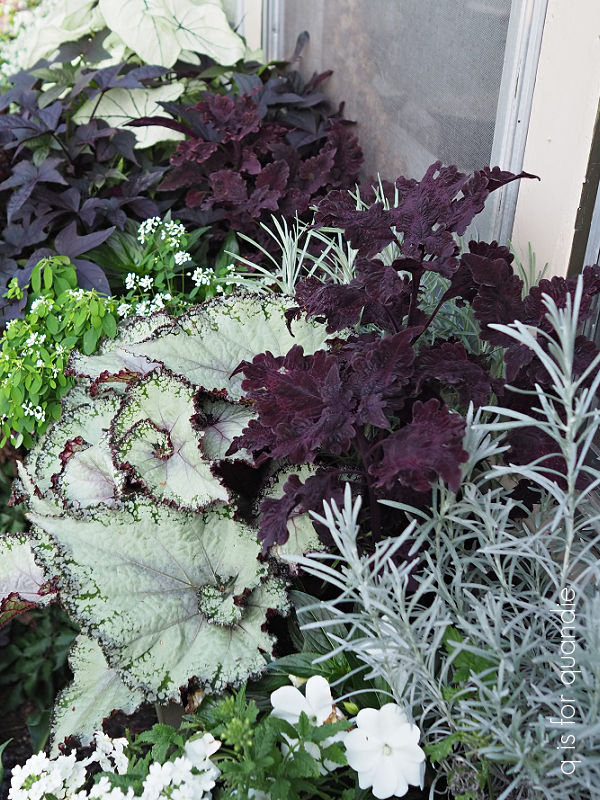
When I planted this one up I called it a ‘black and white’ combination.

For the ‘white’ elements, I used white New Guinea impatiens and Proven Winner’s Superbena Whiteout.

Considering that this window box faces northwest and thus gets mostly shade with a couple of hours of evening sun, that verbena is performing quite nicely I think.

I also included the Proven Winner’s Diamond Snow euphorbia.

The Diamond Snow is supposed to be more compact than the Diamond Frost variety, and I can verify that is true (as you can see for yourself above left).

You can also see my non-flowering white element (above right), a white caladium.  The white New Guinea impatiens (above center) are not performing as well as I would like them to, but I just gave them a shot of fertilizer so hopefully they will put on some more blooms soon.

For the ‘black’ elements in my window box I used plants with a deep, dark purple color like the Blackie potato vine, and the Charmed Wine oxalis.

I also included a ‘black’ coleus, but I’m not precisely sure what variety it is.  Possibly Black Coral.

But the real stars of the show in the front window box this year are those gorgeous rex begonias.

I really wasn’t sure how well these would perform for me.  To be honest, I’ve never done well with begonias in the past.  I tend to overwater them causing the crown of the plant to rot.  In fact, I also planted some tuberous begonias this year and they did in fact rot.

But the begonias in this front window box are stunning.

Despite our super rainy weather.  I don’t think I’ve watered this box more than once or twice so far.

My plan is to try to overwinter these begonias this year, and I may try some propagation experiments with them as well.  I’d love to have even more of them next year!

Overall I’m very happy with my decision to focus more on interesting foliage rather than flowers in my containers this year.  But how about you?  Do you prefer to have an abundance of blooming annuals instead?  Leave a comment and let me know.