
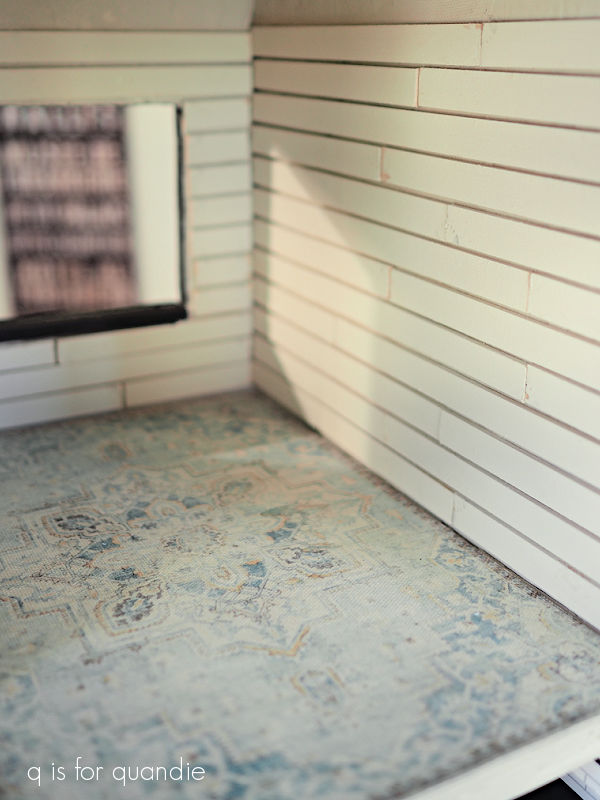
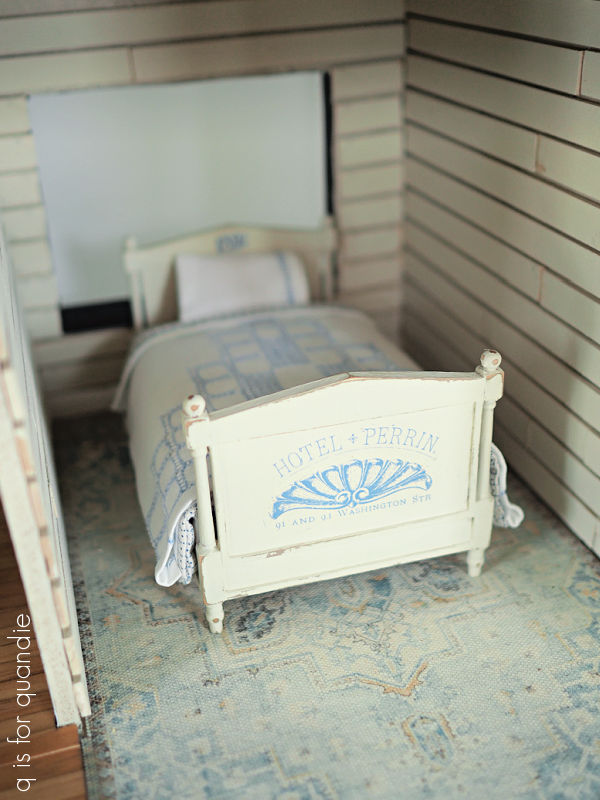
The shiplap wall that I created in last year’s dollhouse project turned out so nicely …

So I decided to try it again in one of the bedrooms of the free dollhouse.
I have to admit that I’m not quite as happy with the outcome this time around. I think that’s because I did all three walls. I should have just stuck with putting shiplap on one feature wall. I think the shiplap is overwhelming the room a bit. But then, I would have needed to cover up the OSB texture on the other two walls somehow.
I also left just a tad too much space between my boards this time too.
Things to remember for next time, right?
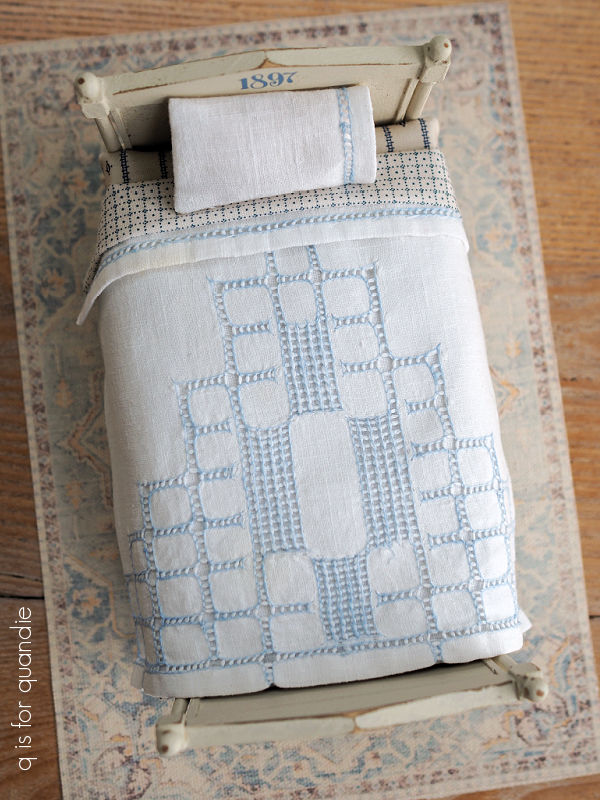
As for the floor, I printed a miniature rug on printable canvas and then glued it down (you can read more about ways to create your own miniature rug here).
Now, remember my grand plan to not spend money on furnishings for the free dollhouse?
Yeah, that didn’t last.
What can I say? Instead of painting full sized furniture, I now love painting miniature furniture. So, I ordered the Diana Vintage Style Bed from The Modern Dollhouse.
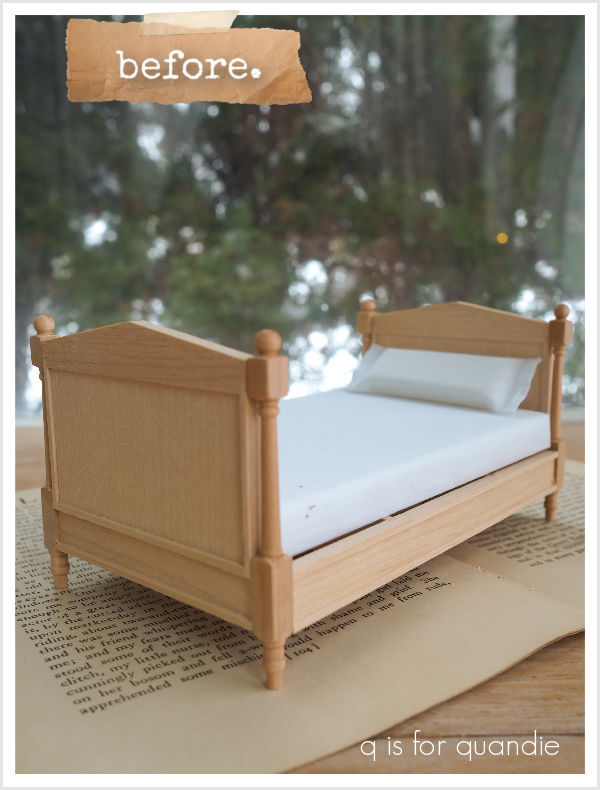
That may look familiar because I used the same bed in last year’s dollhouse project.
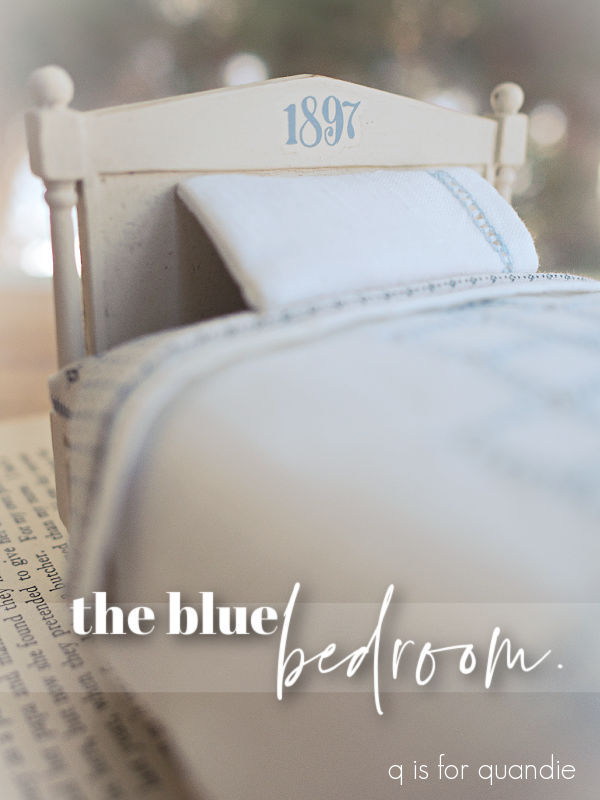
I started out painting the bed in a base coat of Dixie Belle’s Coffee Bean. Once dry, I painted over that with two coats of DB’s Drop Cloth. I then sanded the edges to distress back to the darker color underneath.
Next up I pulled out the Vintage Labels I Middy transfer from redesign with prima. They are the perfect shade of blue to work with that printed rug.
I trimmed out a section of one to fit on the footboard …
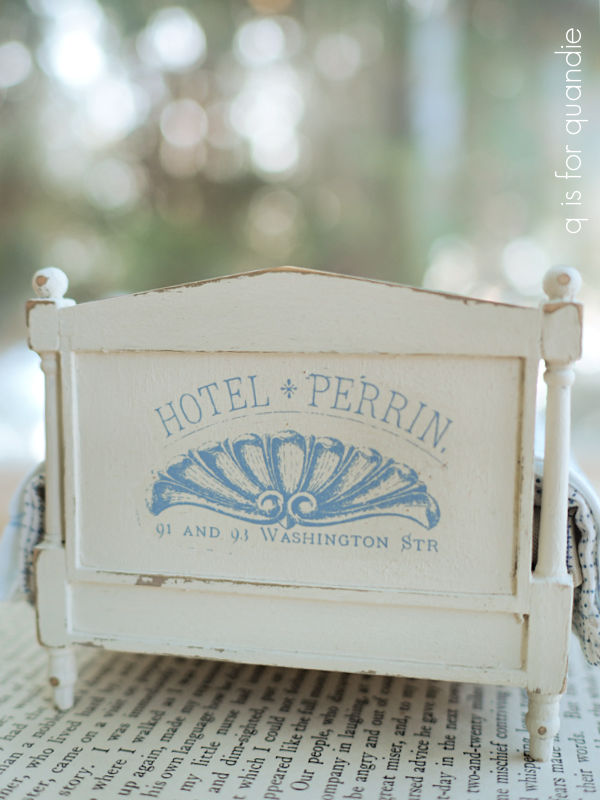
as well as the “1897”, which worked perfectly on the headboard.
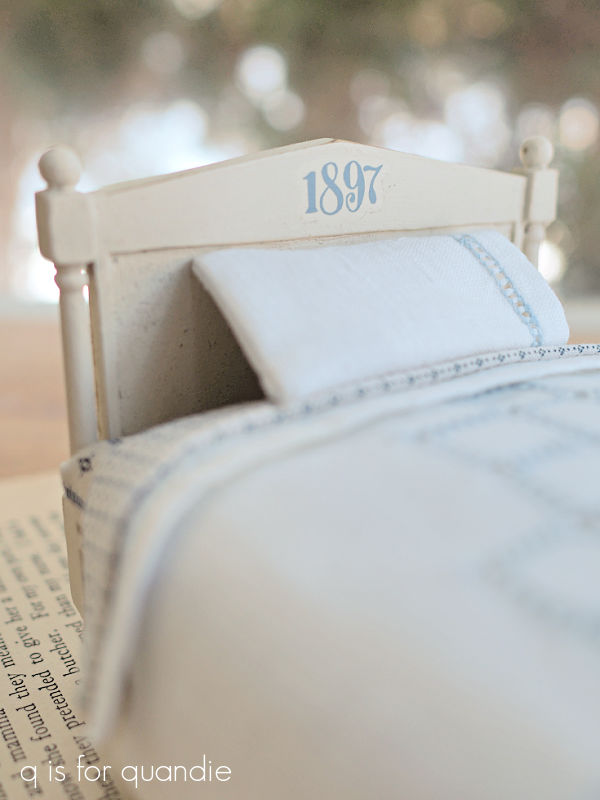
Next it was time to add some linens.
While working on my dollhouse project last year I discovered that vintage tea towels, napkins or hankies make fantastic miniature bedding.
And I just happened to have a beautiful cutwork tea towel that would work perfectly with the shades of blue in this room.
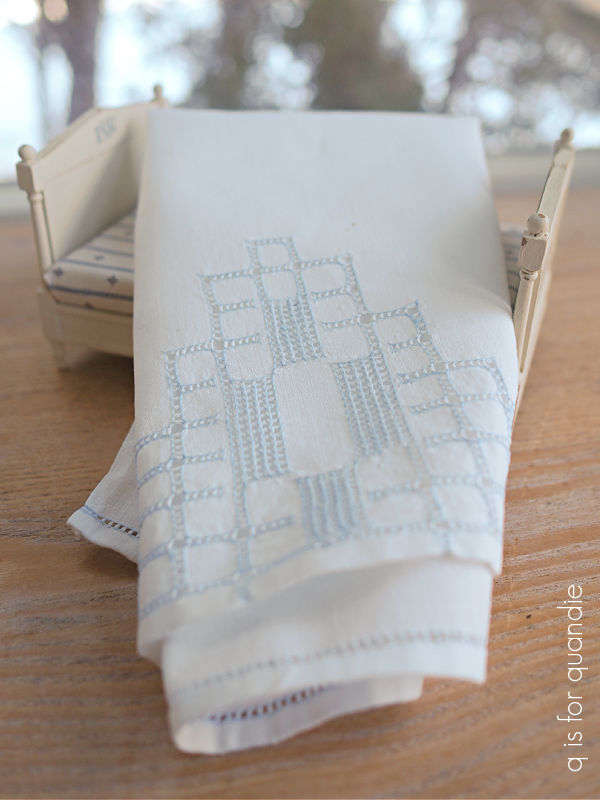
I often find these linens at garage sales for $1 or so, sometimes even less. They just aren’t popular these days, which really works in my favor here.
But I also needed some coordinating fabrics to add interest, and I really didn’t have anything on hand that was going to work. I find that you can’t just use any old patterned fabric when working in miniature. The scale of the pattern has to be small. I looked around a bit on line for fabric specifically meant for dollhouses, but what I found was a bit pricey at around $15 (once shipping was added in) for a scrap of fabric. Since I wanted at least two other patterns, that would have been another outlay of $30 for this bed and that wasn’t going to work with my already blown budget.
Then my friend opK and I did some thrifting last week and I found a pile of fabric remnants for less than $4 for the whole bunch.
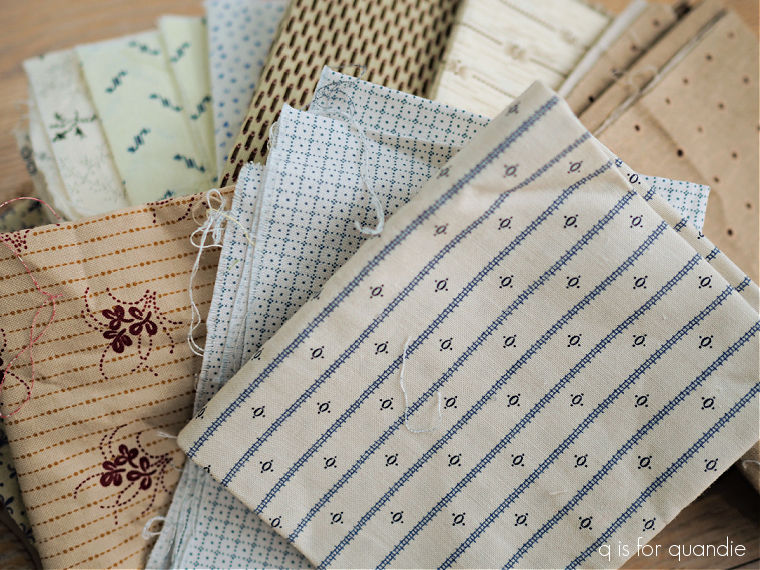
How perfect is that? There were several blue and white patterns in the mix.
I started by covering the mattress with that fabric on the top of the pile.
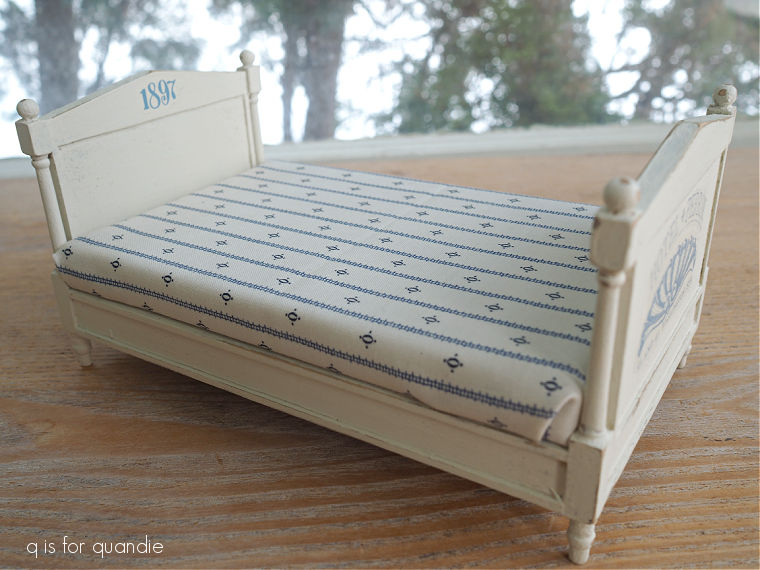
I basically just wrapped the fabric around the mattress that came with the bed and glued it on the bottom.
I started out using Aleene’s Fabric Fusion, but quickly realized I didn’t like that product for this purpose. It was too goopy to allow for a fine line of glue, and it took way too long to dry.
So I switched to Aleene’s Super Thick Tacky Glue which worked much better.
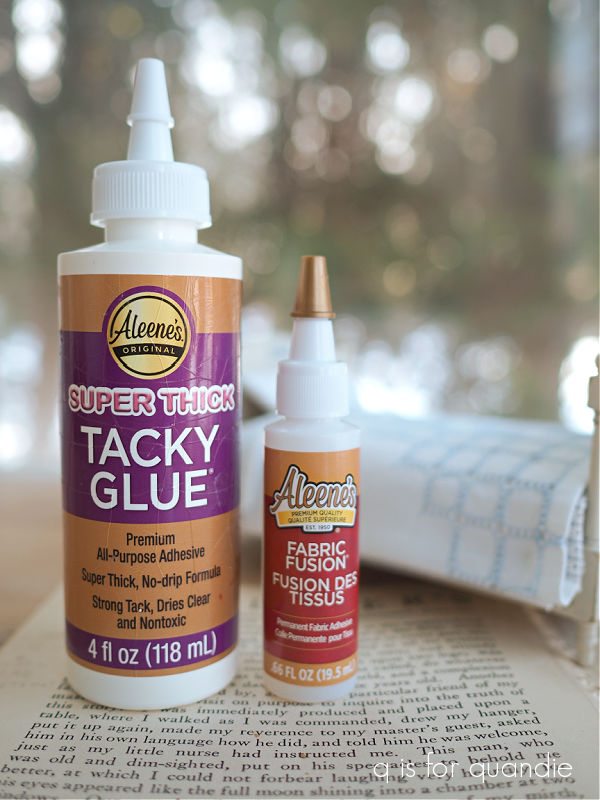
I continued with the Tacky Glue for creating all of the rest of the bedding.
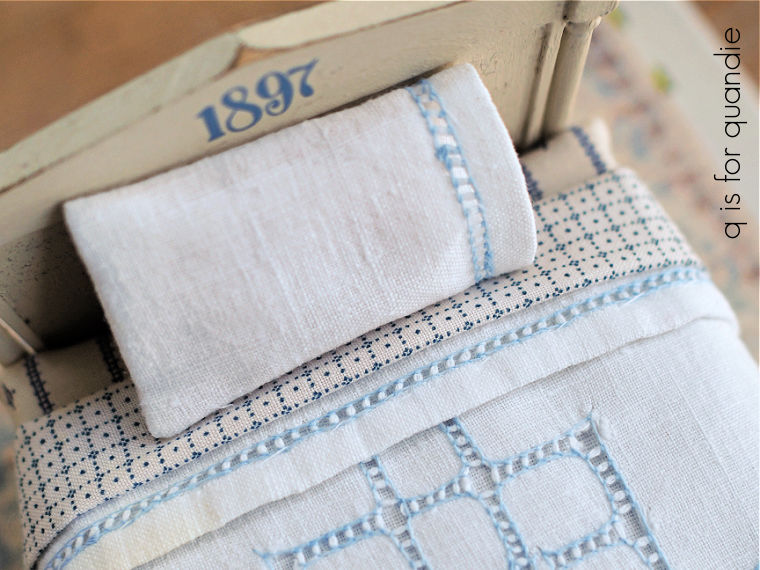
After trimming the tea towel to work as a comforter, I used a couple of the left over pieces to create a pillow case. I also made a sheet for under the comforter that would fold over just at the top using the thrift shop fabric. I lined that one with some batting to give the finished bed a little more loft, and I trimmed the edge with some edging from the tea towel.
For all of the seams, I simply used the Tacky Glue to glue them with the right sides together, then once the glue was dry I turned them right side out. I don’t know how well these glued seams would hold up to constant handling, but I use hot glue to attach all of the linens to the bed so they shouldn’t really be handled much.
 I just love being able to use these gorgeous vintage linens in this way. I’ll definitely be on the lookout for more of them when garage sale season starts up again.
As I mentioned in my post about the kitchen, my plan for this free dollhouse is to ‘lightly’ furnish the rooms without spending too much. Well … I can’t say I’ve stuck to the spending part of that equation, but I am sticking to the ‘lightly furnished’ part.
This way the future owner can dress up the room with any remaining details they choose.
I thought perhaps you guys would be interested in knowing how much I’ve spent on each room so far. I didn’t share that for the kitchen, but then almost everything I put in the kitchen was either gifted to me, or I already had it on hand. I did spend $9.99 on the kitchen flooring though.
For this room, the ship lap was $11. The bed was $23, and my scrap fabric was $4, for a total of $38. Everything else was stuff I already had on hand including the printed rug materials, the vintage tea towel and the transfers used on the bed.
Have I spent too much? Probably. Was it fun? Absolutely.
Leave a comment and let me know what you think of the blue bedroom.

SO CUTE! Love the linens – they always make everything come together!
LikeLike
Thanks so much! I love them too 🙂
LikeLike
That bed is so charming! I love the linens. The blue transfers are perfect. ❤️
LikeLike
I especially liked the 1897, which probably would have been totally lost on a larger item but was perfect for a miniature 🙂
LikeLike
Agreed. 😊
LikeLiked by 1 person
What a fabulous bed! It looks so good with your bed linen creations! I feel you on cost…I was so excited to find a dollhouse at the thrift store – then I went shopping at our local miniature museum and spent $60 on furniture. It’s so easy to do one you get a “vision” and want to create it.
LikeLiked by 1 person
Wait, what? You have a local miniature museum?! How lucky! I can’t imagine how much money I would spend in such a place 😉
LikeLike
Yes! It is two full floors of beautiful houses and furnishings- and the gift shop which is where I get into trouble…but good trouble!
LikeLike
Oh my gosh, I’m so jealous!
LikeLike
I want that bed and linen in adult size! Beautiful!
LikeLike
Wouldn’t that be awesome!
LikeLike
This is so fun to see how you put it all together! That bedding is just too good. Looking forward to seeing more of this project!
Sent from my iPhone
LikeLike
Thanks so much Sheri!
LikeLike
The bed and linens turned out perfectly!
LikeLike
Thanks Sue! I do love having a good use for those lovely vintage linens.
LikeLike
I want those bed linens for my own bedroom. The blue fabrics came together with the bed and rug just beautifully! I don’t see myself ever working on miniatures like this, but I sure am enjoying your fabulous creativity. Can’t wait to see more. 😍
LikeLike
Yay! I’m glad you’re enjoying these posts 🙂
LikeLike
Oh what fun you’re having! Wouldn’t it be fun to have one to decorate for Christmas?
LikeLike
Absolutely!
LikeLike