
As you know, last winter I refurbished the dollhouse that my dad made for me over 30 years ago.
After re-painting the exterior, I redecorated the interior, one room at a time.
The project kept me busy for pretty much the entire winter and into spring.

If you’re interested in seeing all of the details, go to my “mini’s” category to see those posts.
That project is nearly completed though, so I was feeling rather sad that I wouldn’t have another miniature project to keep me occupied during the long Minnesota winter this year.
Then one day last summer my friend opK texted me to say that there was a dollhouse free at the curb just around the corner from my house. So I hopped in the car to go check it out.
And here it is.
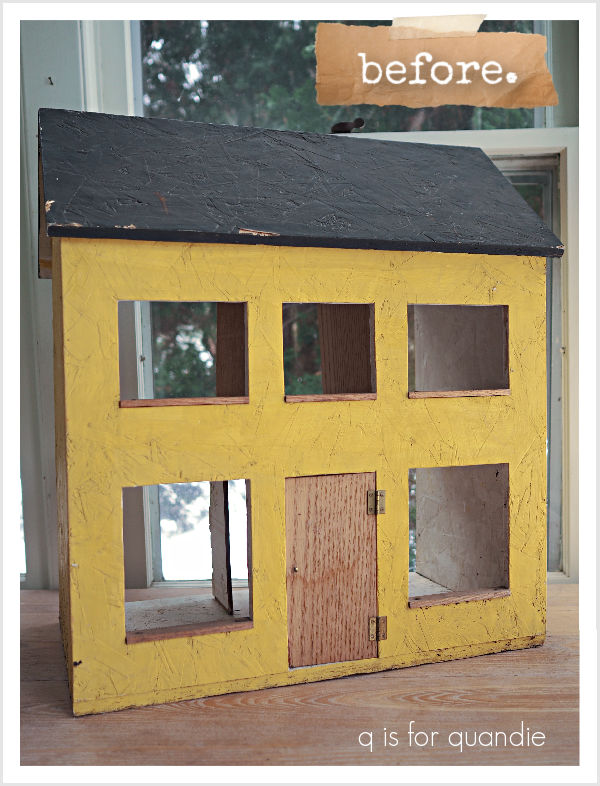
Whoa, huh?! It is definitely mustard yellow!
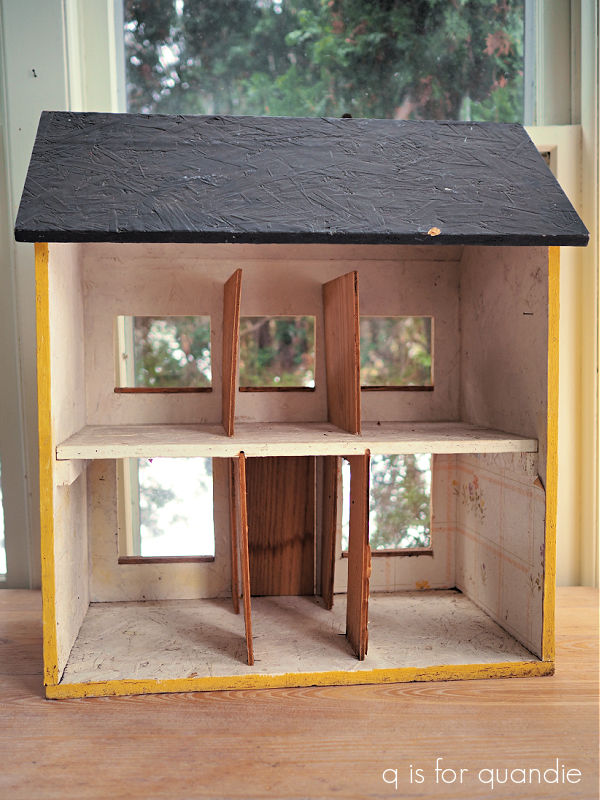
And definitely filthy dirty.
It’s not nearly as detailed (or as large) as my own dollhouse. However, I’m envisioning something a bit more rustic looking in the end and I’m getting inspiration for that from this fabulous piece that I saw on Instagram from Black Barn Vintage.
Initially I wasn’t exactly sure how I was going to get that aged look while still completely covering that mustard color, but I thought I’d see what I could do.
My first step was to thoroughly clean the dollhouse inside and out with hot soapy water.
You’ll probably have noticed that this dollhouse is made out of a weird cheap plywood …
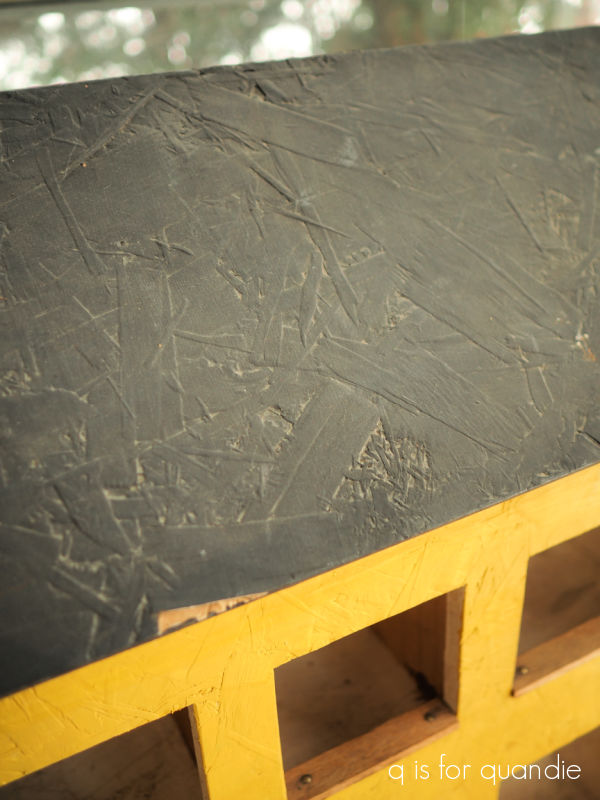
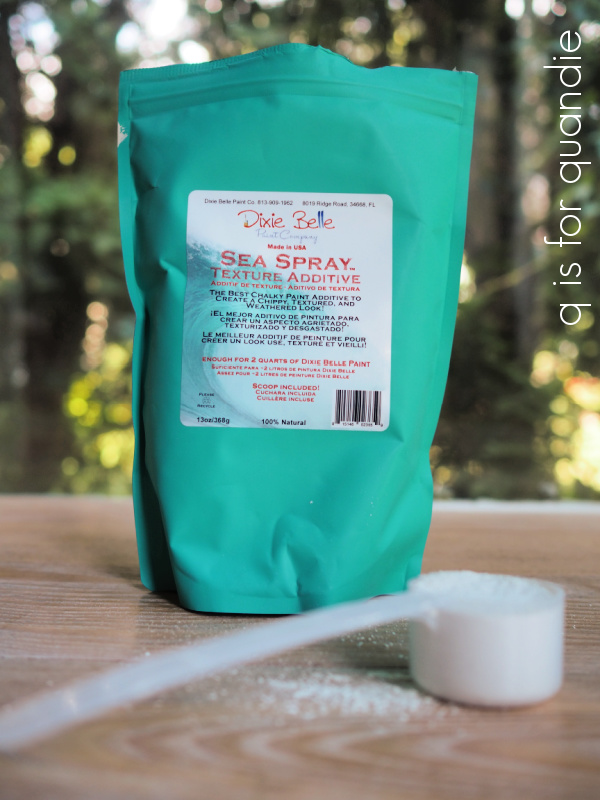
Is this stuff even called plywood? Or does it have another name? Either way it has a lot of unappealing texture to it, so I added some of Dixie Belle’s Sea Spray to their Coffee Bean paint and gave the entire exterior a coat of that. The Sea Spray will add some texture to the paint, which will help tone down the plywood texture.
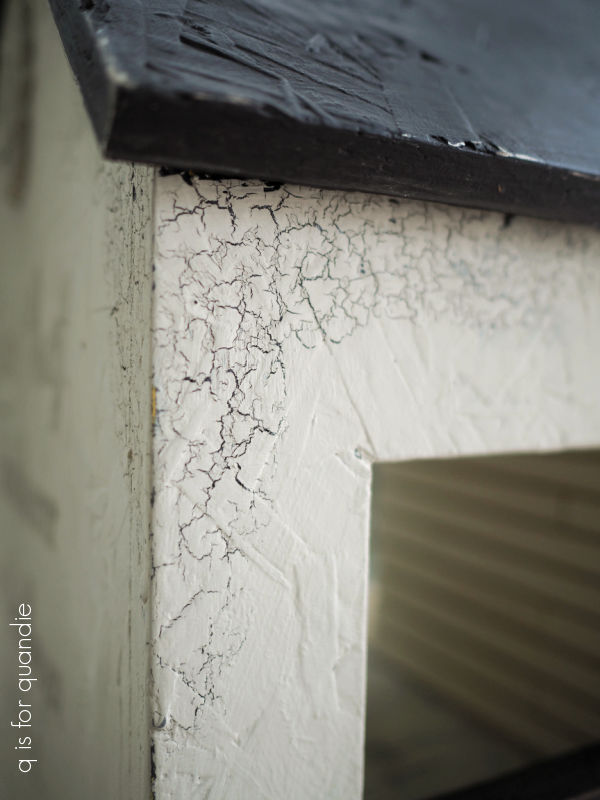
Once the Coffee Bean was dry, I brought out Dixie Belle’s Crackle. I thought it might work well to further disguise some of that original texture.

I’ve actually had this product in my supply cupboard for … dare I say … probably 4 years or more, and I’ve never used it. I’m not sure why. Maybe because the faux crackle look kind of gives me flashbacks to the “country” decor craze from the 80’s. Actually, I hear that’s making a comeback, so if you’re into it, Crackle might be the perfect product for you.

Today’s q tip: you will see the color that is underneath the crackle medium through your final paint color. I definitely didn’t want to see that original yellow, so that’s why I started with a base coat of Coffee Bean.
OK, so once my Coffee Bean color was fully dry, I applied the crackle medium using an inexpensive brush. I like the Synthetic Chip Brush from Dixie Belle that costs a mere $1.50 for tasks like this. I randomly applied the Crackle to the corners, under the eaves and around some of the windows. I didn’t want the entire thing to crackle, just some crackles here and there, so I didn’t fully coat the entire dollhouse. I then allowed the crackle medium to dry for 24 hours.
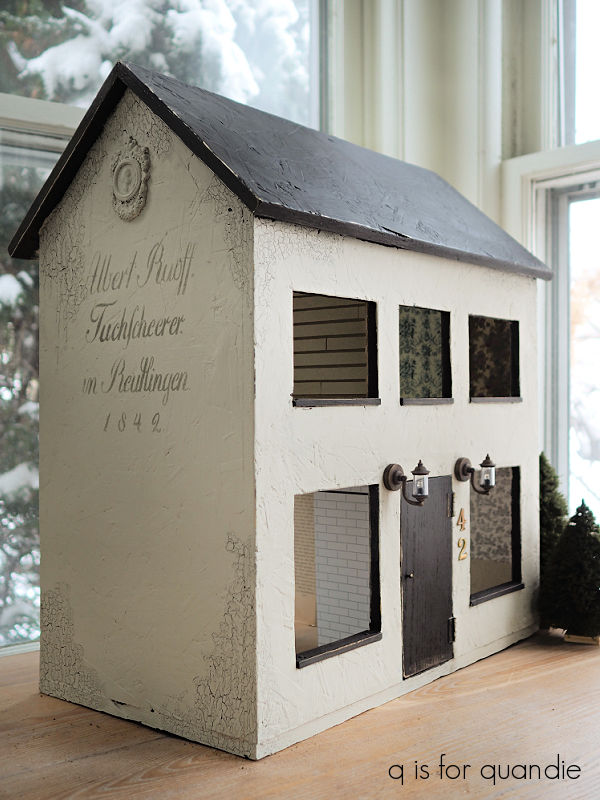
Next up I pulled out my Dixie Belle Ecru paint and brushed it on all three sides of the dollhouse (I left the roof in Coffee Bean) and waited for the magic to happen.
Ta da!
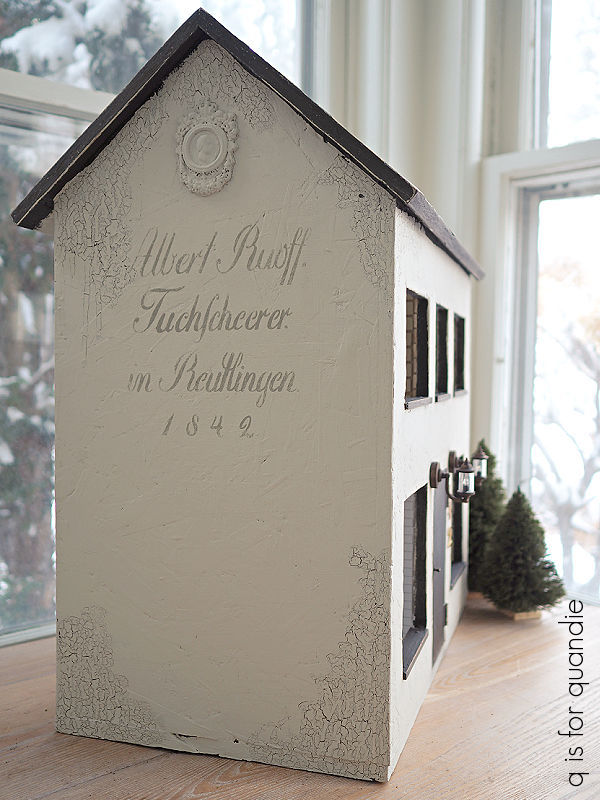
I love those results. It definitely helps the weird plywood texture look more intentional, sort of like stucco. I think it gives off a European vibe. So I decided to lean into that a bit by adding a German stencil to either side of the house.
They actually do have buildings with writing on them in Germany, sort of like this …
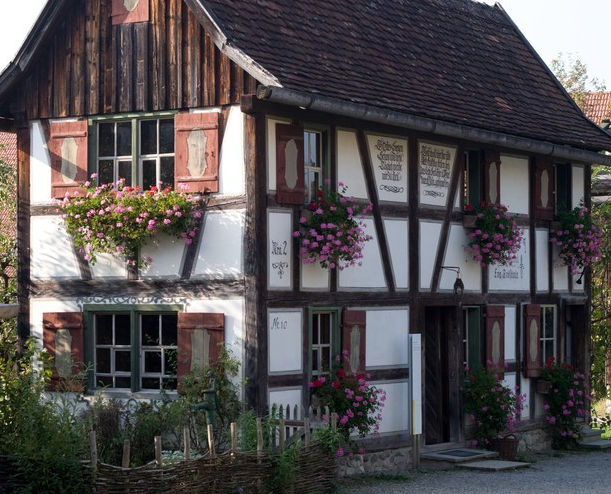
I kept mine a little more simple.
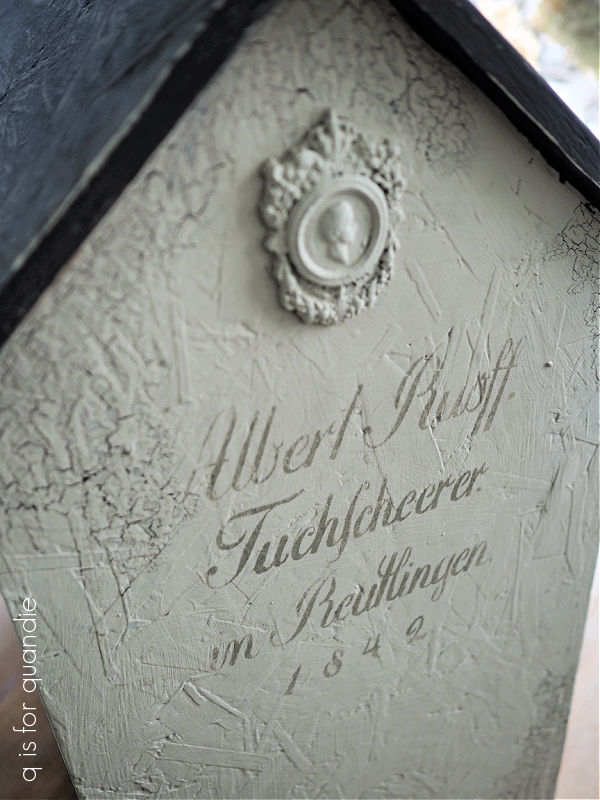
I used a stencil that was given to me by Lynne from Ellen J Goods. It’s from her set of four 8″ German Grain Sack Stencils. I chose Dixie Belle’s Dried Sage for the stenciling rather than a black or the Coffee Bean (which is a dark brown/black) because I wanted it to look as though it has faded with time.
Next up I used the Ancient Findings mold from re.design with prima and some I.O.D. Air Dry Clay to create a pair of ‘plaster’ medallions for under the peak of the roof on either side.
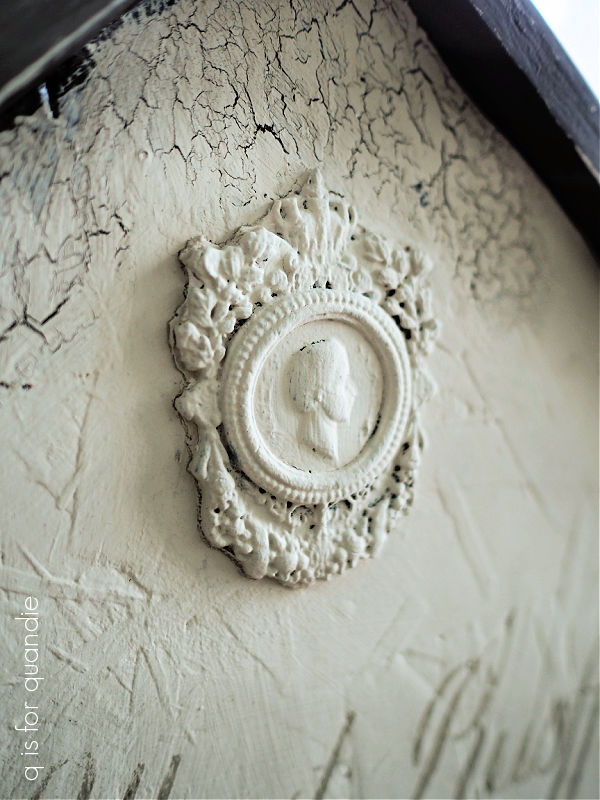
I painted the medallion in Coffee Bean, followed by Ecru as well. I didn’t want it to jump out at you, but rather to be a more subtle detail.
I think the Crackle, stencil and medallion all give your eye something else to focus on rather than that plywood texture.
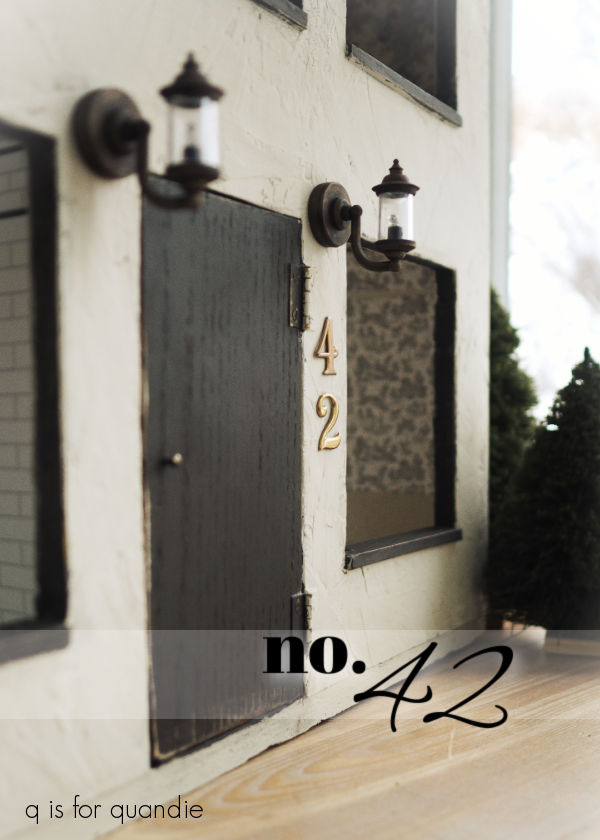
The front door and the window sills are also painted in Coffee Bean.
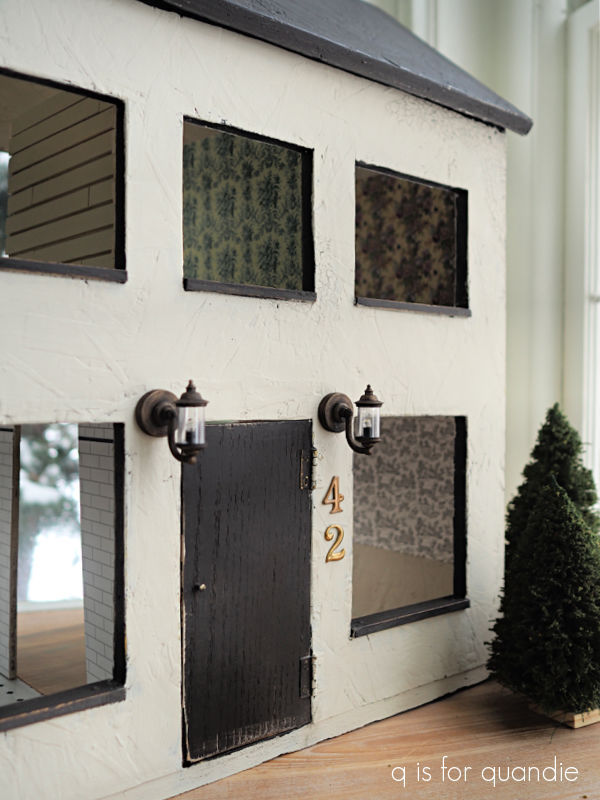
I considered replacing the door with something with a little more detail, or adding window panes somehow, but all of the openings on this dollhouse are a bit over-sized. So, I decided to keep it simple and just paint them.
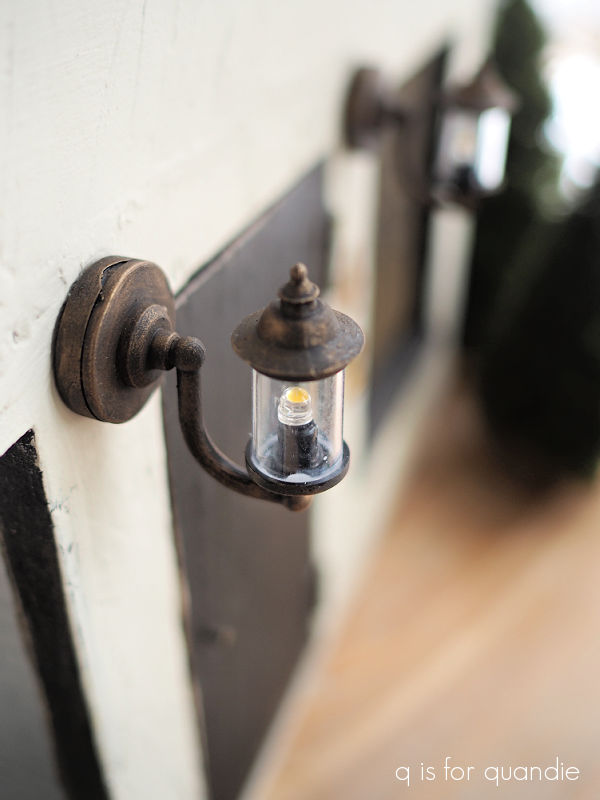
The little brass “42” came from my scrapbook supply stash. I mail ordered the lights from Hobby Lobby for my dollhouse last year, but they ended up being too large. I think they work well here though. They do actually light up if you put a battery in them, but I haven’t quite gotten around to that just yet.
I did doctor them up a bit. They originally had a shiny black plastic finish that looked pretty cheap.
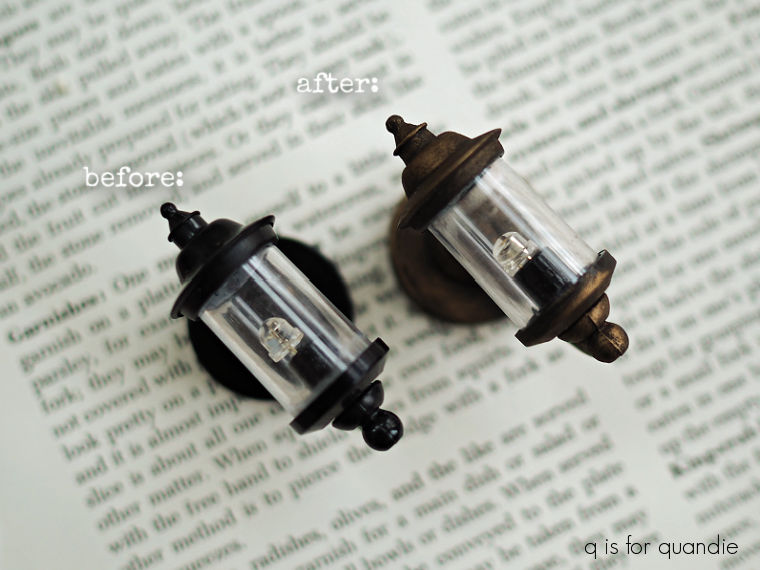
I painted the black plastic with more of the Coffee Bean, and once dry I added some of the Bronze Age metallique wax from re.design with prima.
So far I am loving how this project is turning out.
I’ve already begun work on the interior, and my plan to not spend more than $100 has completely flown out the window. But I’m having so much fun!
I hope you’ll stay tuned as I continue to work on this free-at-the-curb dollhouse!

Wow!! I am loving this doll house ♡ You are amazing ♡ I can hardly wait to see more!!
LikeLike
Thanks Diane! Stay tuned 🙂
LikeLike
OMG! That’s amazing! LOVE it! Your attention to detail always sets me back! Great job!
LikeLike
Thanks so much!
LikeLike
Love when you do dollhouse things. Looking forward to seeing your progress on this one. I copied so much of what you did with your first dollhouse. Thank you for the inspiration!
LikeLike
I’m happy to hear that, because I’m going to have plenty of dollhouse content for the next few months 🙂
LikeLike
I just love this more rustic look. It’s so different from your other dollhouse. The treatment you did totally masked the plywood! Can’t wait to see where this goes!
Sent from my iPhone
LikeLike
Yep, it’s a totally different look for sure!
LikeLike
Only you could turn a cruddy oriented strand board (OSB….thats what that kind of ‘plywood’ is called) dollhouse into this amazing creation!! I am looking at those scraps of OSB in my husband’s shop differently, now….like who knew they actually have potential, haha. It’s amazing…I love the crackled, textured exterior, the medallion, and the tiny lanterns look so much better! WOW! Just wow!
LikeLike
A ha! OSB. I knew that stuff must have a name. Thanks so much Paula!
LikeLike
That’s pretty amazing! I love your vision and that it actually works out! LOL – I have the vision, it just usually ends up looking like sh$t!
LikeLike
Oh, I doubt that! We’re always most critical of our own work 🙂
LikeLike
Simply amazing!!!
LikeLike
Thank you!
LikeLike
How do you think these up? I can’t see anything but the old look when I find things like this and you give it the “on vacation” vibe rather than “garbage dump” appearance. Sweet!
LikeLike
LOL, I do like to cultivate that ‘on vacation’ vibe 😉
LikeLike
Oh boy oh boy oh boy!!!! I thoroughly enjoyed your dollhouse Reno and am SO looking forward to seeing this one. I found a 1:24 scale house at the thrift store – more rustic so I am really excited to see what you do with this. I cannot believe the transformation already – you are so talented.
LikeLike
Yay! I’m so happy that people enjoy these posts because I definitely enjoy doing them!
LikeLike
I know it’s going to be AWESOME! Already looking good! You have such a great eye! I’ll be following along!
LikeLike
Thanks so much Susan!
LikeLike
This looks like so much fun. I love what you’ve done so far!
LikeLike
It is a lot of fun! Thanks so much 🙂
LikeLike
It looks so fab! Th
LikeLike
Thanks Susan!
LikeLike
oh how fun! I’m loving this!
LikeLike
Thanks Gloria!
LikeLike
Love, Love, Love!!!!❤️❤️❤️❤️
LikeLike
Thanks so much!
LikeLike