

The next room up for refurbishment in my dollhouse is the kitchen.
Here’s a ‘before’ shot. That is, before I gave the dollhouse to my in-laws (and then took it back again).
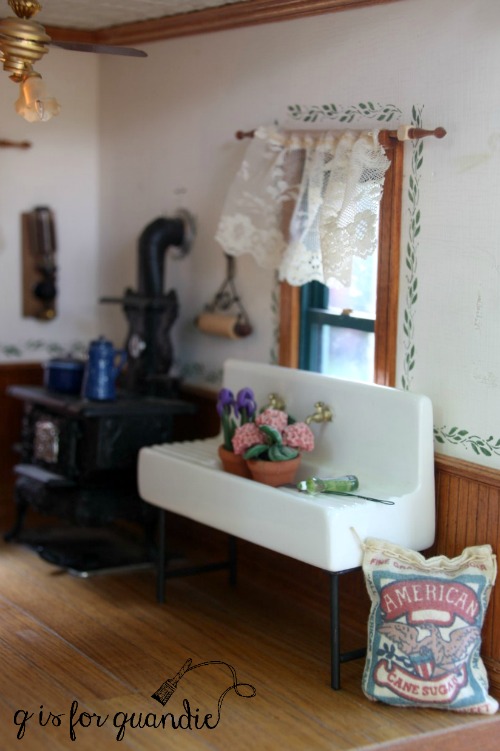
It was very country-fied, complete with a stenciled border, a cast iron stove, lacy curtains and that fab farmhouse sink.
Here’s the other side of the room.
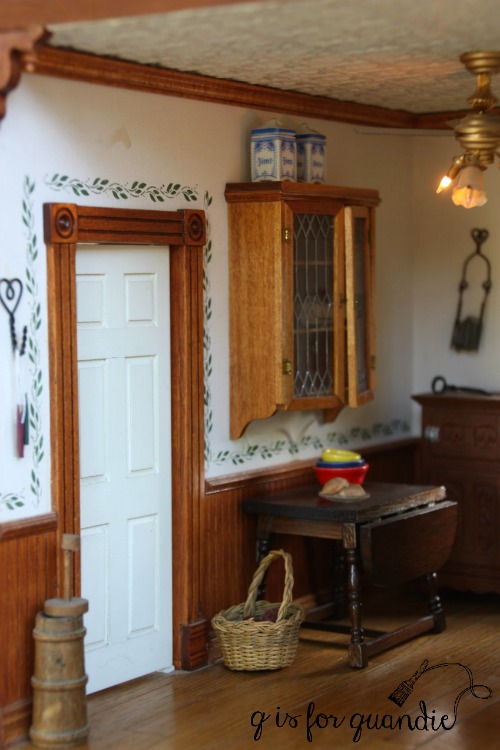
After the dollhouse came back from my in-laws, the kitchen looked like this.

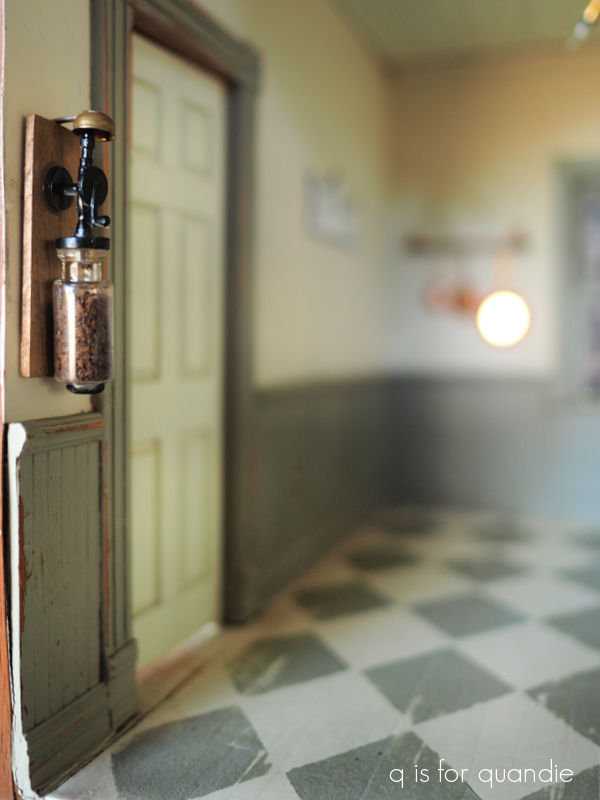
There were a few items left hanging on the wall like that coffee grinder to the right of the window, and that metal floor mat that was under the cast iron stove was still glued in place.
I began by removing those last remaining items and then painting over the stenciled walls with Dixie Belle’s Drop Cloth. Next I painted the wainscoting and other trim in DB’s Dried Sage.
That left the floor to be dealt with. Unfortunately, when I pulled up that metal floor mat the glue that held it in place had damaged the floor underneath. But that’s OK, because I kinda wanted to paint that floor with a checkered pattern anyway.
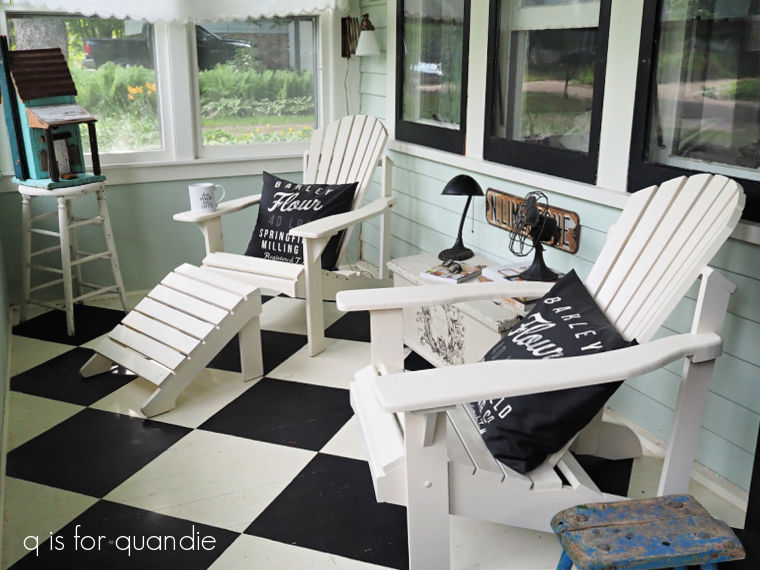
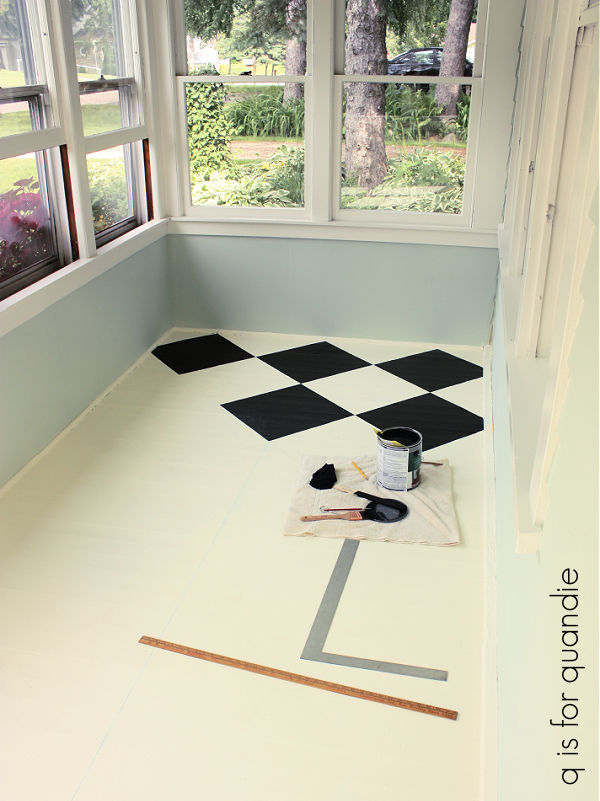
After all, I’ve painted two of our ‘real life’ floors this way. The front porch floor …
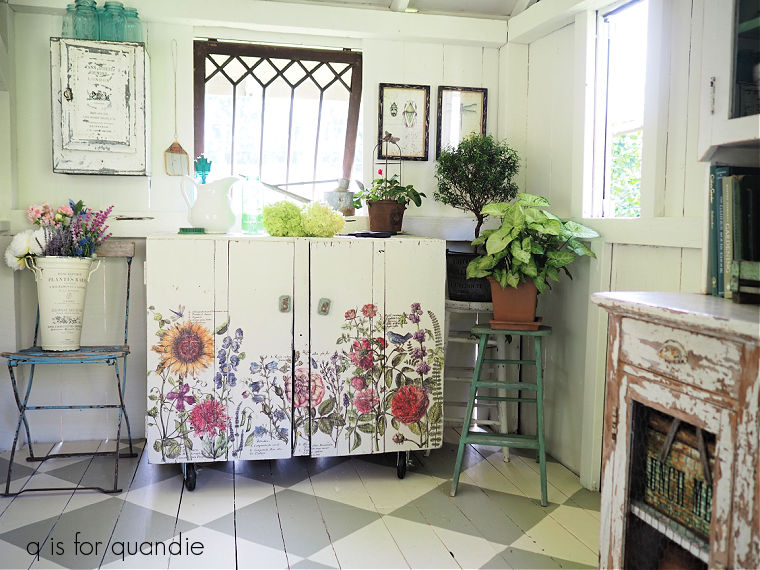
And the potting shed floor …
Our kitchen has a stained checkerboard pattern on the floor too (although I didn’t do this one myself).
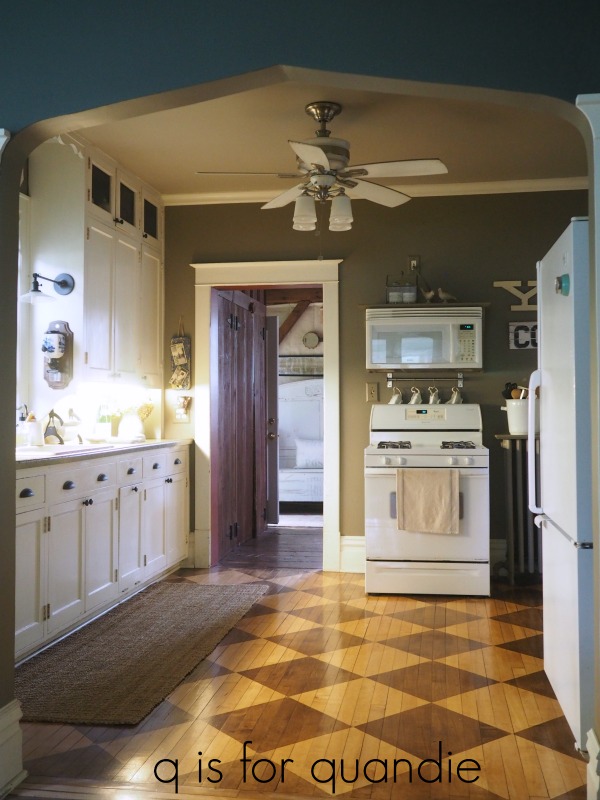
So it seemed like a ‘must do’ to have at least one checkered floor in the dollhouse.
When painting my real life checkered floors, I drew pencil lines and painted the squares free-hand.
But I knew that wasn’t going to work within the tiny confines of the dollhouse kitchen. I was about to bust out the painter’s tape and start taping off squares instead, but then I remembered the Harlequin stencil from Dixie Belle.
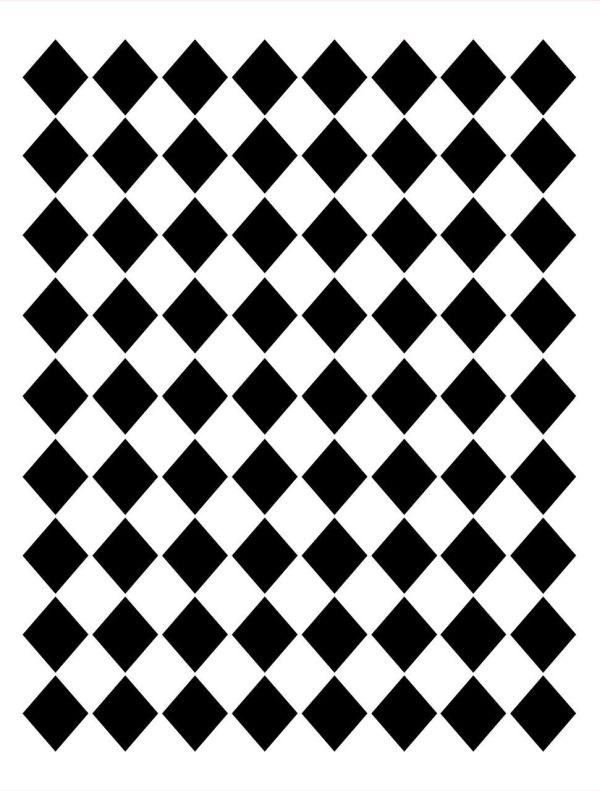
Granted, these are diamonds rather than squares. But it would be SO much easier to use a stencil instead of tape, so I went with it.
I did have to cut the stencil down to the size of my floor so that it would lie flat inside the dollhouse (the full stencil is 14″ x 18″), so that may limit any future options for using the stencil again. But it sure did make this paint job go a lot quicker than it would have if I’d had to tape off all of those squares!
I first painted the entire floor in Dixie Belle’s Drop Cloth. Once dry, I placed my stencil down and then used the Smooth Roller from Dixie Belle to apply their Dried Sage over it. The Smooth Roller is a small, 4.25″ wide, foam roller that worked perfectly for this application. I did have to touch up a couple of spots near the walls using a small brush, but even so it took me less than 5 minutes to paint the pattern on this floor.
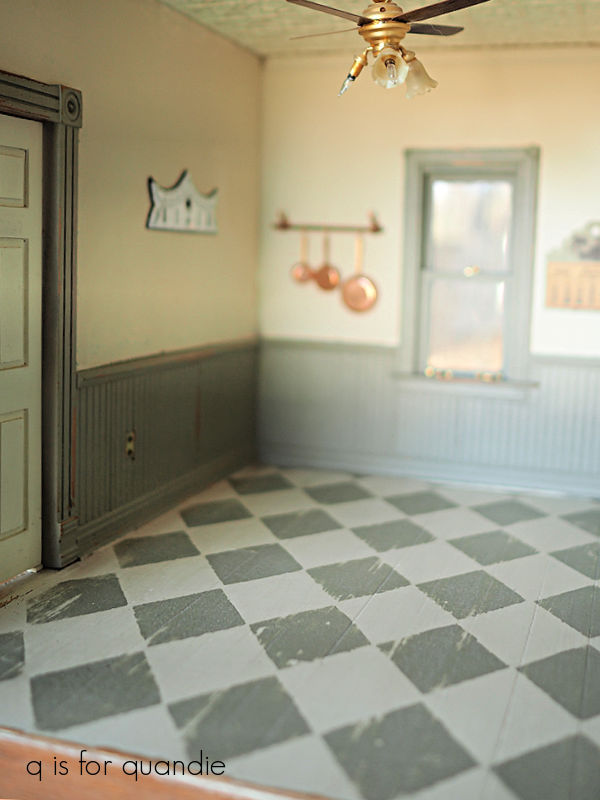
Once the Dried Sage was dry, I sanded lightly over the floor with 220 grit sandpaper to make it look a bit worn. I finished off both the floor and the wainscoting with some of Dixie Belle’s clear wax.
I decided it would be fun to add a small transfer to the wall of the kitchen and I had the perfect Classic Vintage Label from re.design with prima for just that.
![]()
I added that old watch face above it to serve as the kitchen clock.
I also re-hung the coffee grinder.
I added a ‘pot rack’ to the back wall that I created using a copper rod that I found in my dad’s toolbox and a couple of the same hooks that I used in the bathroom. Only this time I added some of Dixie Belle’s Copper Patina Paint to the hooks.
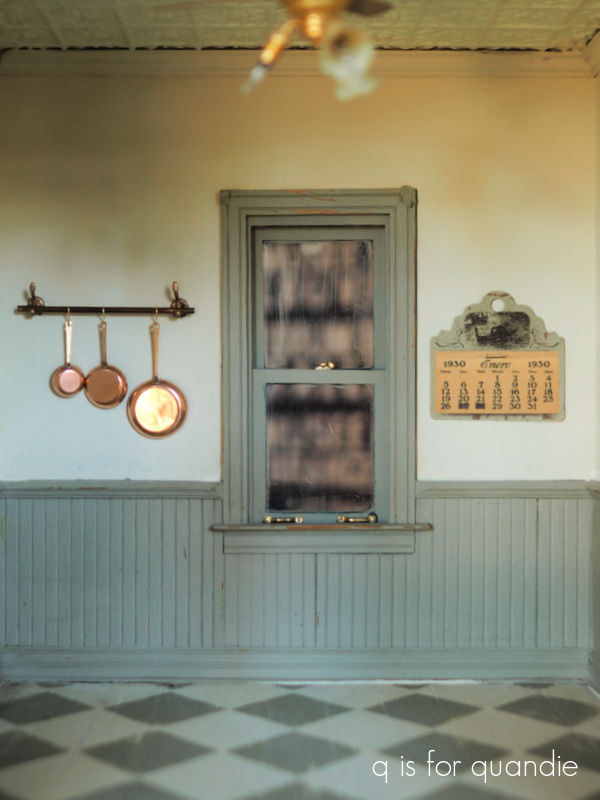
Those copper skillets are from dollhousechandeliers on Etsy and are made with the most amazing attention to detail. They are definitely one of my splurge purchases. You’ll see another copper pot from them in my final kitchen reveal.
Speaking of which, that is coming up next week so be sure to stay tuned!

I am loving this dollhouse series and your attention to detail is amazing!
LikeLike
Thanks so much!
LikeLike
Once again, I’m astounded. So many tiny things! That pot rack and the copper pans are amazing and the stenciled floor is perfect. Well worth it to cut down the stencil even if you only use it once. I love a classic checkerboard floor…black/white, colors, stains (and I can’t believe you did those two free hand!)…beautiful!
LikeLike
I figured it was well worth cutting down that stencil as well, especially since I’d already used it a couple of times on piece of full sized furniture. I definitely got my use out of it!
LikeLike
That floor is absolutely perfect! I love how the whole house is just perfect! I’m really enjoying this “makeover house edition “ 😉
smiles, Alice
LikeLike
I’m glad you’re enjoying it Alice!
LikeLike
Absolutely charming kitchen! I wish I had a tenth of your talent.
LikeLike
I have to admit I don’t really think of myself as all that talented, I think I definitely have a bit of ‘imposter syndrome’. Surely anyone could do these things, right?
LikeLike
I can tell you from personal experience that not everyone can do these things LOL.
LikeLiked by 1 person
It is so much fun to see your excitement over the dollhouse and all the great ideas you implement. What is even better is that all your ideas can be used in our regular size homes as well!
If you know someone who has a Cricut or Silhouette machine they can make simple shaped stencils for you. I don’t know if small letters would work but small shapes like the checkered floor should work. This is a TV tray table I made using a stencil I designed with my silhouette machine. This stencil was made with vinyl and was a one time use stencil. I like using those as there is no bleed through under the stencil. I would be happy to try to make a stencil for you. Just send me an email and let me know.
Thank you for all your inspiration and the time you spend to share it all with us.
[image: image.png]
LikeLike
First, unfortunately there isn’t a way to share your pics in a comment, so sorry about that. I do have a Cricut machine, hadn’t thought about making my own stencil, that’s a great idea! And I have been thinking the same thing, that many of the ideas I’m sharing in my dollhouse could be translated to full size rooms/furniture/etc. Although I might have been thinking of it the other way around, that I’ve been able to apply all of the techniques and skills I’ve learned doing full size furniture to these miniature pieces. Thanks so much for your comment!
LikeLike
I love the floor. I love the colors that you chose. It will be so warm and inviting. ❤️
LikeLike
Thanks Monica!
LikeLike