
Today’s toolbox makeover is really mostly a repeat of a couple I’ve done in the past. And in fact, it’s such a simple formula, it kinda feels like I’m cheating.
I really debated even sharing it here on the blog, but I didn’t have anything else to share this week so I decided to just go for it.
Here is the ‘before’, a basic grey toolbox.

I gave it my usual prep. Washing with Dawn dish soap and the garden hose, a light scuff sanding, and then a coat of Dixie Belle’s Bonding Boss to prevent stains from bleeding through my paint and to improve paint adhesion.
Next up I painted the interior in Dixie Belle’s Cottage Door.

I just love this color. I’m much more drawn to the warmer short of coral/pink shades rather than the cooler pinks these days.
I added a simple Classic Vintage Label transfer from re.design with prima inside the lid.
![]()
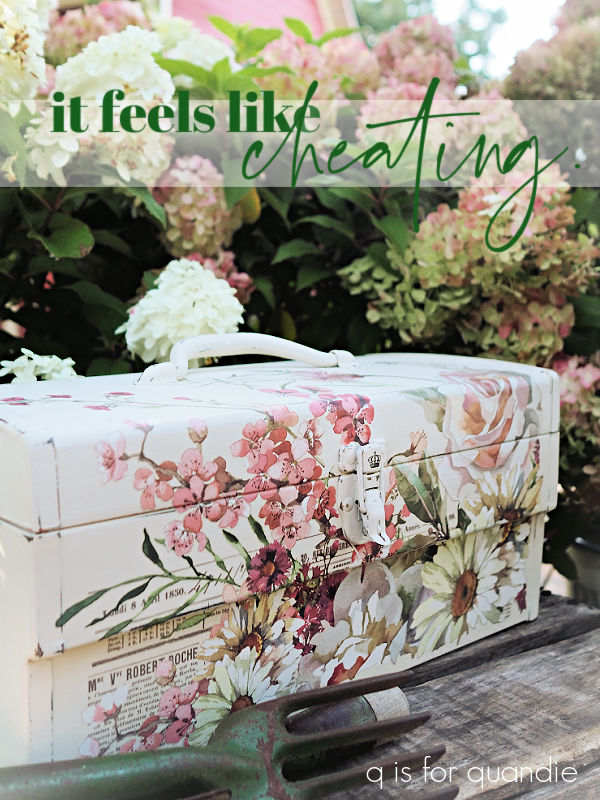
I painted the outside in DB’s Drop Cloth. Once dry, I sanded lightly to distress the edges and after wiping away any dust I applied 1/4 of I.O.D.’s Elysium transfer.

This transfer comes on 4 sheets (as you can see above) and costs around $30. So I’m spending $7.50 for the portion used on this project, which isn’t too bad.

One thing to note about this transfer is that there is some newsprint writing in the background. See it there on the left? Just be sure you are getting that right side up on your project.
To keep the application process simple for myself, I cut the section to fit below the bump out on the toolbox and applied that first. The I trimmed off the section that would fit to the right of the latch and added it next. Finally, I added the section to the left of the latch.
If you look closely, you can see where I didn’t get those two top halves to meet perfectly in the middle below the latch. I don’t think anyone is going to notice that flaw unless I point it out though.

As you can also see, I added a small crown from one of the knob transfers from re.design with prima to the latch.
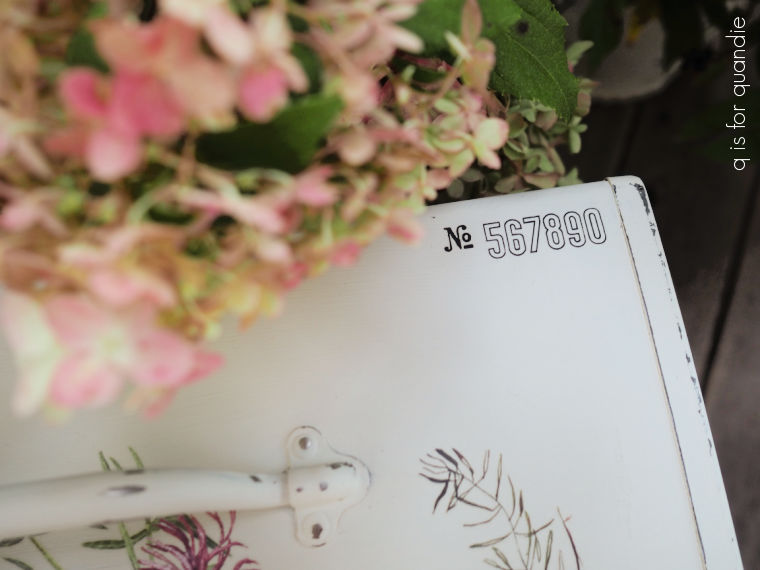
Although some of the florals from the Elysium transfer did wrap up and over the top of the toolbox, I felt like it needed just a bit more. So I added some old Tim Holtz numbers in one corner …
and a tiny bit of the I.O.D. Label Ephemera transfer to the other corner.
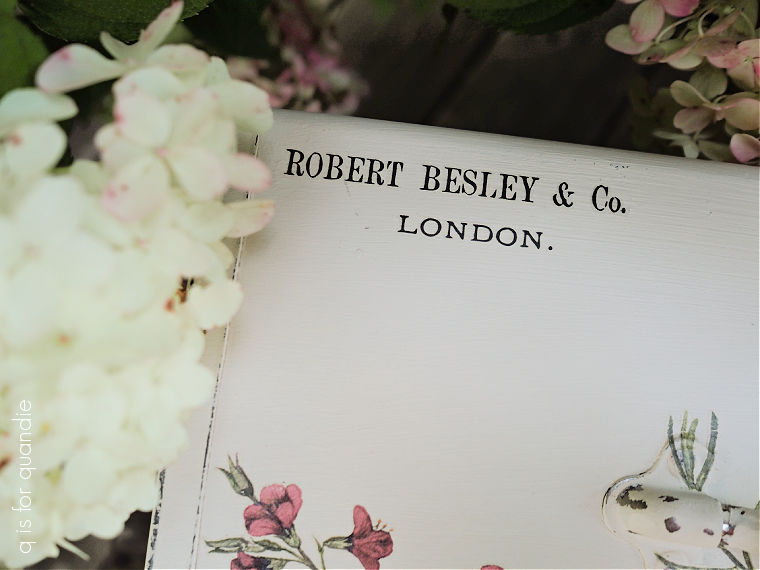
I think those two simple additions really helped balance out the top of the toolbox.

After finishing everything off with a coat of clear wax, that was it. Couldn’t have been simpler.

If any of you locals are in need of a pretty floral toolbox, this one is for sale. Check out my ‘available for local sale‘ page for more details.

I never tire of these gorgeous boxes and this one is beautiful! I love your color choices and the tiny details you always add. I have a nice wooden box and a small tool box to do this winter….and I know they will be better than I could do without your wonderful tutorials. Thank for always sharing the details that make yours beyond lovely!
LikeLike
Thanks so much Paula!
LikeLike
Beautiful as usual! Wish I was local.
LikeLike
Me too!
LikeLike
Another beauty!
LikeLiked by 1 person
Thanks Netti!
LikeLike
I’m always interested in seeing the “toolbox” makeovers! They may be the same formula to you but us normals don’t see it that way! Your placement of the transfers is fresh each time. Yes the cleaning and prepping is the same but that’s it! You are the talent!
another home run for sure!
smiles, Alice
LikeLike
Thank you so much for saying this Alice. I do worry that people may think I’m getting boring, or repetitive, but I do like to use up supplies that I already have on hand. I still have one more section of this transfer left to use on something else!
LikeLike
Lovely just lovely! Hopefully someday we can get up to see you so that I can get one of these lovely boxes❤️
LikeLike