

My friend opK and I hit the thrift shops last week and I came home with a nice little pile of things to makeover.

I’m always looking for wooden items to paint, but somehow I ended up with mostly metal items this time around starting with this trash can.

This is made out of heavy duty galvanized metal, the foot petal still works perfectly and it just needs a good cleaning. I did a quick online search and found this exact trash can for sale on Wayfair for $81.99. But I’m wondering, should I paint mine? The one on Wayfair almost looks like it has a bit of a wash over the metal …

and I also see some rusty spots. What do you think, leave a comment and let me know, add a wash or leave it alone?
Next up is this little group of items.

The little bird on a cage is already perfectly rusty and fabulous, and he’s going to fit on the urn in the front. But first I’m going to rusty up that urn with some of the Dixie Belle Patina paint. In fact, I’m going to rusty up all three of those other items.
Next up are a couple of buckets.

The tall one was a simple makeover. After cleaning it up, I gave it a couple of coats of Dixie Belle’s Drop Cloth and then added an I.O.D. transfer from the Brocante set.

It already had a nice black rolled rim, and I’ve painted a couple of similar pieces in the past that ended up looking like enamelware.

As for the smaller bucket, it had some strange textural flaws.
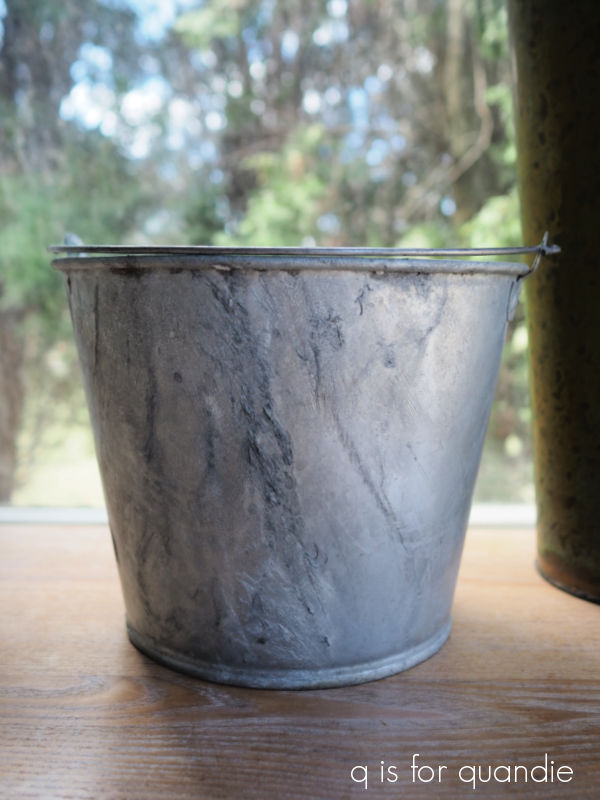
I don’t know what that is, but I couldn’t sand it down so I decided to just work with it. I mixed some of Dixie Belle’s Sea Spray texture additive with some of their Dried Sage paint and then stippled it onto the bucket with a chip brush.
Once dry I sanded it lightly to knock back some of the peaks. Then I added a coat of Drop Cloth over it, and once dry, sanded again. Finally I added another of the Brocante transfers.
Now that it has an overall texture, the drippy looking clumps don’t stand out at all.
I love the end result on both buckets.
I did manage to find a couple of non-metal items while out thrifting that day.

I’ll admit that I was a bit hesitant about the chalkboard. I think the chalkboard phase might be over. But it’s one of those more authentic vintage chalkboards with a little wooden rail to hold the chalk.

So I thought I’d take a chance on it.
After giving it a good cleaning, I refreshed the wooden frame with some brown wax and then I simply added a little different wording to it.

Now we’ll see whether or not it sells.
As for the other item, it’s a cookbook holder.
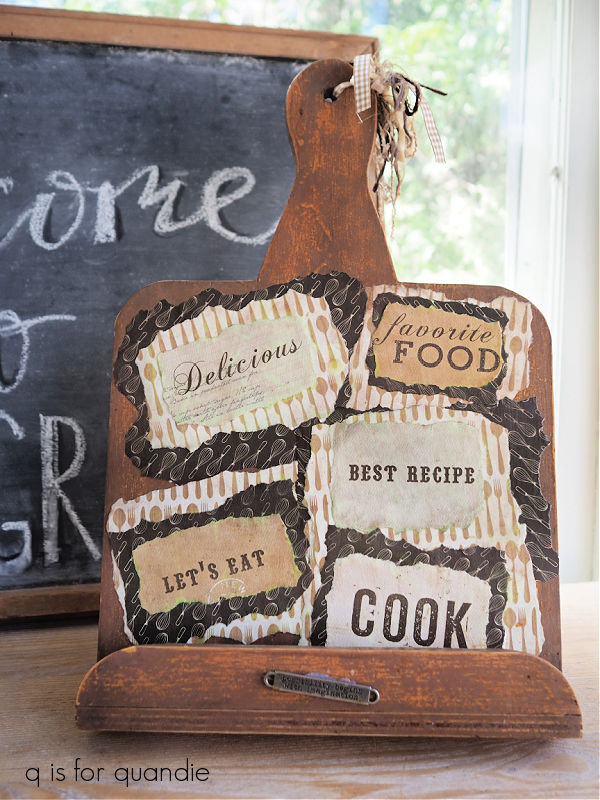
Someone had decoupaged it to within an inch of its life. That’s three layers of torn paper, all decoupaged into place. It took me forever to get those off. It involved lots of soaking with water, scraping with a razor blade and finally some sanding.
I wanted to give it a far more subtle look so after painting it with Dixie Belle’s Dried Sage, I simply added a paint inlay from the I.O.D. Melange set.

Those artichokes seemed like the right touch for a cookbook holder.
While opK and I were heading from one thrift store to another, she spotted an estate sale sign so we hit the brakes to check it out. It ended up being the estate of some serious antique collectors. They had collections of antique crocks and stoneware jugs, old glass bottles, vintage soda pop bottles, and interestingly enough, mortar and pestle sets. I bet there were at least 20 or more of those.
As can often be the case at professionally run estate sales, most of the prices were too high for me. But I did come home with a couple of things.
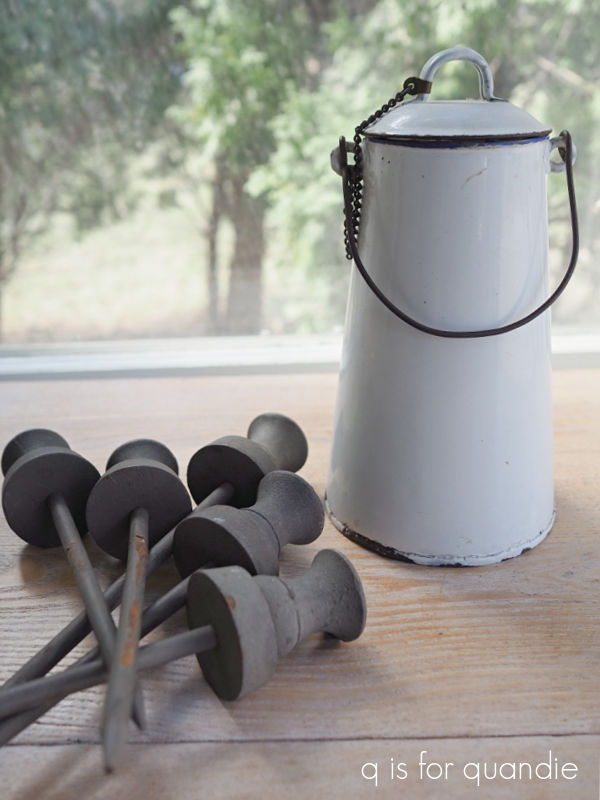
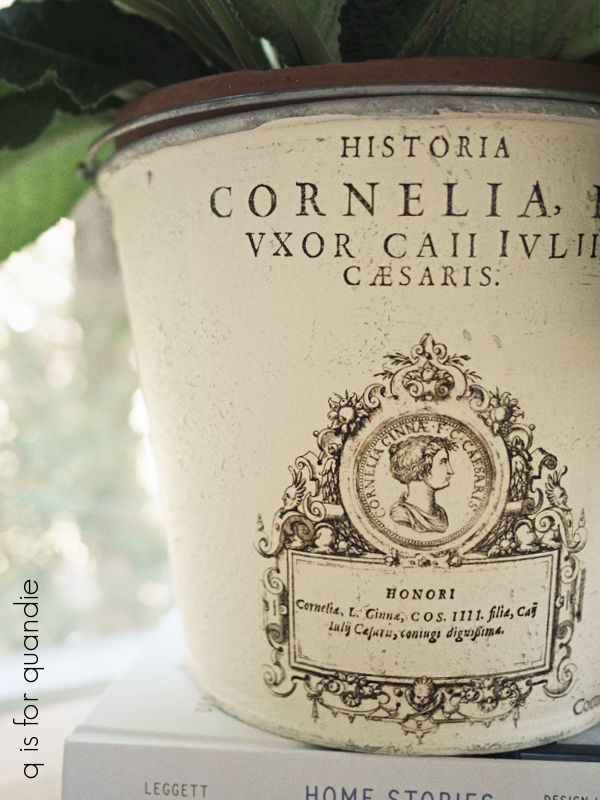
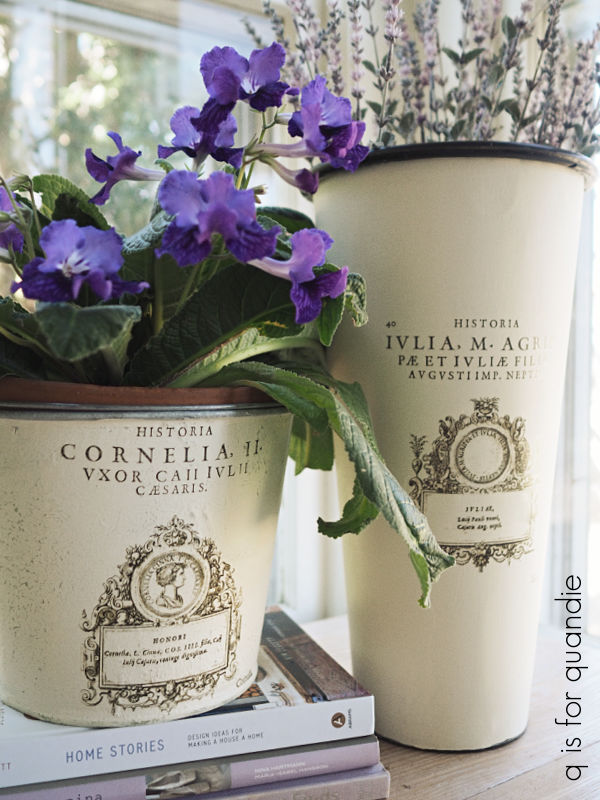
I couldn’t resist the little enamelware pot. It was $18, so a little steep for me but not outrageous.
After washing it up, I decided to add an I.O.D. transfer to it.
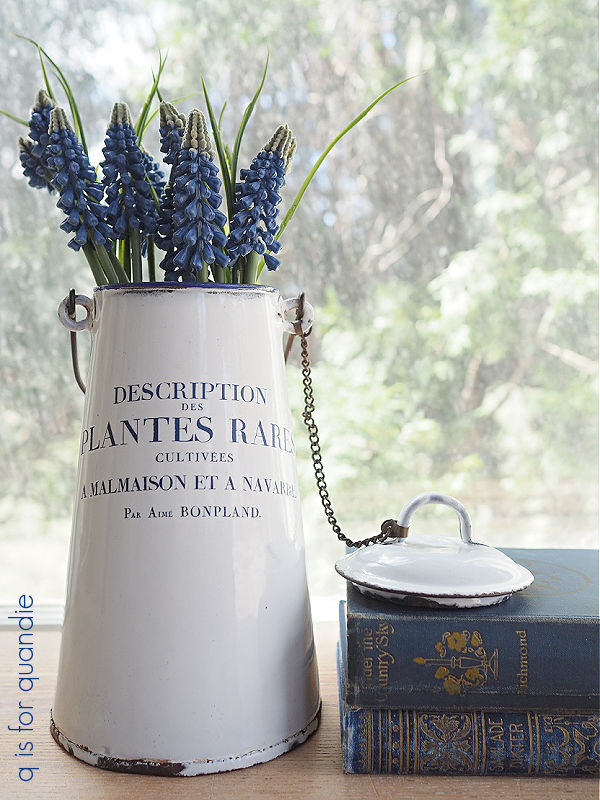
I’m sure that antique purists will be horrified by that. But the transfer could be easily removed down the road when I get tired of it, or if I eventually sell it on to someone who doesn’t like it.
But for now I’m planning to keep this little pot and use it as a vase. And I think that transfer made it just a little more special.
As for the other items, they are hose guards. At least I’m fairly sure that’s what they are.
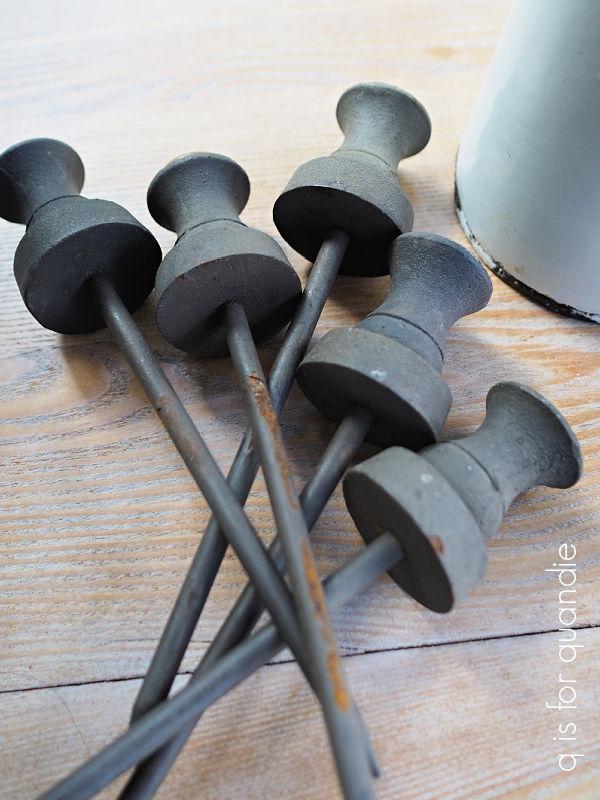
If you aren’t familiar with hose guards, you put them at the edge of a garden bed to prevent your garden hose from dragging through the plants. I purchased some plastic hose guards last summer and they didn’t even last through one season.
These are super heavy, maybe cast iron? I’m not sure what material they are made out of, but I think they’ll be far superior to the plastic ones. And at only $5 for all 5 of them, they were definitely a bargain.
So overall it was a successful day of thrifting. Which of my finds is your favorite? And what about that trash can, would you add a wash? Leave a comment and let me know.

Gosh, what a haul!! I went thrifting, Saturday, with a friend too and while we found some goodies, we found nothing like your haul, but that could be more because I rarely can see what something ‘could be’, like you clearly can! LOL. I love everything you did, but really loved the cookbook stand! As for the trash can…it’s great the way it is, but you’ve never not improved something so I vote you “Quandie it up”.
LikeLike
Thanks so much Paula, I did get lucky with my finds this time around 🙂
LikeLike
Would love to see the paint treatment you would choose for the trash can!
LikeLike
Well, be sure to stay tuned because if I do something with that trash can I’ll definitely share it here!
LikeLiked by 1 person
I always enjoy your thrift makeovers! You never fail to inspire. I vote for a makeover on the trashcan – it seems a bit too new looking for me.
LikeLike
It’s not terribly ‘new’ looking in person, but perhaps a bit boring. I agree that it needs ‘something’!
LikeLike
Love the hose guards! Not sure about the trashcan – I could go either way! I do like it as is though.
LikeLike
I’m excited about the hose guards, I’m certainly they’ll be better than the green plastic ones I used last year 😉
LikeLike
I love what you did with all of those great finds! I think that can needs a wash on it to give it just a bit more visual interest.
LikeLike
I think you just might be right about that!
LikeLike
You have such great creative skills and imagination, why imitate what Wayfair is selling? There are hundreds of trash cans out there with this wash treatment! I’d love to see your wonderful skills at work painting and creating effects! The embossed rooster and lettering would become outstanding with your techniques! I love the way you treated the Dried Sage and layered your Drop Cloth over it in this blog entry. Something like that would be amazing on this trash can. You would do such a great job, and your readers would be delighted to see what magic only YOU could cast on this project!! Go to it!!!
LikeLiked by 1 person
Thanks so much for believing so strongly in my abilities Naomi ;-) I hadn’t considered a layered paint technique for the trash can, but now you’ve got me thinking!
LikeLike
I always love your projects! I think the trash can needs some Quandie rustification using Dixie Belle’s Patina paint and spray!
LikeLike
I was thinking maybe it needed a little patina paint too!
LikeLike
Yes, on the trashcan.
LikeLike