faking it with a little bit of faux.

While my sister and I were driving around the Mac-Grove neighborhood looking for garage sales the other day, my sister admired the window boxes at one house that were full of blooms.  I looked over to see what she was looking at and immediately knew they were fake.  Mainly because I know that you can’t have wisteria flowers coming right out of the dirt in a window box, and you also can’t have them in late August.

Aside from that, they looked pretty good from a distance.  Obviously good enough that my sister thought they were real.

I’ve always been a bit of a plant/flower snob.  Having fake ones just feels like cheating to me.

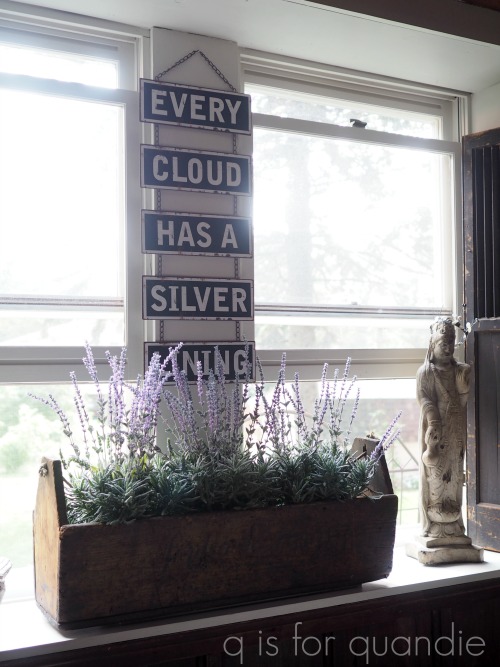
But for the past several months I’ve been trying to decide what to do with this amazing old toolbox that I display in my dining room window.

I found this at a garage sale several years ago, and I added the stencil to the side.

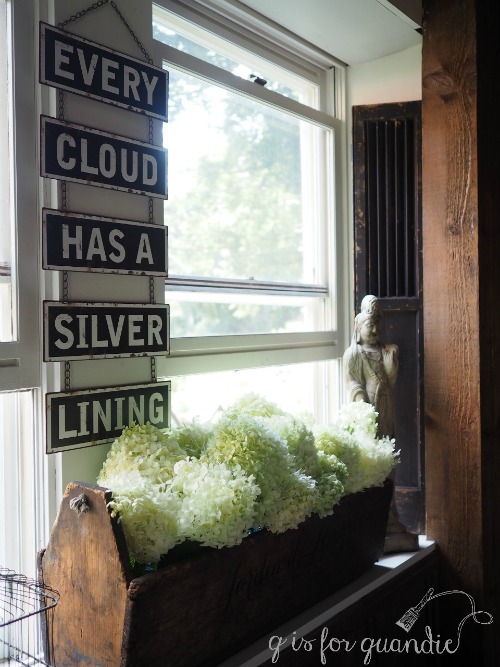
Last year around this time I filled it up with flowers from my Limelight hydrangea.  They were fresh when I took that photo, but they dried in place and looked really pretty for the most of the winter.  But when summer came, I felt like they were starting to look pretty dusty and drab and I needed to come up with another plan.

I thought about putting a row of three small topiaries in the box.  That probably would have looked amazing, but I have a history of killing off topiaries.  And those thing aren’t cheap.

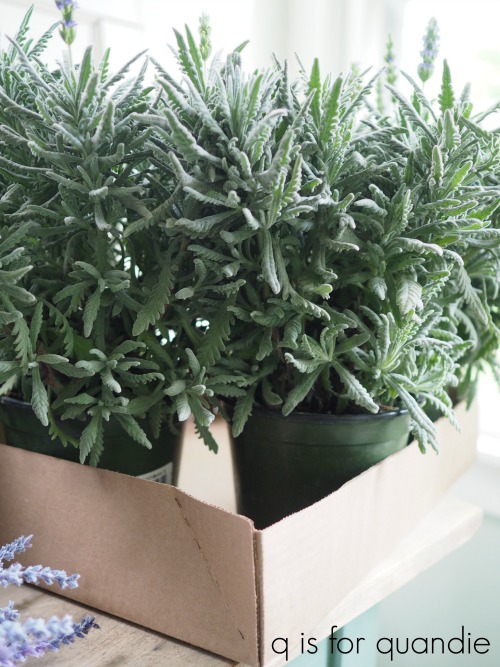
Then I saw some lavender plants at my local Bachman’s (plant nursery) and thought they would look gorgeous in the toolbox.

But I knew that I would never be able to keep these blooming over the winter, even in a south facing window.  In fact, I’ve even tried growing these outside over the summer and haven’t been able to keep them blooming.  After all, lavender likes hot, sunny, dry weather.  We don’t have much of that here in Minnesota, especially in the winter.

So initially I nixed the idea of lavender.  But then I mentioned this conundrum at work and my co-worker Jodie suggested I add a couple of fake flower stems to the real plants.

Eureka!

It had never occurred to me that you could supplement real plants with a few fake flowers.  As long as I can keep the plants themselves alive, I’ll be good to go.

So I waited for the fake flowers to go on sale at Hobby Lobby and then I picked some up for around $2 each.  Then I went back to Bachman’s and purchased three lavender plants for $12.99 each.

I brought them home and popped them into the toolbox.
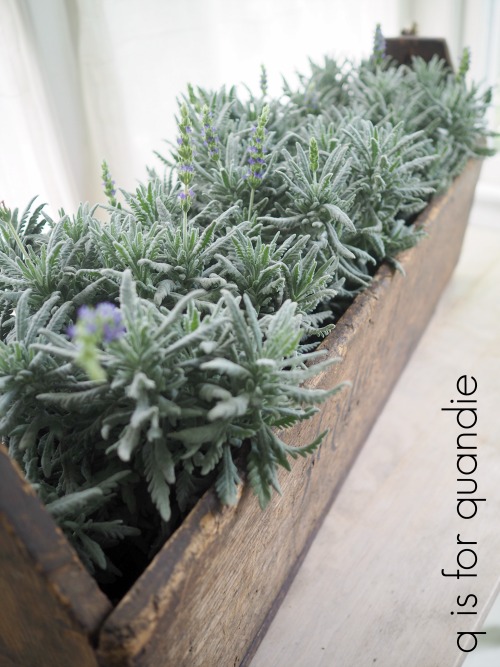
Perfect fit.

Then I cut the faux flowers down a bit …

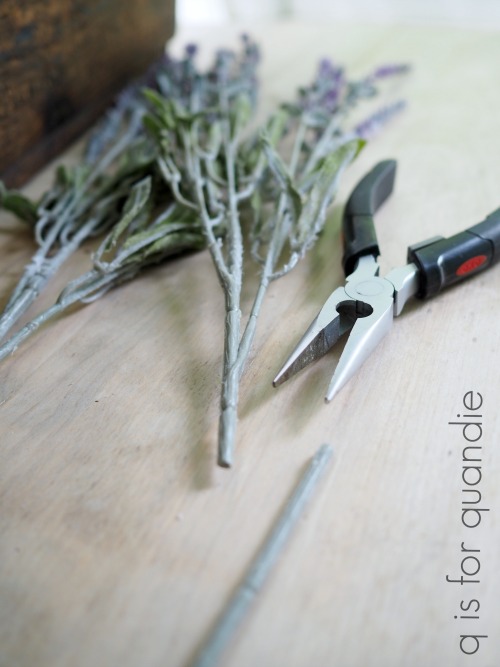
and simply added them to the real plants.

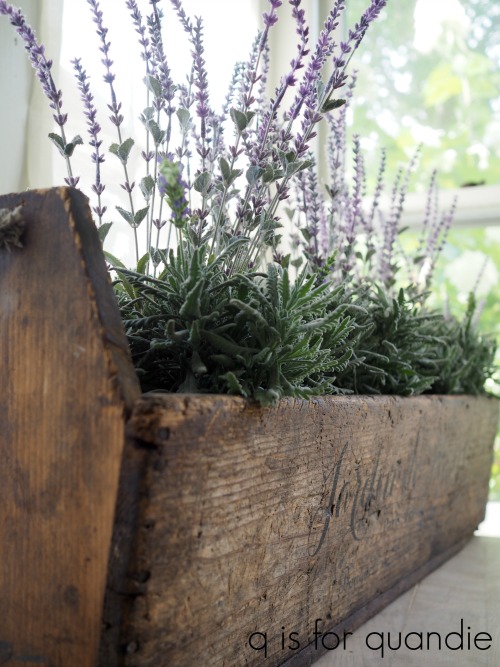
One benefit to using real plants is that they smell amazing.

I think the fake flowers look pretty good, although of course anyone who knows plants is going to realize they can’t possibly be real.  Especially in the middle of January.

It also remains to be seen whether or not I can at least keep the plant itself looking good through winter, but I have read up on it and I should be able to grow lavender indoors in a sunny south facing window, even in Minnesota.

If I can pull it off, I think it’s going to be nice to have something ‘blooming’ in my window all winter long.


going someplace.

For those of you who aren’t from around here, today is a holiday here in the U.S.  It’s Labor Day.  Most of us have no idea why we have this holiday, and there really aren’t any traditions associated with it that are practiced across the board (like a turkey dinner on Thanksgiving, fireworks on the 4th of July, or visiting the graves of loved ones on Memorial Day).

Usually it’s just a good excuse for squeezing in one more barbecue before summer is over.

I did a little research and apparently Labor Day was initially brought about by workers organizing and fighting for shorter work weeks.  Now that’s an idea I can get behind!  In fact, I’m honoring the spirit of Labor Day by taking this entire week off work.  Well, to be honest, mainly that’s really because my mom is in town for her 60th class reunion.  She graduated from Roosevelt High School in 1958.  My sister, mom, niece and I will also be driving out to South Dakota for a few days to visit our cousins while Mr. Q stays home to man the fort.  So if I’m not responding to comments with my usual speed, it’s because I’m busy admiring the cattle on the old family farm.

Even though I’m taking a break from my labors, I have a quick project to share today that I finished up a couple of weeks ago.

Have you been wondering what I did with the mirror that came with the dresser that I shared last Monday (and by the way, that dresser sold in less than two days and I attribute that entirely to the gorgeous transfer from Prima Marketing)?

 Obviously I didn’t put the mirror back on the dresser.

That’s because I love turning mirror harps like this into chalkboards that can be hung on the wall.

I started by removing the inner framed mirror from the harp.  Comically enough, the mirror was the only thing holding that harp together.  As soon as I took it out the entire thing fell apart.  Believe it or not, that’s actually a good thing.  My handyman Ken prefers it that way because it gives him the opportunity to completely re-glue all of the joints.

So he glued it all back together and then cut a piece of hardboard to fit the opening so I could turn it into a chalkboard.  He sent it back like this.

I opted to paint the frame in a pale grey using Homestead House milk paint in Bedford.  I took a calculated risk and did very little prep work.  I wiped it down with a damp rag and that was about it.  If you do this, keep in mind that you are taking a chance that your paint won’t adhere.  With milk paint it’s even possible that all of the paint will flake right back off, especially if there is furniture polish or something similar on the surface of your piece.

But I was willing to risk it since it was just a frame, not an entire piece of furniture.  Worst case scenario I would have to sand it down entirely and re-paint.  Plus I wanted to get some chipping.

As it turned out, it was a good call.  I got the perfect amount of chippy-ness.

As you can see, I chose black for the chalkboard.  I was planning to paint it using black milk paint (you can find my tutorial for using milk paint for chalkboards here).  I thought I had plenty of it on hand, but as it turned out I couldn’t find it.  So I went with Rustoleum’s black chalkboard paint.

To give the piece a little extra something, I used a couple of sections from Prima Marketing’s smaller Seeds transfer at the top …

and bottom of the frame.

I used one of my favorite techniques for adding a chalked design to the chalkboard.  I print the design out on paper, rub chalk all over the back of it, and then trace it onto the chalkboard (you can read the full tutorial on that here).

I’m sure that many of you could do this free-hand, but I’m never happy with my free-hand work so this is how I fake it.

I often have my handyman Ken add a shelf across the bottom of the mirror frames that I turn into chalkboards, but this frame came with its own little shelves already.  They make the perfect spot to display a vintage camera …

or a charming old photo.

I’ll likely take this piece in to Reclaiming Beautiful to sell, unless any of my local readers want to snatch it up first.  See my ‘available for local sale’ page for more details.