
I find mirrors so challenging to photograph. I re-do my share of mirrors, but I rarely share them here on the blog simply because I can’t seem to figure out how to take a good picture of one.
But I thought I’d give it a go today. Please don’t judge my photos too harshly, starting with this ‘before’ picture.
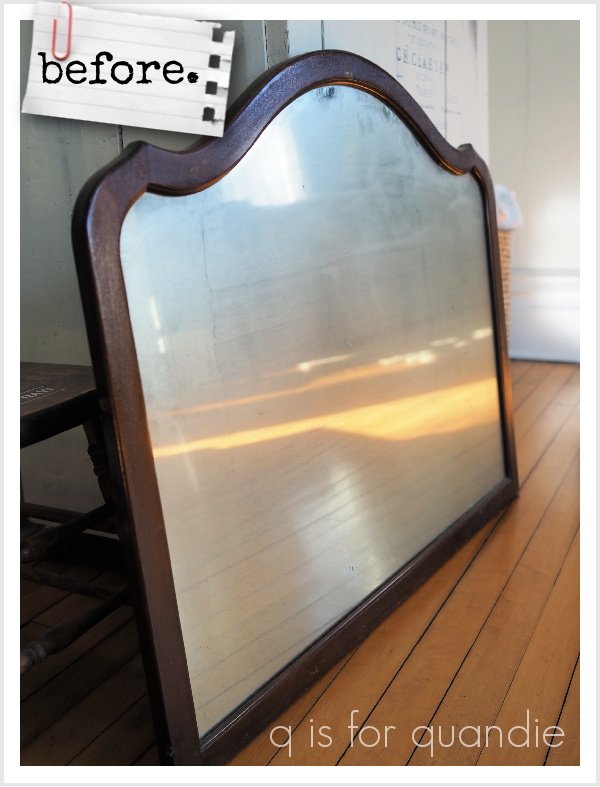
Of course this is simply a mirror that I removed from a dresser. As you probably know by now, I like to do that. Dressers just seem to sell more quickly without their mirrors, in my opinion.
But I don’t just trash the mirrors, I generally revamp them. Sometimes I remove the mirror and switch it out for a chalkboard (like these). Sometimes I paint the frames and add hangers to the back so that they can be hung on the wall instead of mounted on a dresser (like these).
In the case of this particular mirror, neither of those two options seemed like exactly the right choice. The silvering was not in great shape so leaving it a mirror wasn’t going to be the best choice. The frame wasn’t terribly interesting, so turning it into a chalkboard wasn’t going to be a great option either.

This was the best I could do trying to capture the look of that silvering on film. All of those black spots and markings are in the silvering behind the glass of the mirror. In other words, they could not be cleaned off.
So ultimately I decided to let those flaws add to my piece rather than detracting from it by adding a transfer over the front of the mirror.
But first I painted out the wood frame in Miss Mustard Seed milk paint in Typewriter (a.k.a. black).

Here’s a quick q tip for you; I never tape off mirrors or windows when painting them. I find that it’s quite easy to remove excess paint from the glass using a razor blade. Just be sure to use a sharp blade. No need to waste your tape!

It’s interesting how milk paint reverts back to powder when you do this, while chalk paint comes off in curls or strips. I wonder if you could sort of reconstitute that milk paint powder by adding water to turn it back into paint again. Hmmmm. That would be an interesting experiment. Maybe one for another day.
I was hoping to get some good chipping on the frame, so the only prep work I did was to clean it with some TSP substitute. I didn’t do any sanding. Sure enough, I got some amazing chippy-ness.

Next up was applying the transfer.
I must warn you that applying a transfer to glass or mirror can be a little tricky. The transfer will be attracted to your glass surface like a magnet. Seriously. Get too close and it will reach out and grab that glass and not let go.
So when working with glass, my advice is to dry fit your transfer with the backing paper still in place. When you have it exactly where you want it to go, tape it down along one side.
![]()
Next, carefully, keeping that taped edge down, fold the transfer towards you along that taped edge and then remove the backing paper.
![]()
Then very carefully flip it back over and apply as usual.

Goodness. Trying to get my camera to focus on that was an exercise in futility.

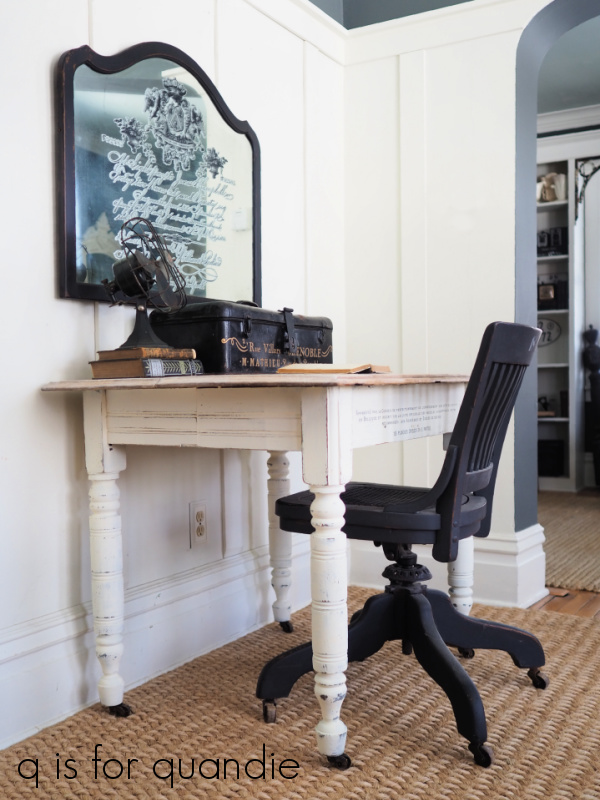
By the way, that is a section from the Parisian Letter transfer from re.design with prima.

For my photos I’ve hung the mirror over a desk. It would work really well in any spot where you want to reflect some light, or maybe get a quick glimpse of your hair before you head out of the house. It certainly won’t let you examine yourself in any kind of detail though. At my age, that seems like a bonus rather than a flaw.
I probably would have had better luck with my photos if I’d waited for an overcast day. Instead it was bright and sunny and we had lots of snow to reflect the light as well, so my piano room was flooded with bright light.
But hopefully my photos do some justice to the end result. I think it looks pretty fabulous and if I had a spot for it, I’d keep it. But I don’t, so this mirror will be for sale. If you’re local and you need a mirror to bounce some light around be sure to check out my ‘available for local sale‘ page for more details.

Wow! A genius idea. I love the looks of this and somehow the chippy-ness adds so much interest to the frame!
LikeLike
Yes, that frame needed a little oomph, and the chippy-ness gave it some 🙂
LikeLike
So awesome and great timing! I found a great old mirror last night at Goodwill from a dresser! Hadn’t thought of adding a transfer to it! Thank you for the inspiration!
LikeLike
You’re welcome!
LikeLike
I so look forward to your emails. I always drop everything to open it and see what amazing things you create. They always give me great ideas. Thank you for sharing the products you use and your helpful tips.
LikeLike
Thank you so much for saying so Dawn, comments like yours inspire me to keep going with blogging 🙂
LikeLike
Love the mirror and the staging!
LikeLike
Thanks Cyndi!
LikeLike
Rest assured, your photos are fine, at least to me. I think people who have blogs are very aware of the quality of photos and other aspects they are posting while their readers are not judging quality with that same, critical eye. Basically, we understand (and forgive) if your pics don’t meet your standards. I know I come her for inspiration and education, so when you say photographing mirrors is difficult, I take you at your word and don’t have my red marking pen out to take off points. Your tip on how to overcome the attraction between the mirror and the transfer is just the kind of help that I enjoy about your blog.
LikeLike
Thanks so much Susan. Your comment made me chuckle because I can picture someone with a red marking pen scrutinizing my mirror photos 😉 I think I’m always more critical of my own work than others are, and you’re right, I should quit being so hard on myself! Life is too short, right?
LikeLike
The mirror turned out great! I love the chippyness. MMS typewriter is one of my all time favs! 😊
LikeLike
It is one of my favs as well. It’s so easy to work with!
LikeLike
I love how you used the perfect shape transfer to turn this into a piece of art.
LikeLike
I had to remove some elements from the transfer on either side of that crest at the top to get it to fit, and once I did that the transfer worked beautifully with that curved top of the mirror. Like it was made for it 🙂
LikeLike
That looks fabulous! Thank you for the Q-tip also! I love your work, just wish we were closer! Thanks for all your inspiration!
Smiles, alice
LikeLike
Thanks so much Alice!
LikeLike
I love it. It turned out so nice with the transfer.
LikeLike
I just love the transformation and helpful tips in today’s post. What gorgeous results!
I found myself chuckling at your comment: “It certainly won’t let you examine yourself in any kind of detail though. At my age, that seems like a bonus rather than a flaw.” I can relate!
LikeLike
LOL, right?
LikeLike
Love the lines of this mirror, and you finished it off beautifully. Your writing style adds to your makeovers just as much as the actual makeover. Ýou are just one multi talented lady! And you’re fun to boot! Lol
LikeLike
Aw shucks, thanks Terri!
LikeLike
Love it. Have you ever used mirror paint? I saw it on another blog recently. They put it on closet door glass panes to keep them from being see-through as a fix to using old doors with panes. Like an old mirror, you cannot really see in it but it’s a cool effect.
Your pictures are great. Easy to follow your ideas.
What is the rug in you photo shoot room under the mirror? Any idea where it came from?
LikeLike
I did use mirror paint once upon a time … the spray paint version. Usually I’m trying to turn a mirror into something else though, not the other way around 😉 As for the rug, I can tell you exactly where it came from, a garage sale! It was only $20, and was in pristine condition, so I snatched it up to use as a photo prop. I keep it rolled up in the front hall closet and I drag it out for photo shoots because my old wood floors have yellowed over time and I don’t love the way they look in photos.
LikeLike
Ha, that’s the best source of an item. I love things the second time around because I know they are cute as someone bought them the first time.
LikeLike
This is another beautiful makeover! I think your photos are great but I agree – mirrors are so hard to photograph (or anything shiny for that matter). Christy at Confessions of a Serial DIYer uses a great trick for photographing mirrors. She has a pitcher of flowers that she places on the dresser (or whatever with a mirror) and then she “hides” behind it, placing her tripod so that it is blocked from view by the flowers. It works great.
LikeLike
That is a fantastic tip, I’ll have to try that next time 🙂
LikeLike
I think this is a unique approach,it turned out fabulous.Love your work and blog have a Blessed Day.
LikeLike
Thanks so much Charleen!
LikeLike
Love how it turned out! Great prices too!
LikeLike
I try to price my stuff to sell!
LikeLike
Just the inspiration to get me going on a mirror I painted a year ago. It has some damage to the backing, which shows a few black lines. I bought a botannical transfer in hopes that the stems of the florals would camouflage the damage. Thanks for the tips.
LikeLike