
A while back one of my local readers, Jackie, contacted me and asked if I wanted a spoon carved secretary desk that she found at a local church sale. The price made the desk too hard for her to pass up, I believe it was $20, so she snatched it up and then offered it to me.
You guys met Jackie back when I toured her scented gardens (part 1 and part 2).

As you can see by the ‘before’ photo, I brought this desk home before my gardens even filled out last spring. I don’t know why it kept getting shoved to the bottom of the pile over the summer, but for some reason it did. Now that September is here, and I’m done with my magic wand decorating project, I’m trying my best to get all of the larger pieces in my workshop painted before the snow falls. Wish me luck on that.
There were a couple of issues with this desk. For one thing, someone had added wooden knobs instead of the original pulls. I’m sure I’m going to offend someone here, but one of my pet peeves is when people put knobs in the two holes that originally accommodated a drawer pull, thus giving the drawer two side by side knobs (top two drawers). IMHO, that just looks wrong.
They had also added a knob to the pull down section of the desk where the original key hole was. This desk would have originally been opened only with a key.
Let’s start with the inside of the desk though. Somehow I managed to miss getting a ‘before’ photo of it. But basically Ken had to add a new chain to hold the drop down leaf, and then I used the RustOleum chalk spray paint in Charcoal to paint it.

Obviously there was no way I was getting inside all of those little cubby holes with a brush, and unlike the last secretary desk I painted, this time the insert was not removable. So I simply painted it in place.
Once the paint dried I added a small section from Prima Marketing’s Beautiful Home transfer on the fronts of the little drawers. This is a white transfer that’s perfect for using over dark paint. Once the transfer was applied, I sanded over it lightly with 220 grit paper and then used a clear wax to seal it.
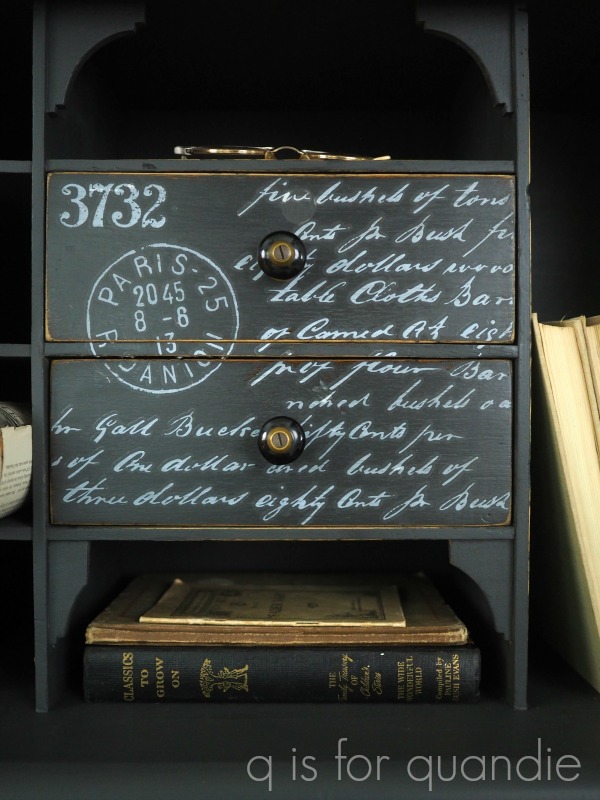
I lined these drawers with some scrapbook paper that I have stockpiled.

I painted the outside of the desk in Dixie Belle’s Midnight Sky.
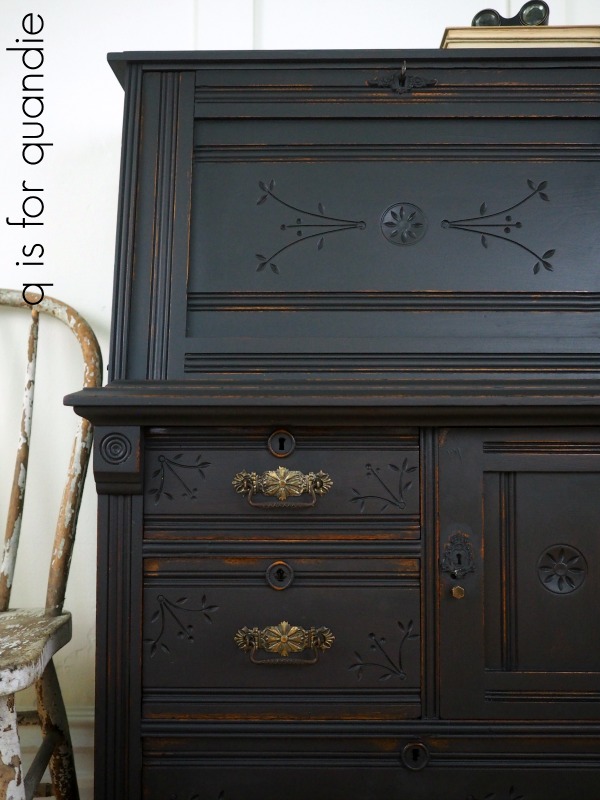
I chose to wet distress this piece instead of using sandpaper. First of all, Dixie Belle paint is really easy to wet distress. Second, I think this results in more of ‘worn off over time look’ than sanding does. If you’ve never tried it, you should give it a go on your next project. Simply use a damp cloth to rub away some of the paint around the edges.
I have so many things I want to mention about the outside of the desk that I don’t know where to start, so let’s just start with those drawer pulls. I just happened to have four matching antique pulls on hand. What are the odds? Trust me, not that great. I usually just have a mishmash of mismatched hardware. But this time it totally worked out, they even fit in the existing holes, so no more double knobs.
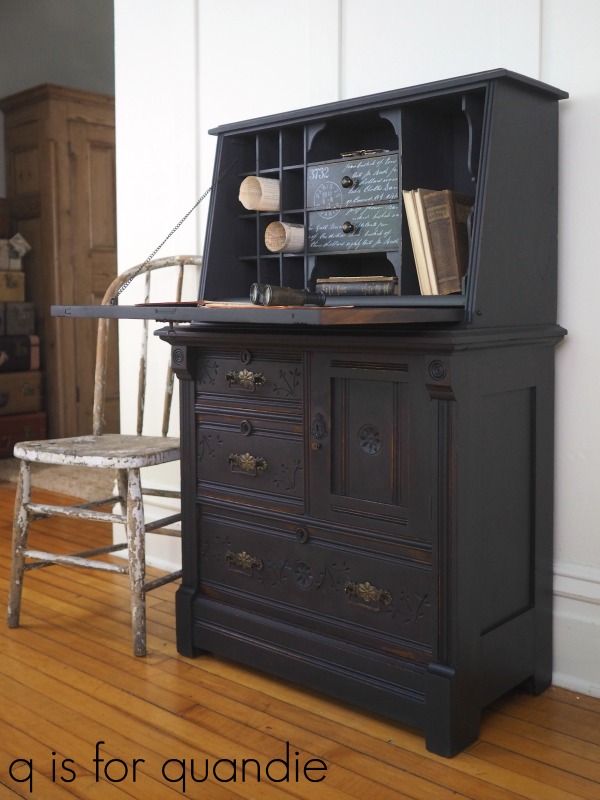
You might have noticed that the middle drawer on the bottom and the door were originally missing the trim around the keyholes (take a look back at that ‘before’ photo to see what I mean). I basically stole the trim from around the keyhole on the drop leaf to use on that middle drawer, thus giving all of the drawers that same round trim. By ‘stole’ I mean I carefully pried it off the drop leaf and then glued it onto that drawer instead.
Then I made new keyhole escutcheons for both the drop leaf and the door using one of Prima Marketing’s new molds called Grandeur Keyholes.

I used Prima’s Modeling Material to make the molds. If you want to learn more about using the molds and the modeling material, check out my previous post on that.
I learned another valuable lesson about the molds while working on this piece. As I’ve already mentioned in previous posts, the molds will shrink as they dry. Now I’ve also learned that if you glue a mold on and paint over it before the mold is dry it will reveal some unpainted wood as it shrinks. See that outline of unpainted wood around the keyhole? That’s what I’m talking about.

Not a huge deal, but from now on I’ll wait for the mold to be completely dry and hardened before painting.
Still, isn’t this a completely fabulous way to make up for missing keyhole escutcheons?! I love it! I chose to downplay my molded keyholes by painting them to match the piece, but you could apply some metallic wax to make them stand out more which would also look great.
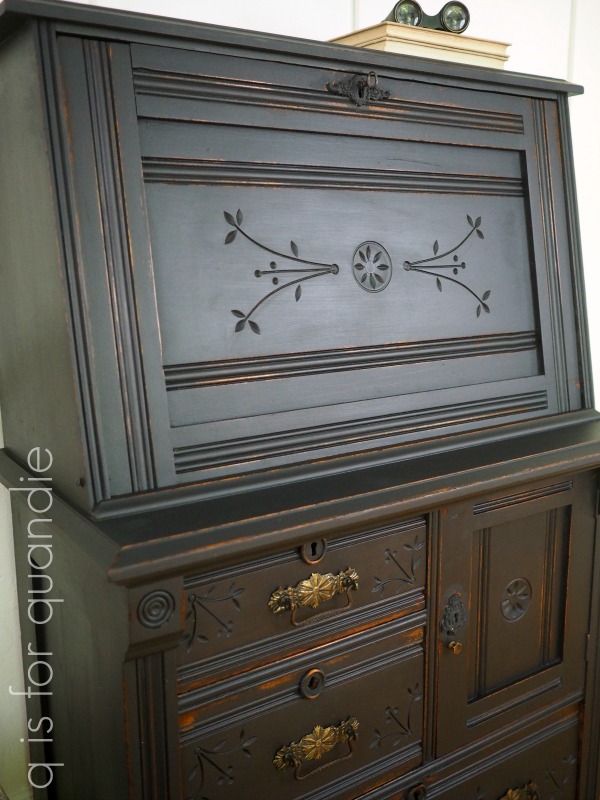
You may have noticed that I now have a key in that drop down leaf too. Don’t be fooled, this is not a functioning key for that lock. Instead, Ken came up with a way of permanently affixing the key so that it can be used like a ‘knob’ to open the drop leaf.
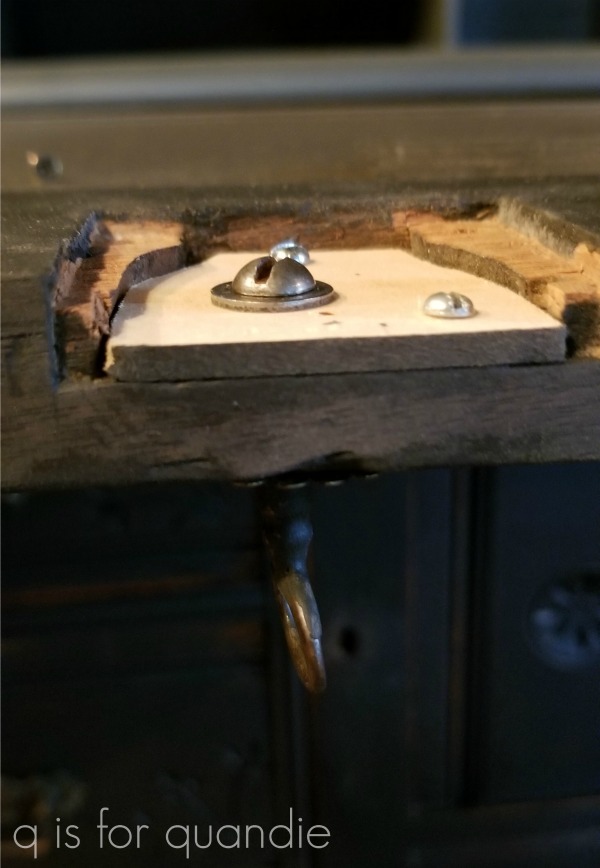
I was going to attempt to describe how he managed it, but honestly it’s over my head. Suffice to say that somehow he made it so that the key has a threaded end now and is screwed on from behind. Then he made a little trap door to cover that up from the back (which ends up being the top of the drop leaf when it’s open).

I filled around it with Dixie Belle Mud. Once dry, I sanded it smooth and painted over it.

Now you’d barely know it was there.
Once again I used Big Mama’s Butta as a finish over the Midnight Sky paint.

I really like the look of this product over the black paint.
You may remember that in my post about my piano room makeover I mentioned that one reason I kept my faux board and batten so tall was so that I could crop out the dark gray upper wall in my staged furniture photos.
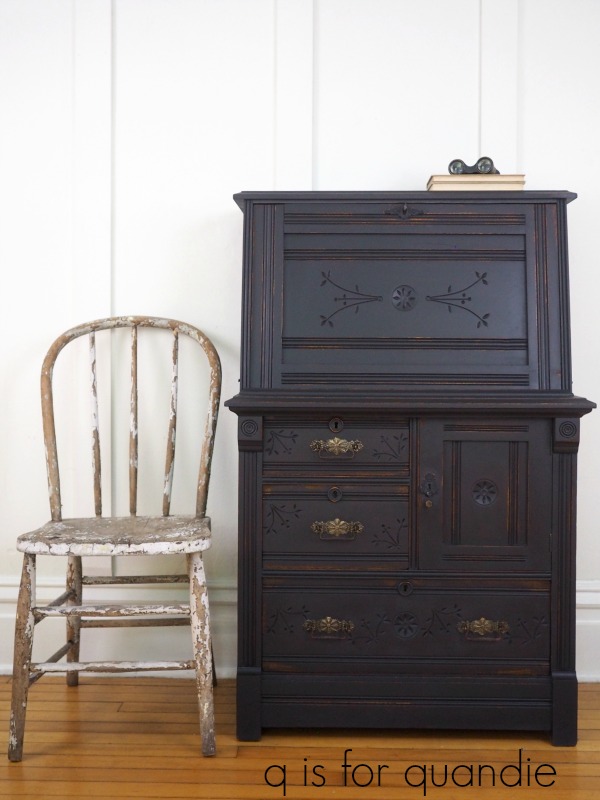
As you can see, it worked like a charm for this piece.
I feel like I was able to restore some of this desk’s former glory, what do you think?

As always, many thanks to Dixie Belle for providing the paint and the Big Mama’s Butta, and to Prima Marketing for providing the transfer, the molds and the modeling material for this project.
If you’re wondering where to purchase the Prima Marketing products check out their ‘where to buy’ page.
If you’re wondering where to buy the Dixie Belle products, you can shop with them directly online or find a retailer near you.
And finally, if you happen to be local (Twin Cities, MN) and in need of a secretary desk, check out my ‘available for local sale’ page for more details.

Love it, as I knew I would. Netti and I were just wondering if perhaps it was just too much work. It’s a stunner, for sure.
LikeLike
Well, I will admit that pieces that I think are going to be more work tend to get left until last 😉 Thanks for finding this one for me Jackie!
LikeLike
As usual Linda, you don’t disappoint!
Jackie and I knew this piece had potential and the end result is wonderful!
I must admit, I couldn’t get excited over the molds and modeling material before this, but what a practical and beautiful solution to the missing keyhole escutcheons!
LikeLike
Prima also has some trim molds that are pretty fab too. I haven’t had an opportunity to use them yet, but they will also a great solution to damaged or missing trim!
LikeLike
This is gorgeous!!!!!!!
Love the inside details too!
LikeLike
Thanks Cyndi!
LikeLike
Love this piece! You are so creative! Do you fine sand your pieces before waxing?
LikeLike
Yes, I do generally run some fine sandpaper over the surface before waxing just to smooth it out a bit.
LikeLike
This is amazing! What a transformation. I am amazed at the molds. Has me wondering how many other things you could use them for. Like Netti, I was on the fence about them but this has me really exited about the possibilities.
LikeLike
I’m really only doing basic things with the molds myself, but there are some people out there creating amazing things with them! Really, they are very versatile. Do something simple like add a keyhole escutcheon, or do something really fabulous like this piece by Stephanie from Rehab to Fab.
LikeLike
You did an awesome job on this desk!! I love it. I love black painted pieces of furniture. The warmness of the wood showing through make them the perfect piece. 😊
LikeLike
Thanks so much Monica!
LikeLike
Yep, Miss Quandie….glory be! you did it!!! ;-D
LikeLike
🙂
LikeLike
Beautiful. And the replacement hardware looks original to the piece.
LikeLike
It really does. It’s the right age and style for sure!
LikeLike
It’s absolutely delicious! If I was closer, I would buy it – am I the only one that truly loves Eastlake furniture?
LikeLike
I hope you’re not the only one 😉 LOL. I have a couple of pieces of Eastlake myself though, so I’m in that club too.
LikeLike
Love it! I like the idea of wet distressing. I have a sweet little dresser that is missing the decorative keyhole surround. It has two small drawers on the top and two bigger drawers on the bottom. One of the top drawers is missing a part of the keyhole surround. They are a very odd diamond shape and decorated. Would you pry them all of and do something matching from a mold, or try to form the clay into a matching one to go with the others ? And..how did you pry yours off without breaking it??????
Thank you.
LikeLike
Shhhhh … just between you and me … I did break it. But I glued it back together and you’d never know 😉 As for your piece, it sure would be fun to play around with the keyhole mold, so I’d be tempted to pry them off and make new ones. But if you don’t want to spend the money on that (the molds are about $20 and the modeling material is also about $20, but will make a lot of keyholes!), then I’d either just leave the broken one alone and paint it, or take it off. That’s assuming you are painting the piece. If you look closely at this dresser you can see that it was missing the diamond shaped keyhole escutcheon from the top drawer. I just left it that way and I think it still looks great!
LikeLike
Hello, thank you! I see yours looks like a round hole as well without the key hole surround. I’m going to have to ponder this a little more. 😀 Thank you again for the advice!
LikeLiked by 1 person
So beautiful!!!!
LikeLike
Thanks Valerie!
LikeLiked by 1 person
That spoon-carved desk does something to my heart! It’s one of those special, unforgettable pieces and you did it magnificent justice. It’s absolutely beautiful now and will be loved for another generation or three. Amazing work!
LikeLike
Thanks Christie!
LikeLike
That is a gorgeous piece – it looks so much less heavy and clunky in black. Hope it gets pride of place in someone’s special home.
LikeLike
I think that’s a good description, and I agree it does look ‘less clunky’ somehow 🙂
LikeLike
That is a gorgeous piece!
LikeLike
Linda…how did you spray paint the inside of the cubbies in the desk top? I have one very similar and thought I’d have to use a brush…knowing all the drips and things would make it a challenge.
LikeLike
My tips for spray painting are to do multiple very light coats rather than trying to cover everything in one pass, keep the can around 10″ – 12″ away from the surface you are painting, use a sweeping motion and avoid holding the can still in one spot. It takes multiple passes at different angles to get inside those cubbies, but it can be done!
LikeLike