

Late last winter I shared the story of the three pieces of furniture that I purchased from one of my readers, Mary. I finished the first two pieces earlier this year but the third piece was hanging out in my carriage house waiting for some more significant repairs.
Specifically, one of the legs had broken off the dresser and a big chunk of it was missing. I thought I had taken a great photo of the dresser in its initial ‘before’ state, but I can’t seem to find it anywhere. Drat!
I did manage to get a photo of the repaired leg before I painted it though.
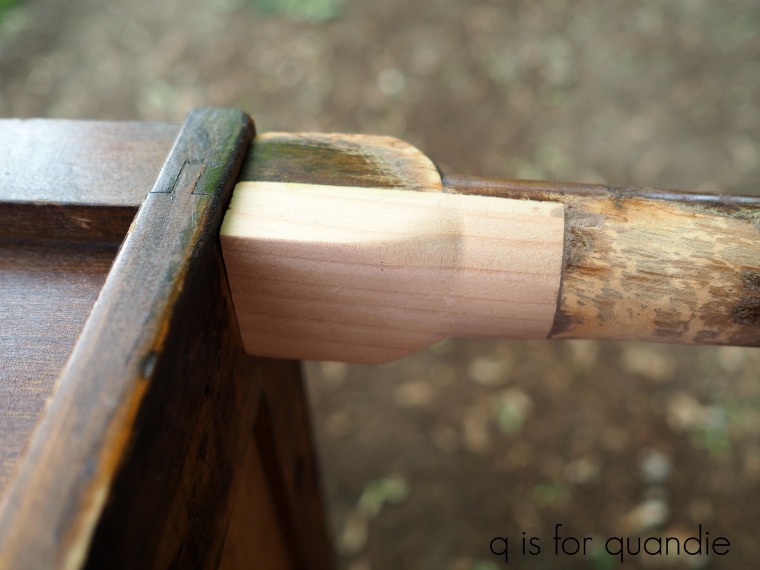
I have to tell you guys, when I first asked my handyman/neighbor Ken to take a look at this leg he gave me one of those looks. You know the one, the look that says you’ve got to be kidding me. But I had total faith that he could fix it and make it look like it was never even broken.
And I was right. Basically Ken cut away the broken portion of the leg. The he cut down and carved a new section of wood to match the shape of the original leg and glued it in place. The man is basically a miracle worker.
Next I realized that a piece from the side of one of the lower drawers was cracked and had broken off. We could have tried gluing that back together, but I don’t think it would have held up very well. So I came up with plan B, remove the lower two drawers and add a shelf to the bottom instead. Then the future owner could use baskets on that shelf instead of having drawers.
This involved another consultation with Ken, and a bit more work on his part, and here’s what I ended up with.
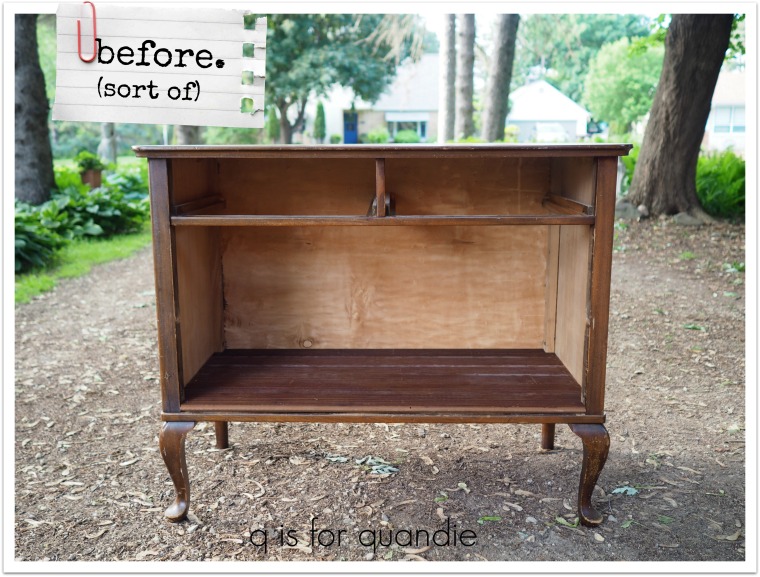
Ken removed the framework that was between the two bottom drawers, and he added a sturdier bottom ‘shelf’ made from the old bead boards from a ceiling that nnK tore out of her breezeway. Try to imagine that there are two smaller drawers still in place at the top because those are going back in.
The next task was to strip the top using Citristrip. That was easy enough.
Once I got that far, I was a little stumped about what color to paint the piece. It had to be something that would work with the wood top and wood bottom shelf because I was leaving both of those unpainted. I also wanted to use a contrasting color inside the bottom section. I debated using green, or maybe aqua, or even just white. But none of those choices felt right.
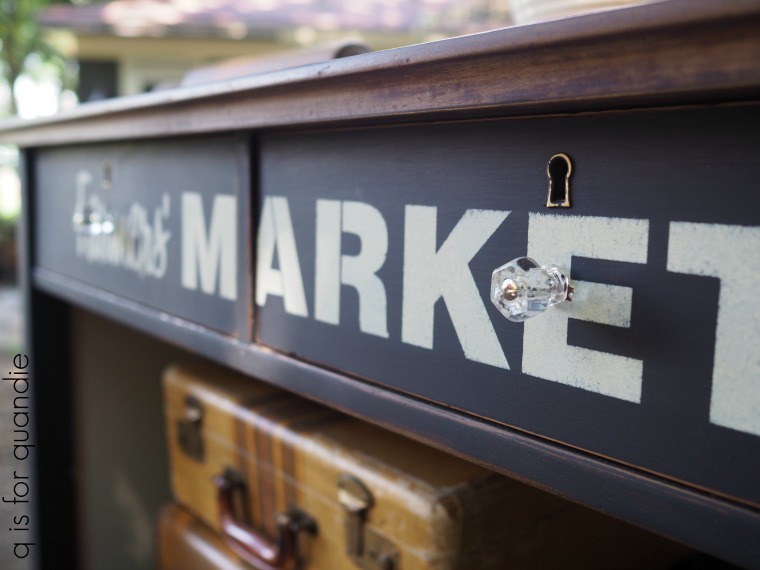
That’s when I decided to just go with what has become my favorite black, Dixie Belle’s Caviar.

And to brighten up the inside of the lower section, I painted it in Fusion’s Plaster. I also painted the insides of the upper two drawers in the same color.

Then, while I had the Plaster out, I went ahead and used it to stencil ‘Farmers Market’ across the top two drawers.
It really wasn’t until this moment that I decided this piece would make an amazing kitchen island. But for that it needed to have some sturdier updated casters so that it could be moved around in a kitchen. The dresser had come with old wooden casters, but a couple of them no longer had the wooden wheel, just the metal framing for the caster.
So I removed all of them, but was unfortunately left with holes that were larger than the size of the new casters that I purchased at my local DIY store.
Once again, I called on Ken for assistance. He filled the old holes using a dowel stick and lots of glue. Once the dowel stick was in place, he cut it off even with the bottom of each leg.

Once the glue was dry, he drilled new holes of the correct size for the new casters.
Next I realized that I also needed to paint the back of the dresser if it was going to be used as an island floating in the middle of someone’s kitchen. So I gave that a couple of coats of Dixie Belle’s Caviar too.
Finally I used Dixie Belle’s Easy Peasy spray on wax as a top coat over the paint. I used Miss Mustard Seed hemp oil to freshen up the bead board lower shelf. And I used Miss Mustard Seed Antiquing Wax on the dresser top.
You might now be rolling your eyes and asking yourself ‘why oh why does she use so many products? couldn’t she have gotten by with just one?’ And the answer is yes, I could have. I could have used the Antiquing wax for the entire piece. It would have worked beautifully over the black paint, and it also would have freshened up the bead board nicely. However, it would have required more elbow grease for both of those than the products I did use and I’m a fan of saving myself extra labor whenever possible. So, three different topcoats it was.
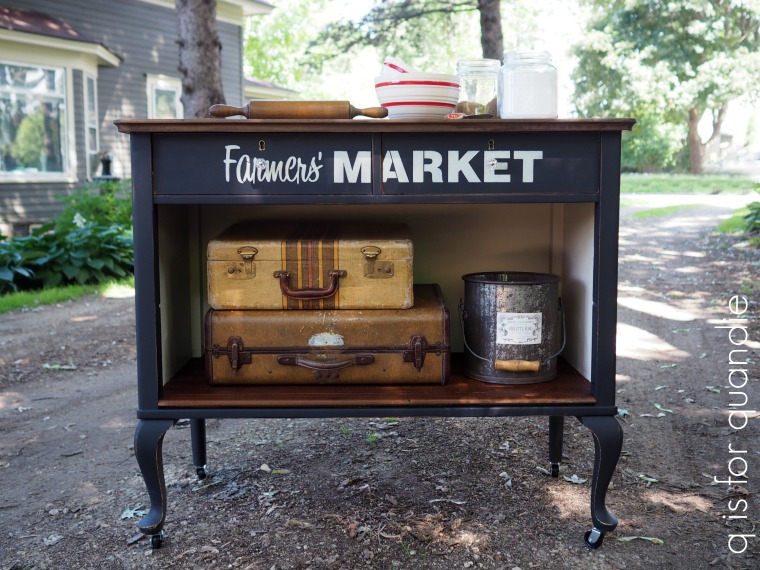
So after many starts and stops and decisions along the way, the Farmers Market Island is finished!
And I absolutely love it!
My sister loved it too and is inspired to create a similar piece for her own kitchen. I’ll be sure to share her project when she gets going on it.

In the meantime, if you are local and need a Farmers Market island be sure to check out my ‘available for local sale‘ page for more details!
P.S. Be sure to let me know what you think of the results on this one Mary!

I love a good transformation! It has great lines and works great as a workstation. I would put lots of old bowls in the bottom and crocks to fill up with bulky utensils that you use all the time. The best part is it can be moved up against the wall if you need extra buffet space. Great job, the black will go into any decor.
LikeLike
I love that idea! Old bowls and crocks would look fab under there. If my sister finds a piece like this for her kitchen, she’ll do the opposite … keep it up against the wall but pull it out when she needs more work space near the stove.
LikeLike
You are a miracle worker… so clever! It looks great! Thanks for sharing your inspirations and ideas. Your blog is my favorite.😁
LikeLike
Thank you so much Linda!
LikeLike
Fabulous! I love the plaster and natural wood on the inside, with the caviar outside! I’m glad you share your dilemmas, and how to fix them. Wonderful inspiration!
LikeLike
I ended up loving the combo of the Plaster with the Caviar. They really are nice together!
LikeLike
I don’t know which I love better….your beautiful transformations or Ken’s beautiful woodworking skills. Turned out lovely.
LikeLike
The other day Ken and I had a conversation about how neither of us could do this without the other. He makes things functional and I then make them pretty.
LikeLike
Love it – and I can sure see a smaller version in Debbie’s kitchen too! Would be great to have that extra workspace when she’s doing her Christmas baking! Another great job is saving furniture, one piece at a time!
LikeLike
Thanks Terri!
LikeLike
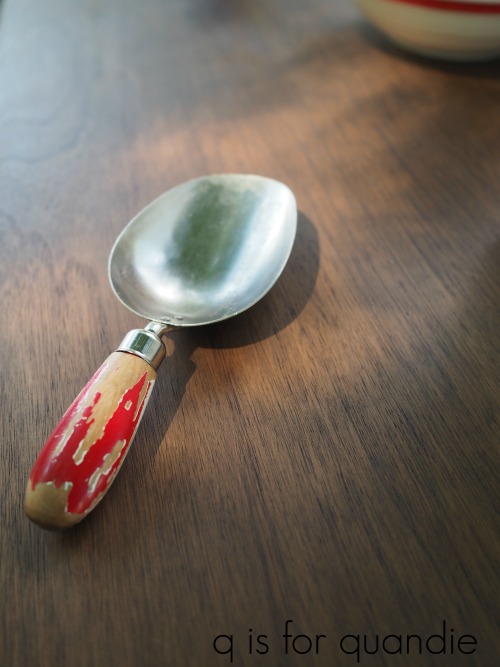
So that’s where Lucy’s scoop went! I had to refill her dish by dumping the big storage jar into it. I was going to ask you if you knew what happened to it. BAM, it made it on to your blog!
LikeLike
LOL! You are giving people a glimpse behind the curtain … don’t give away my secrets 😉
LikeLike
You and Ken could rule the world!! 😀 What a great makeover!! And congrats on the quick sale of the garden beds. They were lovely, and it looks like they went to a great home!
LikeLike
Thanks Cynthia!
LikeLike
I love what you did to this dresser. I love the stencil across the drawers. I have made one of these before myself. They seem to sell quickly. I thiink that the pieces are perfect for people who have smaller kitchens. They are perfect for people who live in apartments too. I will have to try that spray wax. It is intriguing to me.
LikeLike
I used the spray wax on a project I’m sharing on Wednesday too, and in that post I’ve mentioned that it is a little more expensive than the traditional wax or other top coat options. That always seems to be the case, you pay a little more for convenience. But I think it’s worth the splurge to make life a little easier sometimes!
LikeLike
I LOVE the pic with Ken’s hands. The two of you are quite the dynamic duo. Another beautiful transformation.
LikeLike
Isn’t that awesome! Ken is so patient and perfectly willing when I ask him to freeze so that I can get a clear photo with no motion blur 🙂
LikeLike
I’ve long be a fan of unconventional islands. Your redo of this piece is not only charming but will be functional
as well as a conversation starter. Plus anytime you stencil or apply a transfer decal that seals the deal. Apparently I am completely in love with lettering. Ken is a rare gem.
LikeLike
I’m with you Victoria! Somehow adding lettering to a piece always makes me love it more!
LikeLike
Weeell, not sure I am the right Mary, but I think it is great. Love your ideas and what you come up with:) How do you think of them.
LikeLike
The Mary I had in mind is the one I purchased the pieces from 😉 But of course I’m glad to hear from you too! And to be honest, I think if I had to pick the main way I come up with my ideas I’d have to say Pinterest. I get the majority of my ideas while surfing Pinterest 🙂
LikeLike
I love what you did with this Linda! Caviar black is one of my favorites and I really like using that spray wax too… super convenient and easy. Have a good one. 🙂
LikeLike
Thanks! You too Denise!
LikeLike
Well, it’s just gorgeous! The rich black and the contrasting white. It will make a beautiful kitchen island. I think a row of crocks would be pretty in it too. Also, ken needs an apprentice bc somebody should be learning these skills from him.
LikeLike
Ken really does need an apprentice. I try to learn what I can, but I really don’t have the aptitude for the kinds of things Ken does. I wish I did.
LikeLike
Yep, I really do like this one and need one of my own. I have the measurements and the hardwood for doors on mine. Now I just need to find the dresser.
LikeLike
Love it. Wondering how you would make the top over if you wanted it to hang out a little on one side to put stools up to it?
LikeLike
I don’t know of any way to do that other than simply adding a new top which could get costly.
LikeLike
Aloha, I just discovered you! Great ideas and beautiful work via Salvages inspirations via Dixie Bell via via via….lol. Mahalo from Hawaii.
LikeLike
Welcome Lianna! And lucky, lucky you that you live in Hawaii! I’m so envious 😉
LikeLike