
Welcome to day 4 of milk paint madness week!
Today I’m going to share some of my favorite advanced milk paint techniques including using bonding agent, layering milk paint with other types of paint, resists, how to control the chipping, how to create a crackle effect, and custom mixing.
bonding agent.
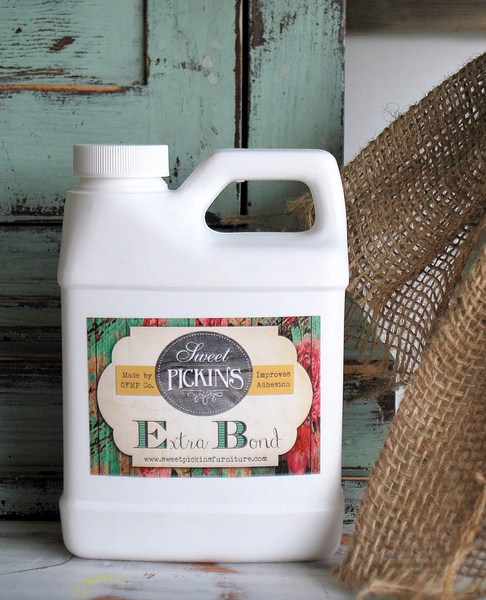
All of the milk paint brands sell a bonding agent. The purpose of bonding agent is to improve the adhesion of milk paint. I’ve never been a big fan of bonding agent, and here’s why. If you don’t want any chipping when using milk paint, then why use milk paint? I feel like bonding agent basically turns milk paint into an acrylic paint. That may not be scientifically accurate, but you get the idea. Your paint will become smoother and have a little bit more sheen. If you want a creamy smooth paint that adheres well and doesn’t chip, use Fusion acrylic paint. It will be cheaper to buy one jar of Fusion paint than it is to buy milk paint plus bonding agent plus a top coat.
However, bonding agent does have its place. For example, when there is a milk paint color that you absolutely love and you want that exact color but you don’t want it to chip. This came up recently for me (and you’ll read more about that tomorrow). Another time you may want to use it is when you have a surface that you know is going to really resist milk paint far more than you want it to, you can paint a first coat of your color with the bonding agent and then a second coat without. You’ll still get the look of milk paint with your second coat, but probably not a lot of chipping.
It’s easy enough to use bonding agent. It’s important to mix your milk paint powder with the water first. Once that’s well mixed, add the bonding agent directly into your paint and mix well. You should add one part bonding agent to two parts paint.
layering.
Back when I first started using milk paint I was very confused about what you could paint over with milk paint and what you couldn’t. Over time I’ve learned a little bit from other painters and a little bit from trial and error. Here’s what I’ve discovered.
Chalk paint and acrylic paint are perfect for layering with milk paint, especially if you’re worried about milk paint chipping right off the existing finish on your piece. Much like painting the first coat using bonding agent, you can also paint a first coat of chalk or acrylic paint. Then use a resist to encourage the milk paint you put over it to chip where you want it to. But more on resists and chipping in a minute.
When layering milk paint over chalk or acrylic paint you do not need to sand the chalk or acrylic paint. Just paint right over it with your milk paint. Please note, this is assuming you have a fresh coat of these paints, not an old paint job with a topcoat of some kind over it.

If you are painting over a piece that was painted previously and then sealed with wax or hemp oil, you need to be sure the topcoat is cured (30 days) before trying to paint over it with milk paint.
If you are painting over a piece that was sealed with The Real Milk Paint Co’s finishing creams or the Tough Coat Sealer you are fine painting over those with milk paint as soon as they are dry.
I treat old latex or oil based paint the same way I would an old varnished finish because all three of those will resist the milk paint to varying degrees. I’ll go into that a bit more in a minute.
I have also found that milk paint does not adhere well to spray paint. You’re probably wondering why in the world anyone would want to put milk paint over spray paint, but I have tried that when painting cane or wicker. I also once tried to paint over a chair that was initially spray painted. Not much of the milk paint stuck.
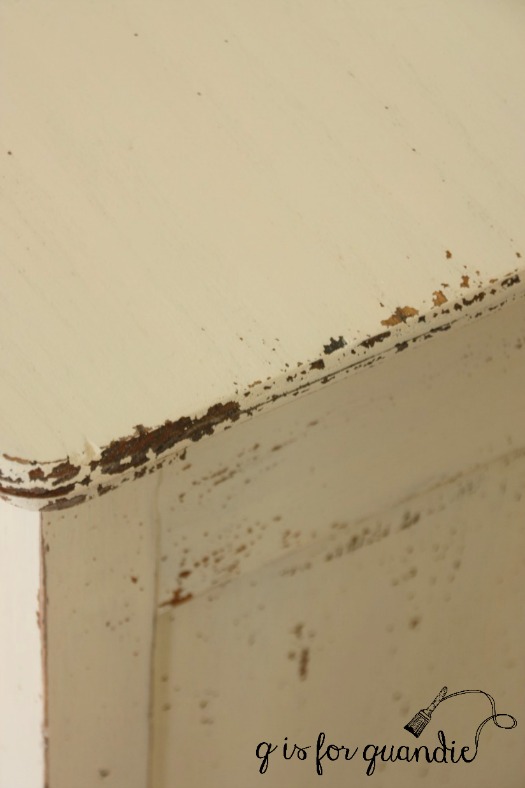
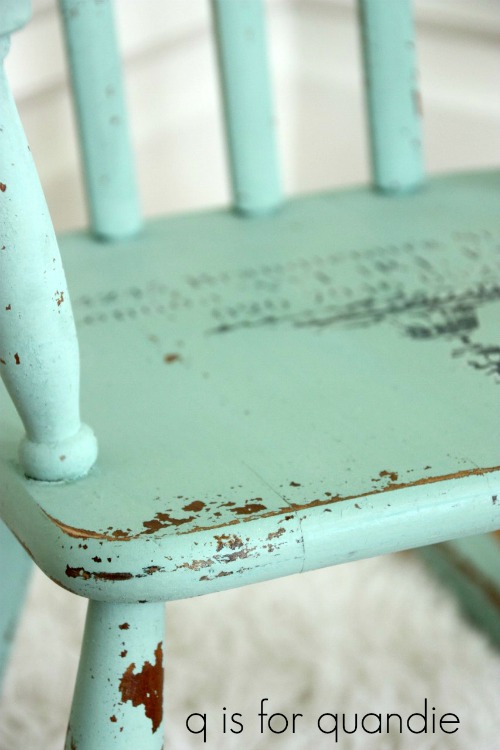
the chippy factor.
The most unique thing about milk paint is its tendency to chip when it meets resistance and thus can’t absorb into the surface that you are painting.
Resistance can take many forms. It can be a pre-existing impervious finish like varnish, it can be layers of furniture wax or polish that have been applied to a piece over the years, it can be oils from handling (or from cooking in the case of kitchen cabinets), or it can be old oil based or latex paint.
With lots of experience painting pieces in milk paint I’ve gotten better at predicting whether or not something is going to chip, but it still sneaks up on me sometimes.

The best way to control unwanted chipping is with good prep!
I can’t stress that enough. If you don’t want out of control chipping, prep your piece by sanding it well, vacuuming off the dust, then cleaning with a grease cutting cleanser like TSP Substitute.
But if you like to live on the edge and you can roll with the punches, just wipe your piece down with a damp cloth and then take your chances. Sometimes that’s a fun way to go too.
resists.
Once you’ve prepped your piece you can apply your own resist in a purposeful way to encourage chipping where you want it. There are lots of choices when it comes to a resist. You can use hemp oil, furniture wax, petroleum jelly, a wax puck, canning wax or candle wax. However, my favorite product to use is the Homestead House Salad Bowl Finish.
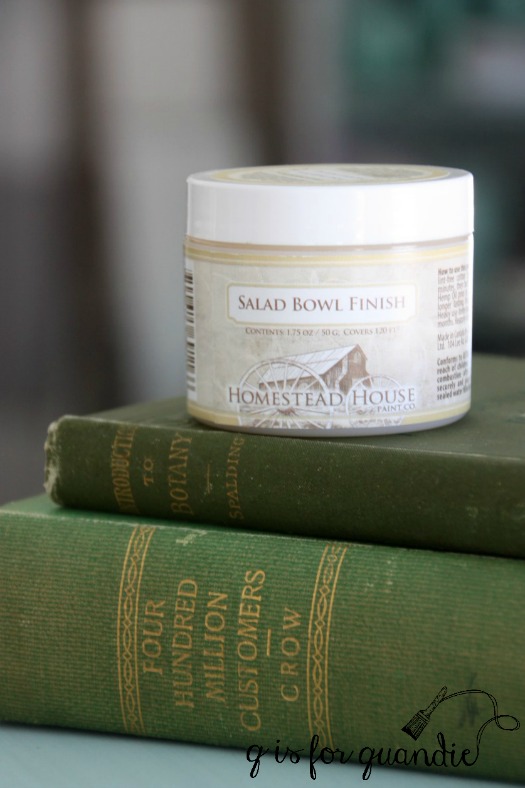
This is a beeswax finish that is formulated just a little bit differently from furniture wax. It’s harder and a little bit more oily, and it works perfectly as a resist. A little bit goes a long way. I have the small jar and haven’t even used half of it yet, and I’ve probably used it on at least a dozen or more pieces. As a side note, it works really well as a resist under Fusion paint too. I’m giving away the larger jar as part of today’s giveaway, so the person who wins will practically have a lifetime supply!
I apply the Salad Bowl Finish much like one would apply lip balm. Get a little on my finger, then use it to rub the wax onto the furniture in a very thin coat only where I want chipping. Add it very sparingly if you just want a little chipping, add more if you want a lot.
Miss Mustard Seed and Sweet Pickins also carry a beeswax finish.
the tape method.
What if you painted your piece and totally forgot to add a resist to encourage chipping? Or maybe you expected the piece to chip naturally and it just didn’t (because sometimes that happens too).

Well, all is not lost. I’ve had great success with using tape to pull off some of the paint. Just press some tape onto the area you want to chip and then yank it off again. It’s sort of like the process of removing lint from your black slacks using tape. I always start with the yellow Frog tape (for delicate surfaces). However, if I find the paint still isn’t coming off I’ve been known to try a stronger tape like packing tape. Just use caution when doing this, you can also pull off a big solid strip of paint which isn’t quite what you want. Go slowly, start out with a very small area and go from there.
crackling.
Applying heat is a great way to encourage your milk paint to crackle. You can do this the accidental way (which I totally do not recommend), which is to paint your piece in the hot sun on a summer day. I’ve done that a few times and have gotten some great crackling, but that’s not very practical or predictable. A better way to encourage crackling is to use a blow dryer which gives you a little more control. I recommend mixing your milk paint a little bit thicker than you would normally, then as soon as you’ve painted it on add some heat by ‘drying’ it with the blow dryer on high heat.
If you want to emphasize the look of a crackled finish, try adding a colored top coat such as antiquing wax or white wax which will catch in those cracks and highlight them.
custom colors.

Mixing a custom color is one of my favorite ways to play around with milk paint. I know you can mix other kinds of paints to create your own colors too, but somehow with milk paint it feels a little more mad scientist-y. Maybe it’s because you mix various powders, then add water, then you have to wait 5 or 10 minutes to make sure the pigments are all fully dissolved before really getting a good look at the color you’ve created. Or maybe it’s because I sometimes practice my evil mad scientist laugh while I’m mixing my own paint colors.
Some of my favorite custom mixed colors are Blue Alligator …
![]()
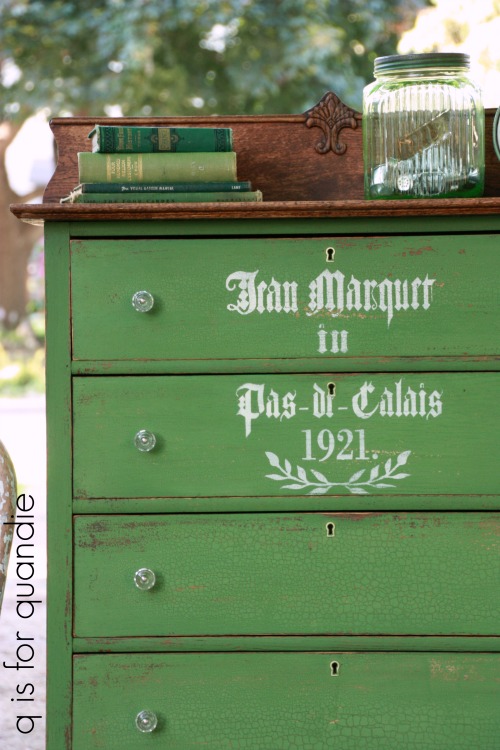
and French Desk Grey …
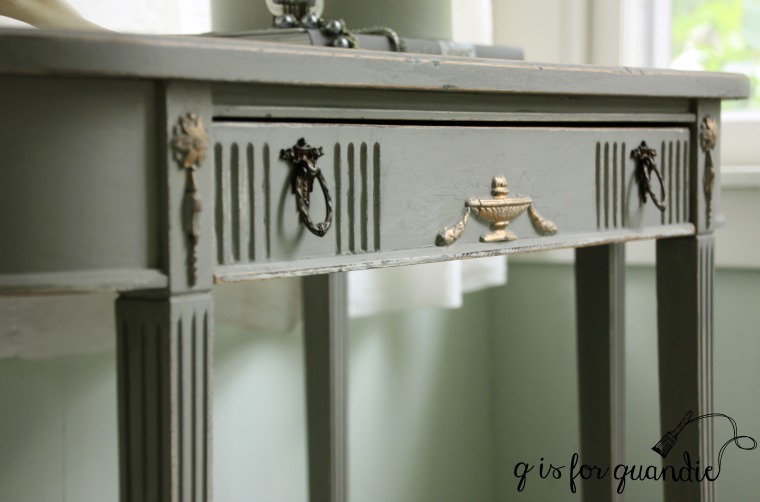
Mixing custom colors is a great way to use up those partial bags of milk paint that don’t have quite enough in them to paint a full piece of furniture.
I hope today’s post has given you some ideas for different techniques you can try with milk paint. Now for the fun part, today’s giveaway:
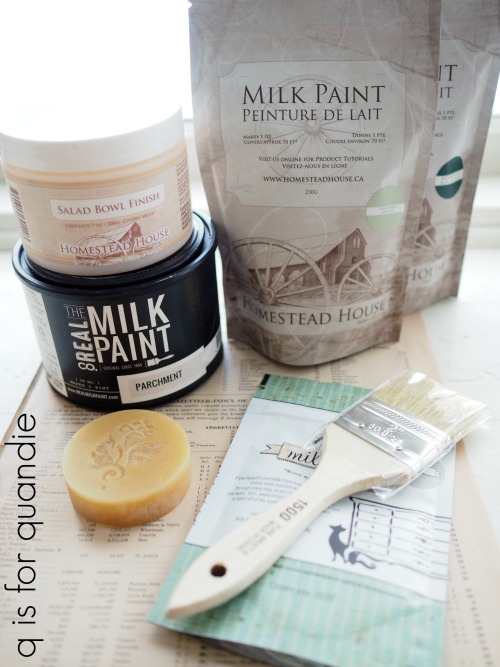
Includes: Four colors of milk paint, a jar of Homestead House Salad Bowl Finish and a Miss Mustard Seed wax puck. Thank you to Homestead House, Miss Mustard Seed and The Real Milk Paint Co for providing items for today’s giveaway.
The basic rules: to be eligible to win today’s prize leave a comment on this blog post telling me if you’ve tried any of these milk paint techniques, or if not, which one you want to try. Your comment must be left on the blog, not on Facebook. You are not required to follow my blog, although it would be awesome if you did!
Normally I make a point of answering every comment left on my blog. If someone takes the time to leave a comment, I like to acknowledge that. But I usually only get 10 to 20 comments so it’s easy to fulfill that promise. But I’m guessing that I’ll get many more comments on these posts so I’m going to warn you up front that I won’t be answering each one. That helps make it easier for me when it’s time to pick a winner too, so I hope you guys will cut me some slack on that this week.
I will randomly draw the name of a winner for today’s prize from all of the comments left on this post by Saturday, April 7, 2018 at the stroke of midnight. You are eligible to win each day, so if you leave a comment on each day’s post, your name is eligible to be drawn for each prize.
The fine print: no purchase necessary, you must be 18 years of age or older to win, void where prohibited by law, the number of eligible entries received determines the odds of winning, approximate retail value of prize is $106, if the prize is not claimed by Friday, April 13, another name will be drawn at random to win, blah, blah, blah.
Be sure to check back tomorrow for the final segment of milk paint madness, and in the meantime remember to pin today’s post for future reference.


Love reading about “chippiness” today!! Can’t wait to try some of these techniques.
LikeLiked by 1 person
Another great read sharing your techniques! I have experimented with Layering and Resisting! And yes, I have used tape!!!
LikeLiked by 1 person
I have not tried any of these “chipping techniques” but would love to try! Very informative post, thanks
LikeLike
Wow there sure are a lot of options and ideas to try – very interesting post & series on Milk Paint. Thank you for sharing.
LikeLike
Loving this series! I have not tried. This yet.
LikeLike
Such great ideas. I have never tried the salad wax, but look forward to doing so. Love the chippy look.
LikeLike
I have used hemp oil and petroleum jelly as resistance with milk paint. I’m anxious to try some of the other tricks you mentioned! Thanks for all your tips this week!
LikeLike
1I have never used a resist method, but the tape method sounds so easy I’d be willing to try it
LikeLike
I have used bonding agent to help control chipping before.
LikeLike
I’ve used the bonding agent when I loved a specific color of milk paint, like you mentioned. Otherwise, I want it chippy!
I’ve also used GREEN frog tape to help with chipping. Who knew!!!
LikeLike
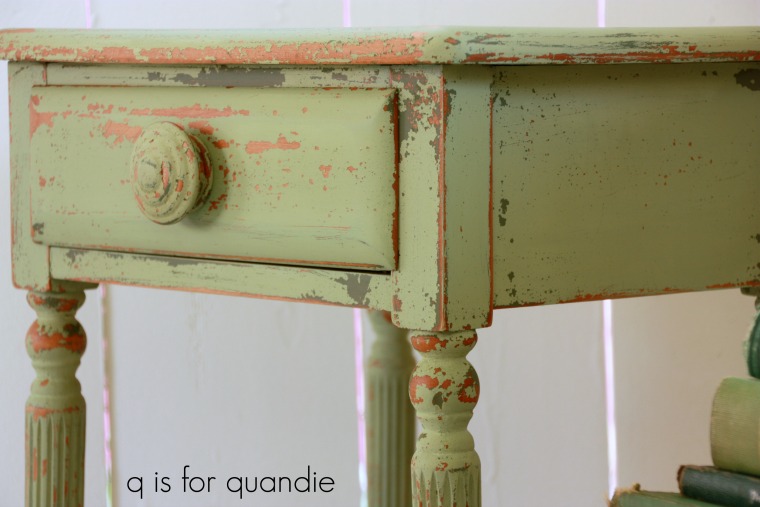
I truly love the pieces of furniture that you paint the lower part and leave the top with the wood finish.
LikeLike
Need to get up the courage to try layering.
LikeLike
I am currently on a milk painting roll.. I have to try the salad finish resist.. but always forget to do resist as MP seems to just do what it wants no matter what I do 🙂
LikeLike
Chippy, chippy, love it!!!
LikeLike
The salad bowl finish is definitely up my alley….!
LikeLike
We must think alike. I think I’ve tried all of these, some by accident. Like the tape method for distressing. I normally like to live on the wild side and just see what milk paint does. Sometimes I get a lot of chipping. Or I tend to sand too much and get no chipping at all. So then the tape comes in handy. I do love the look of your door painted with chalk or acrylic paint aa a base coat. I will have to try that!
LikeLike
Never tried these techniques but am interested in achieving the crackle look on my next piece!
LikeLike
I’ve yet been blessed with the oppurtunity to try milk paint but I want to try the wax puck, mixing colors – I love the color of the gray desk, and layering. Someday I’ll take the leap and give it a try. I’ve been leary about getting uncontrolled chipping but you’ve shown the ways to prevent that. Than you!
LikeLike
Next project will have crackling!
LikeLike
I have tried adding bonding to milk paint but never sure if i was doing it correctly. Loved the post and ready to try again!
LikeLike
I want to try the crackling effect..already have a blow dryer..lol
LikeLike
Omylanta, I can’t wait to try this! I love all your tips! Thanks for leading us on this revolution!
LikeLike
Oh my decisions & choices! I want to try them ALL! Love the custom paint mixing & how you truly use all your paint up with NO Waste! 😘
LikeLike
So want to try each of these techniques, but I am interested in trying the layering technique first. Love the different colors peeking through giving the piece an aged look. Thank you for the techniques and this wonderful giveaway.😊
LikeLike
I love the color of Maritime Blue. I’m in the blue mood for spring although we might never get there her in MN.
LikeLike
I enjoyed reading this informative post. I’ve never heard of using tape to create chipping. I agree with you about bonding agent as I rarely use it with milk paint. Thanks for sharing your tips!
LikeLike
The one I haven’t tried and I definitely will, is the crackle. I’ve had pieces do that on their own a few times, and I’ve always loved the look.
LikeLike
I’ve done layering and the resist technique on the edges of a few pieces which are probably my favorite techniques. But I would like to try mixing up a color or two and also trying to get some really great chipping.
LikeLike
I haven’t used any of these methods but I do find the salad bowl interesting.
LikeLike
Gosh, so many techniques! I have only done some layering with sanding. More to try…thanks so much!
LikeLike
I have never used the salad bowl for a resist. Such a crazy name!
LikeLike
I’d like to start with some layered colors. Great info!
LikeLike
I’ve definitely used your tips for tape and heat to get some chipping on a tough piece!
LikeLike
I think I might like to try wiping a little smear on the edge of the furniture piece. I’ve tried it before with vaseline, but think I put on too much.
LikeLike
I done some layering with milk paint on top of chalk paint and tried a few different resist techniques, mainly with hemp oil and tape. I’ve been meaning to get some salad bowl finish to try!
LikeLike
Loved the tips about chipping today and all the different eventualities one might encounter!
I didn’t know you could crackle milk paint just by painting in the sunshine haha! Maybe the sun over here just isn’t as strong but I’ll definitely be putting that to the test this summer! X
LikeLike
I love your Blue Aligator color. I need to get brave and mix paints to try something unexpected!
LikeLike
I love them all. Fabulous job here.
LikeLike