

As you can probably tell by the ‘before’ photo below, I purchased this dresser back at the end of summer when I was trying to stock up some projects for the winter.

I think we can all agree that the previous owner had made some rather unfortunate hardware decisions, but otherwise this piece didn’t look all that bad at first.
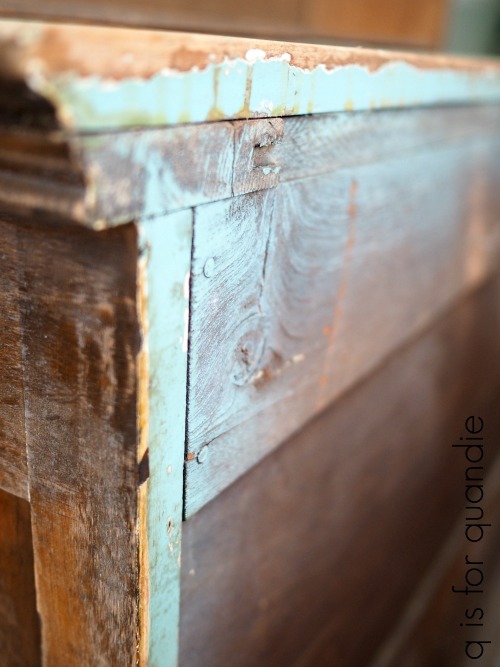
I wanted to strip the top and then wax it with a dark wax, but after stripping the top of the dresser it looked like this.

I’ve run into these black streaks before. I’m not 100% sure, but after doing some quick google research I think they might be iron oxide stains (if any of you have any insight, please share in a comment). Iron oxide stains can occur when the tannins in the wood interact with moisture and turn black over time. There are methods for removing these stains, but I didn’t think it was worth it to spend that much time and effort on this dresser. The wood just wasn’t that pretty. So, in the end I opted to just paint the whole thing.
I also found some clues to tell me this dresser was probably originally intended to be painted. In fact, it had been painted at least twice and possibly three times. Clue no. 1 is on the back side.
Isn’t that a gorgeous aqua? I know I would have loved that color!
Clue no. 2 was inside the openings for the drawers …

So it was probably also pink at one time, and maybe even white.
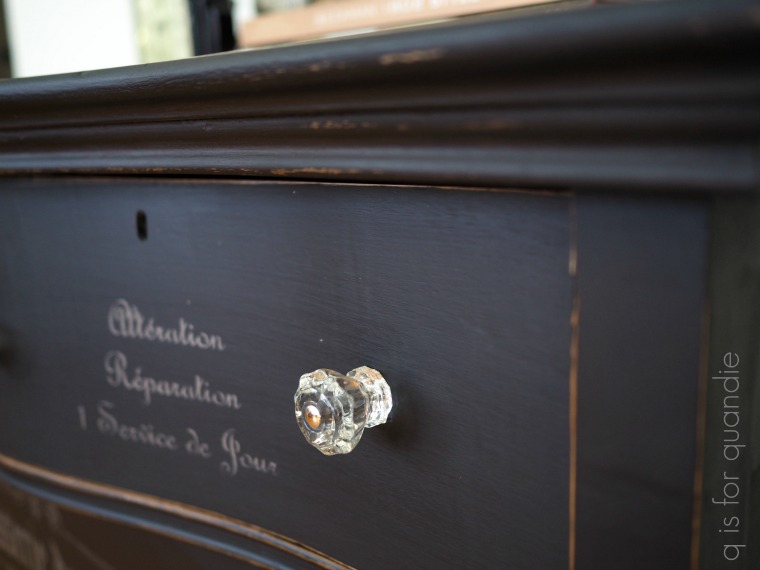
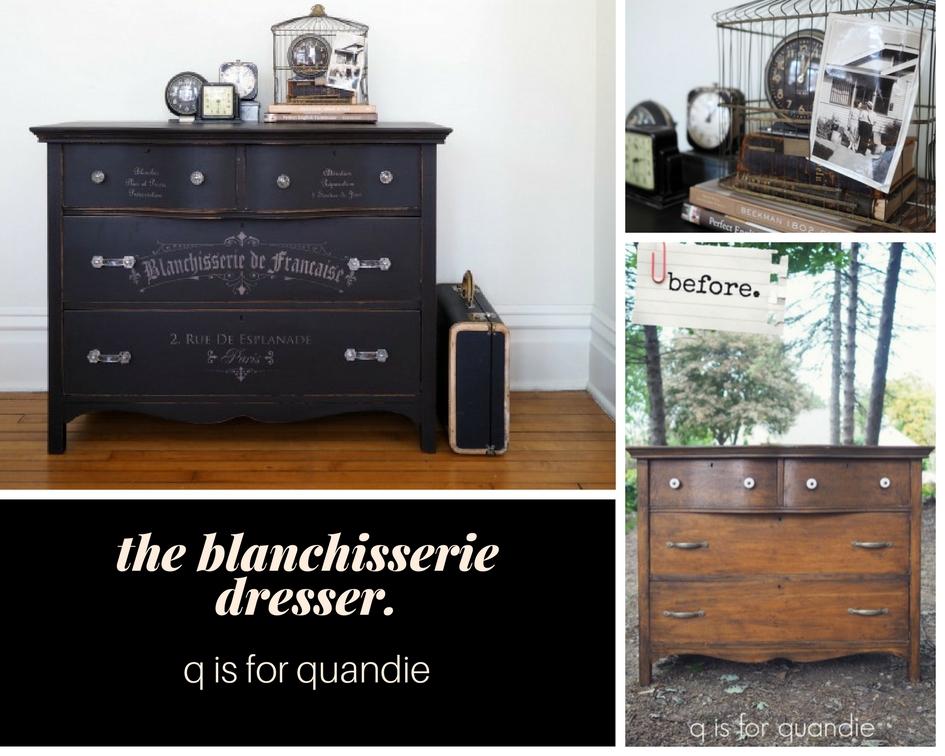
Whoever bought the dresser, then stripped off all of those colors and refinished it, was probably pretty disappointed in the lackluster results. But I was happy to take it back to its roots. Except I didn’t choose aqua, pink or white. At least not on the outside. Instead I chose black. More of Dixie Belle’s Caviar to be precise.

Once the paint was dry I added bits and pieces of my french laundry stencil to the drawer fronts. Once again, I’d love to share a source for this stencil but the company I purchased it from via Etsy seems to no longer be in business.
To keep the stencil subtle I used a warm, dark grey acrylic craft paint rather than a white.

Once the stencil paint was dry, I sanded lightly by hand over the entire dresser with a fine grit paper and then waxed it using Dixie Belle’s Best Dang Wax! in brown. I think the amount of sheen I got from this wax is just about perfect.
I ended up using clear glass knobs and drawer pulls on this dresser because I happened to have them on hand. My friend Sue gave them to me and I had just the right amount for this dresser, plus they were just the right size for the existing holes. It seemed like it was meant to be.
As a nod to the remnants of pink paint that I found inside the dresser, I painted the interiors of the drawers in Fusion’s English Rose.
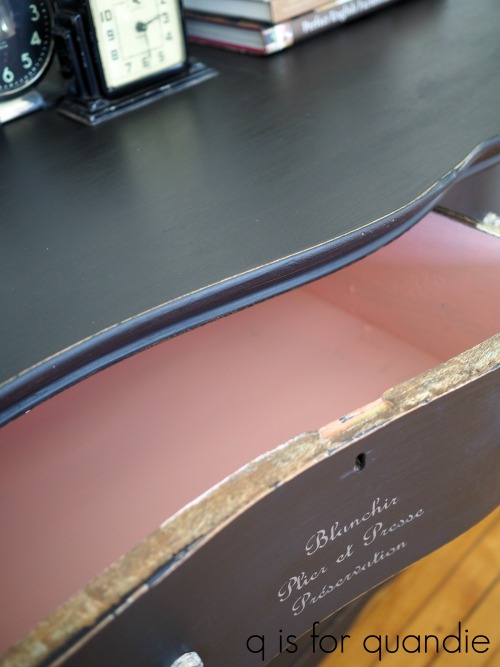
I like to use Fusion paint in spots like this because it doesn’t need a topcoat, yet is still fully washable once cured. A great quality for the insides of drawers. It only took me about 20 minutes for each coat of paint (I used two) and that fabulous pop of pink when you open the drawer is a lot of bang for your buck, time wise. I generally only resort to painting the inside of drawers when they are really stained up and scary looking. These drawers had a few ink stains that needed to be covered up. In order to prevent the ink stains from bleeding through my paint I tried out the new clear sealer that Dixie Belle provided me with last month, B.O.S.S.
B.O.S.S. stands for Blocks Odors, Stains, Stops bleed-thru.
Had I wanted to block odors, or stop a reddish stain from bleeding thru I would have painted the B.O.S.S. over the entire surface. However in my case I just had a couple of stain spots that needed blocking, so I just painted two quick coats of B.O.S.S. over the stains themselves. It worked perfectly.

You might be wondering why I didn’t paint that edge of the drawer. That is because the drawer fits fairly tightly as it is. If I added paint, it would not open and close freely. Always beware of adding too much paint to the edges of your drawers when they are a tight fit. Nobody wants sticky drawers!
I staged the dresser with some of my favorites from my non-collection of vintage alarm clocks, plus one of my favorite old photos.
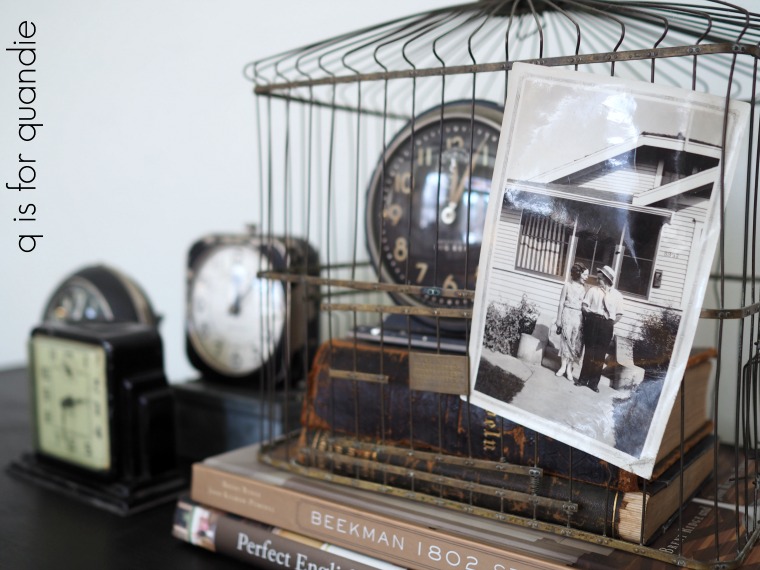
That photo was taken on the stoop of my grandparent’s home in South Minneapolis, but no one in the family seems to know who the people are. They look like such a fun couple though, don’t they? I imagine that it was a sunny spring day and they were on their way to a picnic at Minnehaha Falls when the photo was taken.

This was back in the day when ladies wore dresses and men wore ties on picnics in the park.
They probably had fabulous painted dressers with glass knobs too, but maybe not with french stencils on them. Their loss, right?

I gotta tell you guys, I’m kind of in love with this Dixie Belle Caviar. Lucky they sent me the big jar, because I’m going to be using a lot of this color.
The blanchisserie dresser is available while it lasts, be sure to check my ‘available for local sale’ page for more details!

Beautiful…I am inspired. I did buy a similar one off Etsy this morning from Brown Bag stencils. It doesn’t have the address but I do have a street address on another stencil.
As this company doesn’t ship to Canada, I shipped it to a Parcel Pickup depot in Michigan. I have a large wicker laundry basket I want to put a wash on and stencil and I am going to replicate your look on a piece of furniture.
LikeLike
Nice! I bet both of those will be fantastic Janice!
LikeLike
As always, I love your makeover! I get such inspiration from you and your ‘q-tips’ are the best! Some questions for you…I’ve used shellac for bleed-thru. Is the B.O.S.S. product stinky? Can you use it indoors during the winter months? Thanks!
LikeLike
Hi Toia! The B.O.S.S. is not stinky at all. I used it inside (and I’m in Minnesota in February, brrrrr). It’s also water based, so easy soap and water clean up. Two coats of it did a great job of blocking the ink stains!
LikeLike
I like the new color. The dresser turned out very nice.
LikeLike
Thanks sis!
LikeLike
Beautiful!!! The stencils are the icing on the cake. I agree, Caviar is amazing, I just finished a buffet in it. :))
LikeLike
Caviar is rapidly becoming my favorite black paint!
LikeLike
Absolutely beautiful. Another job well done. Just a tip from my end… for sticky drawers, run a bar of soap along the tracks and also the top, bottom and sides of the drawer front. Works like a charm.
LikeLike
I usually use a cheap block of canning wax, but I’ve never tried soap. I’ll have to try that next time!
LikeLike
Gorgeous, as usual. I feel like I write the same comment every time, but your makeovers are beautiful!
LikeLike
Thanks Maureen! And no worries, feel free to keep leaving that comment over and over 😉
LikeLike
Wow! Just Lovely…I wish I had a spot to put this. The owner I would love to be…another artful piece, Linda!
LikeLike
This piece would fit right in with the other pieces you’ve purchased from me Patty!
LikeLike
I love this piece!!! Wonderful job!
LikeLike
Thanks so much Natalia!
LikeLike
Another winner Q. This color is so perfect I see some Caviar in my future too.
LikeLike
We should all have some Caviar in our future! I like that!
LikeLike
So funny…I’m reading along and look at the picture. All the while I’m thinking why didn’t she paint the edge of the drawer…when BAM…you answer my question. I love that. Lol. Another great makeover. Love the caviar color …remember that one time I actually tried eating caviar and liked it? Strange for me to try…even stranger that I liked it.
LikeLike
I have had too many experiences with drawers with painted edges becoming stuck, so now I just avoid it. As for the caviar, I do seem to remember that you also really enjoyed the brains (sweetbreads) you tried but I’d forgotten about the caviar 😉
LikeLike
I’m sure you loved it Terri because it is close to the saltiest food on earth! 😀
LikeLike
You might be onto something there Mr. Q 😉
LikeLike
Love the caviar and am going to order some! Is the wax really, really easy to use? I need to start on an entire bedroom set. Is it kind a satin finish? Love your *Q-tips*!
LikeLike
Well … here’s the thing … I wouldn’t call any wax ‘really, really easy’ to use. I don’t want to sugar coat it, all waxing is going to require some measure of elbow grease. The simplest technique I’ve found is to apply the wax with a waxing brush (I like Miss Mustard Seed’s wax brush) using a circular motion, wait a few minutes, then come back with a cloth and remove excess wax (by continuously switching to a clean section of cloth as it becomes full of wax) and then buff (also with a clean cloth). The more you buff, the more shine you’ll get. So you can definitely get a satin finish out of the Dixie Belle wax if that’s what you want. It’s not complicated or difficult to learn how to do, but it does take more physical effort than just brushing on a poly topcoat. Personally though, I do love the look of a waxed finish!
LikeLike
WOW! Another perfect dresser. I’m looking forward to using the Caviar color that I bought a while back. Just haven’t decided what to use it on.
LikeLike
I think you’re going to love it Sugar!
LikeLike
Another lovely job,I am beginning to like this.Oh dear what have I just said Have a lovely day , to Mom and sis too.We are still up to our knees in snow up here in Ontario
LikeLike
Time to get out the snowshoes Betty!
LikeLike
Beautiful as always. I love what you do with IODs and stemcils. I’m a fan of stencils myself. After a small learningurve, I’ve gotten rather good at them and love adding raised stencils to my projects. Everyone thinks I carved the design into the wood. As if!! If I had that kind of talent….. I’m just glad people around here haven’t figured out how easy it is! Your Q-Tips are wonderful & always put a smile on my face – even before I read them because I know I’m going to learn something important. Like the lady above – it answered the question I was asking in my mind-“Why didn’t she paint that drawer edge?” I’ve also used a bar of soap with excellent results and it seems to last much longer than wax or wax pucks that I’ve also tried on th recommendation of other bloggers. I learned the soapttechnique from my grandmother when I was just a tiny girl.
LikeLike
I’m definitely going to try that soap thing Christie!
LikeLike
I love this makeover Linda! Beautiful as always. XO
LikeLike
Thank you so much Denise! So far I am loving the Dixie Belle paint, so thanks for inspiring me to try it 🙂
LikeLike
I love ALL your work! You have such a good eye for choosing paint colors to complement each piece. By any chance, did you use Citristrip to strip the top of this piece? Citristrip is probably the culprit that caused the black stains (I think it also contains a fair amount of water). I used Citristrip to strip one of the 100 yr old doors in my house….it left black spots and raised the grain of the wood which ended up needing a lot more sanding before I could finish it. Never used Citristrip again. Most likely, the original finish on your antique piece was shellac or lacquer. The safest way to remove shellac is with medium coarse steel wool dipped in denatured alcohol and then wipe away the liquified shellac in the direction of the wood grain with paper towels. Let all the solvent evaporate from the paper towels before closing the trash bag and protect your work area because it’s a little messy being so liquid-y. You’ll probably have to go over each section 2 or 3 times to clean it all away. If the denatured alcohol doesn’t work, try the same thing with lacquer thinner. These solvents are far safer options than the methylene chloride based chemical strippers…although methylene chloride strippers are VERY effective and fast and leave the wood surface so smooth you almost don’t need to sand…and they’re a WHOLE lot cheaper than Citristrip! Please blog if you try this method. I’d love to know if it worked for you.
LikeLike
Hi. Your work is amazing! I’m painting my nightstand navy and would love to apply a transfer or stencil but am having trouble finding them – I love the ones you used on this piece and most of your pieces – that are just words in french. Can you give me clues where to find them? I think I’d rather have a transfer because I’m scared to stencil (bleed-through) but don’t know if anyone sells transfers like this in light colors to go on navy. Thanks!
LikeLike
This piece is done with a stencil. You can find white transfers that can be used over navy, but personally I’ve never been a big fan of the white transfers. Look at {this post} to see a white transfer over navy. Prima Marketing has a gorgeous gold transfer that works beautifully over navy (see that one here) and also over black (here). Just google ‘prima marketing somewhere in france’ to find places to purchase the gold transfer.
LikeLike
Thanks so much! I’ve done a lot of Googling and have had a hard time finding transfers in white like this. I did find that gold one and am considering it. I know you said the place you got this stencil isn’t there any more but have you found another place you could recommend that would have similar style stencils? Any tips for applying a stencil without bleeding?
LikeLike
Try Brown Bag Stencil Co on Etsy. They have stencils with this same look. Here are my tips for stenciling: 1) use a thicker paint like chalk paint or acrylic craft paint, 2) use a dry brush (load paint on your brush, but then wipe most of it back off on a paper towel), 3) use an up and down pouncing motion, avoid brushing side to side which can push paint under the stencil, 4) make absolutely sure not to move your stencil mid-project. Good luck!
LikeLike