

You might have noticed that I never really quite revealed our entire master bedroom makeover in one complete post. That’s because I was waiting for one last detail, the light fixture.
I waited, and waited, and waited.
I had ordered it online from Menards because I thought that since I drive right past my local Menards on my way home from work it would be incredibly convenient to just stop and pick it up when it came in.
Ha, famous last words.
It was put on back order, and then it was put on back order again, and then the store lost it and had to re-order it. But then they found it and said I could pick it up. Although it probably wasn’t worth the wait, and I could have found a dozen similar light fixtures elsewhere, it’s finally in place and I love it.
You might be remembering that we had a ceiling fan in this spot before, and quite a few of you recommended replacing it with another fan. We really planned on taking that advice. For a house without central a/c, ceiling fans are a plus. We did buy a ceiling fan, but it met with an unfortunate accident. During installation it fell from a great height, that being the top of the ladder, and was irreparably damaged.
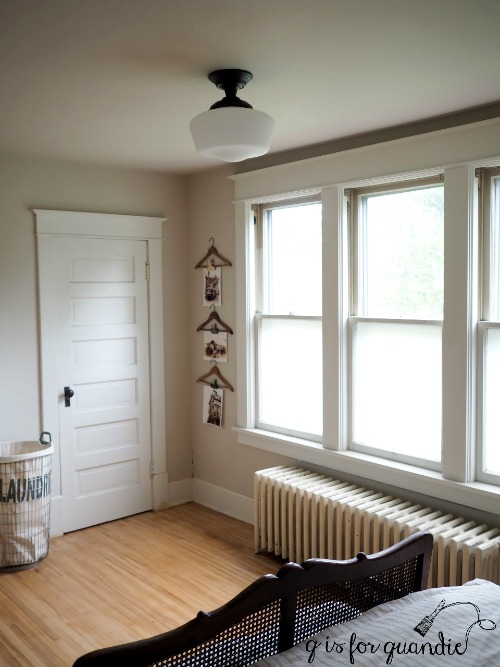
We took that as a sign, and that’s when I ordered the schoolhouse light fixture.
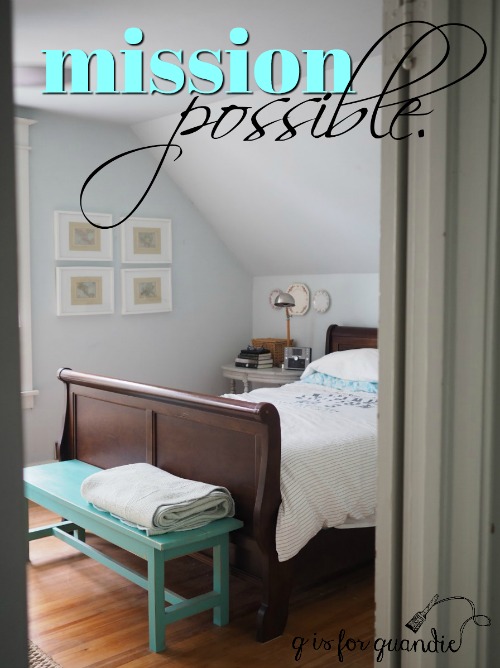
So, after all of that, we now have a light instead of a fan, and I am calling this room done.
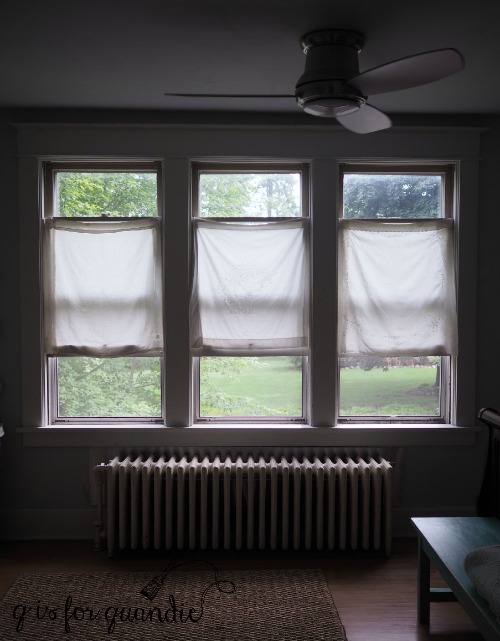
One other detail I didn’t really share with you yet is my choice of window treatment, or probably more accurately, lack of a window treatment.
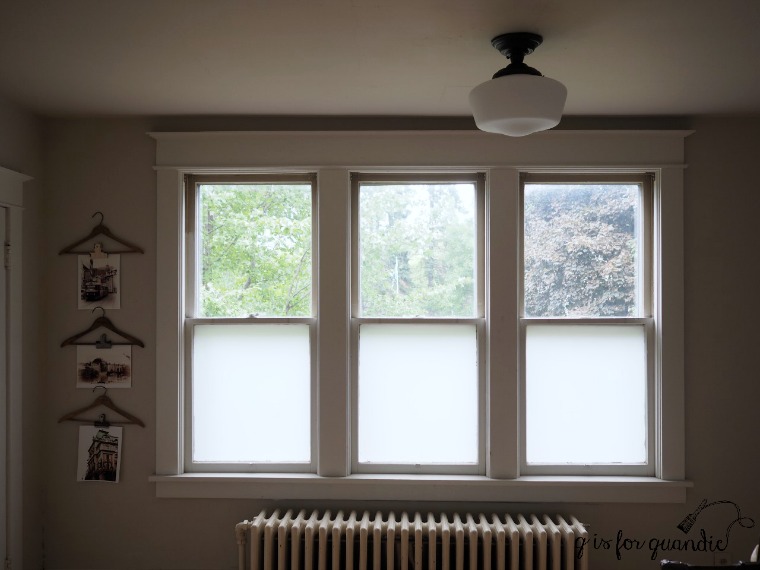
For now I’ve opted to go with privacy film on the lower halves of the windows. It was perfect for summer, but I’m not yet sure about winter. It might be nice to have something ‘warmer’ on the windows for winter.
By the way, remember that cool vintage farm photo I picked up while garage saling a few weeks back? It found a home here in our master bedroom.

It fits in perfectly.
OK, let’s recap the entire project, shall we?
The budget for this room was $1,500 and as is typical, I went way over budget. I lost track of the spending somewhere around the $2,000 mark. But considering that in the end we really made over all three of our upstairs rooms, that’s not so bad. Here’s a reminder of what we accomplished.
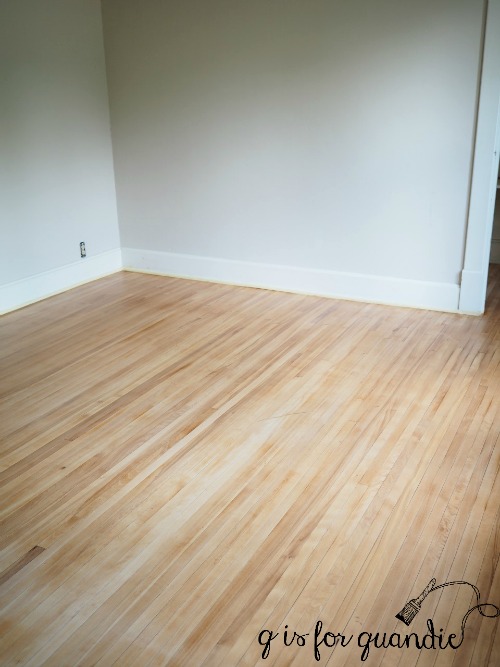
The floors were refinished, resulting in a lovely pale natural color and a matte finish. This was by far the largest expense of the entire project. I’m including the total cost of all of the floors ($1,000) on our upper level in the final tally although obviously a chunk of that expense was for other rooms.
The walls in all three rooms were painted and we put in a ship lap feature wall. The paint cost around $70 and the ship lap materials were $55. I love my ship lap wall and totally recommend adding just one feature wall to add some fixer upper style to one of your rooms. I have to note that this task was super simple for us because we didn’t have to cut around anything (like electrical outlets, windows or doors).

I added a pair of wall sconce reading lights from World Market at $120 for the pair.

I updated our existing nightstands with a couple of coats of milk paint.

I’m not counting this as a ‘cost’ for the project since I used milk paint that I already had on hand.

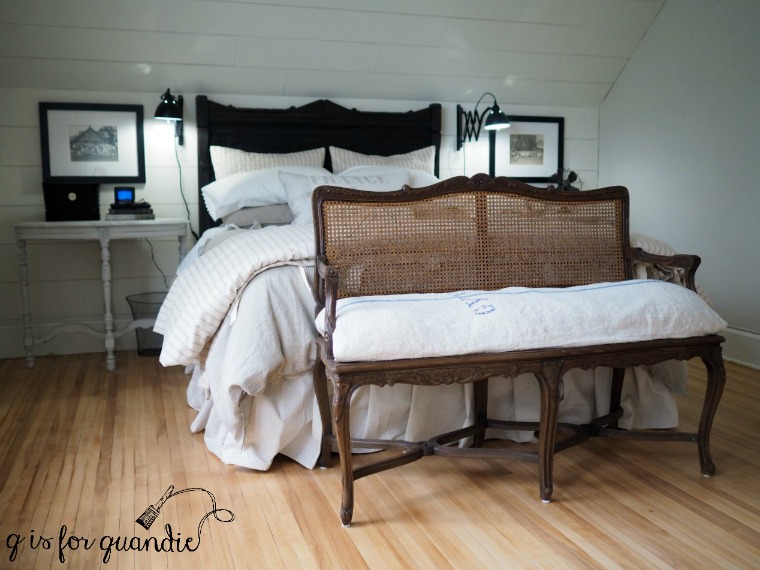
We purchased a new bed frame for $40 and an antique full size headboard that I painted black. I purchased the headboard as part of a set. I sold the other pieces from the set at a profit, thus making the headboard ‘free’ and again I used milk paint that I already had on hand to paint it. We also purchased new bedding at a cost of $650. Gasp! I know. The second largest item in the budget. Bedding is just so expensive, but that does include new pillows, a new feather bed, a new down alternative duvet, plus two duvet covers and pillow shams. I also added a DIY bedskirt made from a drop cloth at a cost of $15.

I added a vintage cane back bench with a European grain sack cushion at the foot of the bed. I paid $125 for the bench and another $69 for the grain sack.
I painted my existing clothes cupboard, again with milk paint I already had on hand. I added two Iron Orchid Designs transfers. These transfers came in a set of 3 for $10. I purchased two sets so that I had two of the same design, but I still have 4 more left to use on other projects (and you’ll see a couple of them next week). 
A lot of the miscellaneous decor I used came from other parts of the house, like my faux dress form Lula, so they didn’t add to the cost.

Or they were just things that I already had on hand, like the vintage advertisement hangers.

I debated adding an area rug to the room, but in the end the floors are so pretty that I hate to cover them up. Also, this room really is rather large and for a rug to not look lost it needs to be a good sized rug. Since I’d already blown the budget out of the water I decided we could live without a rug for the time being.
As requested, I’ve updated this post to include some ‘before’ and ‘after’ comparisons.
Before:
After:
Before:

After:
Before:
After:
So, it’s official. Mission Possible was indeed possible after all. And this time it didn’t take me three years to finish. It helped a lot that I took an entire week off at the day job to get a lot of things done including the ship lap wall, painting all three rooms, painting all of the bedroom furniture and having the floors done. Phew! It was an exhausting week, but in the end it was totally worth it. Now that we have all of the final details in place, we can kick back and enjoy our new bedroom.

I love ❤️ all of it!!!
LikeLike
Thanks Wendy!
LikeLike
Looks like a magazine spread! Those make-over magazines should be printing your photos and showcasing your talents. This room just looks so light and airy…perfectly done and really…it was done fairly inexpensively. Especially when you see the total transformation. I think you need to submit these to a few of the magazines and keep yourself in the magazines!
LikeLike
Who needs a magazine?! You can just see it all here on my blog 😉
LikeLike
Absolutely gorgeous!!! You have such great ideas. It really makes me want to get painting…and shopping!
LikeLike
Thanks Pamela! You should definitely get painting!
LikeLike
You’ve done neutral right. It’s a beautiful room. The bed and bedding are so pretty and I love the clothes cupboard and how you have it styled. I’m in love with that farm picture.
LikeLike
Thank you so much Becky! Yeah, that farm photo was an awesome find. I’m so glad I dug it out of the box at that garage sale 🙂
LikeLike
Beautiful. Very serene. Lovely place to lay your head at the end of the day.
LikeLike
Thanks Maureen!
LikeLike
Beautiful peaceful room. Because I have limited recall abilities I wish you would have put in the ‘before’ photo (s) so I could see how it looked previously. You are accomplishing a lot in your home and your other projects – I am amazed that you also have a full time job! Oh I also purchased those school house light fixtures for my hall, love them. Your neutral colors with a touch of blue is fabulous.
LikeLike
Dang! I can’t believe I didn’t think to include a ‘before’! Luckily I can fix that! I’m going to go in and add one. As far as accomplishing so much, well … I just plug away at stuff and it’s amazing how much one can get done over time. And yet, I still have a ‘to-do wish list’ longer than my arm 😉
LikeLike
Done!
LikeLike
Your bedroom looks wonderful! So many clever ideas! I am curious about the dropcloth bedskirt though. How is that accomplished?
LikeLike
Just click on the link for the headboard, or easier {click here}, I give some basic instructions in that post and I also have a link to the more detailed instructions that I copied from someone on Hometalk. It was super simple, but I’m not sure how well it will hold up over time. So far, so good though.
LikeLike
It is all lovely Linda!!
LikeLike
Thanks Lisa!
LikeLike
It turned out nice and only took a few months. Plus the rest of the upstairs got redone too. All look good except when i house sit now I have a tiny bedroom to sleep in.
LikeLike
Well, the next time you house sit you can stay in the master bedroom and have plenty of space!
LikeLike
If Q keeps going to Disney you won’t need to house sit, I got your back, sis!
LikeLike
Thanks bro! I like going to Disney too.
LikeLike
Beautiful, thanks for sharing.
LikeLike
You’re welcome Laura!
LikeLike
Gorgeous and peaceful, just what you want in a bedroom. I love the neutrals, they’re timeless and classic. Everything works so well together, beautiful job! What’s next on your list? 😉
LikeLike
Probably the ‘piano room’. There isn’t a lot I want to do in there, just a couple of tweaks. I need to ditch the horizontal stripes because this really is the only room that I can use for winter furniture photo shoots and I need a more neutral background. I still want to get that piano painted. And the fan is really outdated, but I might just paint it and see if that makes a difference. But first I’m taking a decorating break and going to Disney World 😉 !!
LikeLike
It’s all so deeeeeeeeeeelicious, Linda! Reminds me that I need to send you photos of my bedroom that has the same slanted ceiling — love it!
LikeLike
For sure Joni! Love to see your photos.
LikeLike
I absolutely love the room! You did a wonderful job. The details are fantastic. Well done! I had no doubt.
LikeLike
LOL, I wish I could say the same 😉 I think I had my moments of doubt. But I managed to get ‘er done!
LikeLike
Beautiful job, I love it! I have noticed a new trend from the other bloggers (yours is my favorite) towards black and white furnishings, woodwork and less farmhouse (but still some). Do you think that is an upcoming trend?
Thanks for sharing- I love it all.
LikeLike
Hmmmmm. Good question. ‘Farmhouse’ is one of those things that is very hard to define and different people interpret it in different ways. I definitely don’t think that there is a trend toward ‘less farmhouse’ regardless of your definition. I do see a trend towards mixing warm wood tones with painted pieces though. I also think that in my particular style there is a trend toward using more neutral shades and less color, but there are also plenty of people out there going in the other direction and adding lots of color. Especially when going with more of a mid-modern or eclectic sort of look.
LikeLike
Such a beautiful space, Linda…it makes me think of curling up with a good book and a cozy nap! You did a wonderful job putting this room together!
LikeLike
Thanks so much Linda! And there is nothing I love more than curling up with a good book, so hopefully I’ll get to do some of that this coming winter!
LikeLike
LOVE, LOVE, LOVE. Beautiful. Love your style so much.
LikeLike
Thanks Sheila!
LikeLike