
At my June Carriage House sale a friend, Kathy, purchased some of my painted metal toolboxes. Remember them?
She decided that it would be fun to package all of her Christmas presents in vintage toolboxes this year (how awesome, right?) and so she needed a few more. She asked me to advise her on how to paint some of her own. I decided that it would work better if she just brought all of her unpainted toolboxes over one afternoon and we painted them together. After all, it takes just a little paint to cover a toolbox and she wanted all different colors. It would cost a fortune to buy all of the colors of paint, plus wax. I was happy to share my paint, I seem to have a ton of it these days.
As it turned out, she had quite a few toolboxes to paint, so we recruited some extra help in the form of my sister and my friend Terri and last Sunday afternoon we painted all of them. My niece came by too, but she was working on her own painting project.
Once Kathy had brought all of her toolboxes in, I first vetoed painting two of them. They had some great patina and Kathy totally agreed that we shouldn’t lose that.
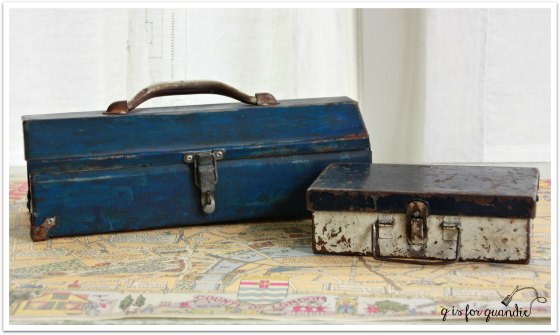
We did add some rub-on’s to them for a little extra pizzazz. This particular rub-on came from Hobby Lobby.

But the rest of the toolboxes went in the pile to paint.

We started by sanding them all lightly and then wiping them down with TSP substitute. Next we taped off any bits that we didn’t want to get paint on. And we started painting.

We used a variety of paints including Fusion mineral paint, Dixie Belle chalk paint and Urban Rooster chalky paint.
Kathy learned the hard way that you shouldn’t paint all sides of your box at once. She realized once she had it all covered that she couldn’t set it down!

I kidded her that she just had to hold it up in the air until it dried! We solved the problem by setting it on a paint can. She could fix the slight ring on the bottom with her second coat.
We did notice that the Fusion paint dried much more quickly than the chalk paints, so if you are ever planning to paint a bunch of boxes in one short afternoon, Fusion might be the better choice. Aside from that, we found that all of the paints worked well on the metal.
We put two coats of paint on each box. Once dry we sanded to distress and added wax. We unanimously agreed that we preferred using a dark wax on the darker colors, but a clear wax on the lighter ones (Laurentien and Lily Pond). Finally we added rub-on’s to each box.

Above photo: top box is in Fusion’s Laurentien, middle box is in Dixie Belle’s Kudzu and bottom box is Fusion’s Renfrew Blue.
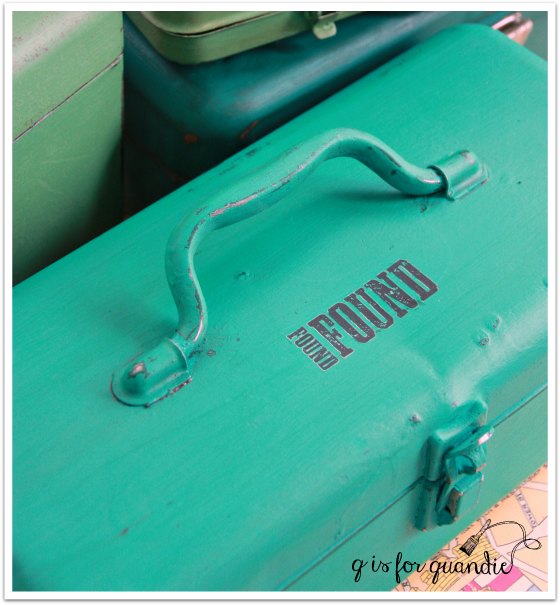
This next box is painted in Fusion’s Lily Pond.

And this is another one painted in Kudzu with a Tim Holtz rub-on.
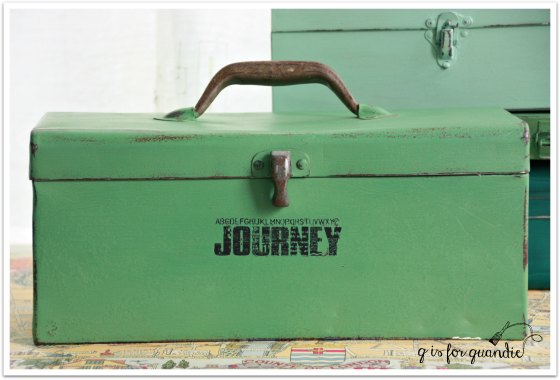
The box that we all thought was the ugliest to start with was our favorite in the end.

This is the dark green box on the top of the stack in the ‘before’ photo. Huge improvement right? And ironically this is the only box where we didn’t tape off the handle and latch because the prior owner had spray painted every bit of it green.
So, no need to even bother with taped off handles and latches! Just paint the whole thing!
It’s painted in Urban Rooster’s Jaded Rooster and that is a Tim Holtz rub-on, available at Hobby Lobby and Michaels the last time I checked.
We had a really fun afternoon being creative, we laughed and joked and basically behaved badly. For a snack we had french bread dipped in flavored vinegar’s from Stillwater Olive Oil Co. My favorite was the Cara Cara Orange Vanilla balsamic vinegar. That stuff is to die for. It would make an amazing salad dressing. We also sampled Cinnamon Pear and White Pomegranate. We added some Pistachio oil that I picked up at the Vom Fass in the Mall of America.
And best of all, Kathy went home with her trunk full of fab painted vintage toolboxes all ready to be filled with Christmas goodies!
Linked up with:

It looked like not only a great idea but fun time had by all! They turned out amazing!
Smiles, alice
LikeLike
Thanks Alice!
LikeLike
Great afternoon…not only productive, but fun visiting too! You are an excellent teacher and an even better friend. And now we get to see Debbie and Kris, so even better. Life is good.
LikeLike
I agree, life is good!
LikeLike
I love this… Both the painted toolboxes and the girls day painting! Wish I lived closer – I’d invite myself to help!
LikeLike
And we would have loved to have you! The more the merrier, right?
LikeLiked by 1 person
What a brilliant idea for Christmas gifting painted vintage toolboxes. Sounds like y’all had a not only productive day but a yummy one as well.
LikeLike
Aren’t they going to look awesome all piled up under the tree?!
LikeLike
Totally agree they will look fab piled under the tree. And it’s such a fun way to package a gift but wait it’s actually two gifts.
LikeLike
Great idea and it sounds like a fun afternoon!
LikeLike
I am getting a ton of use out of that Jaded Rooster paint! Thanks again for that Darrielle!
LikeLike
What a “create” day! Makes me homesick for my 5 sisters .. we use to get together to craft or bake a couple times a year…and of course the toolboxes look great!
LikeLike
Five sisters! Holy cow. Lucky you. I just have the one. But now that she lives close by, I bet she’ll be recruiting me to help with her annual Christmas baking.
LikeLike
Great idea. They all look fabulous. I would love to get a (Christmas) gift wrapped in a toolbox, actually just the empty toolbox would make me happy. Hmm, shall I give you my address so you can pass it on to your friend? I would definitely come and paint it myself, really, no problem at all… 😉
LikeLike
I’m with you, I’d be happy with just the toolbox!
LikeLike
That sounds like the best day! The only thing missing was a male stripper!! Just kidding… Unless they doubled as a masseuse and wine glass filler…HA!!!
LikeLike
Mr. Q has been known to provide the occasional shoulder massage and wine glass filling, but I draw the line at stripping 😉
LikeLike
Always happy to massage and pour wine, but we’re all happy Quandie drew the line where she did. 😉
LikeLike
This is such a fun idea…and it looks like fun to make, too!
LikeLike
They are a great painting project for winter too, since it’s easy to paint them indoors!
LikeLike
This.Is.Awesome!!!
LikeLike
Thank. You. 😉
LikeLike
Wonderful idea!!!!!
LikeLike
Thanks Paula!
LikeLike