
I have been struggling a bit with the milk paint lately. I know it’s unpredictable, and it’s hard to control the chippy factor. I know all about the color variations. But this summer I seem to be getting one unexpected result after another. This dresser is a case in point.
Let’s start at the beginning.
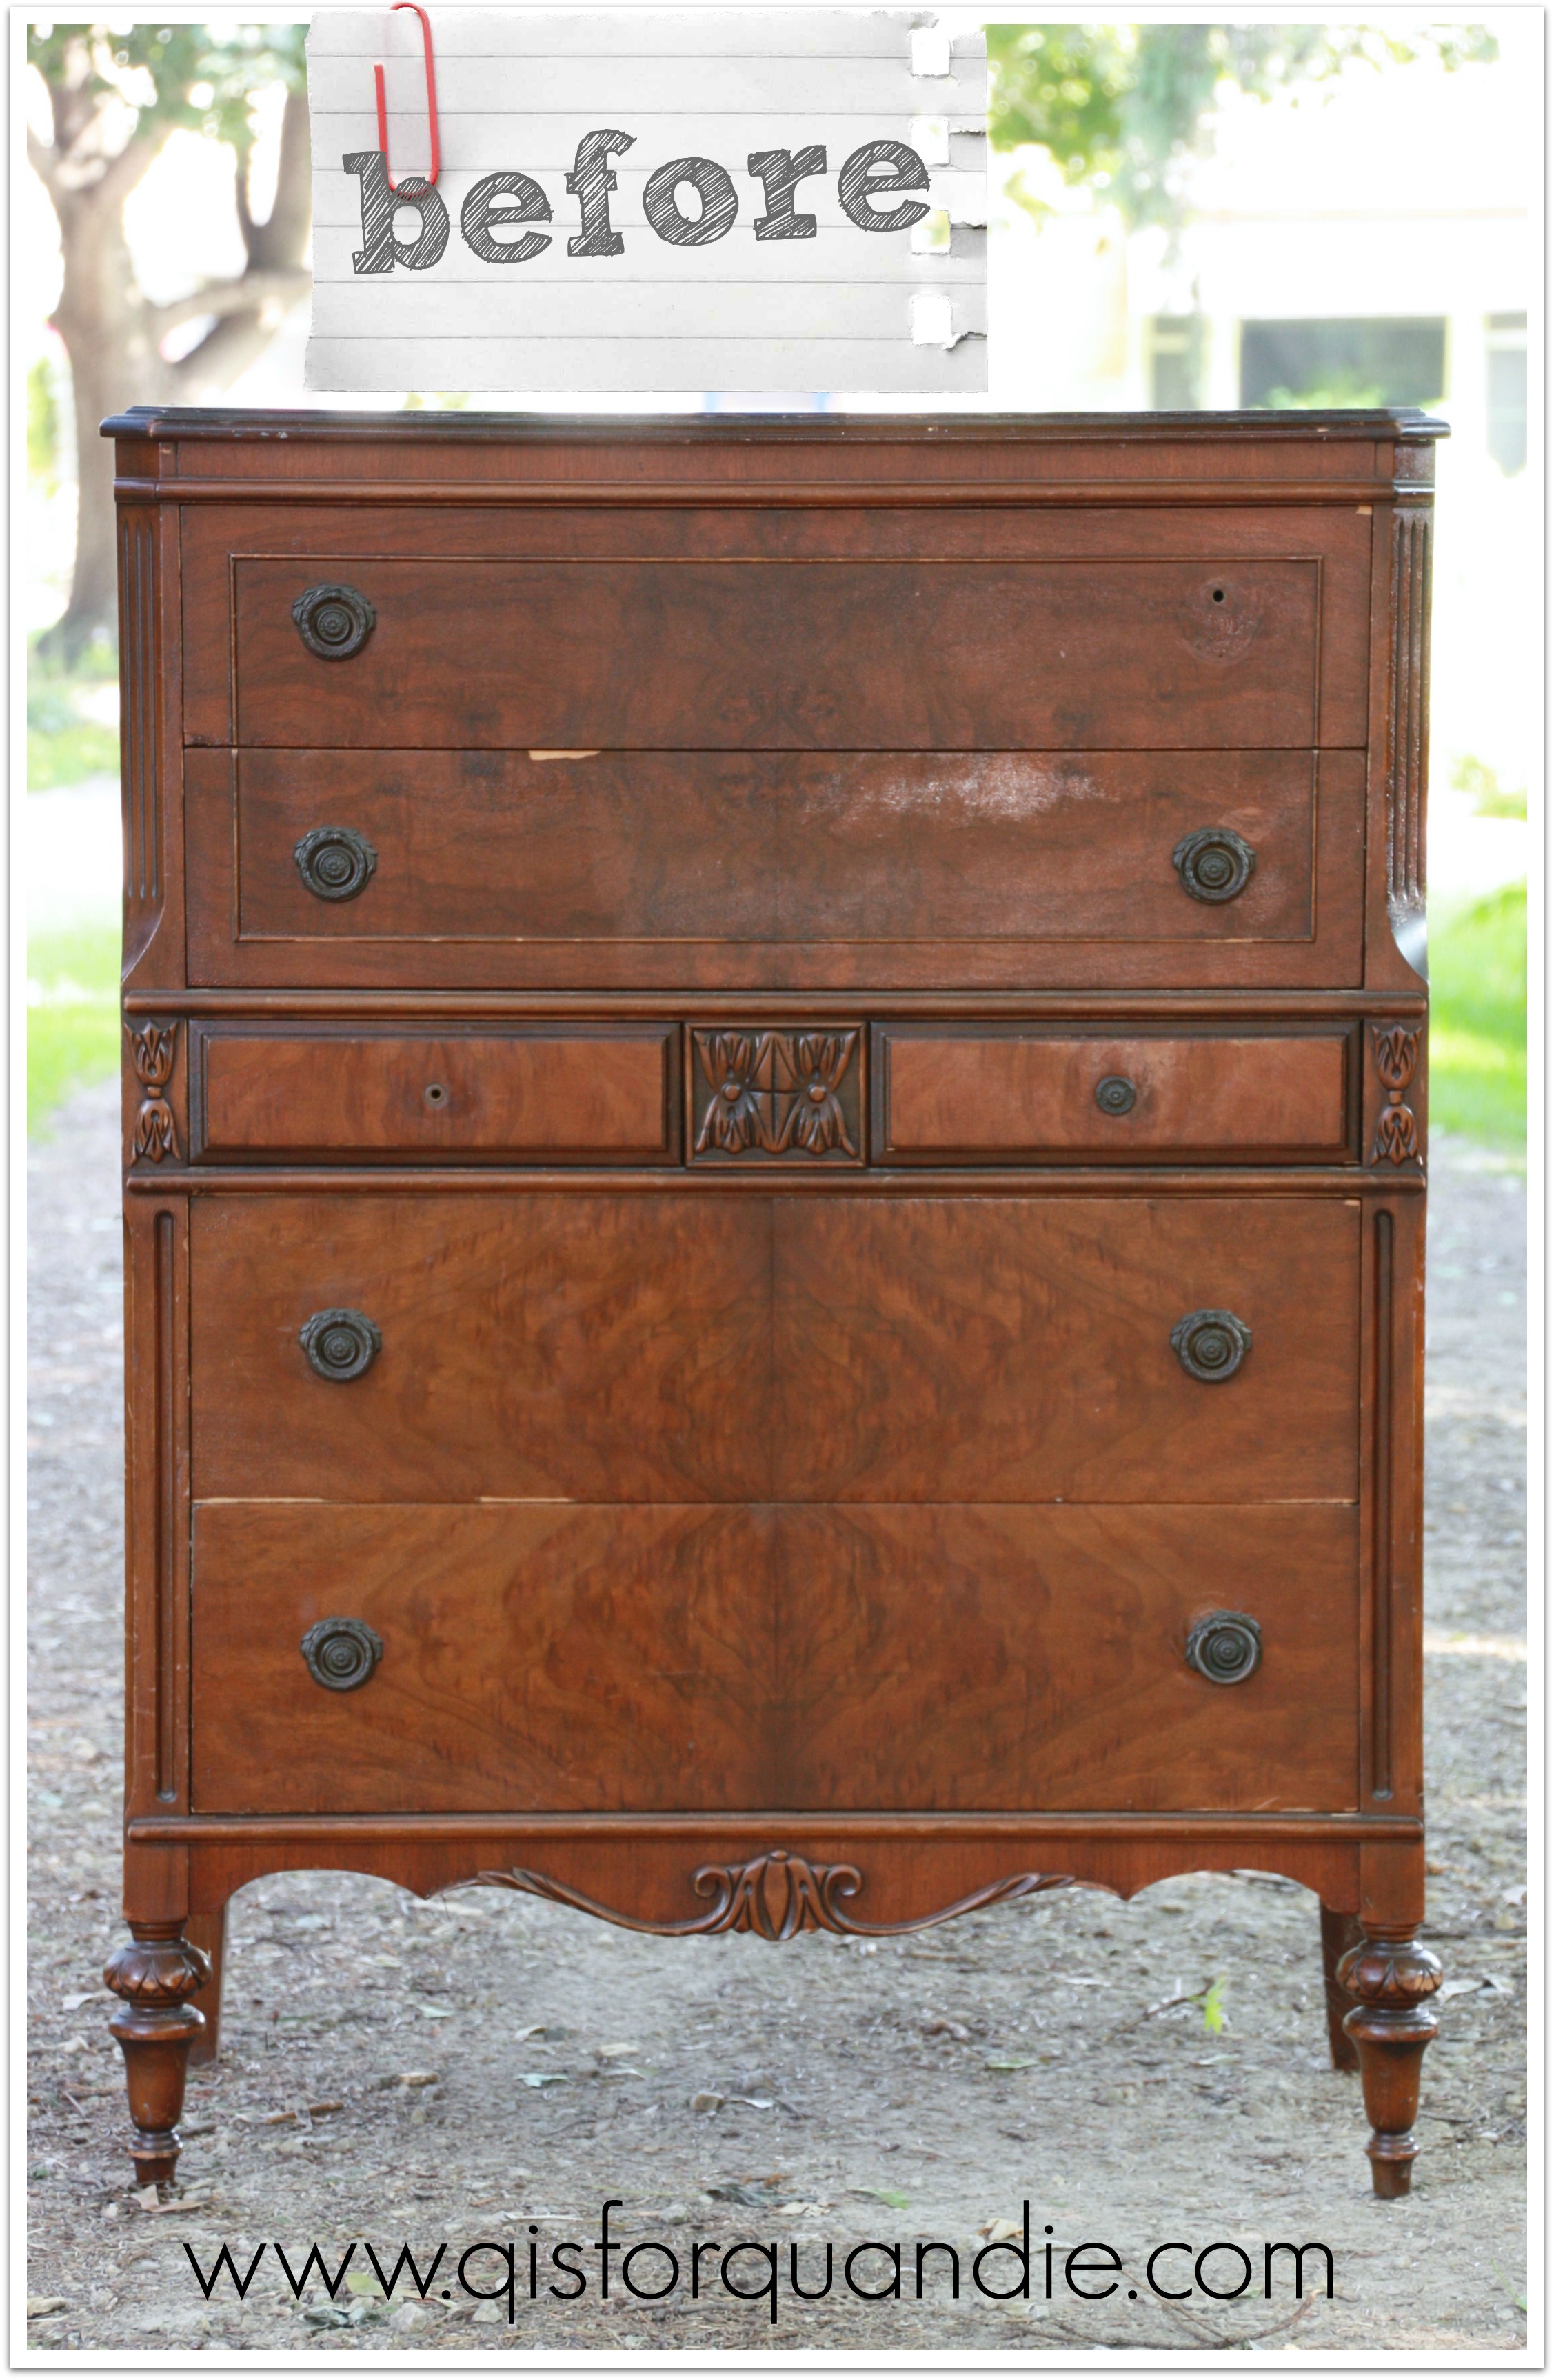 This one has lots of potential, right? It has a little bit of veneer damage, and a chunk of the trim is missing at the bottom. It’s the perfect candidate for a paint job.
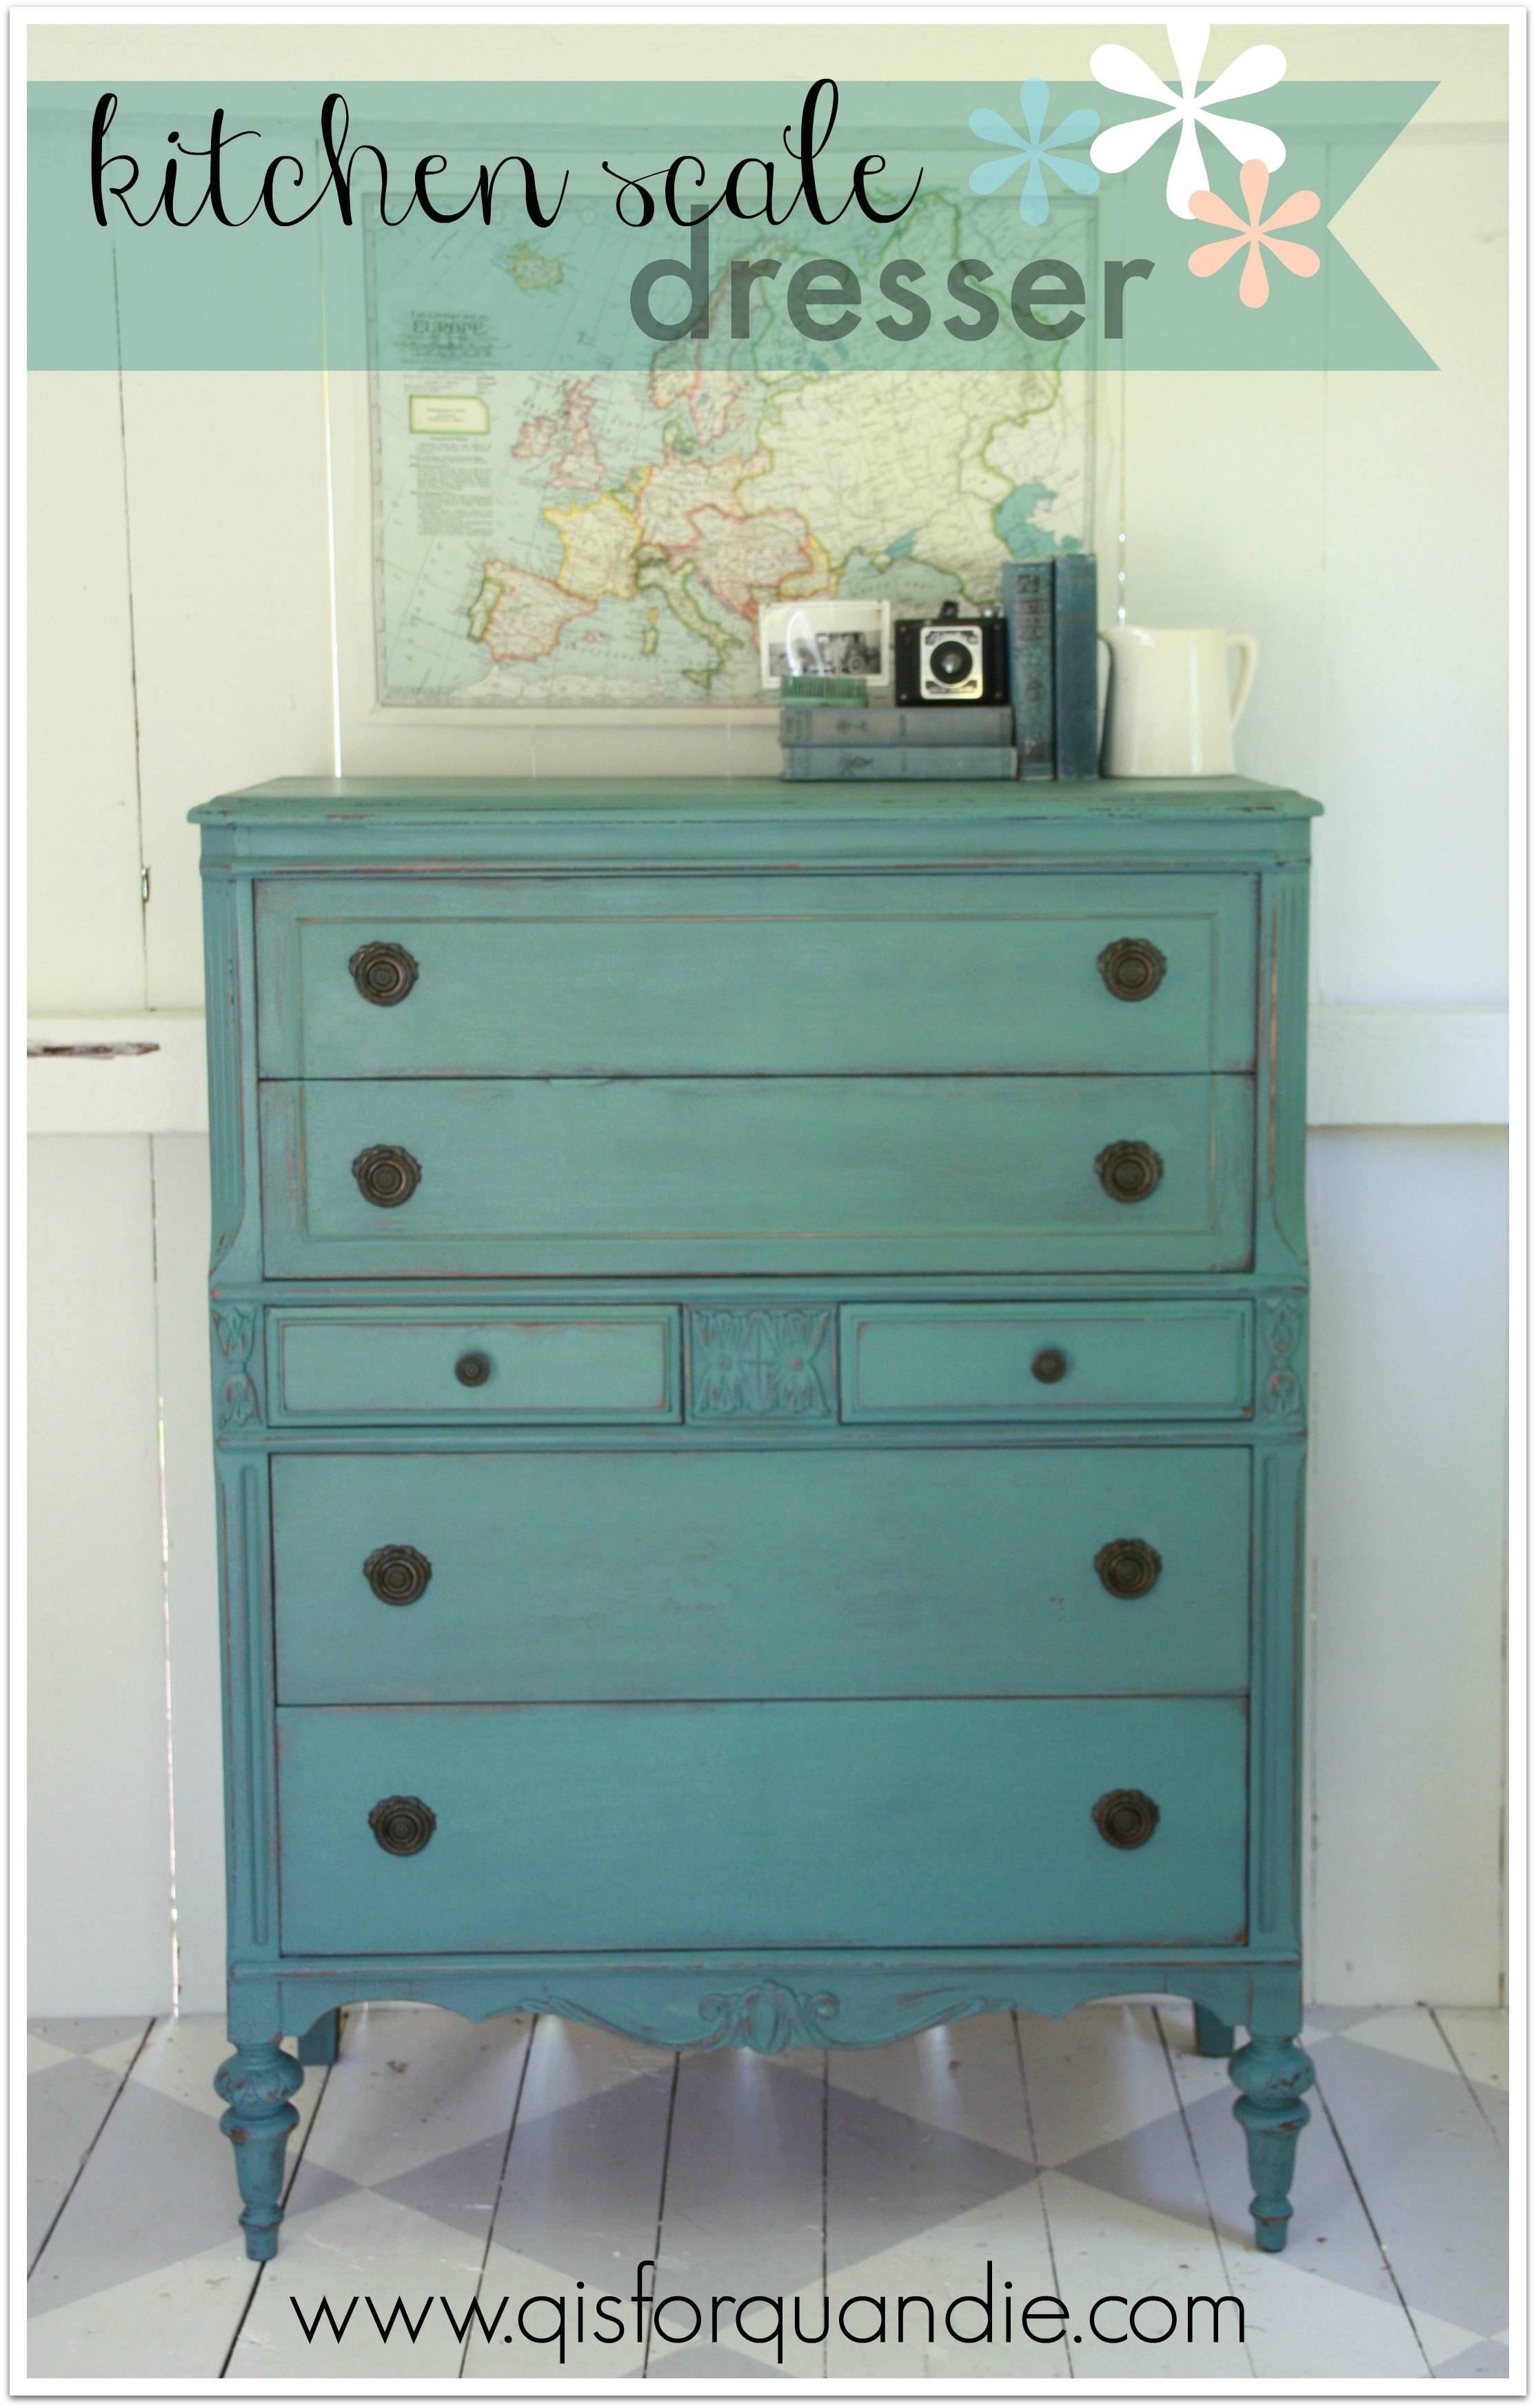
I decided to go with my absolute fave MMSMP color, Kitchen Scale. I hadn’t used this color for a while. My own mirrored buffet is painted this color and I absolutely love it.
It works fantastically with grey, the neutral of the moment.
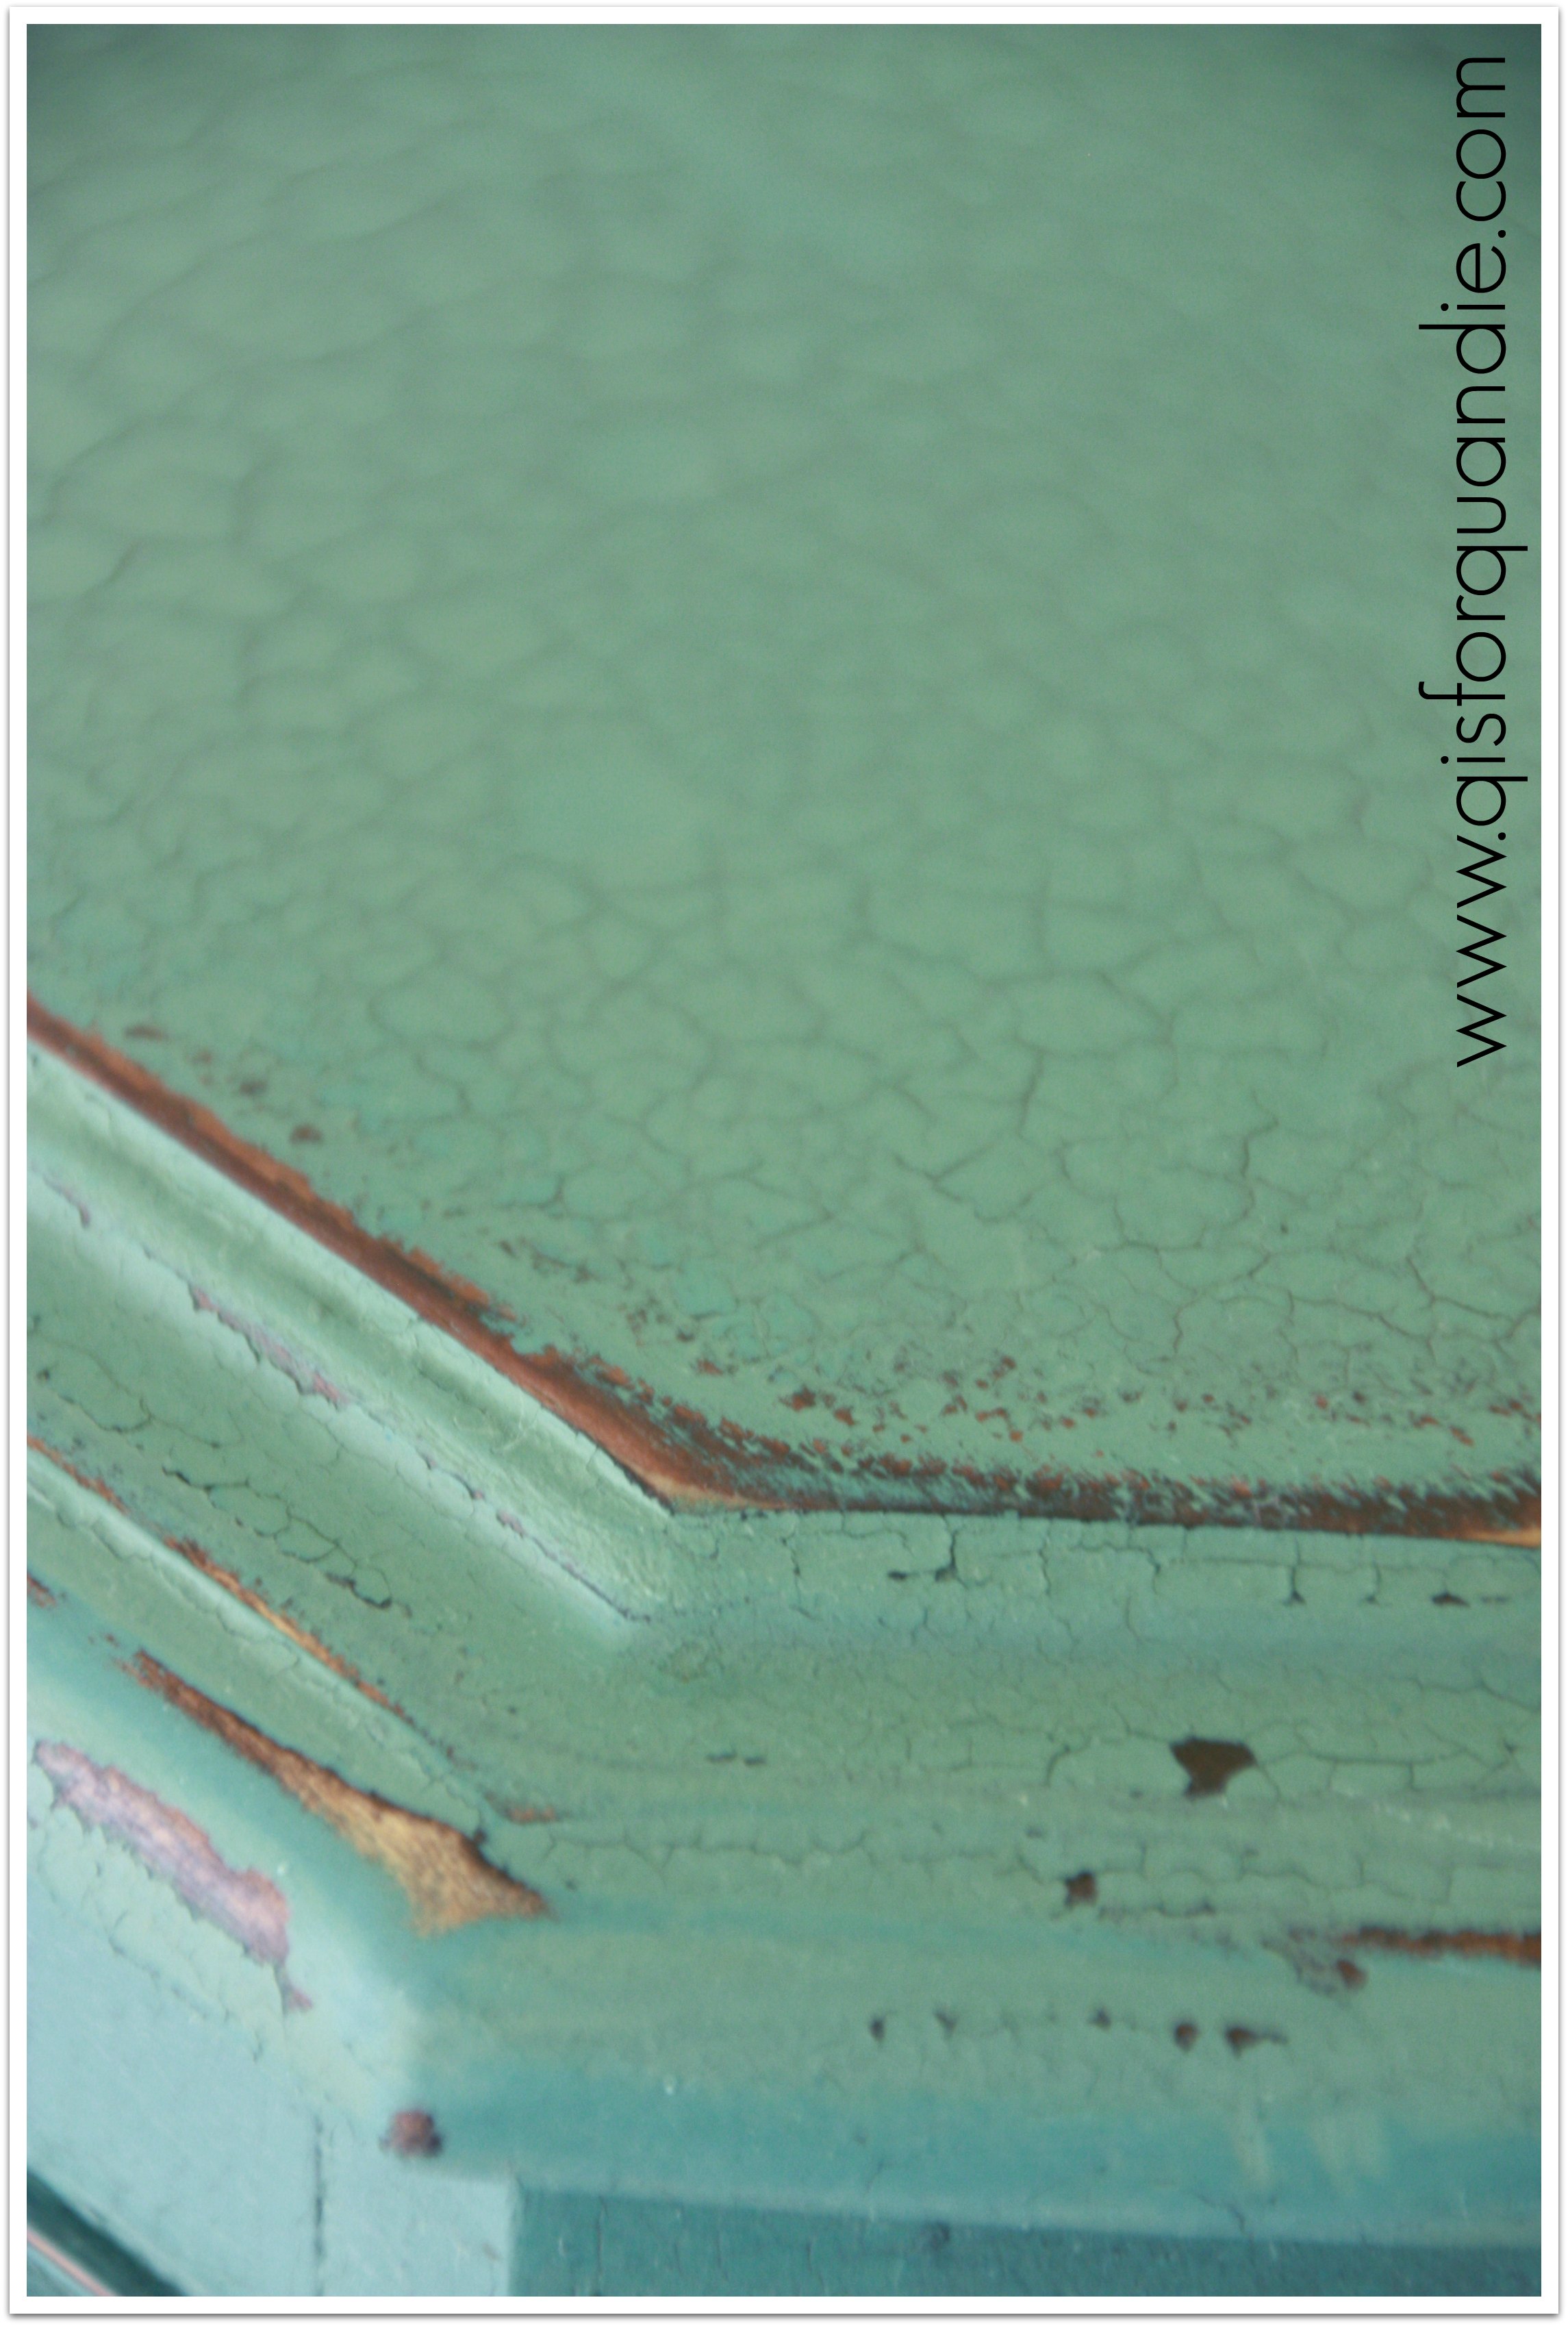
So I decided it was time for a Kitchen Scale dresser. I sanded this one quite vigorously because it was in rough shape, and I didn’t want a ton of chipping, just a subtle chippyness. I have to note here that I did mix the paint a little bit thicker than usual. I ignored the little voice in my head that was telling me to thin it down a bit more, which may have been a mistake. I painted my first coat and closed up shop for the evening. When I went back out the next day, I found a massive amount of crackling. On every surface except for the sides of the dresser. The sides didn’t crackle at all, go figure. Massive, bad, over the top, too much crackling everywhere else. I should have taken a picture for you, but I didn’t. When I have issues like this, it generally puts me in a bad mood and photography doesn’t happen.
I will note here that I did not apply heat to the dresser, and it was not all that warm outside and I did not paint under the full sun. Why the giant crackles? Was it just the thickness of the paint? No idea.
I decided to sand the heck out of it again, and try adding another coat of thinner paint. It had the desired result. It toned down the crackle. Oh, it’s still there, for sure, but now it’s at an acceptable level.
Am I the only one who considers this an acceptable level?
Often people wonder if milk paint will continue to chip away down the road, and the answer is no, it shouldn’t. As long as all of the loose chips were removed as part of the finishing process. In this case, I sanded the dresser pretty thoroughly and then vacuumed it to remove any loose chips. I put a final coat of hemp oil on it which also helps the paint remain adhered. I can run my hand across this dresser pretty vigorously and no paint chips off.
Alternatively, some people choose to leave the chipping paint in place and seal it with a poly finish. I’ve never tried this approach, but I can see where it would be a fabulous look in some cases. Maybe down the road, if I get a good chipper, I’ll give this a try.
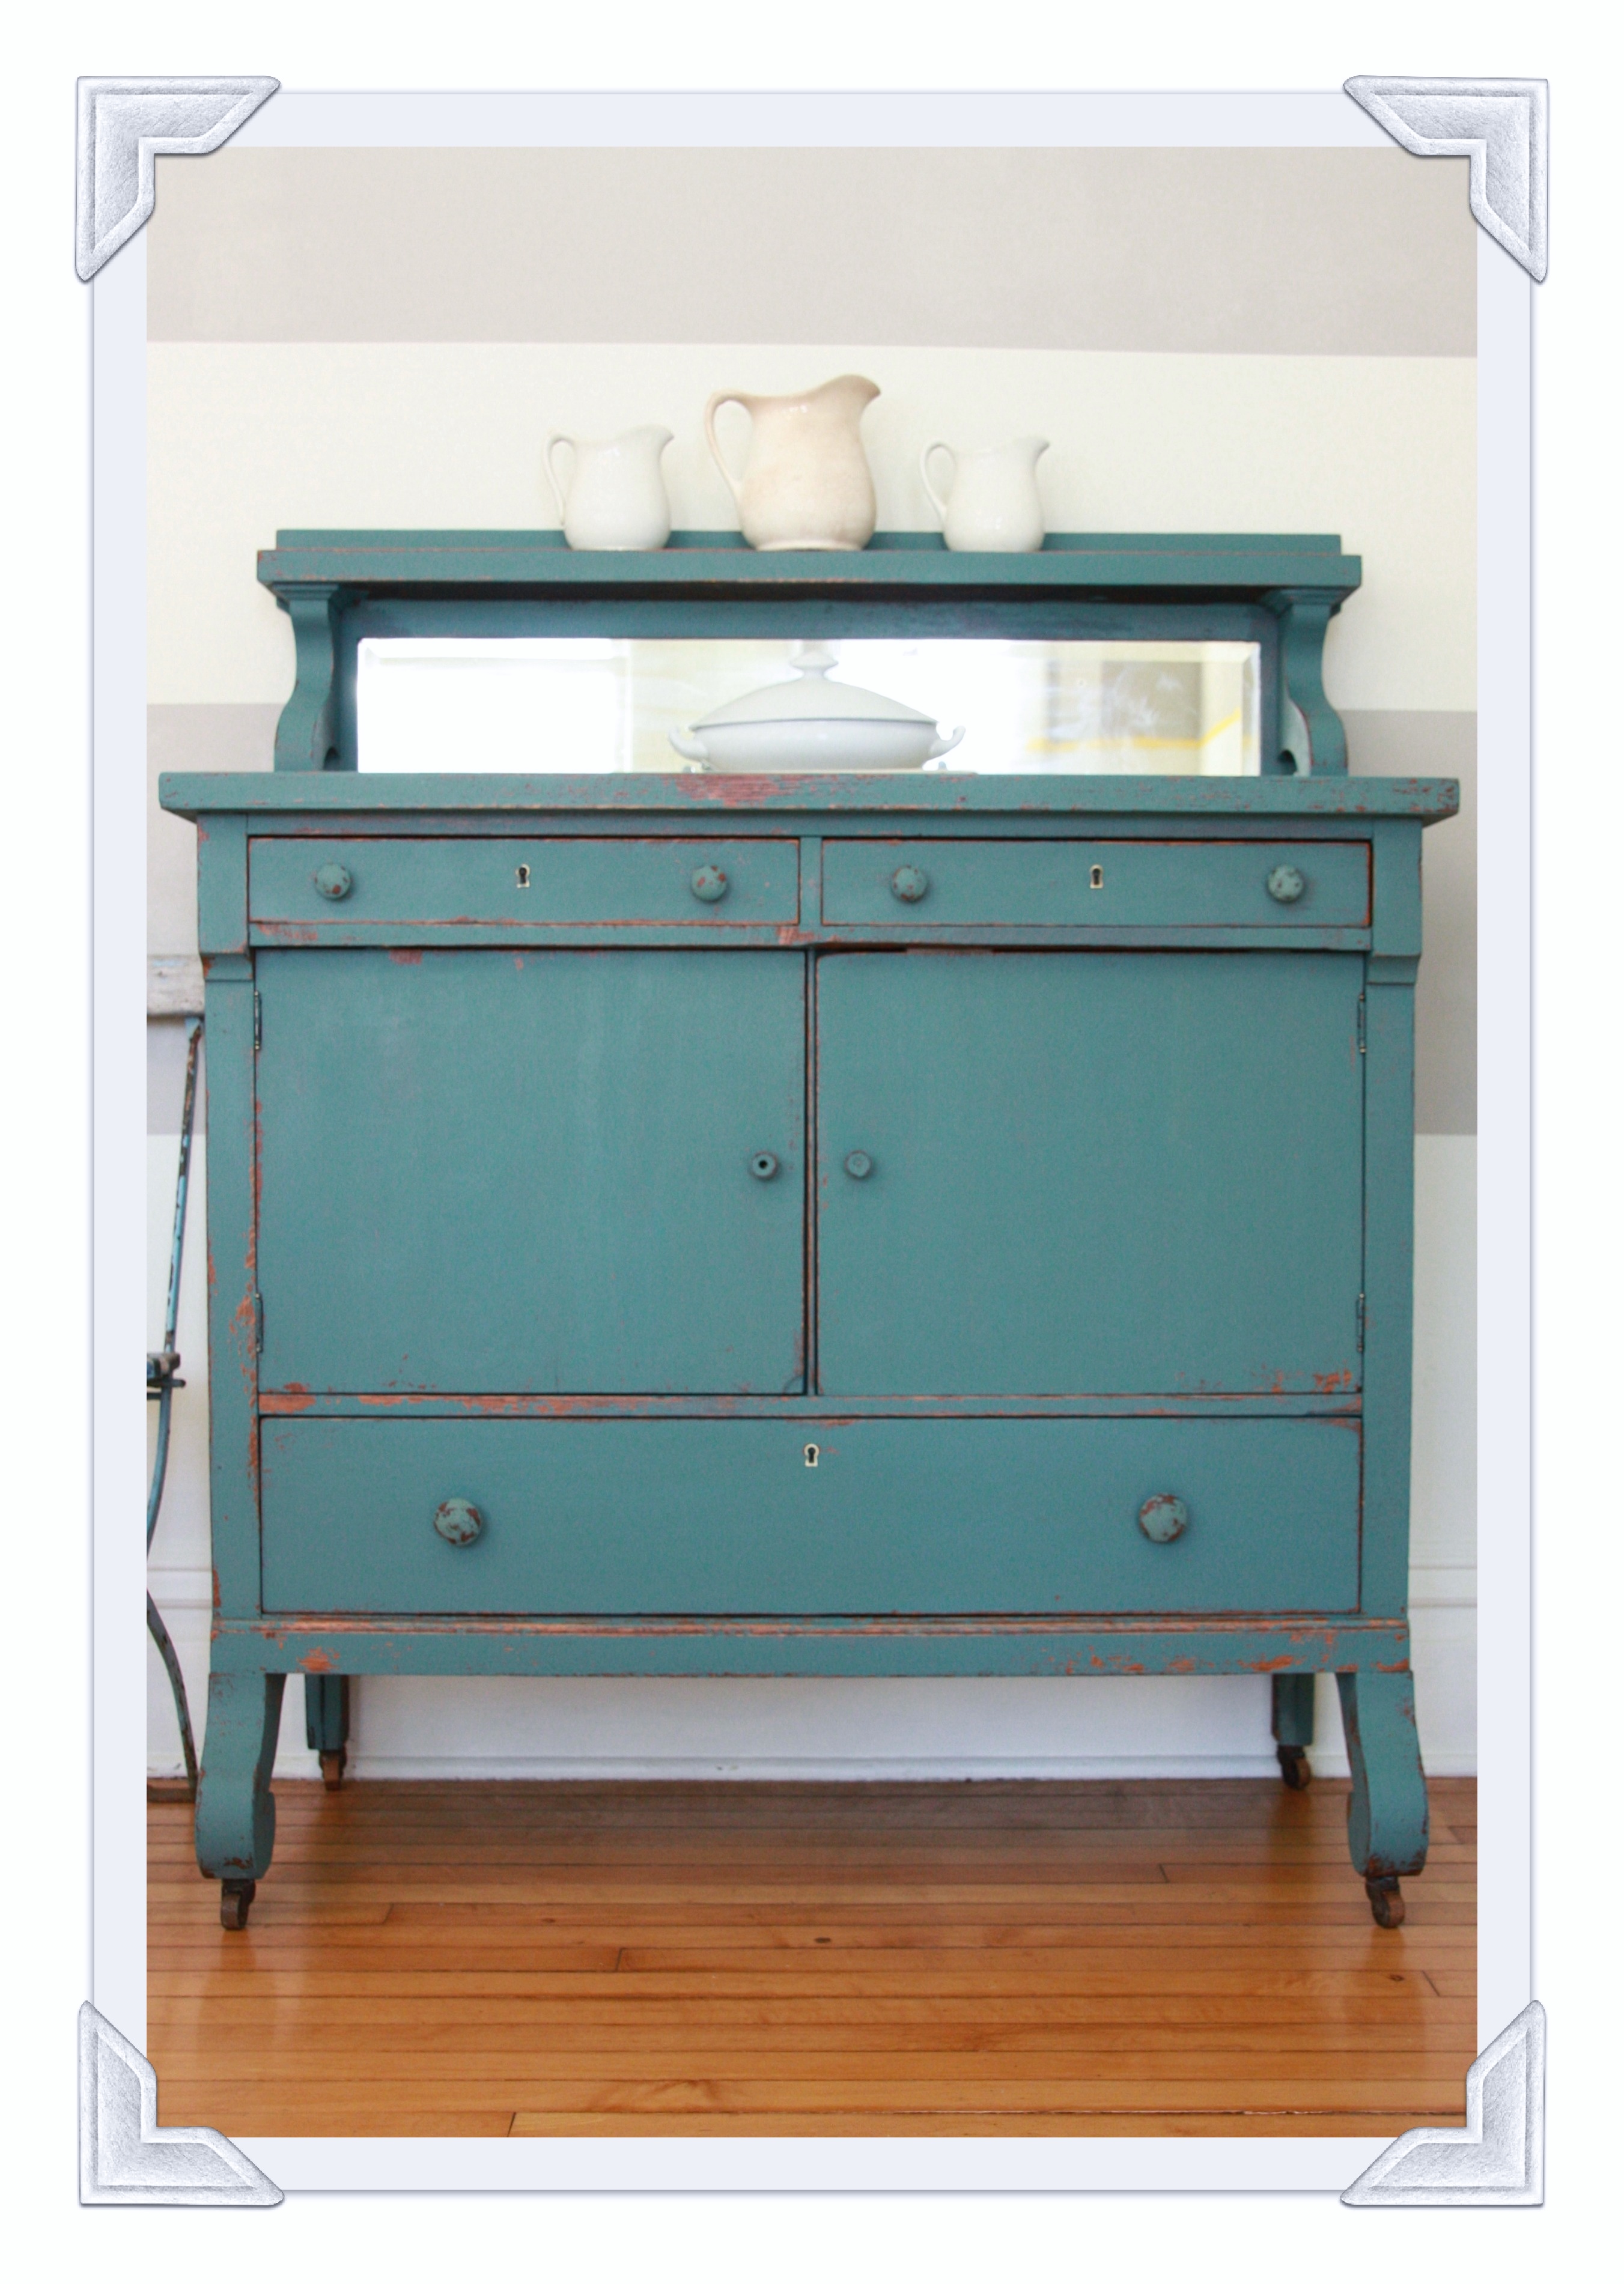
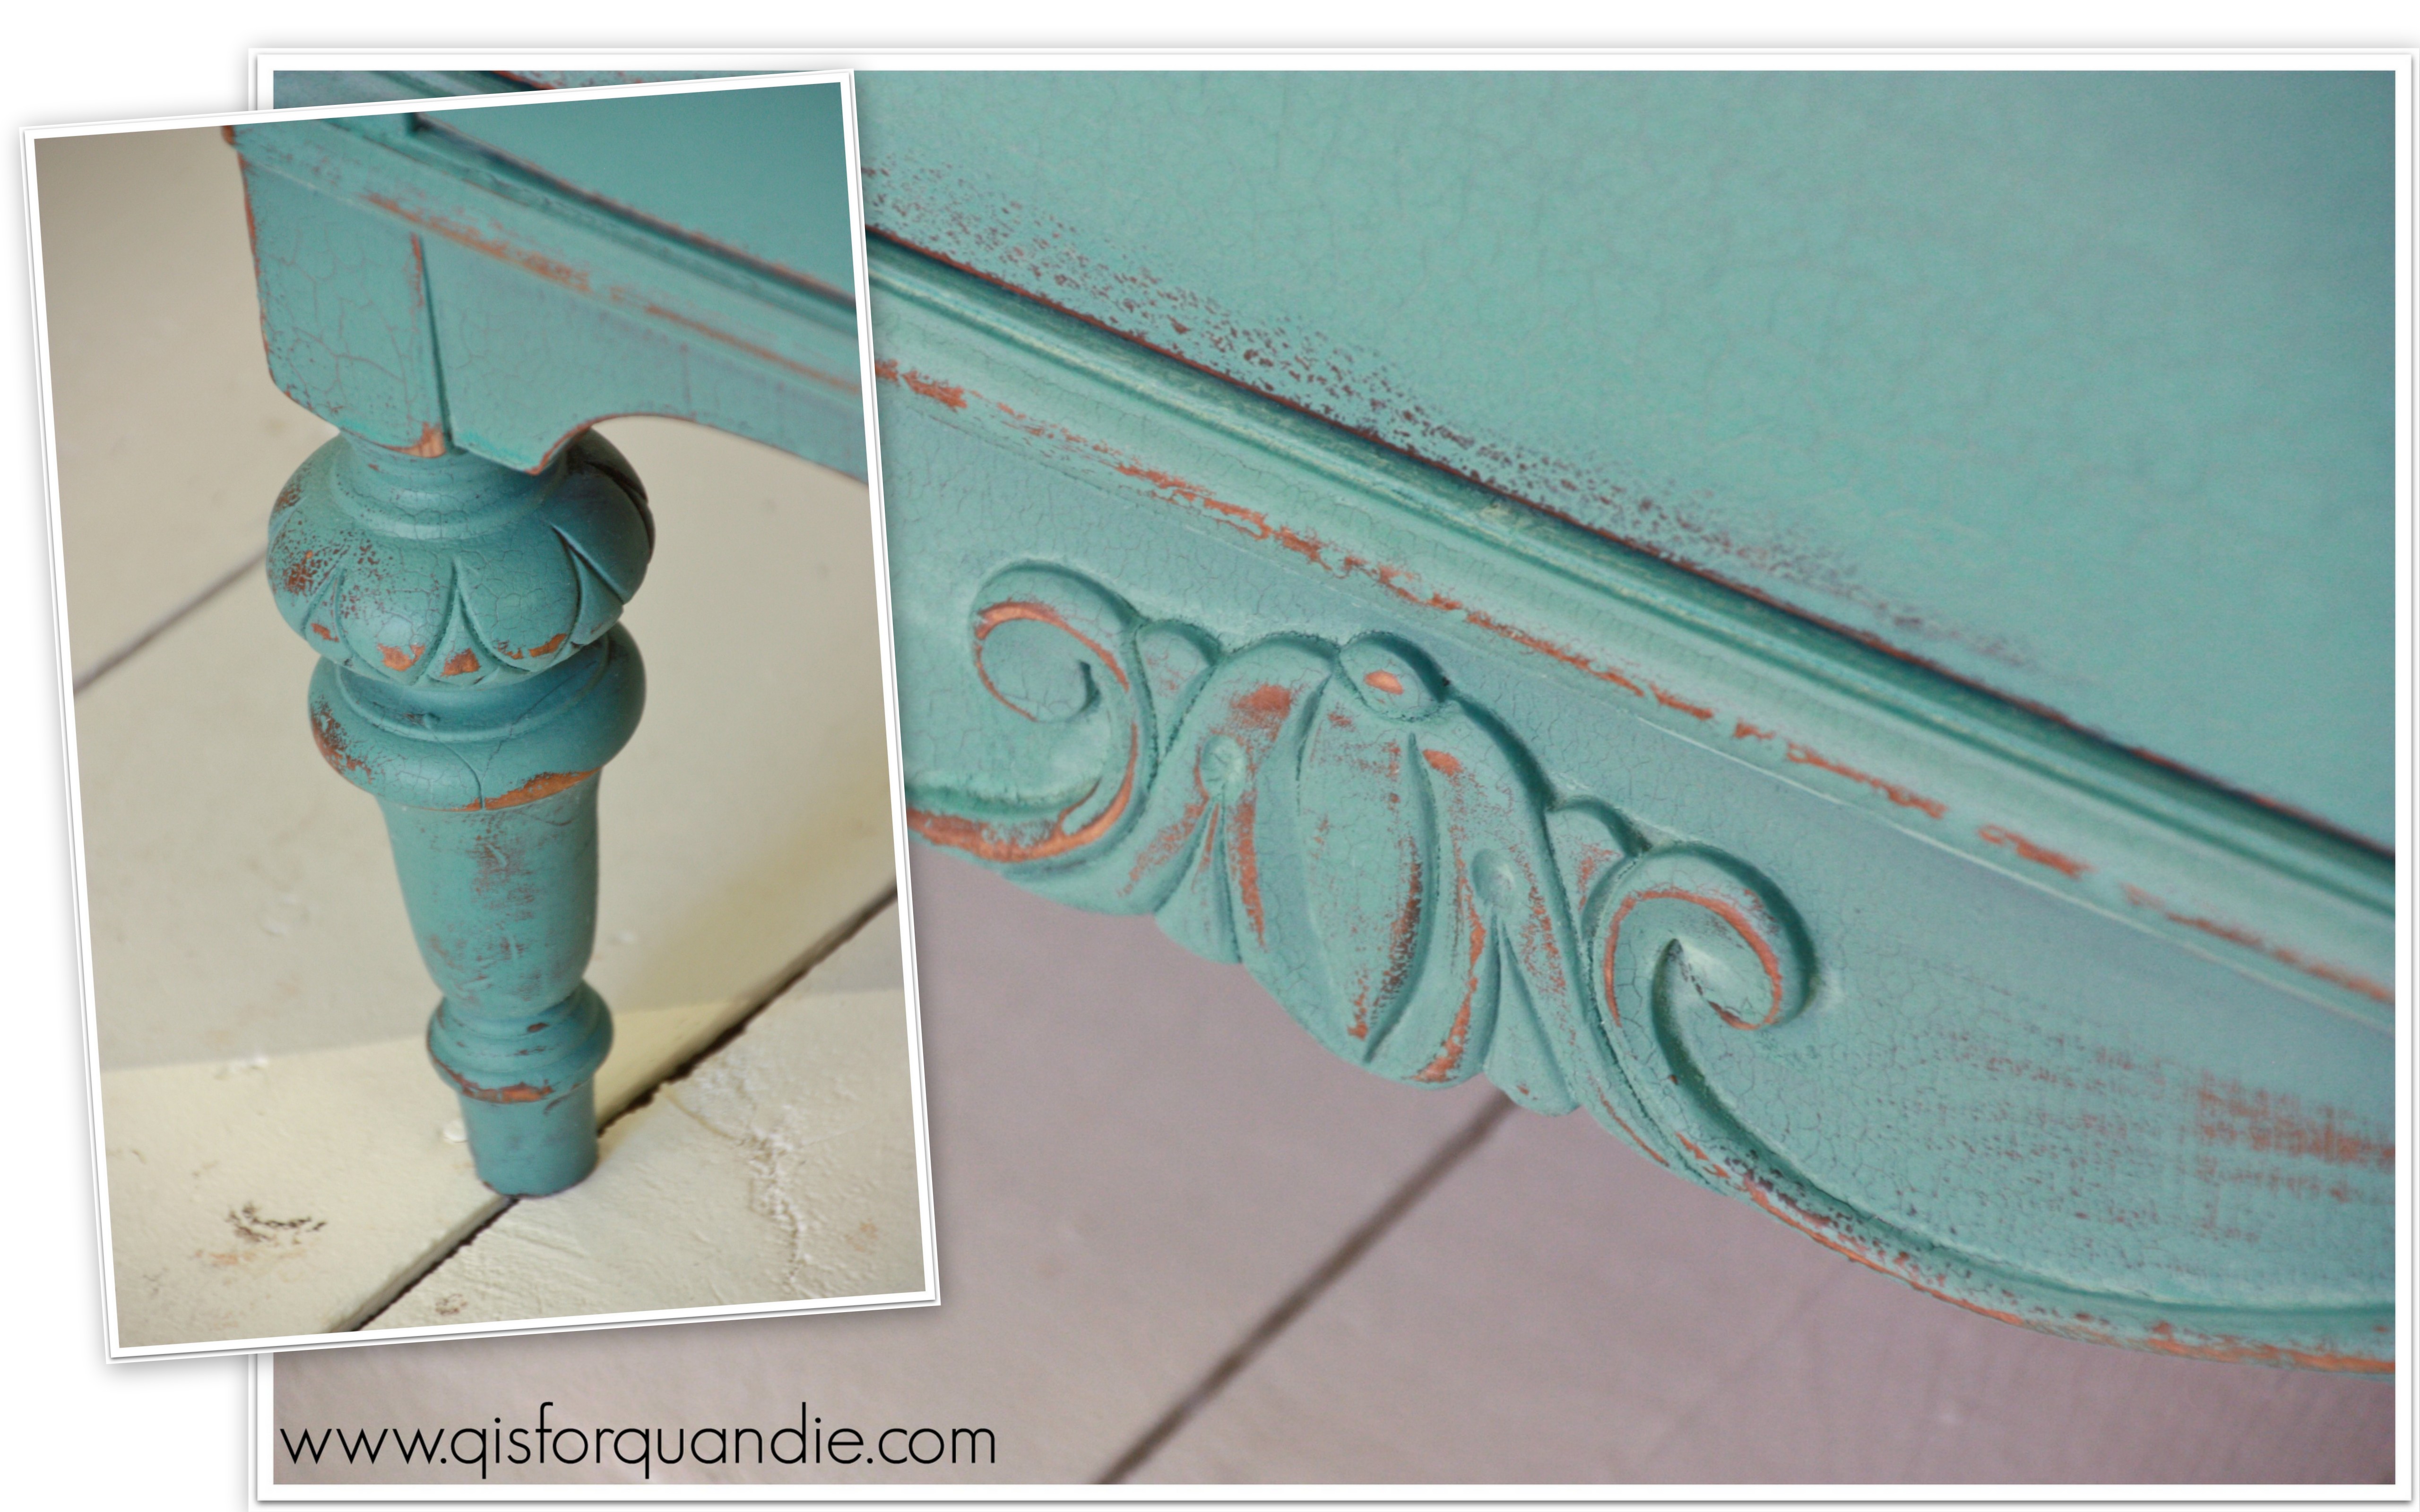
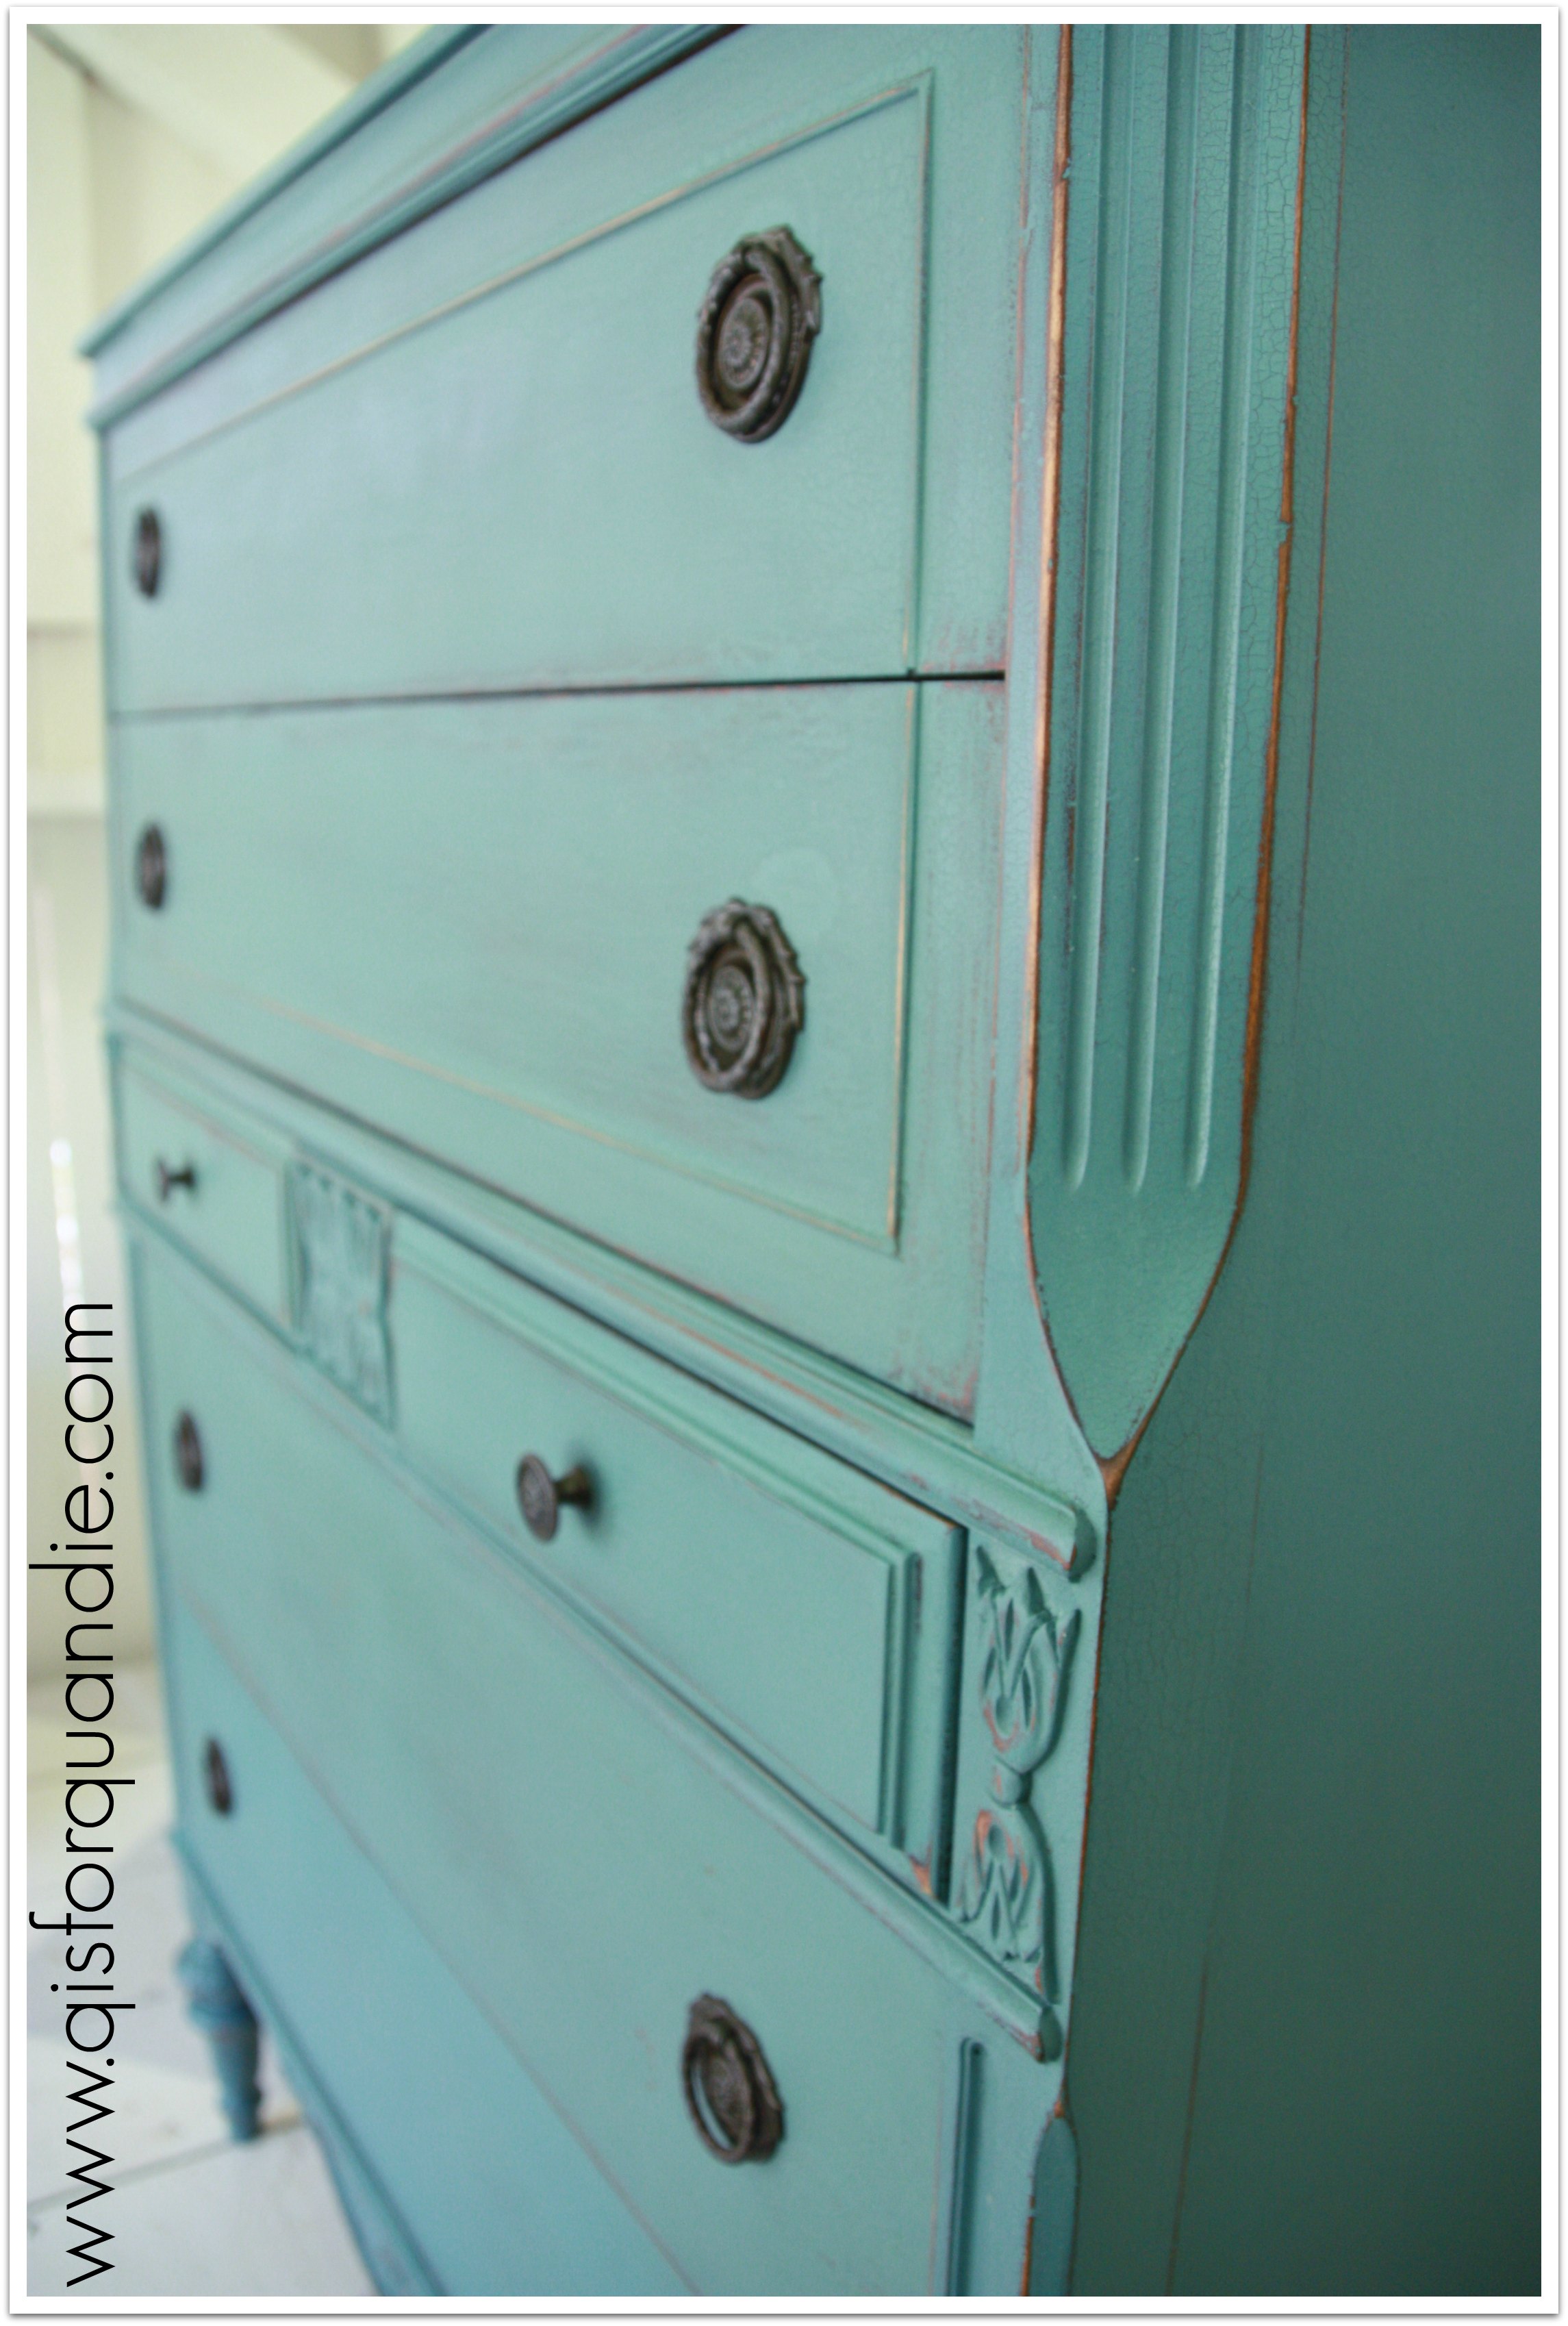
In the end, I think the dresser is quite lovely. It has some fantastic details like the angled sides and the carved bits that really pop now. I kept the original hardware because it is quite charming. This dresser is definitely distressed and has an aged appearance, but there are plenty of us out there who love that look, right?
Please say yes.
The moral to my story, if at first you don’t succeed, try, try, again. You can always sand something down and add a little more paint.
After all, ending up with something that looks like this is not an altogether bad thing.
 Anyone out there in the market for a gorgeous distressed dresser in my favorite shade of milk paint?
If so, leave me a comment and I will get back to you. Ooops! Sorry, this one is SOLD.

It’s beautiful! I love the distressed look! Great job. 👏
LikeLike
Thanks Kathy. I like knowing that there are more like me out there that like ’em distressed.
LikeLike
The process may have been distressing, but the distressed look on this piece is awesome! I really like this one!
LikeLike
Ha! Good one. I like it 😉
LikeLike
Although Kitchen Scale is not my favorite color, I love how this piece turned out! Great work!
Jill
LikeLike
This begs the question, what is your favorite color?
LikeLike
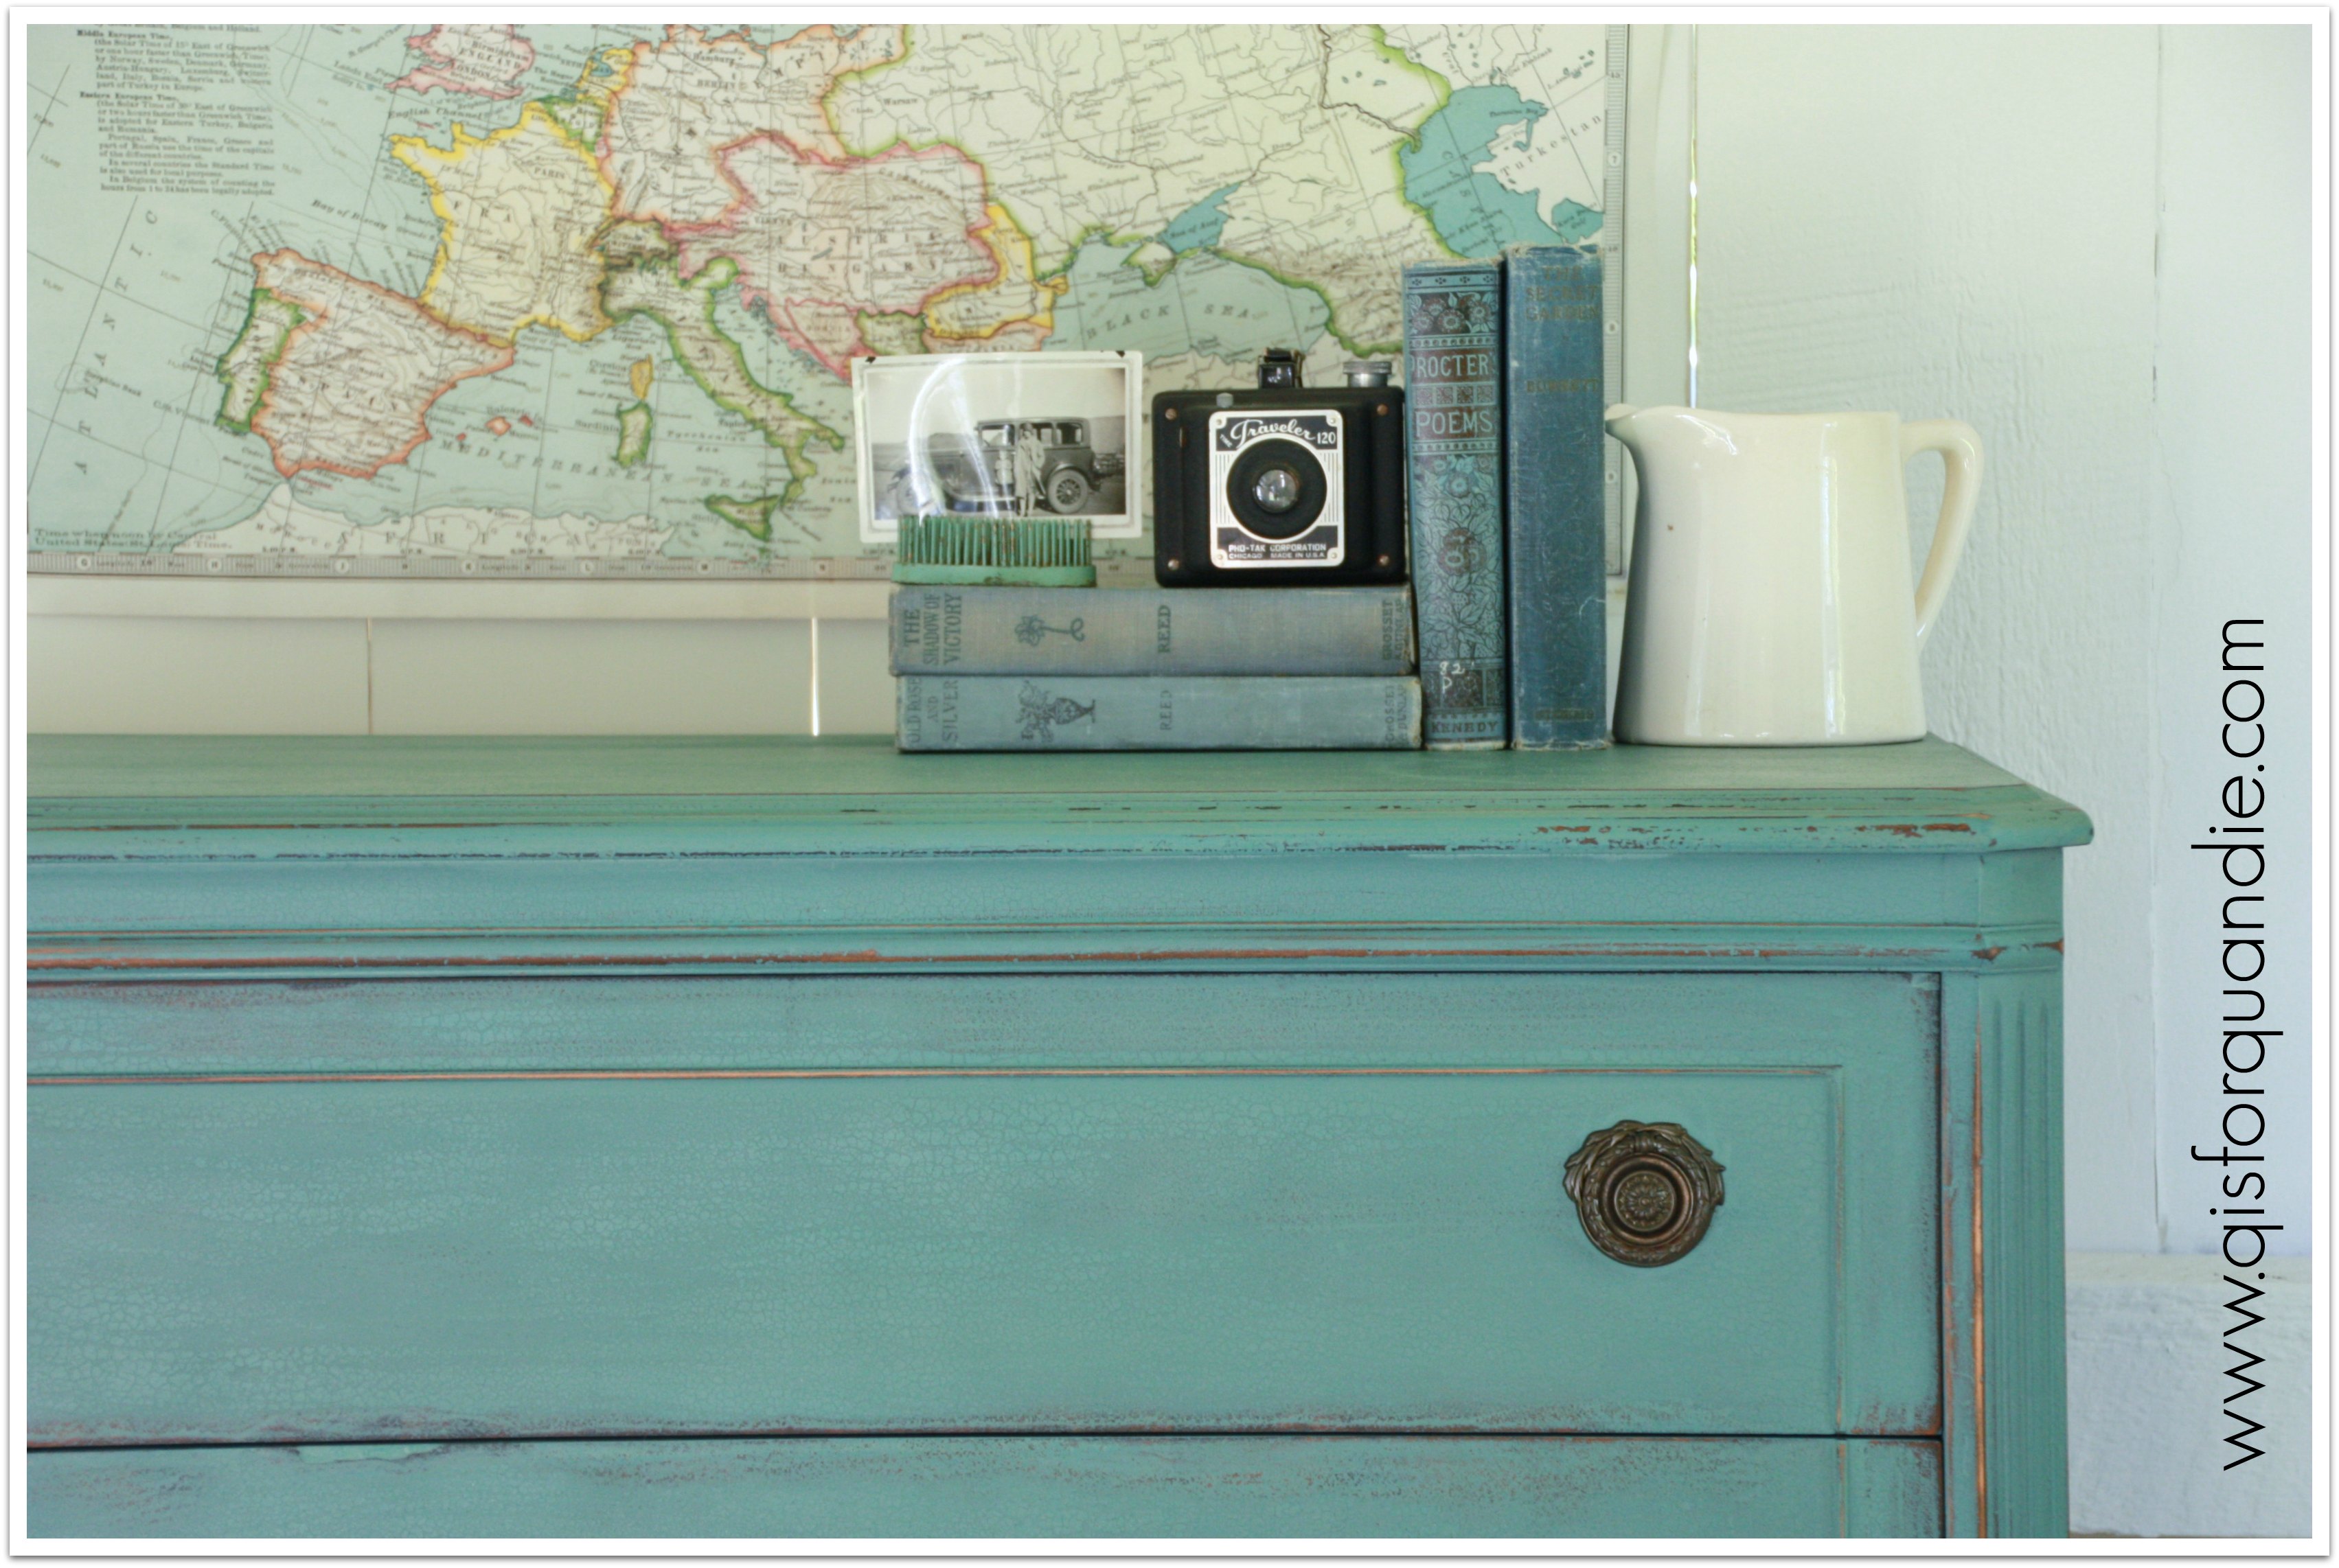
I love it, the distressing is what makes it interesting. To me, anyway. On a side note, your studio is really working out beautifully, the shots are quite lovely. Nice map too 😉
LikeLike
Thanks Meggan. I’m still working on my photography skills, I need to crisp up the shots of the full piece. I’m going to add a tripod to the mix and see what I can do. But otherwise so far I am loving the photo cottage!
LikeLike
I actually think the details were barely noticeable before it acquired this most excellent paint application. Hate you had to tackle this twice but dang it was worth the end result. She’s a real looker!
LikeLike
Perhaps that is what I need to remind myself of, that it was worth the effort for the end result!
LikeLike
I just love love love your pieces … You mentioned your Grandmother the other day …her talent is manifested in you just another medium .
Sent from my iPhone
>
LikeLike
That is an awesome thought! Thanks Janice!
LikeLike
Gorgeous-Kitchen Scale is my favorite too! I love how it turn out!
LikeLike
I just lost my long comment. I’ll try again. Just wanted to say that the crackle happened on my last Kitchen Scale project and when I looked for the answer on-line the majority of the people said that happens when a coat is painted over again before it is dried. I think this kind of crackle is the most authentic looking over any other technique. I love this dresser of yours because there is just the right amount of wood showing through with the chipping. Mine didn’t chip at all and I didn’t sand.
LikeLike
Oh, don’t you hate it when that happens. As for the crackle, I got it on the very first coat before even adding a second coat. And the cracks were Wide (with a capital W).
LikeLiked by 1 person
It’s stories such as yours that makes me so reluctant to try milk paint. Most of the pieces I’ve seen with milk paint are so lovely…including this one. I just don’t want all of that aggravation! 🙂 Your work is fabulous! Kudos for persevering!
LikeLike
Well, I think you hit the nail on the head really. You can’t get the same gorgeous chippy genuine-looking results with other forms of paint. But you do have to be prepared for the unexpected and ready to roll with the punches. It’s not right for every project, but for some projects it’s totally the best choice.
LikeLike
Love, love, love!
LikeLike
I really love this color although I’ve never tried it but might just have to now that I’ve seen so much of it on your blog. Great choice of color for this piece; it’s just beautiful!
On a side note, I’ve just recently found your blog from, I think, the Miss Mustard Seed Milk Paint blog. I’ve spent the last several days reading through all your blog posts and saving pictures of your work to inspire me as I start my own furniture painting business. I’ve learned so much from what you’ve posted and will definitely keep up with you. I hope to comment often too.
LikeLike
Welcome Cindy! I’m glad you found me! You should definitely try the Kitchen Scale, not only is it gorgeous, but I also think it’s one of the easiest milk paint colors to work with.
LikeLike
This looks lovely! Well done! I wouldn’t have changed the hardware either 🙂
Smiles!
LikeLike