
Since deciding to spend Saturday sitting beside my bff’s pool drinking special Fresca’s (that’s Fresca with vodka, don’t knock it til you try it, it is very refreshing), I’ve been feeling guilty because I don’t have any fabulous new content for the blog. I have several projects underway in the Carriage House, but none are quite finished. I didn’t want to bore you with another gardening post (although I do have one coming soon). So I came up with a brilliant plan! I’ll begin a new ‘column’ on the blog sharing some of my furniture rehabs from the pre-blog days.
I’m starting with this darling radio cabinet that became a wine cabinet.
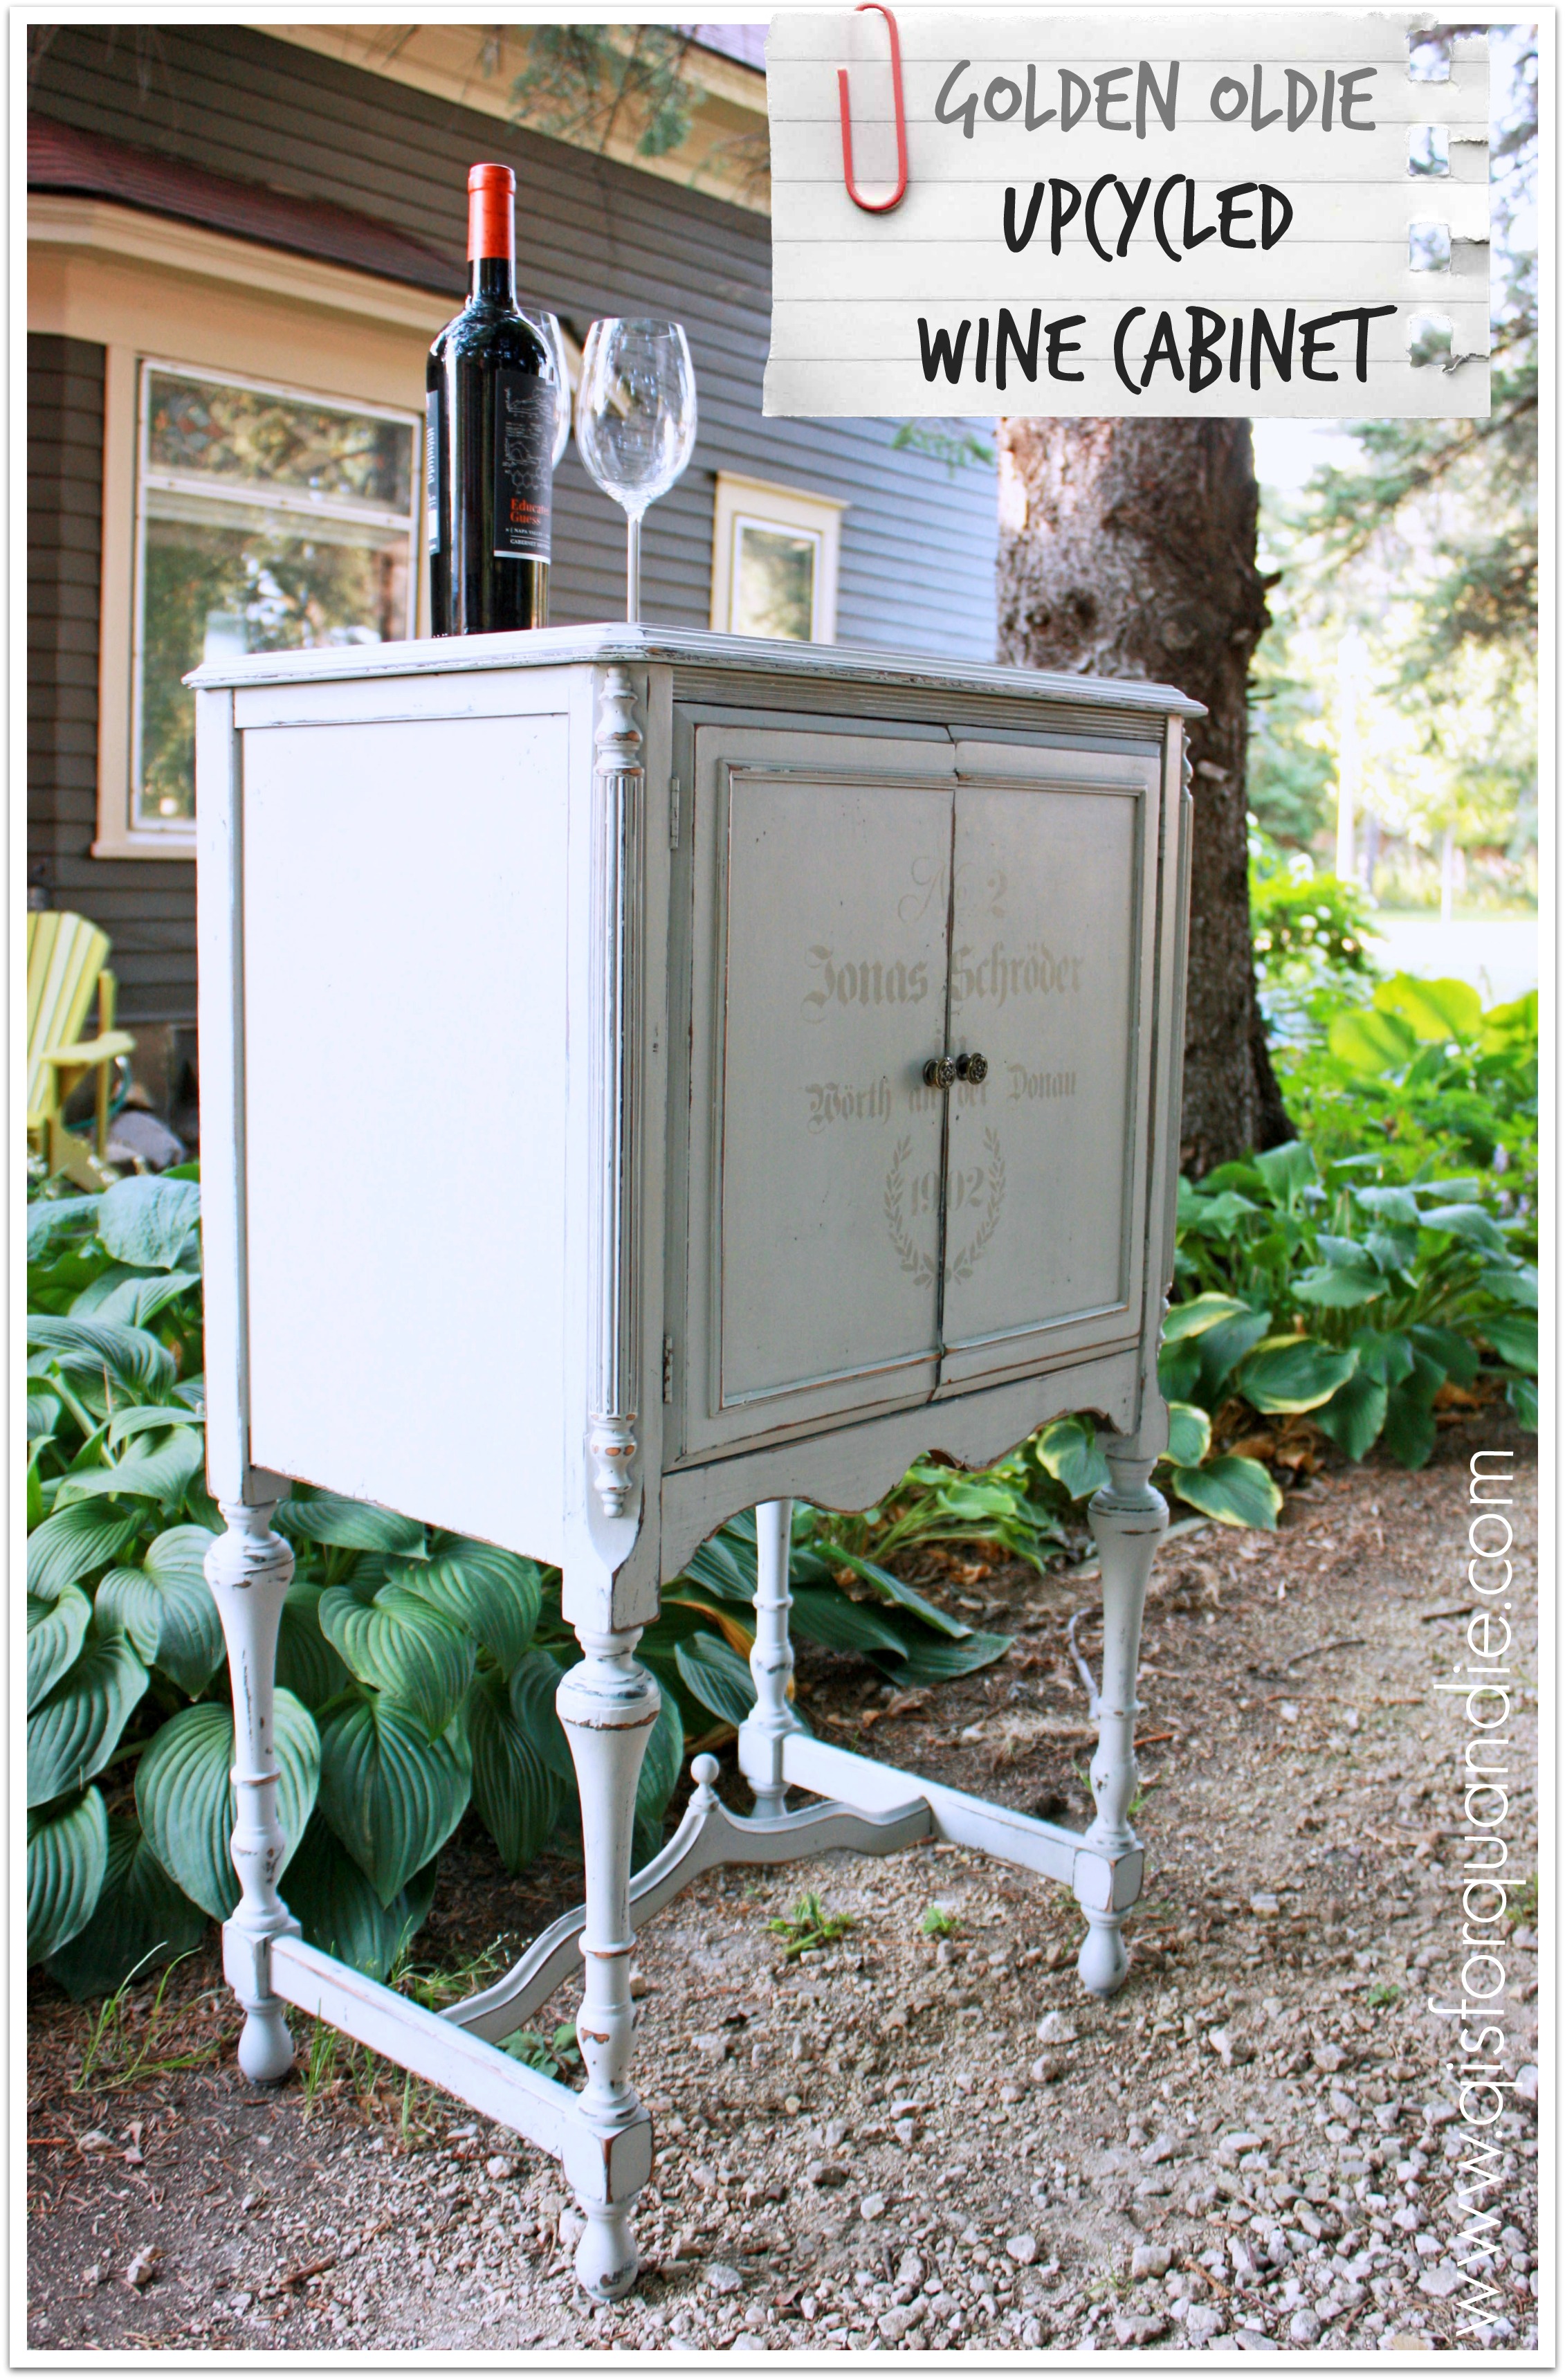
Unfortunately, prior to the blog I often neglected to take before pics. But this was your basic gutted radio cabinet. It was empty inside and was open in the back. Originally there would have been a huge radio inside (‘cuz back in the day, they were huge. Remember when we thought boomboxes were portable, ha!)? I think there may have been a turntable inside as well because the top opened.
I bribed Ken into helping me with this one, probably with wine. He built the shelves which were modeled after the wine storage in my pantry (which he also built). He was able to tuck them into place with the top off. Once that was done, he attached the top permanently using dowels and glue.
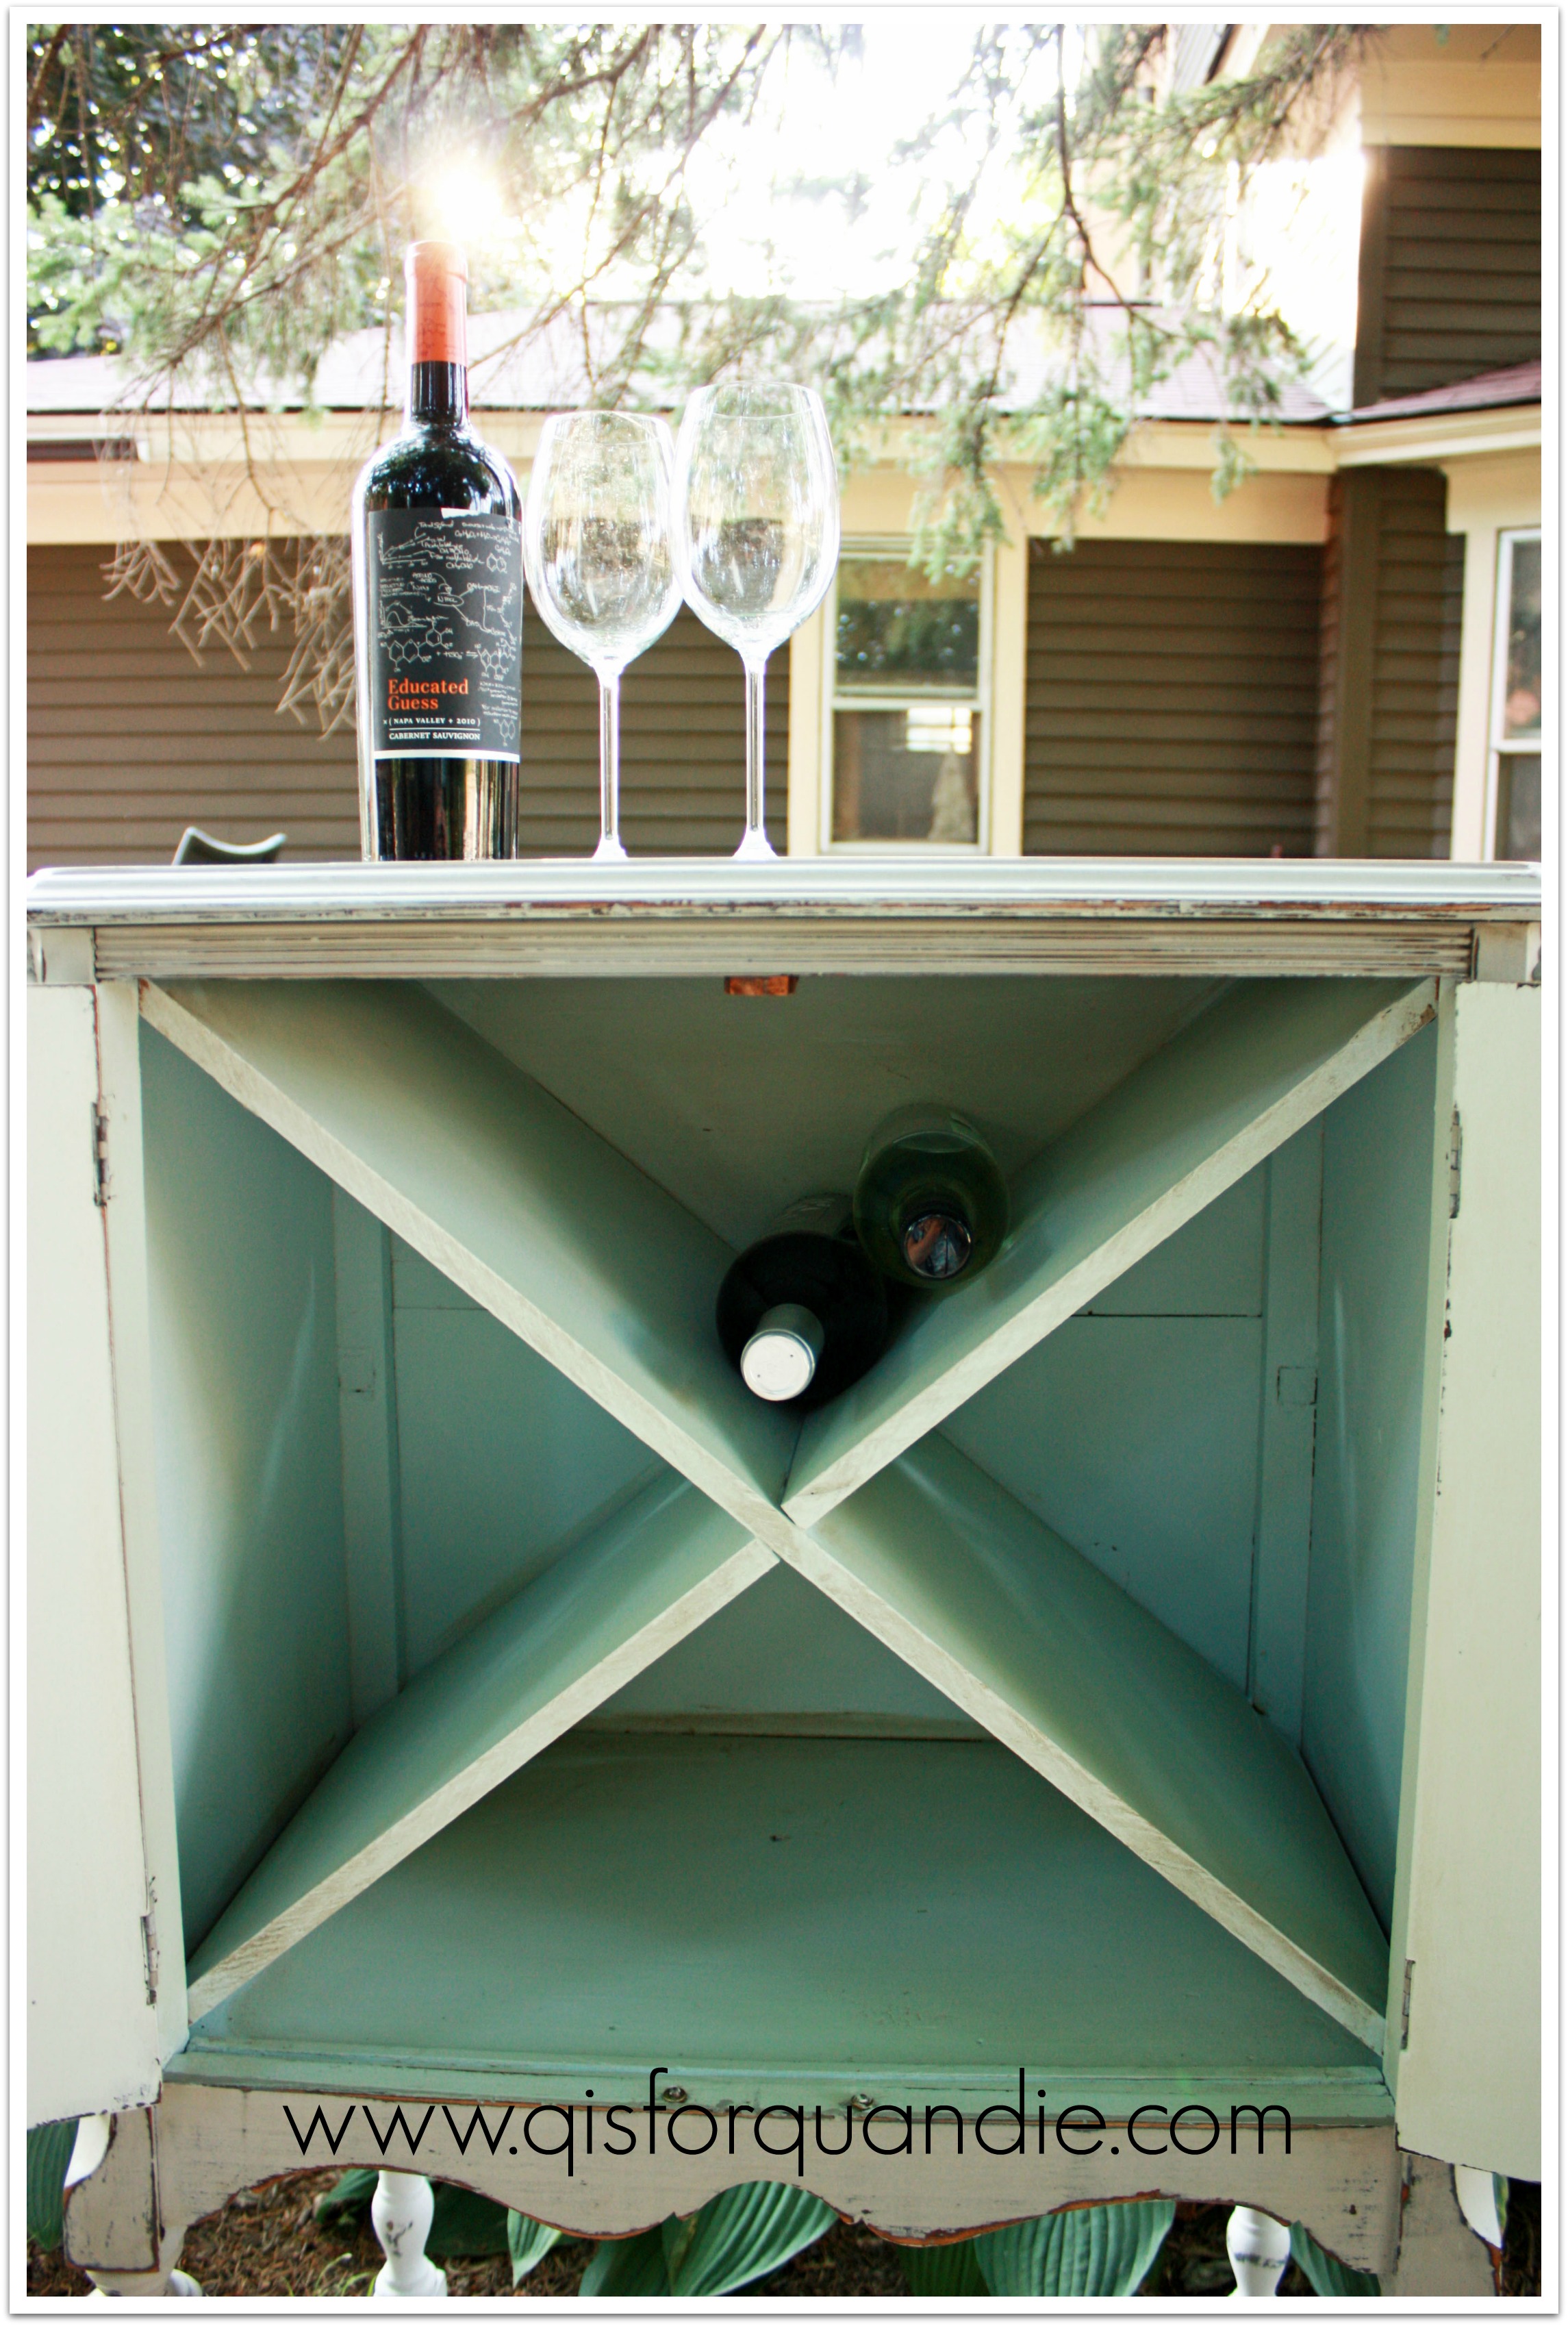
I tested this out and one could store over two dozen bottles of wine in here. Not bad.
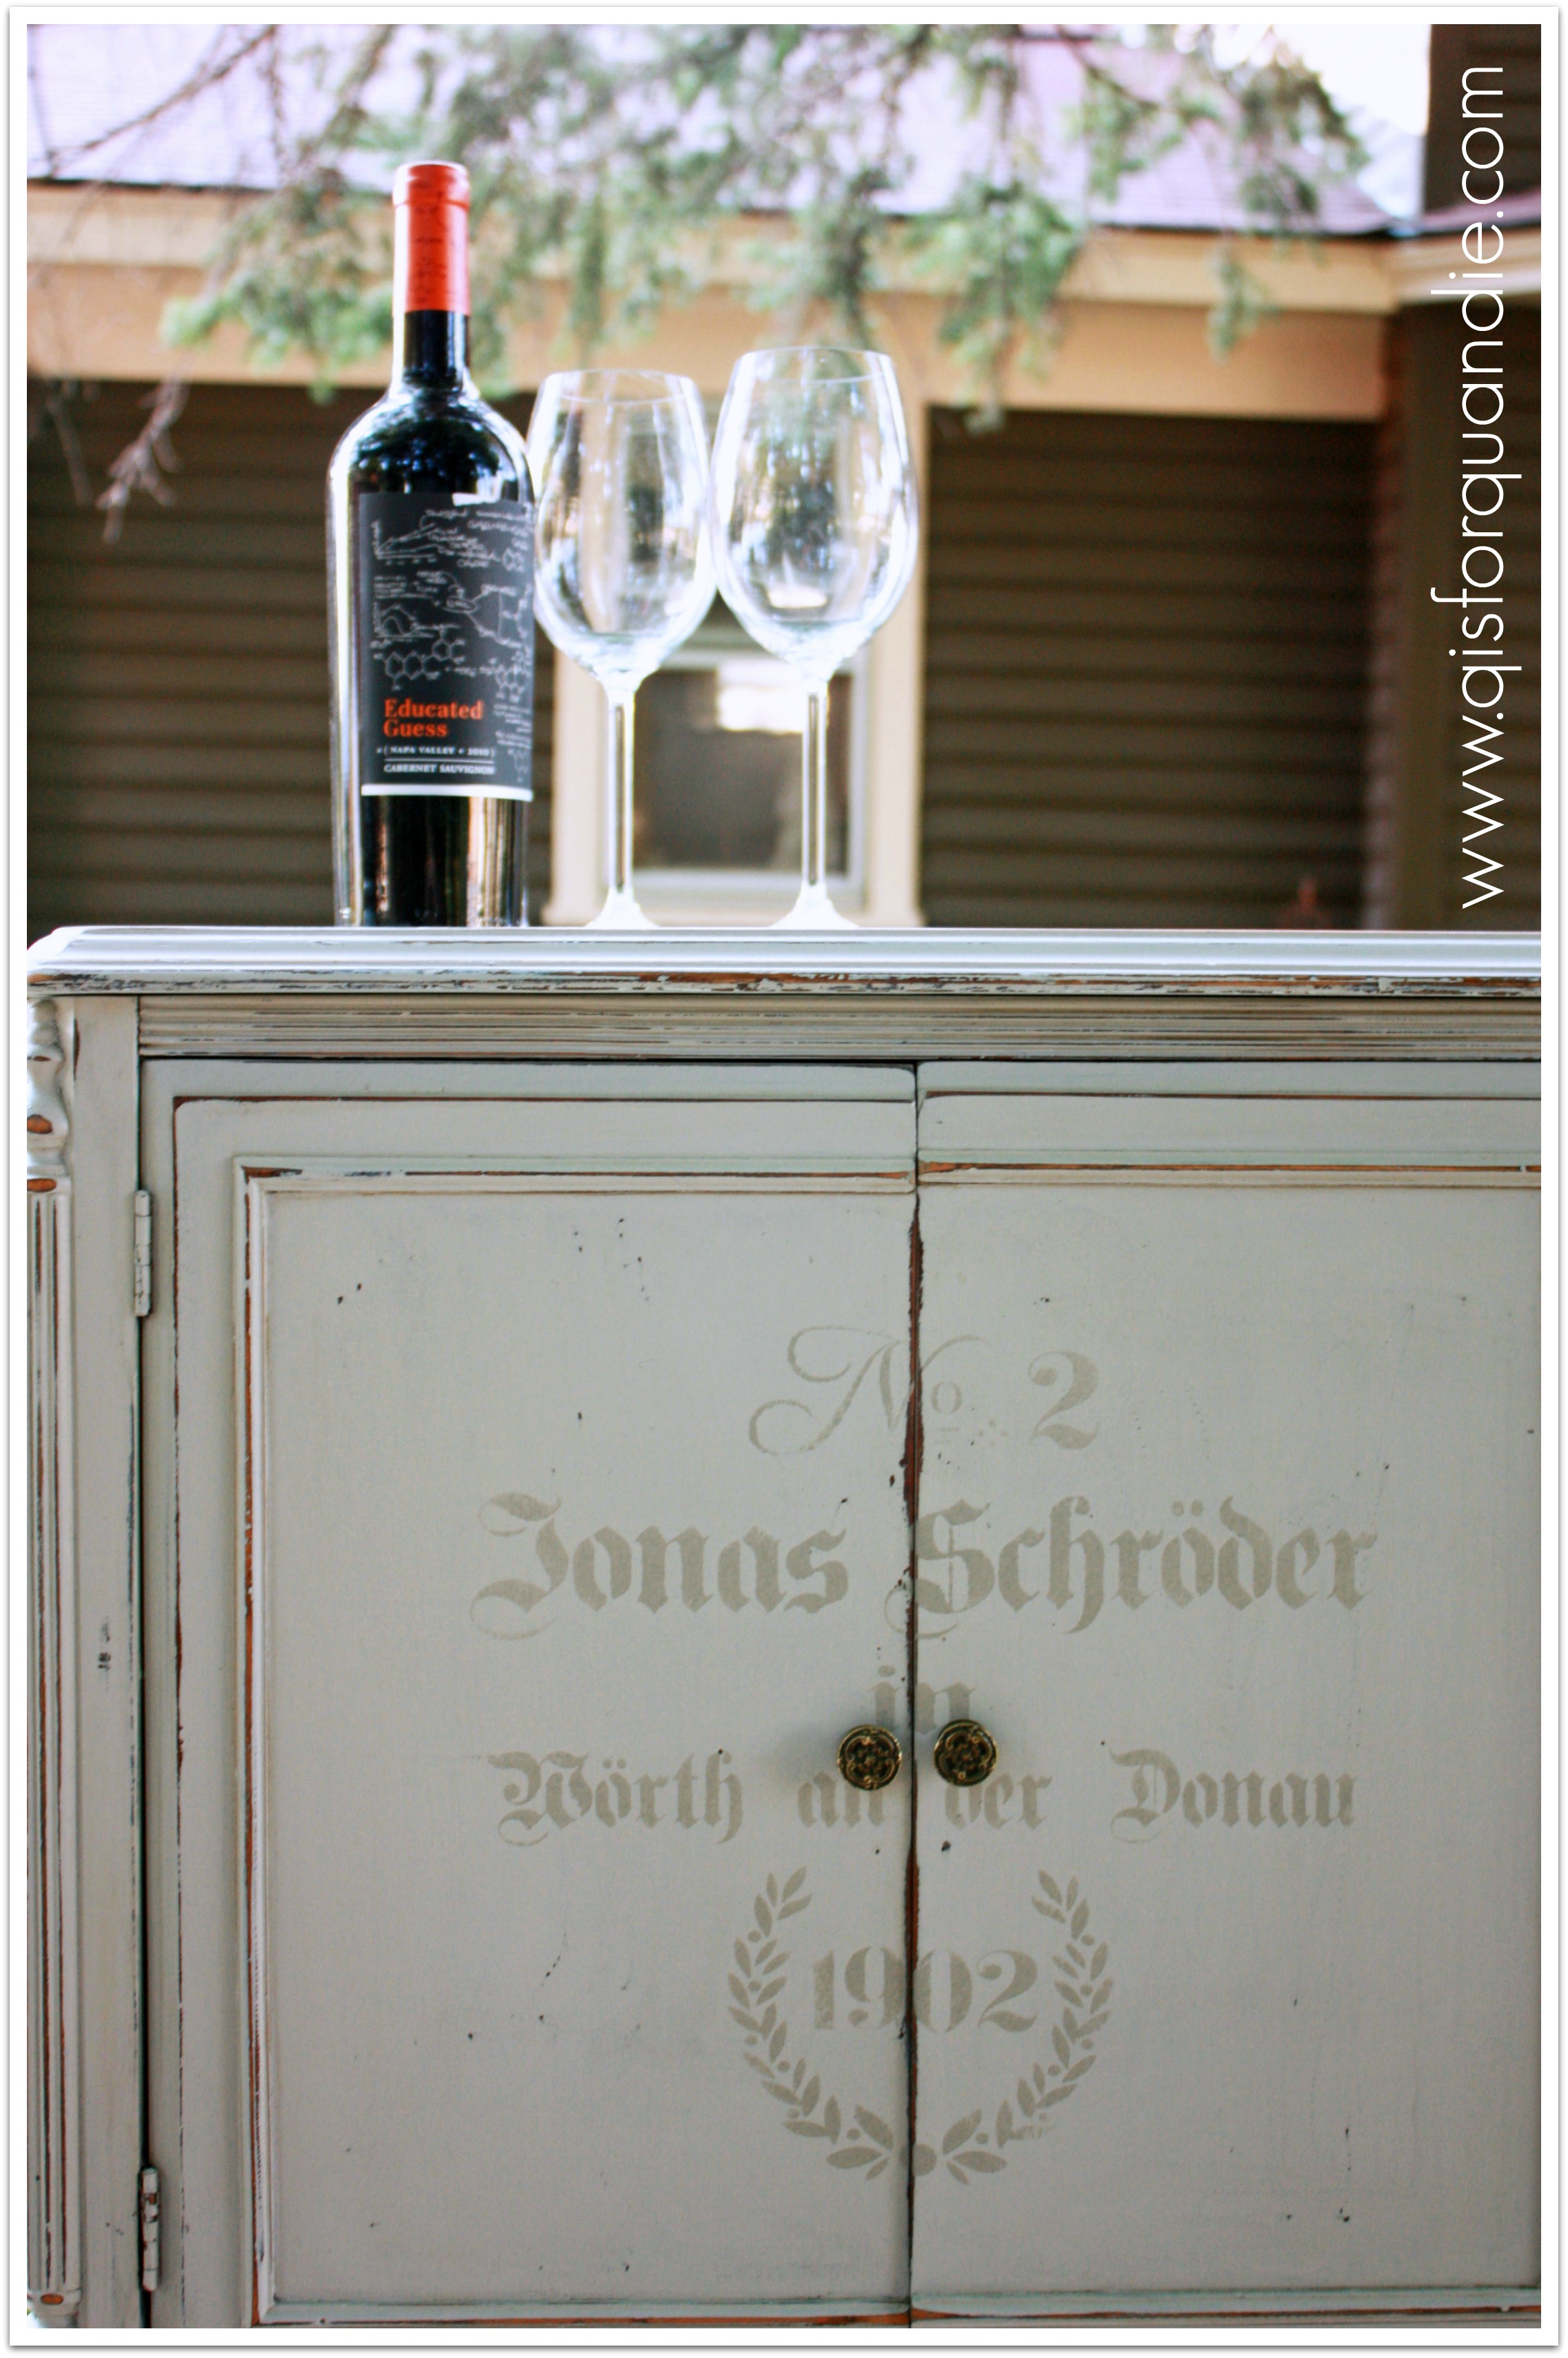
I used one of my fave stencils on the front.
Back in the day, I mainly painted with homemade chalk paint. Basically flat or satin latex mixed with Plaster of Paris and a little water. I had great success with it, and I still use it some times. It won’t give you the chippyness of milk paint, but it is budget friendly and you have endless choices for color.
I love the detail at the bottom of this cabinet. It needed to be glued up a bit when I got it.

So the next time you see a beat up radio cabinet at a garage sale (or heaven forbid, at the curb), think outside the box and turn it into wine storage!


Pretty cool…so does this love with you now?
LikeLike
I brought this one up to the Round Barn to sell, and in the end the store owner, Lori, bought it for herself. Which I took as a supreme compliment because she has excellent taste!
LikeLike
Love the cabinet. We drink Diet Dew with vodka, topped off with a bit of OJ. Fab! I’m going to try Fresca.
LikeLike
That sounds quite delicious as well. Might have to try that on the next pool day.
LikeLike
This cabinet is fabulous. Love this. Just beautiful.
Kris
LikeLike
Thanks Kris!
LikeLike
Love the cabinet and the drink!
LikeLike
Give it a try. It’s a perfect poolside beverage, not too sugary, easy to make and very refreshing!
LikeLike
Yes, very nice and I particularly like that you liked the aqua color way before it was trendy. This was a classic piece with beautiful lines that you upcycled into a functional piece with a whole new life ahead of it.
LikeLike
I have loved aqua for a long time I think. It hasn’t always been my fave color, but aqua and I go way back 😉
LikeLike
Love the cabinet! If you want to get a little fancy, add a little grenadine to your Fresca and vodka, it is not too bad!
LikeLike
LOL – love it! Next time we will fancy it up!
LikeLike
How about a Fresca! https://www.youtube.com/watch?v=XDFCL5Oiqk0
LikeLike
Love your blog…and your Carriage House sales…and your gardens (can’t help but nose around a little at your sales). Keep meaning to check out the Round Barn as well.
Do you mind giving a little advice? I’d like to repaint a dresser that was once painted black. I think I’ll just paint it black again as it’s in a teenage boys room. What would you recommend for a beginner to try. Chalk paint, milk paint? I understand neither would need any prep work and they both need a wax coat, correct? The waxing is what scares me. I’ve read some other blogs with people not having the best results. Any advice? Thanks!
LikeLike
Hi Robin! I know your name from my mailing list for the sale. Not sure which face it belongs to, although I am sure I would recognize you. Honestly, I wouldn’t recommend milk paint for you. At least not the MMS. I don’t like painting over existing paint with the milk paint. You are going to have adhesion problems unless you add the bonding agent, and then we are talking paint, bonding agent, wax … too much money for one dresser I think. I like chalk paint better for both painting over existing paint and for beginners. It’s super easy to use, just mix well and paint. However, as much as they advertise no prep work, again for painting over existing paint I would sand lightly. Nothing major, just rough up the surface a bit. But, if you are going with black, you’ll find that Annie Sloan doesn’t make a black. The closest is graphite which is a very dark charcoal grey. However, it just so happens that I was in Home Depot the other day, and they are carrying a brand of chalk paint now and it comes in black! I haven’t tried it, but it might work perfectly for you. As for the waxing (they have a wax at Home Depot as well), that is super easy. Just rub it on with a lint free (especially important with black, I recommend an old black t-shirt) cloth. You’ll easily see when you’re adding the wax how it changes up the look. If you can rub lotion on your arms, you can rub wax on a dresser … or something like that. So, to sum up, sand lightly, paint with chalk paint, sand very lightly again (or a lot if you want it very distressed), rub on wax. Done. Good luck!
LikeLike
Thank you so much for the great advice! I’m going to head to Home Depot and give it a go!
I have met you. I’m Stumpy’s mom 🙂 I sent him your post about Karen’s pond. He helped with it so I thought he might like to see how beautiful his handiwork is looking now.
Thanks again for the help. I’ll say it again…love your blog!
LikeLike
Oh … Stumpy’s mom! OK. Fun that he helped with the pond. Let me know how your dresser turns out. And thanks for saying you love my blog! I’m glad you enjoy it.
LikeLike
Great idea!
LikeLike